
Subscribe to Our Youtube Channel
Related Manuals for AUSTRALIAN MONITOR ISP Series


Summary of Contents for AUSTRALIAN MONITOR ISP Series
- Page 1 INSTALLATION AND OPERATION MANUAL ISP SERIES POWER AMPLIFIERS IS2120P IS2250P IS4120P IS4250P...
-
Page 2: Important Safety Information
Assurez-vous que l’appareil est hors tension avant de connecter les hauts parleurs. Veri ez que la sortie des enceintes soit protégées contre un contact physique. Respecter les polarités des terminaux ainsi que le câblage des enceintes pendant le fonctionnement afin d’assurer une utilisation sécurisee. ISP SERIES INSTALLATION AND OPERATION MANUAL... -
Page 3: Introduction & Contents
Rear Panel The ISP series power amplifiers are 1 unit 1.75” high, 19” wide, or 2 unit Installation & Setup 3.5” high, 19” wide rack mountable units depending on the model. -
Page 4: Protection Features
Audio electrical connector type Light Emitting Diode. Terminal block connector type. Also known as a Euroblock. PHOENIX CONNECTOR DIP SWITCH Dual in-line package switch. Used on the front and rear of the product to select various settings ISP SERIES INSTALLATION AND OPERATION MANUAL... -
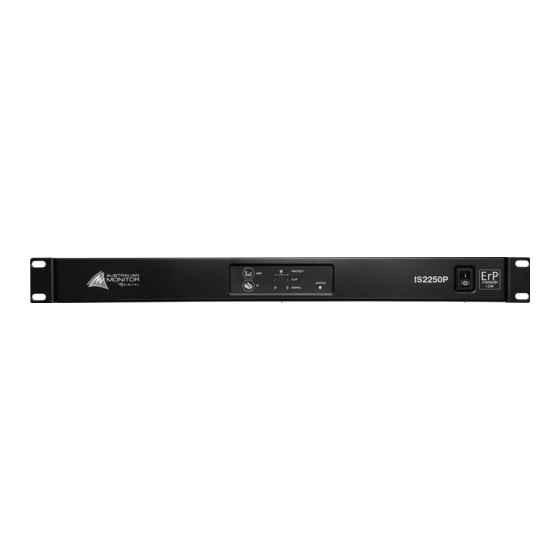
Page 5: Front Panel
A red LED will illuminate when output signal clipping occurs. POWER SWITCH Press the switch to the up position to power the unit on. At start-up (turn-on), the input to the amplifier is muted for approximately two seconds. ISP SERIES INSTALLATION AND OPERATION MANUAL... -
Page 6: Rear Panel
PHOENIX BALANCED INPUT A balanced male 3-pin (3.81mm) Phoenix type connector is provided on each input channel. Consult the Balanced Input Wiring section of this manual for further detail of this control. ISP SERIES INSTALLATION AND OPERATION MANUAL... -
Page 7: Installation And Setup
30 minutes. The amplifier will exit standby mode when the signal level returns above -40dBV. The auto standby function can be disabled and the timeout period modified in the user interface. +3V3 STANDBY Internal Logic ISP DEVICE Switch closed = Standby active Switch open = Standby not active ISP SERIES INSTALLATION AND OPERATION MANUAL... - Page 8 2. Consult online manual for added functions GPIO 1,2,3,4 Internal Logic Australian Monitor RC1 (Linear) 500k Wallplate ISP DEVICE The GPIO's number, it's required function and its' active high or low signaling states are configured in webpage. ISP SERIES INSTALLATION AND OPERATION MANUAL...
- Page 9 TTL INPUT Internal Logic Hi-Z Coil Flyback Internal Protection Logic Overcurrent Protection SCADA System ISP DEVICE The GPIO's number, it's required function and its' active high or low signaling states are configured in webpage. ISP SERIES INSTALLATION AND OPERATION MANUAL...
-
Page 10: Network Configuration
Windows Machine (and any OS that has a NetBIOS client installed and operational): Supported Browsers: Google Chrome, Firefox LAN address (via NetBIOS): http://ausmonitor/ http://ausmonitor.local OSX (and any OS that has Bonjour installed and operating): Supported Browsers: Google Chrome, Safari, Firefox LAN address (via Bonjour (mDNS)): http://ausmonitor.local ISP SERIES INSTALLATION AND OPERATION MANUAL... -
Page 11: Reset Button
Hold down the reset button for approx 15 seconds until the amber, red and green LEDs all flash on three times. Immediately release the button. The network configuration, user account data and audio settings will be set back to the factory default values. ISP SERIES INSTALLATION AND OPERATION MANUAL... -
Page 12: Expansion Board Installation
4. Push the card back in the unit and install the 2 board firmly into the correct position outermost Philips head screws from the supplied (see example image below): blanking plate (see image below): ISP SERIES INSTALLATION AND OPERATION MANUAL... -
Page 13: Power Requirements
MOUNTING The ISP series amplifiers are one or two rack units high (1U) (2U) and will fit a standard EIA 19” or rack. Typically amplifiers may be stacked directly on top of each other with no need for spacing between units, unless installed in high ambient temperature environments where a single rack unit space between amplifiers will assist cooling further. -
Page 14: Output Wiring
70V LINE 100V LINE Minimum total Minimum total Minimum total speaker impedance speaker impedance speaker impedance 120W (100V) = 83Ω 120W (70V) = 40Ω All models 4Ω 250W (100V) = 40Ω 250W (70V) = 20Ω ISP SERIES INSTALLATION AND OPERATION MANUAL... -
Page 15: Hum Problems
If the fault current is large enough, it will destroy the input to your amplifier and look for the next available path, which may be you! Before making any connections to your ISP Series amplifier, observe the following: • Ensure the mains voltage supply matches the label on the rear panel of your amplifier (±10%). -
Page 16: Basic Setup & Operation
RESOLUTION Green on Audio signal present None required Green off No audio signal present Increase the input audio level Green flashing Amplifier channel is set to mute Unmute the channel using the Web application ISP SERIES INSTALLATION AND OPERATION MANUAL... - Page 17 This is the main dashboard display for the amplifier. Each channel output level is displayed with a fader to control the output volume. The status of each channel is also displayed at the very bottom. ISP SERIES INSTALLATION AND OPERATION MANUAL...
-
Page 18: Audio Tab
Presets can also be saved and recalled for a given configuration and are accessed by the Preset Action button. CONTROL TAB: The control tab is used to restore default settings, configure auto standby and setup the GPIO control functionality. See standby and GPIO setup section of the manual for further details. ISP SERIES INSTALLATION AND OPERATION MANUAL... -
Page 19: Network Settings Tab
When performing a software update its important not to interrupt the power to the amplifier during the update procedure. The update time can vary depending on the host machine but generally takes about 4 minutes to complete. The software updates the webpage and firmware in the amplifier concurrently. ISP SERIES INSTALLATION AND OPERATION MANUAL... -
Page 20: Accounts Tab
Standard users have access to the following tabs: • HOME Accounts can also be made active/inactive so that the account information credentials are retained. FOOTER TAB: The footer tabs have provide the following functions: • Download the latest owners manual from Australian Monitor website (this document) • Link to the Australian Monitor website (https://www.australianmonitor.com.au/) • Product information. This provides all of the installed software and hardware versions. The serial numbers are also recorded here. ISP SERIES INSTALLATION AND OPERATION MANUAL... -
Page 21: Maintenance
No internal adjustments need to be made to the unit to maintain optimum performance. To provide years of unhindered operation we suggest a maintenance inspection be carried out on annually. FIRE REGULATION COMPLIANCE This amplifier is not certified to fire regulations standards such as EN 54-16 ISP SERIES INSTALLATION AND OPERATION MANUAL... -
Page 22: Specifications
SPECIFICATIONS IS2120P IS2250P IS4120P IS4250P CONDITIONS/COMMENTS TOPOLOGY Class-D CHANNELS POWER OUTPUT (PER CH) 4Ω 136W 262W 140W 261W 1kHz. 1%THD. -10W/+30W, CEA-2006, one 130W 244W 132W 245W channel driven 100V 128W 221W 138W 223W MAXIMUM OUTPUT LEVEL 27.2dBV/ 30.0dBV/ 27.2dBV/ 30.0dBV/ 20Hz~20kHz, <1%THD, 4Ω... - Page 23 SPECIFICATIONS CONT. IS2120P IS2250P IS4120P IS4250P CONDITIONS/COMMENTS Volume control Matrix Mixer High/Low/All pass filters 12 band parametric equaliser per channel Compressor/Limiter Delay up to 75m(220ms) per amplifier output Audio level sense for standby/auto-wake Internal Sine Wave Generator (500, 1k, 5k and 10kHz) Internal Pink Noise Generator MISCELLANEOUS INPUT IMPEDANCE...
-
Page 24: Product Dimensions
SUPPORTED OPERATING Windows, OSX & Linux, Android & iOS SYSTEMS Due to continuous improvements, all specifications are subject to change ENGINEERED BY AUSTRALIAN MONITOR Address: 1 Clyde St, Silverwater NSW 2128 Australia. Website: www.australianmonitor.com.au International enquiries email: international@australianmonitor.com.au ABN 35 007 573 417...
Need help?
Do you have a question about the ISP Series and is the answer not in the manual?
Questions and answers