
Related Manuals for Sena SFR


Summary of Contents for Sena SFR
- Page 1 ® Motorcycle Bluetooth Communication System 1.2 km 0.8 mile User’s Guide www.sena.com...
- Page 2 ® word mark and logos are owned by the Bluetooth SIG, Inc. and any use of such marks by Sena is under license. iPhone, iPod touch are registered trademarks of Apple Inc. Zumo™ is a trademark of Garmin Ltd. or its subsidiaries. TomTom™ is the trademark or registered...
-
Page 3: Table Of Contents
3.5 Volume Adjustment .......................12 11.4 Scan and Save ........................23 3.6 Muting the Microphone ......................12 11.5 Temporary Preset ........................23 3.7 Sena Softwares ........................12 11.6 FM Sharing ..........................23 PAIRING THE HEADSET WITH BLUETOOTH DEVICES ........13 11.7 Region Selection ........................24 4.1 Mobile Phone Pairing - Mobile Phone, Bluetooth Stereo Device .........13 12 FUNCTION PRIORITY ................... -
Page 4: Safety Precautions
• When relevant, follow all regulations regarding the use of the camera. Safety Precautions (1) Do not use your camera in an aircraft, unless permitted. (2) Turn off the camera when you are near medical equipment. Your camera can cause interference with medical devices in hospital or healthcare facilities. - Page 5 Battery CAUTION Your product has a built-in battery. Be careful to heed all safety information in this guide. • If the product emits an unusual smell, feels hot, or appears abnormal in any other way Failure to carefully observe the safety precautions can cause battery heat generation, while using or charging, stop using it immediately.
- Page 6 NOTICE • Keep the product free of dust. Dust may damage mechanical and electronic parts of the product. • The product should be stored at room temperature. Do not expose the product to extremely high or low temperature as this may reduce the life span of electronic devices, damage the battery, and/or melt plastic parts of the product.
-
Page 7: Package Contents
Wired Boom Microphone 1 PACKAGE CONTENTS • Wired Boom Microphone • Headset Main Unit • Microphone Sponges (2) • Hook and Loop Fastener for Wired Boom Microphone • Hook and Loop Fasteners for Main Unit (4) • Boom Microphone Holder • Double Sided Adhesive Tapes for Main Unit (2) • Hook and Loop Fastener for Boom Microphone Holder Speaker Wired Microphone • Speakers • Wired Microphone • Hook and Loop Fastener for Wired Microphone • Hook and Loop Fasteners for Speakers (2) Others • USB Power & Data Cable... -
Page 8: Installing The Headset On Your Helmet
2.1.2 Using the Double Sided Adhesive Tapes for Main Unit 2 INSTALLING THE HEADSET ON YOUR HELMET 1. Attach double sided adhesive tapes to the back plate of the main unit. 2. Attach double sided adhesive tapes to the main unit on the left side of your helmet. -
Page 9: Installing The Speakers
2.2 Installing the Speakers 2.3 Installing the Microphones 1. Attach the hook and loop fasteners for speakers to the ear pockets 2.3.1 Using the Wired Boom Microphone inside the helmet. 1. Attach the hook and loop fastener for wired boom microphone on 2. - Page 10 2.3.2 Using the Wired Microphone Note: If you have a full face helmet, you can use the wired microphone. You can use the boom microphone holder after attaching the hook and loop 1. Attach the hook and loop fastener for wired microphone on the fastener for boom microphone holder on it to ensure secure installation.
-
Page 11: Getting Started
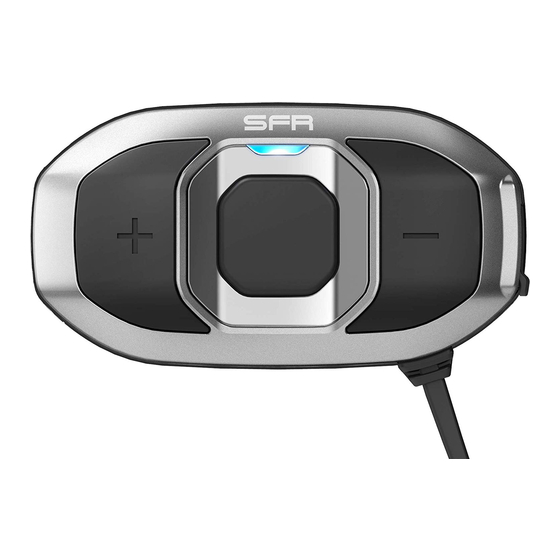
3.2 Powering On and Off 3 GETTING STARTED To power on the headset, press and hold the Center Button and the (+) Button for 1 second. To power off the headset, tap the Center Button and the (+) Button. 3.1 Product Details 3.3 Charging The headset can be charged using many common methods via the (–) Button... -
Page 12: Volume Adjustment
You can upgrade the headset’s firmware and configure its settings tone triple beeps. Then you will hear a voice prompt indicating the directly from your PC or Apple computer. Download the Sena Device battery level is high, medium, or low. -
Page 13: Pairing The Headset With Bluetooth Devices
3. Search for Bluetooth devices on your mobile phone. Select the each Bluetooth device. The headset can also be paired with up to Sena SFR in the list of the devices detected on the mobile phone. three other Sena headsets. -
Page 14: Advanced Selective Pairing: A2Dp Stereo Or Handsfree
3. Search for Bluetooth devices on your mobile phone. Select the by wire. The GPS voice instruction or the radar detector alarm is also Sena SFR in the list of the devices detected on the mobile phone. heard in the background via SR10 while having an intercom conversation 4. -
Page 15: Intercom Pairing
3. Search for Bluetooth devices on your mobile phone. Select the third intercom friend. Sena SFR in the list of the devices detected on the mobile phone. 4. If your mobile phone asks for a PIN, enter 0000. 4.4 Intercom Pairing 4.4.1 Pairing with Other Headsets for Intercom Conversation... -
Page 16: Mobile Phone, Gps, Sr10
5.2 Speed Dialing 5 MOBILE PHONE, GPS, SR10 1. Press and hold the (+) Button for 3 seconds and you will hear a mid-tone single beep and a voice prompt, “Speed dial”. 2. Tap the (+) Button or the (-) Button to navigate between the menus. -
Page 17: Gps Navigation
3. Search for Bluetooth devices on the GPS navigation. Select the 2. To adjust the volume, tap the (+) Button or the (-) Button. Sena SFR in the list of the devices detected on the GPS. 3. To track forward or track back, press and hold the (+) Button or 4. -
Page 18: Intercom
Note: 7 INTERCOM 1. Both you and your intercom friend can remotely control music playback such as track forward and track back. 2. Music sharing will be paused when you are using your mobile phone or listening to GPS instructions. 7.1 Two-way Intercom 3. -
Page 19: Multi-Way Intercom
7.2 Multi-Way Intercom 7.2.2 Starting Four-way Intercom Multi-Way Intercom enables conference-call-style conversations with With three intercom friends connected, a new participant (D) can up to three intercom friends at the same time. While multi-way intercom make it a four-way intercom conference by making an intercom call to is in progress, mobile phone connection is temporarily disconnected. -
Page 20: Three-Way Conference Phone Call With Intercom Participant
7.2.3 Ending Multi-Way Intercom 8 THREE-WAY CONFERENCE PHONE CALL You can completely terminate the conference intercom or just WITH INTERCOM PARTICIPANT disconnect an intercom connection with one of your active intercom friends. 1. Press and hold the Center Button for 3 seconds until you hear a beep to terminate all intercom connections. -
Page 21: Group Intercom
Universal Intercom allows you to have intercom conversations with intercom with three other most recently paired headsets. users of non-Sena Bluetooth headsets. You can pair the headset with only one non-Sena headset at a time. The intercom distance depends 1. Go through intercom pairing with up to three headsets you want to on the performance of the Bluetooth headset to which it’s connected. -
Page 22: Fm Radio
3. You can have a two-way intercom or multi-way intercom 11 FM RADIO communication with up to three intercom friends using non-Sena headset. 11.1 FM Radio On/Off To turn on or off the FM radio, press and hold the (-) Button for... -
Page 23: Scan And Save
(-) Button for 1 second or end the intercom call. 1. Press and hold the (+) Button for 1 second. 2. The Sena tuner pauses at each station it finds for 8 seconds Note: before moving to the next. -
Page 24: Region Selection
11.7 Region Selection 12 FUNCTION PRIORITY You can select the proper FM frequency region from the Sena Device Manager. With the region setting, you may optimize the seek function to avoid unnecessary frequency ranges. The headset operates in the following order of priority:... -
Page 25: Configuration Setting
2. Tap the (+) Button or the (-) Button to navigate between the 13.1.1 Remote Control Pairing menus. You will hear voice prompts for each menu item. You can remotely control the headset using Sena Remote Control 3. You can execute the command by tapping the Center Button. devices (sold separately). -
Page 26: Software Configuration Setting
13.2 Software Configuration Setting 13.2.3 Audio Boost (Default: Disable) You can change the settings of the headset through the Sena Device Enabling Audio Boost increases the overall maximum volume. Manager or the Sena Smartphone App. Disabling Audio Boost reduces the overall maximum volume, but delivers more balanced sound. - Page 27 13.2.6 VOX Intercom (Default: Disable) 13.2.7 HD Voice (Default: Disable) If this feature is enabled, you can initiate an intercom conversation HD Voice allows you to communicate in high-definition during phone with the last connected intercom friend by voice. When you want to calls.
- Page 28 13.2.9 Intercom VOX Sensitivity (Default: 3) 13.2.12 FM Station Guide (Default: Enable) VOX sensitivity can be adjusted depending on your riding environment. When FM Station Guide is enabled, FM station frequencies are given Level 5 is the highest sensitivity setting and 1 is the lowest. by voice prompts as you select preset stations.
- Page 29 C. The FM radio will be heard in the background when GPS instructions are foreground audio can be adjusted using the headset. How much heard. background audio that is heard can be adjusted using the Sena Smartphone App. HD Intercom and Audio Source Priority become Note: disabled temporarily when Audio Overlay is enabled.
-
Page 30: Firmware Upgrade
14 FIRMWARE UPGRADE The headset supports firmware upgrades. You can update the firmware using the Sena Device Manager. Please visit Sena Bluetooth website at www.sena.com to check the latest software downloads. 15 TROUBLESHOOTING 15.1 Factory Reset If you want to restore the headset to factory default settings, use the Factory Reset in the configuration menu. - Page 31 1.0.1 www.sena.com User’s Guide for Firmware v1.0...
Need help?
Do you have a question about the SFR and is the answer not in the manual?
Questions and answers