Table of Contents
Advertisement
Quick Links
Discontinued 04/01/15, ECR ZV-125
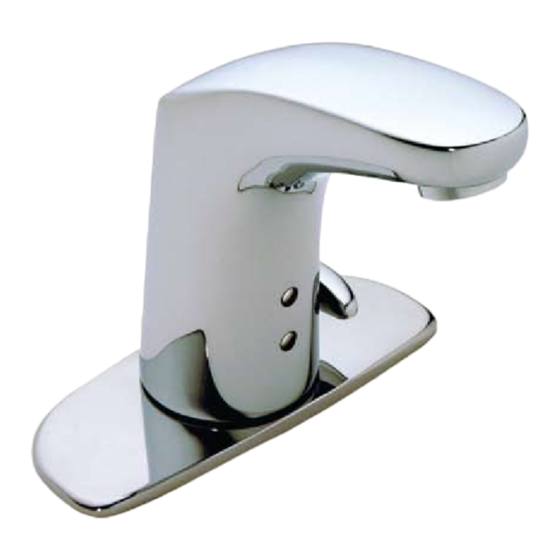
Lavatory Faucet
AC Powered, Sensor-Activated
Installation, Operation & Service Instructions
Important:
■
Water lines must be thoroughly flushed before and after installing
the faucet to prevent foreign matter, i.e. copper chips, sand, stones,
etc. from clogging and possibly damaging the faucet.
■
Check strainers must be installed on every faucet to prevent water
cross-connection and to prevent foreign matter from effecting
Operation of the faucet.
■
All 120 VAC power sources required for faucet installation are to
be provided by a licensed electrician in accordance with state and
local codes.
■
A Symmons power supply must be used with the S-6080-AC and
S-6080-ACM model faucets otherwise warranty will be voided.
Technical Data
■
Recognition range: 5.5" (140mm) from sensor
■
After flow period: 1 second
■
Maximum water flow period: 10 seconds
■
Maximum hot water supply temperature: 180˚F (82˚C)
■
Electrical installation: 120 VAC to 6 Volt DC power supply
■
Working pressure: 14.5psi - 145psi (100kPa - 1000kPa)
■
Normal water flow: .25GAL/cycle
Faucet Models
■
S-6080-AC - Single faucet powered with a 120 volt AC to 6 volt
DC wall plug power supply.
■
S-6080-ACM - Multiple faucet configuration powered by a single
120 volt AC to 6 volt DC power supply (S-6240). Up to eight (8)
S-6080-ACM faucets can be powered by one power supply.
Faucet Installation Options:
The S-6080-AC/ACM series faucets can be installed in one of three
faucet supply configurations.
■
Hot and cold supply with lever handle temperature adjustment.
(factory standard)
■
Hot and cold supply with preset tempered water.
(field modified)
■
Single supply for pre-mixed water. (field modified)
Option 1 Installation
■
For 4" center deckplate installation, place faucet and supply(s)
through deck plate (SF-138).
■
Affix deck plate with studs facing down to faucet using two screws
(SF-143) provided in mounting kit (SF-142).
■
NOTE: For S-6080-LST (18" long copper supply tube) thread
supply tubes into faucet housing. Tubes thread into base with
LEFT hand thread. Be sure brass tube bushing with o-ring is fully
installed in base and tight.
■
Mount the faucet on the wash basin using anchor bar (KN-23),
spacer (KN-26), and nut (L-36) on 4" centers. Ensure the gasket
(SF-140) is correctly positioned between the faucet and wash
basin. For single hole mount installation, attach studs found
in single mount kit (SF-158) to base of housing. Place faucet
supply(s) through wash basin and secure using wiring fixing plate
and nuts from single mount kit.
Ultra-Sense
S-6080-AC, S-6080-ACM
■
■
NOTE: For S-6080-LST (18" long copper supply tubes) attach check
strainer assembly (SF-181) directly to supply stops. Cut tubing to
proper length and attach tubing to check strainer assembly using nut
(IL-8) and ferrule (IL-9).
Option 2 Installation
Modifying the faucet for hot and cold supply with tempered water
■
■
■
■
Option 3 Installation
Modifying the faucet for single supply pre-mixed water
■
■
■
■
■
■
™
1
2
Attach supply hose(s) (SF-148) to check strainer assembly (SF-186).
Purge angle stops before connecting check strainer assembly (SF-186).
Remove handle screw (SF-155), handle (SF-154) and handle limit
stop (SF-156).
Reinstall handle (SF-154) and adjust the temperature as required.
Remove handle (SF-154) and push plug (SF-153) in place of the
handle.
Continue with Option 1 installation instructions.
Detach parts (SF-155), (SF-154) and (SF-156).
Unscrew the flexible hot water supply hose (SF-148).
hand thread.
Screw on the plug (SF-159) in place of the supply hose.
Reinstall the temperature adjustment handle (SF-154) and turn
counterclockwise (cold position) as far as it goes. Remove handle
and push plug (SF-153) in place of the handle.
Push the plug (SF-153) in place of the temperature adjustment
handle.
Continue with Option 1 installation instructions.
3
Note: left
Advertisement
Table of Contents

Summary of Contents for Symmons Ultra-Sense S-6080-ACM
- Page 1 All 120 VAC power sources required for faucet installation are to be provided by a licensed electrician in accordance with state and local codes. ■ A Symmons power supply must be used with the S-6080-AC and S-6080-ACM model faucets otherwise warranty will be voided. Technical Data ■...
- Page 2 The installer may choose to purchase an electrical termination box Recognition range and after flow from an electrical distributor or use the Symmons termination box Recognition range is the distance at which the sensor reacts by (part no. SF-194 purchased and supplied seperately).
- Page 3 31 Brooks Drive Braintree, MA 02184 ■ Phone: (800) 796-6667 Fax: (800) 961-9621 ■ Website: www.symmons.com Email: get he lp@s ym mon s.co m ■ ■ ■ ©2007 - 2014 Symmons Industries, Inc. Printed in U.S.A SF-188 ZV-486 12 301 4...


Need help?
Do you have a question about the Ultra-Sense S-6080-ACM and is the answer not in the manual?
Questions and answers