Advertisement
Advertisement
Table of Contents

Related Manuals for Taga Harmony HTA-700B v.3-USB


Summary of Contents for Taga Harmony HTA-700B v.3-USB
- Page 1 HTA-700B v.3-USB / HTA-700B v.3 HIGH-FIDELITY HYBRID INTEGRATED AMPLIFIER HTA 700B v.3 HYBRID STEREO AMPLIFIER CD LINE BT OPT USB Instruction Manual Edition 06-2019...
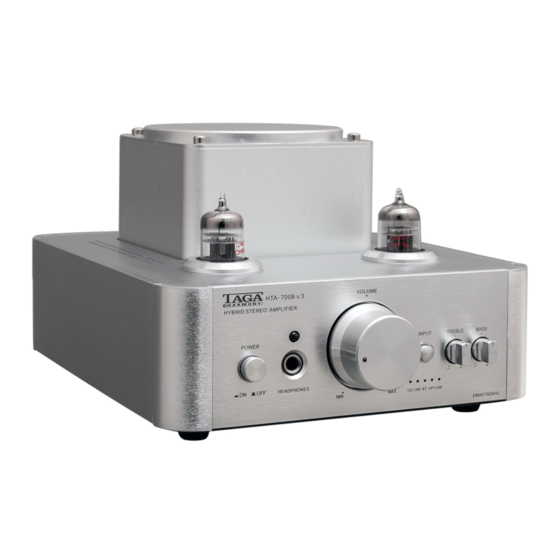
- Page 2 Introduction Thank you for purchasing this TAGA Harmony amplifier. HTA-700B v.3 is the latest edition of our highly-rewarded and extremely popular mid-size hybrid integrated amplifier. It utilizes 2 x 12AU7 vacuum tubes in the preamp section serving as a buffer amplifier and a pair of TDA7296 transistors in the output.
-
Page 3: Table Of Contents
Contents Safety Instructions Important Safety Instructions Remote controller Front and Rear Panel Hooking up speaker cables Hooking up the amplifier Operation USB Connection (only HTA-700B v.3-USB model) Bluetooth Connection ® Additional information Specifications Kit content... -
Page 4: Safety Instructions
Safety Instructions IMPORTANT READ THIS SECTION CAREFULLY BEFORE PROCEEDING! WARNING: TO REDUCE THE RISK OF FIRE OR ELECTRIC SHOCK, DO NOT EXPOSE THIS PRODUCT TO RAIN OR MOISTURE. DO NOT REMOVE CHASSIS (OR BACK). NO USER-SERVICEABLE PARTS INSIDE. REFER SERVICING TO QUALIFIED SERVICE PERSONNEL. The triangle containing a lightning symbol is intended to alert the user to the presence of uninsulated dangerous voltages within the product’s enclosure that may be of sufficient magnitude to constitute a risk of electric shock to persons. -
Page 5: Important Safety Instructions
Important Safety Instructions... -
Page 6: Remote Controller
Remote Controller Battery Installation Open the cover of the battery compartment. Insert two AAA batteries into the battery compartment. Carefully follow the polarity diagram inside the battery compartment ( positive + and negative - symbols). Replace the cover. Note: • Always use AAA batteries and do not use the rechargeable batteries. -
Page 7: Front And Rear Panel
2. Line Input Selector Button 3. Bluetooth Input Selector Button ® 4. Optical Input Selector Button 5. USB Input Selector Button (only HTA-700B v.3-USB model) 6. Mute Button 7. Volume Buttons (▼/▲) Front and Rear Panel HTA 700B v.3 HYBRID STEREO AMPLIFIER... -
Page 8: Hooking Up Speaker Cables
Front and Rear Panel /HTA-700B v.3-USB model shown/ Rear Panel: 12. Analog Stereo RCA Inputs CD / LINE 13. Preamplifier Stereo RCA Output 14. Digital Optical Input 15. USB Input Port* 16. Bluetooth Antenna and Antenna Socket ® 17. Speaker Right Channel Output (Speaker Connectors) 18. -
Page 9: Hooking Up The Amplifier
Optical cable RCA interconnect cable A-to-B USB 2.0 digital cable FM/AM tuner, Video game, CD Player, etc. console, etc. RCA interconnect cable Computer/ laptop (only HTA-700B v.3-USB model) Power amplifier, powered speakers, active subwoofer, etc. Headphones /HTA-700B v.3-USB model shown/... - Page 10 SPEAKERS OUT connectors located on the rear of the amplifier (check “Hooking Up Speaker Cables” for more details). HTA-700B v.3-USB model only: If you want to play music from a computer: using a A-to-B USB 2.0 digital cable (not supplied with this product) connect the computer to the USB Input port (check “USB Connection”...
-
Page 11: Operation
Operation Plug the Power Cable to the amplifier and into the electrical outlet. Turn on the amplifier – press the Power Switch (the Power Switch should be in the down position). The status LED located on the Volume Regulator should turn red in a few seconds. -
Page 12: Usb Connection
: the marker on the knob in the vertical position. Turn the knob counterclockwise (-) to decrease the amount of low frequencies. Turn the knob clockwise (+) to increase the amount of low frequencies (+). USB Connection (only HTA-700B v.3-USB model) Computers with Windows ®... - Page 13 Operation Figure 1 3. You can now listen to the playback from the computer and amplifier. 4. You can also control playback settings through the USB BRAVO-HD Audio Device Control Panel (Figure 2). • Start the BRAVO-HD program from the desktop or program menu. The BRAVO-HD Control Panel will appear.
-
Page 14: Bluetooth ® Connection
Operation Bluetooth Connection ® • After the amplifier is switched on - the built-in Bluetooth receiver is waiting to be ® paired with a Bluetooth source. ® • Select the BT input – the blue BT LED indicator will be flashing. •... -
Page 15: Additional Information
Additional information Break-In Your TAGA Harmony amplifier sounds great immediately after it is taken out of the carton but as all hybrid amplifiers, this amplifier requires a “break-in” period to reach its full sonic capabilities. During the “break-in” period it is recommended to operate the amplifier at moderate volume levels. -
Page 16: Specifications
RCA Pre-Out Bluetooth® is a registered trademark of Bluetooth SIG, Inc. We reserve the right to change the technical data and the design of the product without notice as a result of further development. *Applies to the HTA-700B v.3-USB model... -
Page 17: Kit Content
We strongly advise to contact a professional installer or dealer in order to install TAGA Harmony products. We recommend using high quality TAGA Harmony cables and other installation accessories. Kit Content: Amplifier Bluetooth Antenna ® Remote Controller Power Cable Instruction Manual Your product is marked with the symbol as showed on the left. - Page 18 Notes...
- Page 19 Notes...
- Page 20 Notes...
Need help?
Do you have a question about the HTA-700B v.3-USB and is the answer not in the manual?
Questions and answers