Water Right Sanitizer Plus Series Installation Instructions & Owner's Manual
Water conditioners
Hide thumbs
Also See for Sanitizer Plus Series:
- Installation instructions & owner's manual (28 pages) ,
- Installation instructions & owner's manual (24 pages) ,
- Installation instructions & owner's manual (36 pages)
Advertisement
Table of Contents
- 1 Table of Contents
- 2 Pre-Installation Instructions for Dealers
- 3 Bypass Valve
- 4 Installation
- 5 Start-Up Instructions
- 6 Programming Procedures
- 7 Operating Displays and Instructions
- 8 Troubleshooting Guide
- 9 Replacement Parts
- 10 Replacement Parts
- 11 Specifications
- 12 Warranty
- 13 Quick Reference Guide
- 14 Hardness
- Download this manual
Advertisement
Table of Contents

Related Manuals for Water Right Sanitizer Plus Series


Summary of Contents for Water Right Sanitizer Plus Series
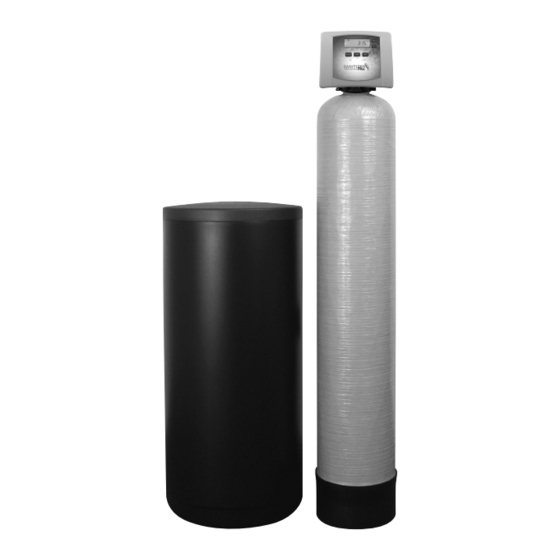
- Page 1 Sanitizer Plus Series ® Water Conditioners...
-
Page 2: Table Of Contents
TABLE OF CONTENTS Pre-Installation Instructions for Dealers . . . . . . . . . . . . . . . . . . . . . . . . . . . . . . . . . . . . . . . . 3 Bypass Valve . -
Page 3: Pre-Installation Instructions For Dealers
PRE-INSTALLATION INSTRUCTIONS FOR DEALERS The manufacturer has preset the water treatment unit’s sequence of cycles, cycle times, salt dose, exchange capacity and salt dose refill time . The dealer should read this page and guide the installer regarding hardness, day override, and time of regeneration, before installation: For the installer, the following must be used: •... -
Page 4: Bypass Valve
BYPASS VALVE The bypass valve is typically used to isolate the control valve from the plumbing system’s water pressure in order to perform control valve repairs or maintenance . The 1” full flow bypass valve incorporates four positions, including a diagnostic position that allows a service technician to have pressure to test a system while providing untreated bypass water to the building . -
Page 5: Installation
INSTALLATION GENERAL INSTALLATION & SERVICE WARNINGS The control valve, fittings and/or bypass are designed to accommodate minor plumbing misalignments . There is a small amount of “give” to properly connect the piping, but the water softener is not designed to support the weight of the plumbing . Do not use Vaseline, oils, other hydrocarbon lubricants or spray silicone anywhere . - Page 6 INSTALLATION should be set before installing the nut, split ring and “O” Ring . Avoid getting solder flux, primer, and solvent cement on any part of the “O” Rings, split rings, bypass valve or control valve . If the building’s electrical system is grounded to the plumbing, install a copper grounding strap from the inlet to the outlet pipe .
- Page 7 9 . SAFETY BRINE TANK CONNECTION: Install the 3/8” O .D . polyethylene tube from the Refill Elbow to the Brine Safety Float valve in the brine tank . Connection at Refill Elbow on the control valve Connection at Brine Safety Float in brine tank 10 .
-
Page 8: Start-Up Instructions
START-UP INSTRUCTIONS • After installation is complete, rotate bypass handles to bypass mode (see Fig.2 on page 4) . • Turn on water and check for leaks . • Fully open a cold water faucet — preferably a laundry sink or bathtub without an aerator . •... -
Page 9: Programming Procedures
PROGRAMMING PROCEDURES 1. Set time of day: Time of day should only need to be set after extended power outages or when daylight saving time begins or ends . If an extended power outage occurs, the time of day will flash on and off indicating that the time should be reset . STEP 1 –... -
Page 10: Operating Displays And Instructions
WATER HARDNESS DAYS BETWEEN REGEN STEP 4 – REGENERATION HOUR: The manufacturer has factory set 2:00 A .M . REGEN TIME HOUR as the default . This is the hour of day for regeneration and can be reset 2:00 by using + or — buttons . “AM/PM” toggles after 12 . The default time is 2:00 a .m . - Page 11 DAYS TO A REGEN CAPACITY REMAINING 1600 If the system has called for a regeneration that will occur at the preset time of regeneration, the words “REGEN TODAY” will appear on the display . If a water meter is installed, “GPM” flashes on the display when water is being treated, indicating gallons per minute going through the system .
- Page 12 should be replaced . The battery is a 3 Volt Lithium Coin Cell type 2032 and is readily available at most stores . To access battery location, remove front cover (see diagram on page 18 for battery location). 5 . CHECK SALT INDICATOR AND AUDIBLE ALARM: This control valve is equipped with a Low Salt Warning to alert homeowners that the system is operating in a low salt condition .
- Page 13 This page left intentionally blank.
-
Page 14: Troubleshooting Guide
TROUBLESHOOTING GUIDE PROBLEM CAUSE CORRECTION A . No power at electric outlet A . Repair outlet or use working outlet B . Control valve power adapter not plugged into B . Plug power adapter into outlet or connect outlet or power cord end not connected to PC power cord end to PC board connection board connection 1. - Page 15 PROBLEM CAUSE CORRECTION A . Turn bypass handles to place bypass in A . Bypass valve in bypass position service position 7. Control valve does not B . Meter is not connected to meter connection on B . Connect meter to three pin connection labeled regenerate automatically PC board METER on PC board...
- Page 16 TROUBLESHOOTING GUIDE PROBLEM CAUSE CORRECTION A . Injector is plugged A . Remove injector and clean or replace B . Faulty regenerant piston B . Replace regenerant piston C . Regenerant line connection leak C . Inspect regenerant line for air leak 12.
- Page 17 PROBLEM CAUSE CORRECTION D . Verify that proper voltage is being supplied . 15. E2, Err – 1002, Err – Press NEXT and REGEN buttons for 3 seconds 102 = Control valve D . Improper voltage being delivered to PC board to resynchronize software with piston position motor ran too short or disconnect power supply from PC board for...
- Page 18 TROUBLESHOOTING GUIDE PROBLEM CAUSE CORRECTION 19. Err – 1007, Err – 107, A . Open up MAV/NHBP valve and check piston Err – 117 = MAV/ and seal/ stack assembly for foreign material . SEPS/NHBP/AUX A . Foreign material is lodged in Press NEXT and REGEN buttons for 3 seconds MAV valve motor MAV/NHBP valve...
-
Page 19: Replacement Parts
REPLACEMENT PARTS FRONT COVER AND DRIVE ASSEMBLY Item No. Part No. Description Qty. CV3540S-A Black cover CV3540-WS-A Gray cover CV3107-1 Motor CV3106-1 Drive bracket & spring clip ® CV3554WS PC board, Sanitizer CV3110 Drive gear, 12 x 36 CV3109 Drive gear cover CV3526 Transformer, 110V-12V CV3543... - Page 20 REPLACEMENT PARTS PISTON ASSEMBLY Item No. Part No. Description Qty. CV3005 1” spacer stack assembly CV3430 1 .25” spacer stack assembly CV3004 Drive cap assembly CV3135 O-ring 228 CV3011 1” piston assembly downflow CV3011-01 1” piston assembly upflow CV3407 1 .25” piston assembly downflow CV3174 Regenerant piston CV3180...
- Page 21 REPLACEMENT PARTS BYPASS VALVE Item No. Part No. Description Qty. CV3151 Nut, 1” quick connect CV3150 Split ring CV3105 O-ring 215 CV3145 Bypass rotor, 1” CV3146 Bypass cap CV3147 Bypass handle CV3148 Bypass rotor seal retainer CV3152 O-ring 135 CV3155 O-ring 112 CV3156 O-ring 214...
- Page 22 REPLACEMENT PARTS INJECTOR ASSEMBLIES Item No. Part No. Description Qty. CV3176 Injector cap CV3152 O-ring 135 CV3177-01 Injector screen CV3010-1Z Injector assembly plug CV3010-1A A injector assembly, black CV3010-1B B injector assembly, brown CV3010-1C C injector assembly, violet CV3010-1D D injector assembly, CV3010-1E E injector assembly, white...
- Page 23 REPLACEMENT PARTS DRAIN LINE ASSEMBLY 3/4” Item No. Part No. Description Qty. CH4615 Elbow locking clip CPKP10TS8-BULK Optional insert, 5/8” tube CV3192 Optional nut, 3/4” drain elbow CV3158-01 Drain elbow, 3/4” NPT with O-ring CV3163 O-ring 019 CV3159-01 DLFC retainer assembly CV3162-007 0 .7 DLFC for 3/4”...
- Page 24 REPLACEMENT PARTS WATER METER AND METER PLUG Item No. Part No. Description Qty. CV3151 Nut, 1” QC CV3003 Meter assembly, includes items 3 & 4 CV3118-01 Turbine assembly CV3105 O-ring 215 CV3003-01 Meter plug assembly SERVICE WRENCH - CV3193-02 Although no tools are necessary to assemble or disassemble the valve, the Service Wrench, (shown in various positions on the valve) is available to aid in assembly or disassembly .
-
Page 25: Replacement Parts
REPLACEMENT PARTS BRINE TANK ASSEMBLY Item No. Part No. Description Qty. CG2191- 84 Brine tank cover, injection molded WR CG2180 Brine tank cover, standard CH1072-01 Optional 18” diameter salt grid CH1080 Optional 24” diameter salt grid CG21833CB1C00 18” x 33” brine tank, black CG21840CB1C00 18”... - Page 26 INSTALLATION FITTING ASSEMBLIES 1” PVC MALE NPT ELBOW 3/4” & 1” PVC SOLVENT ELBOW Item Item Part No. Description Qty. Part No. Description Qty. CV3007 1” PVC male NPT elbow assembly CV3007-01 3/4” & 1” PVC solvent elbow assembly CV3151 Nut, 1”...
- Page 27 1-1/4” & 1-1/2” BRASS SWEAT 1-1/4” & 1-1/2” PVC SOLVENT Item Item Part No. Description Qty. Part No. Description Qty. CV3007- 09 1-1/4 & 1-1/2” brass sweat assembly CV3007- 07 1-1/4” & 1-1/2” PVC solvent assembly CV3151 Nut, 1” quick connect CV3151 Nut, 1”...
-
Page 28: Specifications
SPECIFICATIONS MODEL ASP1-1044 ASP1-1054 ASP1-1354 ASP2-1044 ASP2-1054 ASP2-1354 1Capacity: Maximum 11,800 @ 12 .4 22,600 @ 15 .9 36,900 @ 21 .2 20,300 @ 12 .4 34,800@ 15 .9 60,300 @ 26 .5 (Grains/Lbs . NaCI) Medium 11,400 @ 9 .3 20,700 @ 12 .4 33,600 @ 15 .9 19,100 @ 9 .3... -
Page 29: Warranty
Water Conditioner Limited Warranty Congratulations. You have purchased one of the finest water treatment systems available. In the unlikely event of a problem due to defects in material and workmanship, we proudly warrant our water conditioners to the original owner, when installed in accordance with Water-Right specifications. -
Page 30: Quick Reference Guide
TIME OF DAY 2:40 QUICK REFERENCE GUIDE GENERAL OPERATION MANUAL REGENERATION FLOW RATE When the system is operating, one of four displays will be shown: NOTE: For softeners, if brine tank does REGEN TODAY and TIME OF DAY will flash alternately if a regeneration time of day/gpm, flow rate, capacity remaining or days to a regen .
Need help?
Do you have a question about the Sanitizer Plus Series and is the answer not in the manual?
Questions and answers