Table of Contents
Advertisement
Quick Links
Advertisement
Table of Contents

Related Manuals for Ironton 61482


Summary of Contents for Ironton 61482
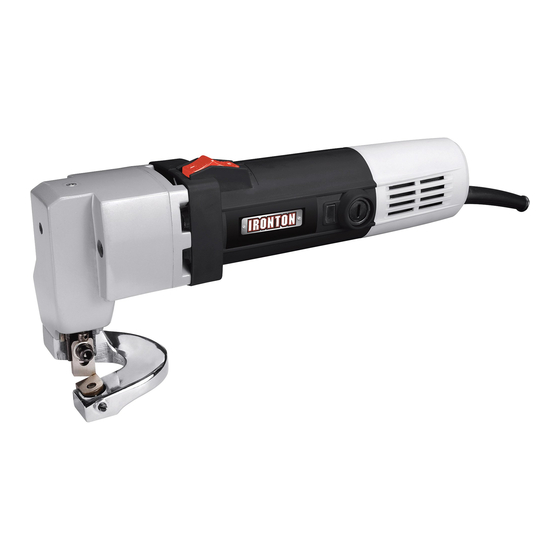
- Page 1 Electric Metal Cutting Shear Owner’s Manual WARNING: Read carefully and understand all ASSEMBLY AND OPERATION INSTRUCTIONS before operating. Failure to follow the safety rules and other basic safety precautions may result in serious personal injury. Item #61482 READ & SAVE THESE INSTRUCTIONS...
- Page 2 Thank you very much for choosing an Ironton™ product! For future reference, please complete the owner’s record below: Serial Number/Lot Date Code: ________________________________ Purchase Date: ____________________________________________ Save the receipt, warranty, and this manual. It is important that you read the entire manual to become familiar with this product before you begin using it.
-
Page 3: Table Of Contents
Table of Contents Intended Use ............................4 Technical Specifications ........................4 Important Safety Information ....................... 4 Specific Operation Warnings ....................... 6 Grounding .............................. 6 Extension Cords ............................ 7 Main Parts of Metal Shear ........................8 Before Each Use ............................ 8 Operating Instructions .......................... -
Page 4: Intended Use
Intended Use The Ironton Electric Metal Cutting Shear is a powerful tool with a 3.5 Amp and 120V motor. It smoothly cuts sheet metal, aluminum, and plastic up to 14 gauge. It cuts a radius as small as 1 ½... - Page 5 children to handle the product. Be aware of all power lines, electrical circuits, water pipes, and other mechanical hazards in your work area. Some of these hazards may be hidden from your view and may cause personal injury and/or property damage if contacted. ⚠WARNING PERSONAL SAFETY ...
-
Page 6: Specific Operation Warnings
Use only accessories that are recommended by the manufacturer for use with your product. Accessories that may be suitable for one product may create a risk of injury when used with another tool. Never use an accessory that has a lower operating speed or operating pressure than the tool itself. -
Page 7: Extension Cords
Double Insulated Tools: Tools with Two-Prong Plugs Tools marked Double Insulated do not require grounding. They have a special double insulation system which satisfies OSHA requirements and complies with the applicable standards of Underwriters Laboratories, Inc., the Canadian Standard Association, and the National Electrical Code. (See Figure B.) Double insulated tools may be used in either of the 120 volt outlets shown in the following illustration. -
Page 8: Main Parts Of Metal Shear
When using more than one extension cord to make up the total length, make sure each cord contains at least the minimum wire size required. If you are using one extension cord for more than one tool, add the nameplate amperes and use the sum to determine the required minimum cord size. -
Page 9: Operating Instructions
Lubricating the Metal Shear 1. Make sure that the power switch is in the OFF position and plug in the metal shear. 2. Turn on the metal shear and run for one minute. 3. Turn off the metal shear and unplug from the outlet. 4. - Page 10 Adjusting the Cutting Blades 1. Using a probe through the motor vents in the side of the cover, turn the fan until the cutting blades are open to the maximum amount. You can measure the gap between the blades using an automotive feeler gauge (not included).
-
Page 11: After Each Use
After Each Use ⚠WARNING Store idle tools out of reach of children and other untrained persons. Tools are dangerous in the hands of untrained users. Do not touch the metal shear right after use. Replacing the Blades 1. Remove the screw and washer (6, 5, 4) holding the upper shear blade (reference area 12) and remove it as shown in the image below, using the included hex key. -
Page 12: Maintenance
Maintenance ⚠WARNING Maintain and clean tools. Properly maintained tools are less likely to bind and are easier to control. Do not use a damaged metal shear. Use only accessories that are recommended by the manufacturer for your model. Maintain the shear by adopting a program of conscientious repair and maintenance in accordance with the following recommended procedures. -
Page 13: Parts Diagram
Parts Diagram Page 13 of 17... -
Page 14: Parts List
Parts List Reference Part Description Quantity Socket Head Screw Spring Pin M4x30 Tool Rest Socket Head Screw M6x16 Spring Washer 6 Plain Washer 6 Lock Nut M5 Adjusting Flat Head Screw M5x16 Lower Shear Blade (fixed) Shaft Sleeve Lock Screw M4x12 Nut M4 Socket Head Screw M6X13 Upper Shear Blade... -
Page 15: Replacement Parts
Reference Part Description Quantity Screw ST3.9X9.5 Power Switch Switch Holder Strain Relief Cord Holder Cover Power Cord Replacement Parts For replacement parts and technical questions, please call Customer Service at 1-800-222-5381. Not all product components are available for replacement. The illustrations provided are a convenient reference to the location and position of parts in the assembly sequence. -
Page 16: Limited Warranty
Northern Tool and Equipment Company, Inc. ("We'' or ''Us'') warrants to the original purchaser only (''You'' or ''Your'') that the Ironton product purchased will be free from material defects in both materials and workmanship, normal wear and tear excepted, for a period of one year from date of purchase. - Page 17 Distributed by: Northern Tool & Equipment Company, Inc. Burnsville, Minnesota 55306 www.northerntool.com Made in China Page 17 of 17...
Need help?
Do you have a question about the 61482 and is the answer not in the manual?
Questions and answers