
Related Manuals for Stevens AeroModel Build It! RingRat 250


Summary of Contents for Stevens AeroModel Build It! RingRat 250
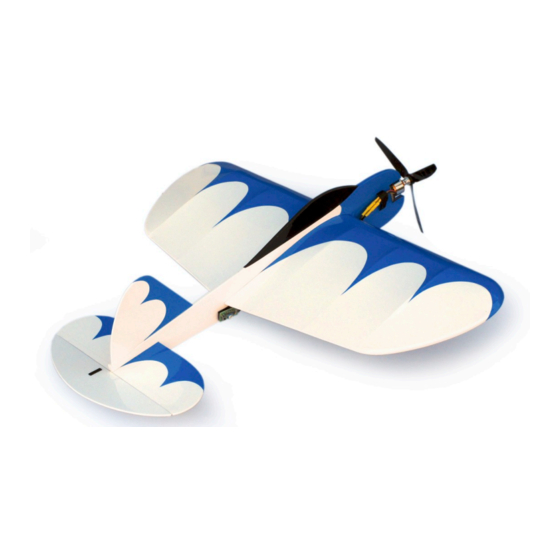
- Page 1 RingRat 250 Wing Span: 26.5 inches | Wing Area: 250 square inches | Average Flying Weight: 12.5 ounces Build Instructions - Version 1.24 (revised 01.07.2015) RingRat 250 © 2010 Stevens AeroModel all rights reserved. Page 1 of 29...
-
Page 2: Product Support
Product Support WARRANTY Stevens AeroModel guarantees this kit to be free from defects in both material and workmanship at the date of purchase. This warranty does not cover any component parts damaged by use or modification. In no case shall Stevens AeroModel’s liability exceed the original cost of the purchased kit. Further, Stevens AeroModel reserves the right to change or modify this warranty without notice. -
Page 3: Kit Contents
☐ Design Master Aerosol Lacquer Paint ☐ X-ACTO Pin Vise & Drill Set [XAC7155] ☐ Deft Clear Spray Lacquer ☐ ZONA 4 in 1 Saw Set [ZON35251] RingRat 250 © 2010 Stevens AeroModel all rights reserved. Page 3 of 29... - Page 4 Suitable Electronics & Equipment (Available at StevensAero.com) SA-Sport Power System: This power system is available from Stevens AeroModel (www.stevensaero.com) and combines performance and affordability. ☐ 1 - SA Sport Park 400 Brushless Outrunner Motor [SUPA2212-6] ☐ 1 - SA Sport 30A Brushless ESC [SUP30AESC] ☐...
- Page 5 Laser Cut Parts Inventory RingRat 250 © 2010 Stevens AeroModel all rights reserved. Page 5 of 29...
- Page 6 Laser Cut Parts Inventory RingRat 250 © 2010 Stevens AeroModel all rights reserved. Page 6 of 29...
- Page 7 General Assembly Instructions Thank you, for purchasing this Stevens AeroModel RingRat™250. A design inspired by the joy of flying. This model has been developed and manufactured using state of the art CAD/CAM systems and features a unique interlocking construction process that, when compared to traditional methods found in other model aircraft kits, save countless hours of measuring, cutting, sanding, and fitting.
-
Page 8: Wing Construction
☐ With etching facing up, slide W6 through slot ☐ Fit and bond trailing edge parts W3a and in R1. Ensure that the end marked “LEFT” W3b. extends through to the left side of R1. RingRat 250 © 2010 Stevens AeroModel all rights reserved. Page 8 of 29... - Page 9 ☐ Fit the other rib R2 in the same manner. Square structure on a flat surface and bond all joints with medium CA, building up a fillet along all joints between ribs and W6. RingRat 250 © 2010 Stevens AeroModel all rights reserved. Page 9 of 29...
- Page 10 Align mark with center of wing at R1, then bond leading edge stock within notch at leading edge of all ribs. RingRat 250 © 2010 Stevens AeroModel all rights reserved. Page 10 of 29...
- Page 11 ☐ ☐ With wing tip fit flush to rib R4, leading edge, and trailing edge, bond with medium CA. ☐ Repeat prior ☐ ☐ steps to bond right wing tip to right side of wing assembly. RingRat 250 © 2010 Stevens AeroModel all rights reserved. Page 11 of 29...
- Page 12 Starting with top of wing, align arrow in center of sheet with center rib R1, pointing towards leading edge stock. Bond sheet to leading edge stock only. RingRat 250 © 2010 Stevens AeroModel all rights reserved. Page 12 of 29...
- Page 13 ☐ Center W11 over rib R1 and bond to front ☐ Invert wing and remove stand off tabs. Note: spar only. Two tabs on R1! RingRat 250 © 2010 Stevens AeroModel all rights reserved. Page 13 of 29...
- Page 14 ☐ Align and bond W7 pushrod exit to recess in ☐ Using 400 grit sand paper finish sand wing, bottom of rib R1. squaring trailing edge and rounding wing tips. RingRat 250 © 2010 Stevens AeroModel all rights reserved. Page 14 of 29...
- Page 15 6 in. length of 1/2 in. wide velcro at this time. Velcro strap is installed through slots in ply support from top of wing. RingRat 250 © 2010 Stevens AeroModel all rights reserved. Page 15 of 29...
- Page 16 ☐ From provided 3/32 in. O.D. aluminum tubing cut four 1/4 in. lengths to create crimp tubes for lead-out wire. Tip: score tubing at cut length with a sharp blade then snap off length. RingRat 250 © 2010 Stevens AeroModel all rights reserved. Page 16 of 29...
- Page 17 ☐ With leadout wires properly installed, cover the remainder of the wing using your color choice of high quality, light weight, model aircraft film such as Stevens AeroModel’s AeroLITE or AeroFILM. RingRat 250 © 2010 Stevens AeroModel all rights reserved. Page 17 of 29...
-
Page 18: Fuselage Construction
☐ Measure and cut to length, leaving 1/8” to 1/4” extra to be trimmed off later. ☐ Dry fit motor mount M2a to M1’s and F2 (left). RingRat 250 © 2010 Stevens AeroModel all rights reserved. Page 18 of 29... - Page 19 ☐ Trim excess hardwood and sand to match Note: Rear tabs on M1’s will protrude slightly, shape of fuselage at nose. allowing doubler F2 (right) to key in place. RingRat 250 © 2010 Stevens AeroModel all rights reserved. Page 19 of 29...
- Page 20 ☐ Seal fuselage components with clear lacquer, dope, or cover with your color choice of high quality, light weight, model aircraft film such as Stevens AeroModel’s AeroLITE or AeroFILM. RingRat 250 © 2010 Stevens AeroModel all rights reserved. Page 20 of 29...
-
Page 21: Final Assembly
CA glue. Stabilizer must be centered to fuselage "top" and in-line with canopy. RingRat 250 © 2010 Stevens AeroModel all rights reserved. Page 21 of 29... - Page 22 Bellcrank and battery access hole may be left open without Next, make a 45 degree bend one inch from significantly affecting performance of model. the first bend as shown. RingRat 250 © 2010 Stevens AeroModel all rights reserved. Page 22 of 29...
- Page 23 ☐ Insert tail skid and center along the fuselage toward the rear of the model. ☐ Insert two #2 1/4 in. screws, trapping the tail skid under the heads of the screws. RingRat 250 © 2010 Stevens AeroModel all rights reserved. Page 23 of 29...
- Page 24 Micro 2 E/Z Link ☐ Trim posts slightly and flatten with a warm [DUB920]. soldering iron or covering trim iron. Retain with a few drops of thin CA. RingRat 250 © 2010 Stevens AeroModel all rights reserved. Page 24 of 29...
- Page 25 ☐ Pass a 6 in. length of 1/2 in. wide velcro trailing edges of the wing will secure the battery safety strap through slots in motor speed control and timer. mount and fuselage. RingRat 250 © 2010 Stevens AeroModel all rights reserved. Page 25 of 29...
- Page 26 Flight Control Setup and Pre-Flight. Wrap bands 3 times around dowel and gear. RingRat 250 © 2010 Stevens AeroModel all rights reserved. Page 26 of 29...
- Page 27 Work the C.G. back and increase the sensitivity of the elevator in small increments over time, as you gain experience. RingRat 250 © 2010 Stevens AeroModel all rights reserved. Page 27 of 29...
- Page 28 The RingRat 250 will settle gently to the ground and roll out will be a few feet. Disconnect the battery until you are ready to begin another flight. RingRat 250 © 2010 Stevens AeroModel all rights reserved. Page 28 of 29...
- Page 29 You may correspond with Stevens AeroModel staff using any of the following methods: email: support@stevensaero.com Phone: 719-387-4187 RingRat 250 © 2010 Stevens AeroModel all rights reserved. Page 29 of 29...
Need help?
Do you have a question about the Build It! RingRat 250 and is the answer not in the manual?
Questions and answers