Grundfos CU 3X2 Installation And Operating Instructions Manual
Hide thumbs
Also See for CU 3X2:
- Installation and operating instructions manual (58 pages) ,
- Instructions manual (40 pages) ,
- Installation and operating instructions manual (18 pages)
Table of Contents
Advertisement
Advertisement
Table of Contents

Related Manuals for Grundfos CU 3X2


Summary of Contents for Grundfos CU 3X2
- Page 1 GRUNDFOS INSTRUCTIONS CU 3X2, CU 3X4 Installation and operating instructions...
- Page 2 DK: EF-overensstemmelseserklæring My firma Grundfos prohlašujeme na svou plnou odpovědnost, že Vi, Grundfos, erklærer under ansvar at produkterne CU 352, CU 354, výrobky CU 352, CU 354, CU 362 a CU 372, na něž se toto prohlášení CU 362 og CU 372 som denne erklæring omhandler, er i vztahuje, jsou v souladu s ustanoveními směrnice Rady pro sblížení...
- Page 3 Uporabljena norma: EN 61326-1: 2006. Použitá norma: EN 61326-1: 2006. ES izjava o skladnosti velja samo kadar je izdana kot del Grundfos Toto prehlásenie o konformite ES je platné iba vtedy, ak je instalacije in navodil delovanja (publikacija številka 96842987 0513).
- Page 4 TR: EC uygunluk bildirgesi Vi, Grundfos, försäkrar under ansvar att produkterna CU 352, CU Grundfos olarak bu beyannameye konu olan CU 352, CU 354, CU 354, CU 362 och CU 372, som omfattas av denna försäkran, är i 362 ve CU 372 ürünlerinin, AB Üyesi Ülkelerin kanunlarını birbirine överensstämmelse med rådets direktiv om inbördes närmande till...
-
Page 5: Table Of Contents
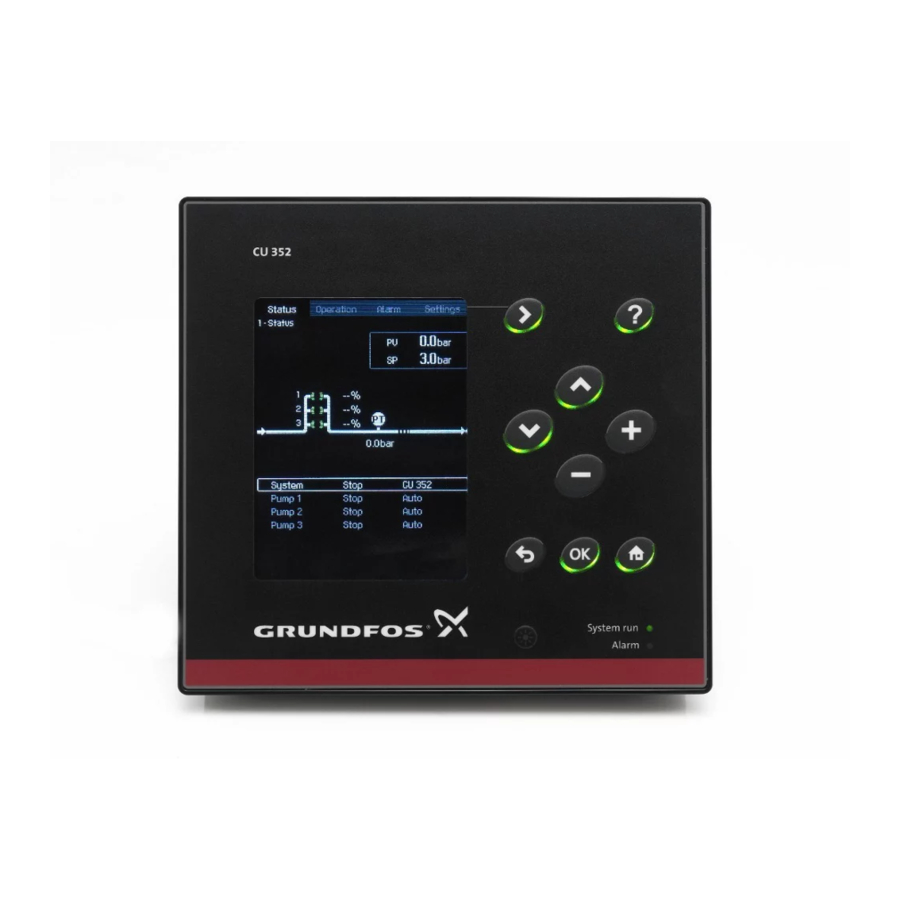
Mechanical installation EMC-correct installation 2. Product description Internal GENIbus connection The CU 3X2 is a flexible control unit for control and Fieldbus communication interface monitoring of up to six pumps. In the following modules sections two variants will be described: Fitting the CIM module •... -
Page 6: Indicator Lights
2.1 Indicator lights Warning The CU 3X2 has one green and one red indicator If the CU 3X2 is used in a manner not light. specified by the manufacturer, the The green indicator light is on when the power protection provided by the CU 3X2 may supply has been switched on. -
Page 7: Identification
3. Identification 3.1 Type key The CU 3X2 can be identified by means of the Code Example nameplate on the back. See fig. 3. Control unit Controller series 0536 CU 362 Type Serial No. Model number 98146953 - VO1 1228 Product No. -
Page 8: Location
CU 3X2 to the mounting frame 4.2 Enclosure class (pos. 2, fig. 6). See fig. 7. The CU 3X2 is IP54 when mounted in the front of an IPX4 enclosure. The cabinet must be of a flame-retardant material. -
Page 9: Emc-Correct Installation
CU 3X2 and the frame. See fig. 7. • Use screened cables for GENIbus. Connect the screen to the cable clamp of the CU 3X2 in front of the terminals A1, Y1 and B1. See fig. 8. Also use screened cable for the CIM module. -
Page 10: Internal Genibus Connection
6.2 Fieldbus communication interface 6.3 Fitting the CIM module modules Warning The CU 3X2 can be connected to an external communication network via an add-on CIM module. Switch off the power supply to the CIM: Communication Interface Module. CU 3X2 before fitting the CIM module. - Page 11 Placing the new labels on the back 3. Fit the CIM module. See fig. 12. cover 5. Refit the back cover to the CU 3X2, and secure it with the mounting screw. See fig. 14. Fig. 12 Fitting the CIM module Fig.
-
Page 12: Start-Up
7. Start-up 9.6 Digital inputs Start-up must be carried out by an authorised Open-circuit voltage 24 VDC person. Closed-circuit current 5 mA, DC Warning Frequency range 0-4 Hz Prior to start-up, read the installation and operating instructions for the 9.7 Analog inputs product in question. -
Page 13: Battery Backup (Ups)
9.11 Battery backup (UPS) 9.12 Terminal groups A battery can be connected to the CU 3X2 as backup for the normal power supply. The battery can be connected directly to the CU 3X2 without a fuse. With the backup battery the CU 3X2 can continue to operate despite interruptions in the normal power supply. -
Page 14: Overview Of Inputs And Outputs
NO: Normally open contact Common. Position numbers, see fig. 16. Group Terminal Designation Data Diagram Connection to phase CU 3X2 conductor 1 x 100-240 VAC ± 10 %, 50/60 Hz Connection to neutral conductor Connection to protective earth RS-485 A... -
Page 15: Maintenance
2. If this is not possible, contact the nearest 7. Connect all conductors according to markings. Grundfos company or service workshop. 8. Configure the new CU 3X2 by means of a PC Tool. See service instructions for the product in question. - Page 16 Argentina China Hong Kong Bombas GRUNDFOS de Argentina S.A. GRUNDFOS Pumps (Shanghai) Co. Ltd. GRUNDFOS Pumps (Hong Kong) Ltd. Ruta Panamericana km. 37.500 Centro 50/F Maxdo Center No. 8 XingYi Rd. Unit 1, Ground floor Industrial Garin Hongqiao development Zone Siu Wai Industrial Centre 1619 Garín Pcia.
- Page 17 United Arab Emirates Telefax: +60-3-5569 2866 Singapore GRUNDFOS Gulf Distribution Mexico GRUNDFOS (Singapore) Pte. Ltd. P.O. Box 16768 Bombas GRUNDFOS de México S.A. de 25 Jalan Tukang Jebel Ali Free Zone C.V. Singapore 619264 Dubai Boulevard TLC No. 15 Phone: +65-6681 9688...
- Page 18 96842987 0513 ECM: 1112029 www.grundfos.com...
Need help?
Do you have a question about the CU 3X2 and is the answer not in the manual?
Questions and answers