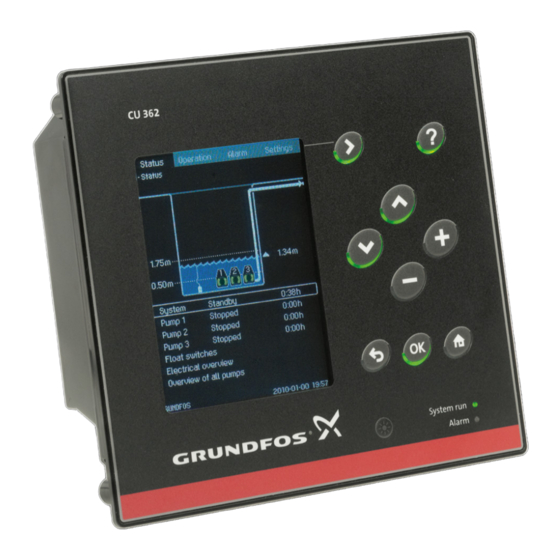
Grundfos CU 3x4 Installation And Operating Instructions Manual
Hide thumbs
Also See for CU 3x4:
- Installation and operating instructions manual (58 pages) ,
- Instructions manual (40 pages) ,
- Installation and operating instructions manual (18 pages)
Table of Contents
Advertisement
Quick Links
Advertisement
Table of Contents

Summary of Contents for Grundfos CU 3x4
- Page 1 GRUNDFOS INSTRUCTIONS CU 3X2, CU 3X4 Installation and operating instructions...
-
Page 2: Table Of Contents
English (GB) Installation and operating instructions 1. Symbols used in this document Original installation and operating instructions CONTENTS Warning Page If these safety instructions are not observed, it may result in personal injury. Symbols used in this document Product description Warning Indicator lights If these instructions are not observed, it... -
Page 3: Indicator Lights
Some help texts apply to the entire display, other texts to the individual lines of the display. The CU 3X2 must not be installed in explosive environments, but may be used together with Grundfos pumps approved for installation in potentially explosive environments. -
Page 4: Identification
3. Identification 4. Installation The CU 3X2 can be identified by means of the The CU 3X2 is only intended for use in control nameplate on the back. See fig. 3. panels. Before installation, check the following: • Does the CU 3X2 correspond to the one ordered? 0536 CU 362... -
Page 5: Location
5. Mechanical installation Warning Fasten the CU 3X2 with the four screws, M5 x 10, Short-circuit protection supplied with the unit (pos. 1). The installation must incorporate external Maximum torque: 1.4 Nm. fuses. Dimensions of the CU 3X2, see section EU/IEC: Dimensions. -
Page 6: Emc-Correct Installation
The CU 3X2 is normally mounted in a panel which also contains an IO 351 module, contactors and other power equipment. The panel can also contain other Grundfos modules and frequency converters. In order to ensure faultless operation, it is very important to install the electronic modules in an EMC-correct way: •... -
Page 7: Internal Genibus Connection
6.1 Internal GENIbus connection Internal communication is established via GENIbus. CU 3X2 Unit n Unit n+1 Fig. 9 GENIbus connection The module type and the number of modules depend on the application software. 6.2 Fieldbus communication interface 6.3 Fitting the CIM module modules Warning The CU 3X2 can be connected to an external... - Page 8 2. Open the back cover and break off the tap. See 4. Place the labels supplied with the CIM module on fig. 11. the back cover. See fig. 13. CIM 250 Type: Kit Funct. module - Geni/RS485Op 96824795 Prod. No. P.
-
Page 9: Startup
7. Startup 9.6 Digital inputs Startup must be carried out by an authorised person. Open-circuit voltage 24 VDC Warning Closed-circuit current 5 mA, DC Prior to startup, read the installation and Frequency range 0-4 Hz operating instructions for the product in question. -
Page 10: Battery Backup (Ups)
9.11 Battery backup (UPS) 9.12 Terminal groups A battery can be connected to the CU 3X2 as backup for the normal power supply. The battery can be connected directly to the CU 3X2 without a fuse. With the backup battery the CU 3X2 can continue to operate despite interruptions in the normal power supply. -
Page 11: Overview Of Inputs And Outputs
10. Overview of inputs and outputs Digital input DO: Digital output Analog input NC: Normally closed contact NO: Normally open contact Common. Position numbers, see fig. 16. Group Terminal Designation Data Diagram Connection to phase CU 3X2 conductor 1 x 100-240 VAC ± 10 %, 50/60 Hz Connection to neutral conductor Connection to... -
Page 12: Maintenance
2. If this is not possible, contact the nearest 7. Connect all conductors according to markings. Grundfos company or service workshop. 8. Configure the new CU 3X2 by means of a PC Tool. See service instructions for the product in question. - Page 13 Declaration of conformity GB: EU declaration of conformity BG: Декларация за съответствие на EO We, Grundfos, declare under our sole responsibility that the products Ние, фирма Grundfos, заявяваме с пълна отговорност, че CU323, CU352, CU354, CU362, CU372, to which the declaration продуктите...
- Page 14 VI: Tuyên bố tuân thủ EU AL: Deklara e konformitetit të BE Chúng tôi, Grundfos, tuyên bố trong phạm vi trách nhiệm duy nhất Ne, Grundfos, deklarojmë vetëm nën përgjegjësinë tonë se produktet của mình rằng sản phẩm CU323, CU352, CU354, CU362, CU372 mà...
- Page 15 Declaration of conformity EAC Блоки управления насосами серии CU сертифицированы на соответствие требованиям Технических регламентов Таможенного союза: ТР ТС 004/2011 «О безопасности низковольтного оборудования»; ТР ТС 020/2011 «Электромагнитная совместимость технических средств». Сертификат соответствия: № ТС RU C-DK.АИ30.В.01166, срок действия до 07.12.2019г. Выдан: Органом...
- Page 16 Argentina China Hong Kong Bombas GRUNDFOS de Argentina S.A. GRUNDFOS Pumps (Shanghai) Co. Ltd. GRUNDFOS Pumps (Hong Kong) Ltd. Ruta Panamericana km. 37.500 Centro 10F The Hub, No. 33 Suhong Road Unit 1, Ground floor Industrial Garin Minhang District Siu Wai Industrial Centre 1619 Garín Pcia.
- Page 17 Malaysia Serbia Turkey GRUNDFOS Pumps Sdn. Bhd. Grundfos Srbija d.o.o. GRUNDFOS POMPA San. ve Tic. Ltd. 7 Jalan Peguam U1/25 Omladinskih brigada 90b Sti. Glenmarie Industrial Park 11070 Novi Beograd Gebze Organize Sanayi Bölgesi 40150 Shah Alam Phone: +381 11 2258 740...
- Page 18 96842987 0217 ECM: 1201244 www.grundfos.com...


Need help?
Do you have a question about the CU 3x4 and is the answer not in the manual?
Questions and answers