Table of Contents
Advertisement
Quick Links
Advertisement
Table of Contents

Related Manuals for Xylem McDonnell & Miller 42S-N Series


Summary of Contents for Xylem McDonnell & Miller 42S-N Series
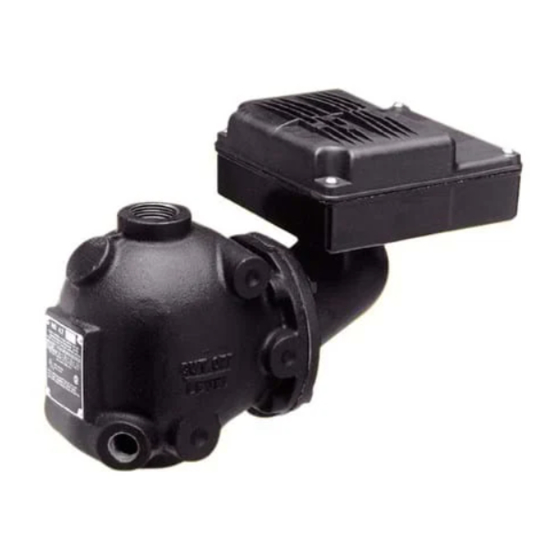
- Page 1 INSTRUCTION MANUAL MM-231G...
-
Page 2: Operation
CAUTION: • A more frequent replacement interval may be necessary based on the condition of the unit at time of inspection. McDonnell Miller s warranty is one (1) year from date & of installation or two (2) years from the date of manufacture. OPERATION Maximum Pressure: 50 psi (3.5 kg/cm Electrical Ratings... -
Page 3: Installation
INSTALLATION – TOOLS NEEDED: IMPORTANT: Follow the boiler manufacturer's Two (2) pipe wrenches, one (1) flathead screw instructions along with all applicable codes and driver, and pipe sealing compound. ordinances for piping, blow down valve and water gauge glass requirements. STEP 1 - Determine the Elevation at Which the Low Water Cut-Off/Pump Controller Must be Installed Series 42S... - Page 4 STEP 2 - Installation a. Using a pipe wrench, unscrew shipping block (A) from upper 1” NPT tapping (B) of the control body. For 42S-A Control a. Drain the water in the boiler until the level falls below the lower gauge glass connection (C).
- Page 5 d. • Install upper ‘Y’ fitting (K) into upper 1/2” NPT gauge glass tapping on boiler. • Install lower ‘Y’ fitting (L) into 1/2” NPT gauge glass tapping on boiler. e. • Screw reducer bushing (O) and nipple (N) into top 1” NPT tapping (P).
- Page 6 For 42S Control a. Mount and pipe control (CC) on vertical equalizing pipes (DD) at the required elevation as determined in Step 1. b. Install a full ported ball valve (NN) directly below the lower cross of the water (lower) equalizing line. For 42S-N Control a.
-
Page 7: Step 3 - Electrical Wiring
STEP 3 - Electrical Wiring WARNING • To prevent electrical shock, turn off the electrical power before making electrical connections. • This low water cut-off must be installed in series with all other limit and operating controls installed on the boiler. -
Page 8: Wiring Diagrams
WIRING DIAGRAMS Low Water Cut-Off Only 1. Main Line Switch - For burner circuits within the 2. Pilot Switch - To holding coil of a starter when switch’s electrical rating. the burner circuit exceeds the switch’s electrical rating. LINE LINE LOAD LOAD Pump Control Only... - Page 9 c. Re-attach the junction box cover (KK). STEP 4 - Testing This control is factory calibrated for specific applica- Dimensions provided are typical for a boiler not being tions. The following testing procedure is only meant fired and/or not at pressure. Actual operating ranges to serve as a verification of proper operating are shown on page 2 in the "Operation"...
-
Page 10: Installation Complete
c. Continue watching the gauge glass (D) to see that the water continues to rise to " approximately 1a” (35mm) above the (35 mm) horizontal cast line (MM). The pump should shut off. CAUTION To prevent serious personal injury from steam and hot water during blow-down, connect piping to the discharge side of the blow-down valve to avoid exposure to steam discharge. -
Page 11: Maintenance
MAINTENANCE BLOW DOWN PROCEDURE: SCHEDULE: CAUTION Blow down control as follows when boiler is To prevent serious personal injury from steam in operation. pipe blow down, connect a drain pipe to the • Daily if operating pressure is above 15 psi. control opening to avoid exposure to steam discharge. - Page 12 COMMERCIAL WARRANTY Warranty. For goods sold to commercial buyers, Seller warrants the goods sold to Buyer hereunder (with the exception of membranes, seals, gaskets, elastomer materials, coatings and other “wear parts” or consumables all of which are not warranted except as otherwise provided in the quotation or sales form) will be (i) be built in accordance with the specifications referred to in the quotation or sales form, if such specifications are expressly made a part of this Agreement, and (ii) free from defects in material and workmanship for a period of one (1) year from the date of installation or two (2) years from the date of manufacture, whichever shall occur first, unless a longer period is specified in the product...
Need help?
Do you have a question about the McDonnell & Miller 42S-N Series and is the answer not in the manual?
Questions and answers