
Related Manuals for USC LPV Series


Summary of Contents for USC LPV Series
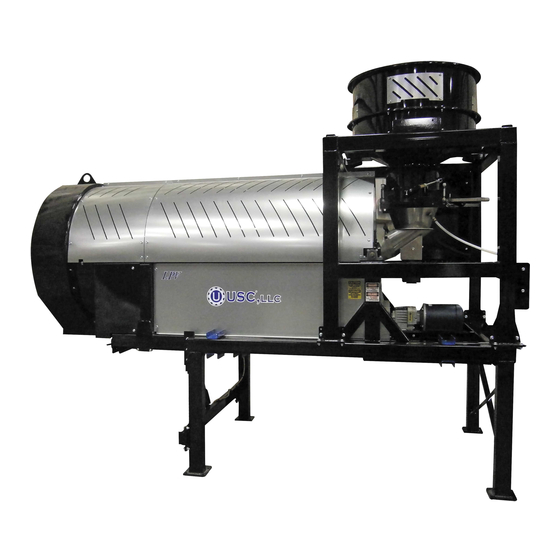
- Page 1 LPV SEED TREATER FOR SEED METERING WHEEL& LOSS- IN-WEIGHT, TREATERS. Operators Manual Document: TD-09-06-1028 Revision: F 2320 124th Road Sabetha, Kansas 66534 www.uscllc.com Revision Effective 04 JULY 2019...
- Page 2 OVERVIEW The purpose of this manual is to provide you with the basic information needed to operate and maintain the LPV Seed Treater. It does not hold USC, LLC liable for any accidents or injuries that may occur. The technical information provided in this document is based on extensive testing under controlled conditions at the USC research and development facility.
-
Page 3: Table Of Contents
LPV SEED TREATER Table of Contents Section Contents Page # Section A Safety Instructions ..............4 C2D2 Specifications and Labels ..........16 Section B Installation ................. 17 LPV Automated Treater Set-up..........18 Section C Mechanical Operation .............. 26 LPV Treater with Seed Wheel Overview ........ 26 Seed Wheel ................ -
Page 4: Section A
LPV SEED TREATER Safety Instructions Section Every year accidents in the work place maim, kill and injure people. Although it may be impossible to prevent all accidents, with the right combination of training, operating practices, safety devices, and operator vigilance, the number of accidents can be significantly reduced. - Page 5 LPV SEED TREATER Indicates an imminently hazardous situation which, if not avoided, will result in death or serious injury. Indique une situation extrêmement dangereuse qui, si pas ! DANGER évitée, entraînera la mort ou des blessures graves. Indicates a potentially hazardous situation which, if not avoided, could result in death or serious injury.
- Page 6 LPV SEED TREATER Mandatory Lockout Power Symbol. Disconnect, lockout and tagout electrical and other energy sources before inspecting, cleaning or performing maintenance on this panel. Symbole de puissance de verrouillage obligatoire. Débranchez, verrouillez et étiquetez les sources d’énergie électrique et autres avant d’inspecter, de nettoyer ou d’effectuer des travaux de mainte- nance sur ce panneau.
- Page 7 LPV SEED TREATER LOCKOUT / TAGOUT PROCEDURES Lockout/Tagout is the placement of a lock/tag on an energy isolating device in accordance with an established procedure. When taking equipment out of service to perform maintenance or repair work, always follow the lockout / tagout procedures as outlined in ANSI Z344.1 and/or OSHA Standard 1910.147.
- Page 8 LPV SEED TREATER CONTROLLED STOP This is the stopping of machine motion by reducing the electrical command signal to 0 (zero) once the stop signal has been recognized. ARRET CONTROLE Ce est l' arrêt du mouvement de la machine en réduisant le signal de commande électrique à...
- Page 9 LPV SEED TREATER YOU are responsible for the SAFE operation and maintenance of your USC, LLC equipment . YOU must ensure that you and anyone else who is going to operate, maintain or work around the equipment be familiar with the operating and maintenance procedures and related SAFETY information contained in this manual.
- Page 10 LPV SEED TREATER 4. Provide a fire extinguisher for use in case of an accident. Store in a highly visible place. 5. Do not allow children, spectators or bystanders within hazard area of machine. 6. Wear appropriate protective gear. This includes but is not limited A hard hat •...
- Page 11 LPV SEED TREATER PLACEMENT SAFETY 1. Move only with the appropriate equipment 2. Stay away from overhead power lines when moving equipment. Electrocution can occur without direct contact. 3. Be familiar with machine hazard area. If anyone enters hazard areas, shut down machine immediately.
- Page 12 2. Replace safety labels that are missing or have become illegible. 3. Replaced parts that displayed a safety label should also display the current label. 4. Replacement safety labels are available. Contact USC at (785) 431-7900 . How to Install Safety Labels: Be sure that the installation area is clean and dry.
- Page 13 LPV SEED TREATER Think SAFETY! Work SAFELY! REMEMBER—If Safety Labels have been damaged, removed, become illegible, or parts replaced without safety labels, new labels must be applied. New safety labels are available through your authorized dealer. Part # 09-02-0010 Part # 09-02-0003 Part # 09-02-0015 Page 13...
- Page 14 LPV SEED TREATER Part # 09-02-0001 Part # 09-02-0002 Page 14...
- Page 15 LPV SEED TREATER Part # 09-02-0001 Part # 09-02-0002 Page 15...
-
Page 16: C2D2 Specifications And Labels
LPV SEED TREATER C2D2 SPECIFICATIONS AND LABELS If any of the panels are located in the hazardous area described in the installation section (see page 16), the following criteria must be met. 1. All 120VAC connections must be hard wired to a listed IP65 rated enclosure in accordance with local electrical codes. -
Page 17: Section B
USC equipment may operate within a Group II, Division 2, Class G hazardous area which contains seed dust. If so, the equipment must be certified for use in this area. -
Page 18: Lpv Automated Treater Set-Up
également dans la zone dangereuse où se trouve le système USC. Si oui, nous recommandons que le pouvoir soit câblé dans la source. Ne pas utiliser une prise électrique standard à cet effet. Pour les autres méthodes acceptables de se connecter à... - Page 19 LPV SEED TREATER LPV AUTOMATED TREATER SET - UP (ALL LPV TREATERS) The LPV Treater CAN NOT be lifted using the forklift pockets and or transported without all four of the shipping brackets re-installed. Failure to do so may cause damage to the tilting frame.
- Page 20 LPV SEED TREATER LPV AUTOMATED TREATER SET - UP (ALL LPV TREATERS) When removing the actuator (03-17-0104) from the box, ensure that you do not allow the shaft to rotate. The actuator was installed and tested at the factory so the shaft is in the correct position before it was disassembled prior to shipping.
- Page 21 LPV SEED TREATER LPV AUTOMATED TREATER SET - UP (ALL TREATERS) After the actuator is installed it should move freely by hand. NOTICE If something is binding, damage to the actuator or the mounting brackets could occur. Après l'actionneur est installé, il doit se déplacer librement à la main. AVIS Si quelque chose est obligatoire, les dommages à...
- Page 22 LPV SEED TREATER VERSION 4 LPV TREATER CONNECTIONS (Except 575v / 3ph) 1. Connect a cable with four pin connector to one of the three Powerlink connectors on the MCP. Connect the other end to the Powerlink connector on the closest con- trol panel.
- Page 23 LPV SEED TREATER VERSION 4 LPV TREATER CONNECTIONS (Except 575v / 3ph) 6. Connect the red cable to the PJESTOPA on the Main Control Panel (MCP) and then to the PJESTOPB on the next panel that is closest to the MCP. Repeat this process until all control panels are connected in a daisy chain configuration.
- Page 24 LPV SEED TREATER VERSION 4 LPV TREATER CONNECTIONS DRUM TILT ACTUATOR DRUM LEVELING SENSOR SEED WHEEL SMW HOPPER PROXIMITY SENSOR Page 24...
- Page 25 18. Have a certified electrician provide power to the seed treating system. Provide convenient shutdown switches, comply with local electrical codes and ensure that the system is properly grounded and bonded. The USC system must be connected to the same electrical requirements as specified in the main control panel on the power requirement tag, or the electrical schematic shipped with the piece of equip- ment.
-
Page 26: Section C
LPV SEED TREATER Section Mechanical Operation LPV TREATER WITH SEED WHEEL OVERVIEW 12” Hopper Extension Proximity Sensor Rotating Drum Seed Wheel Adjustable Seed Flow Gate Quick Release Atomizer Chamber Handle Plumbing To Atomizer Discharge Atomizer Motor Chute Treater Control Panel Drum Motor Page 26... -
Page 27: Seed Wheel
LPV SEED TREATER SEED WHEEL The hopper is equipped with three proximity switches. The top switch controls the inlet conveyor and the lower switches, located in the seed wheel, control the pump(s). Refer to H-O-A Screen in section D. See the Proximity Switch Adjustment Guide in Section F for more in-depth information on these switches. -
Page 28: Seed Wheel With Atomizer Chamber
LPV SEED TREATER SEED WHEEL WITH ATOMIZER CHAMBER The atomizer chamber consists of a patented design which disperses treatment evenly to each seed. A motor drives the atomizer head at approximately 1725 RPM’s. As treatment is being pumped into the atomizer chamber, it drops into the atomizer head. The centrifugal force of the spinning head forces the treatment to be sprayed out through a screen covering in all 360 degrees. - Page 29 LPV SEED TREATER The Illustration below shows how seed passes through the atomizing chamber. The red represents treatment being dispensed to the seed as it passes through the chamber. After the seed passes through the atomizer, it goes into the drum where the coating process is completed.
-
Page 30: Loss-In-Weight Scale With Atomizer Chamber
LPV SEED TREATER LPV TREATER WITH LOSS-IN-WEIGHT BOX 2 BOX OVERVIEW Pro Box Rotating Platform Drum Scale Quick Release Atomizer Chamber Handle Discharge Chute Plumbing To Atomizer Control Panel Atomizer Motor Drum Motor Page 30... - Page 31 LPV SEED TREATER LOSS-IN-WEIGHT WITH ATOMIZER CHAMBERS The atomizer chamber operates the same way with the Loss In Weight and Seed Me- tering wheel version. The difference is the way that the seed flow is regulated. The adjustable gate on the Loss In Weight version is automatically controlled by an actua- tor that is constantly adjusting the seed flow gate.
- Page 32 LPV SEED TREATER LOSS-IN-WEIGHT GATE LOCATED ON THE TREATER FOR TRI-FLO Quick Release Atomizer Chamber Handle Gate Atomizing Chamber TREATER WITH BATCH HOPPER ABOVE. (NOTE: LOSS-IN-WEIGHT Quick Release GATE LOCATED ON BATCH Atomizer Chamber Handle HOPPER OR FLOOR MOUNTED TRI-FLO) FLOW CHAMBER Atomizing Chamber...
-
Page 33: Rotating Drum Overview
LPV SEED TREATER ROTATING DRUM The rotating drum is 8 feet long and accepts treated seed through the opening on the hopper end. As seed passes through the length of the drum it is tumbled, producing accurate and uniform seed coating. The seed then exits the seed treater out the discharge end of the machine. -
Page 34: Section D
This section provides a general overview and description of the operator control panels for the LPV Seed Treater. USC recommends the use of a surge protection device with a NOTICE minimum rating of 400 Joules for all automated main control panels. -
Page 35: Section E
LPV SEED TREATER Section Troubleshooting Below is a table describing the most frequent mechanical problems and solutions with the USC LPV Seed Treater. For further assistance, contact USC at (785) 431-7900. Problem Possible Cause Solution Inlet Conveyor will not turn on. - Page 36 LPV SEED TREATER Problem Possible Cause Solution Pump will not turn off in AUTO 1. Proximity switch is dirty. Clean proximity switch. when seed runs out. 2. Proximity switch is set too 2. Adjust the pump proximity sensitive. switch sensitivity by turning adjustment screw counter- clockwise (page 37).
-
Page 37: Proximity Switch Adjustment Guide
LPV SEED TREATER PROXIMITY SWITCH ADJUSTMENT GUIDE If a proximity switch is not working properly, this can be caused by wear, dust, or even moisture. The first step is to clean the lens of the proximity switch. If this does not solve the problem, the next step would be to adjust the sensitivity of the proximity switch. -
Page 38: Section F
Une mauvaise performance ou un danger peut survenir. Do not use compressed air or water under pressure to clean any of the components of the USC equipment. Ne pas utiliser d'air comprimé ou de l'eau sous pression pour ! DANGER nettoyer l'un des composants de l'équipement USC. - Page 39 Record the cleaning on the company required documents. If operating in a CSA 22.1, Class II, Division 2, Group G hazardous area, USC recommends this step be performed on a daily basis.
- Page 40 LPV SEED TREATER ATOMIZER To access the inside of the atomizer housing, disconnect the motor power cable from the atomizer motor, push up on the quick release handle and slide out the atomizer. After completing maintenance, slide the atomizer back into the operating position, pull down quick release handle to lock it in place and reconnect the motor power cord.
- Page 41 Record the cleaning on the company required documents. If operating in a CSA 22.1, Class II, Division 2, Group G hazardous area, USC recommends this step be performed on a daily basis.
-
Page 42: Section G
LPV SEED TREATER Section Storage When storing the LPV Seed Treater for long periods of time, the following procedure must be followed to reduce the chance of rust, corrosion and fatigue of the treater. You can also use these steps when storing the machine for the winter. A dust mask and protective rubber gloves shall be used when cleaning the machine. - Page 43 LPV SEED TREATER SEED WHEEL & SUPPLY HOPPER 1. Turn power off to the treater and treater components. 2. Remove shields from the seed wheel and remove any debris or build-up. Compressed air can be used to blow out any foreign material. 3.
- Page 44 LPV SEED TREATER ATOMIZER CHAMBER 1. Remove and clean the atomizer housing. 2. Remove the atomizer head and stainless steel plumbing. The atomizer head may be disassembled (right), for easier cleaning. It is threaded together and can simply be unscrewed. 3.
- Page 45 LPV SEED TREATER NOTES: Page 45...
-
Page 46: Section H
USC Limited Warranty Section USC, LLC, (Manufacturer) warrants its seed treating equipment as follows: 1. Limited Warranty: Manufacturer warrants that the Products sold hereunder will be free from defects in material and workmanship for a period of 18 months from date of shipment. - Page 47 LPV SEED TREATER USC, LLC 2320 124th road Sabetha, KS 66534 EMAIL: sales-team@uscllc.com WEB: www.uscllc.com Page 47...
Need help?
Do you have a question about the LPV Series and is the answer not in the manual?
Questions and answers