
Related Manuals for DAPAudio CA-4500


Summary of Contents for DAPAudio CA-4500
- Page 1 MANUAL ENGLISH CA-4500 Ordercode: D4515 Highlite International B.V. – Vestastraat 2 – 6468 EX – Kerkrade – the Netherlands...
-
Page 2: Table Of Contents
CA-4500 Table of contents Warning ....................................2 Safety Instructions ................................. 2 Operating Determinations ............................4 Return Procedure ................................4 Claims ....................................4 Description of the device ..............................5 Overview ..................................5 Frontside..................................6 Backside ..................................6 Installation ................................... 6 Set Up and Operation ............................... 7 NORMAL .................................. -
Page 3: Warning
Save the carton and all packing materials. In the event that a fixture must be returned to the factory, it is important that the fixture be returned in the original factory box and packing. Your shipment includes: ● DAP Audio CA-4500 ● Schuko power cable (1,5 m) ●... - Page 4 CA-4500 ● Avoid ground loops! Always be sure to connect the power amps and the mixing console to the same electrical circuit to ensure the same phase! ● Before changing the ground, always turn off your amplifier. ● Connecting amplifier outputs to oscilloscopes or other test equipment, while the amplifier is in bridge mode, may damage both, the amplifier and test equipment.
-
Page 5: Operating Determinations
CA-4500 Operating Determinations This system is not designed for permanent operation. Consistent operation breaks will ensure that the system will serve you for a long time without defects. If this system is operated in any other way than the one described in this manual, the product may suffer damages and the warranty becomes void. -
Page 6: Description Of The Device
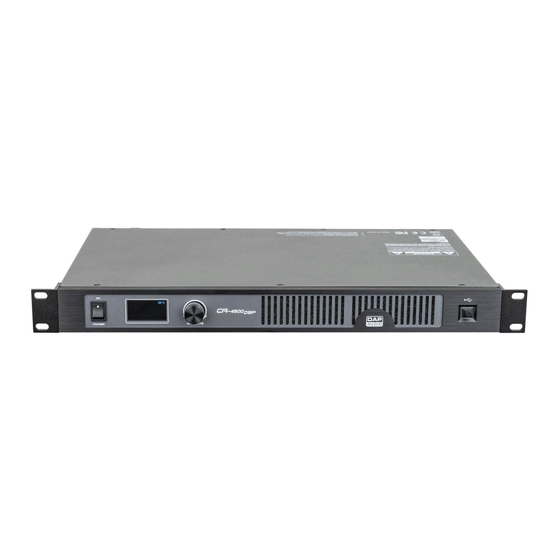
Description of the device Features The CA-4500 is a 4-channel DSP-powered amplifier. It can be easily configured by means of the OLED display or the PC software. It is equipped with crossovers, a delay, a limiter and an EQ. ●... -
Page 7: Frontside
08) 210-240V AC, IEC power connector IN + Fuse 10A/250V Installation Remove all packing materials from the CA-4500. Check if all foam and plastic padding is removed. Fit the equipment to a 19" rack. Connect all cables. Do not supply power before the whole system is set up and connected properly. -
Page 8: Set Up And Operation
CA-4500 Set Up and Operation Before plugging the unit in, always make sure that the power supply matches the product specification voltage. Do not attempt to operate a 120V specification product on 240V power, or vice versa. Install this device on a flat surface, not bending or curved. -
Page 9: Ch12 Bri
CA-4500 CH12 BRI Outputs 1 and 2 are bridged and outputs 3 and 4 function independently. Fig. 05 Ordercode: D4515... -
Page 10: Ch34 Bri
CA-4500 CH34 BRI Outputs 3 and 4 are bridged and outputs 1 and 2 function independently. Fig. 06 Ordercode: D4515... -
Page 11: Ch12/34 Bri
CA-4500 CH12/34 BRI Outputs 1 and 2 are bridged. Outputs 3 and 4 are bridged. Fig. 07 LINK Outputs 1-4 are linked. For example, if you adjust gain of the output 1, then gain of the outputs 2, 3 and 4 will be adjusted automatically. -
Page 12: Operations
CA-4500 Operations Gain Adjustment 01) Upon start-up, the device will show the gain settings of the currently active setup. 02) It is possible to select the output channels and adjust their gain levels. Turn the menu control (03) to select CH1-4 and press the menu control (03) to start editing. -
Page 13: Routing
CA-4500 1. Routing In this menu, it is possible to route the 6 input channels (A, B, C, D, A+B and C+D) to the 4 output channels (1-4). 01) Turn the menu control (03) to select the desired output channel (1-4). Press the menu control (03) to confirm your choice. -
Page 14: Delay
CA-4500 3. Delay In this menu, it is possible to set the delay time of the 4 output channels (1-4). 01) Turn the menu control (03) to select the desired output channel (1-4). Press the menu control (03) to confirm your choice. -
Page 15: Eq Setting
In this menu, it is possible to set EQ parameters of the 4 output channels (1-4). With those parameters you can correct frequency characteristics by adjusting the frequency response curve. The CA-4500 is equipped with an 8-band EQ, a low-pass filter (LP), a high-pass filter (HP) and a bypass (ALLBYPASS). -
Page 16: Hp And Lp Filters
CA-4500 5.1. HP and LP Filters Apart from the 8 EQ bands, you can also adjust the FREQ and Q of the HP (high-pass filter) and the LP (low-pass filter). 01) If the HP is set to its minimum value, the HP filter is OFF. If the LP is set to its maximum value, the LP filter is OFF. -
Page 17: Preset
CA-4500 7. Preset In this menu, it is possible to save new setups and load the existing ones. 01) Turn the menu control (03) to select one of the 3 options: ● SAVE: Save the newly created setups. ● LOAD: Load the existing setups. -
Page 18: Load
CA-4500 08) Once you have edited all the characters, turn the menu control (03) to the right in order to select SAVE and press the menu control (03) to save your setup. The display will show: 09) Turn the menu control (03) to select SAVE (save a setup) or CANCEL (cancel and return to the previous menu) and press the menu control (03) to confirm your choice. -
Page 19: Noisegate
CA-4500 8. Noisegate In this menu, it is possible to set the noise gate parameters of the 4 output channels (1-4). 01) Turn the menu control (03) to select the desired output channel (1-4). Press the menu control (03) to confirm your choice. -
Page 20: Workmode
CA-4500 9.1. Workmode In this menu, it is possible to choose the desired operation mode. 01) The available modes are: ● NORMAL: All 4 outputs function independently. ● CH12 BRI: Outputs 1 and 2 are bridged and outputs 3 and 4 function independently. -
Page 21: Connection Cables
Follow the configuration examples below for your particular connection. Maintenance The CA-4500 requires almost no maintenance. However, you should keep the unit clean. Disconnect the mains power supply, and then wipe the cover with a damp cloth. Do not immerse in liquid. -
Page 22: Troubleshooting
CA-4500 Troubleshooting CA-4500 This troubleshooting guide is meant to help solve simple problems. If a problem occurs, carry out the steps below in sequence until a solution is found. If the unit operates properly, do not carry out following steps. -
Page 23: Dimensions
CA-4500 Dimensions Ordercode: D4515... - Page 24 ©2019 DAP Audio...
Need help?
Do you have a question about the CA-4500 and is the answer not in the manual?
Questions and answers