
Related Manuals for SCHUNK ROTA NCK plus


Summary of Contents for SCHUNK ROTA NCK plus
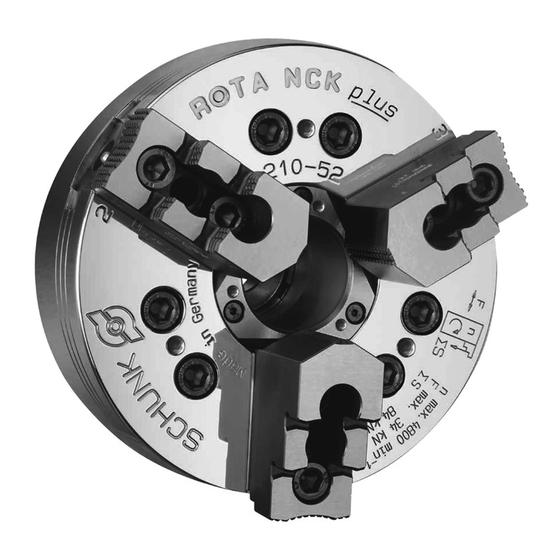
- Page 1 Translation of the original operating manual Power Chuck ROTA NCK plus Assembly and operating manual Superior Clamping and Gripping...
- Page 2 Imprint Copyright: This manual remains the copyrighted property of SCHUNK GmbH & Co. KG. It is solely supplied to our customers and operators of our products and forms part of the product. This documentation may not be duplicated or made accessible to third parties, in particu- lar competitive companies, without our prior permission.
-
Page 3: Table Of Contents
7.3.2 Mounting the chuck by means of a direct mount ........31 7.3.3 Mounting the ROTA NCKplus Chuck with straight recess mount ..... 33 8 Function ........................36 8.1 Function and handling .................... 36 8.2 Replacement or renewal of jaws ................36 02.00|ROTA NCK plus |en... - Page 4 9.2 Changing the top jaws .................... 39 9.3 Maintenance intervals .................... 39 10 Disposal ........................40 11 Assembly drawing ....................41 12 Spare parts ......................42 13 Translation of original EC declaration of incorporation ..........43 02.00|ROTA NCK plus |en...
-
Page 5: General
Non-observance will inevitably cause irreversible injury or death. WARNING Dangers for persons! Non-observance can lead to irreversible injury and even death. CAUTION Dangers for persons! Non-observance can cause minor injuries. NOTICE Material damage! Information about avoiding material damage. 02.00|ROTA NCK plus |en... -
Page 6: Applicable Documents
• Catalog data sheet of the purchased product * • Calculation of the jaw centrifugal forces, "Technology" chapter in the lathe chuck catalog * The documents marked with an asterisk (*) can be downloaded on our homepage www.schunk.com. 02.00|ROTA NCK plus |en... -
Page 7: Basic Safety Instructions
Only original SCHUNK spare parts may be used. Intended use The chuck is used to clamp workpieces on machine tools and other suitable technical facilities, paying particular attention to the tech- nical data specified by the manufacturer. -
Page 8: Notes On Particular Risks
• The lathe chuck may only be used on machines and facilities that fulfill the minimum requirements of the EC Machinery Di- rective; specifically, they must have effective technical measures to protect against possible mechanical hazards. 02.00|ROTA NCK plus |en... - Page 9 • Ensure that the working environment is clean before starting assembly and installation work. • Wear suitable safety shoes. • Follow the safety and accident-prevention regulations when operating the chuck, especially when working with machine tools and other technical equipment. 02.00|ROTA NCK plus |en...
- Page 10 • Ensure the chuck's axial and concentric runout. • Check options for remedying imbalances on special top jaws and workpieces. • Reduce the speed. • Wear hearing protection. 02.00|ROTA NCK plus |en...
-
Page 11: Notes On Safe Operation
If the machine tool or technical equipment can reach a higher speed than the chuck's top speed, a reliable speed limiter must be installed and proof must be provided that the speed limiter is effective. 02.00|ROTA NCK plus |en... - Page 12 (clamping force, coeffi- cient of friction, wear characteristics). (For product information about LINOMAX, see the "Accesso- ries" chapter of the SCHUNK lathe chuck catalog or contact SCHUNK). • Use a suitable high-pressure grease gun to ensure that you reach all the greasing areas.
-
Page 13: Substantial Modifications
Only use screws with a quality of 12.9. 2.4.1 Substantial modifications No substantial modifications may be made to the chuck. If the operator carries out a substantial modification to the chuck, the product shall no longer conform to the EC Machinery Directive 2006/42/EC. 02.00|ROTA NCK plus |en... -
Page 14: Personnel Qualification
Only allow specialists to remedy faults. Spare parts Only ever use original SCHUNK spare parts. Environmental regulations Comply with the applicable legal norms when disposing of waste. -
Page 15: Using Personal Protective Equipment
Basic safety instructions Using personal protective equipment When using this product, you must comply with the relevant health and safety at work rules and you must use the required personal safety equipment (minimum: category 2). 02.00|ROTA NCK plus |en... -
Page 16: Warranty
• Observe the maximum number of clamping cycles ( 6, Page 19) • Observe the specified maintenance and lubrication intervals ( 9, Page 38) Parts touching the workpiece and wear parts are not included in the warranty. 02.00|ROTA NCK plus |en... -
Page 17: Torques Per Screw
(screw quality 12.9) Screw size M10 M12 M14 M16 M20 M24 Max. admissible torque M (Nm) Tightening torques for the protection sleeve mounting screws (screw quality 8.8) Screw size Tightening torques M (Nm) 02.00|ROTA NCK plus |en... -
Page 18: Scope Of Delivery
Scope of Delivery Scope of Delivery Power chuck Fastening screws T-nuts with screws or 3 Jaw-Nuts Mounting wrench Eye bolt from size 210 and up 02.00|ROTA NCK plus |en... -
Page 19: Technical Data
VDI 3106, whereby the maximum standard value may not be exceeded. The calculated values have to be examined with a dynamic measurement. Control of function (piston movement and actuation pressure) has to be 02.00|ROTA NCK plus |en... -
Page 20: Clamping Force / Speed Diagrams
The chucks were operated with the max. permissable force and the jaws were located exactly on line with the chuck O.D. The chuck is in perfect condition and lubricated with SCHUNK LINOMAX special grease. Should one or several of the above mentioned parameters be changed the diagrams are no longer valid. - Page 21 Technical data Clamping force / speed diagram ROTA NCKplus 210-52 Clamping force / speed diagram ROTA NCKplus 250-75 Clamping force / speed diagram ROTA NCKplus 315-91 02.00|ROTA NCK plus |en...
-
Page 22: Calculations For Clamping Force And Speed
The sum of the initial clamping force F and the total centrifugal force F is the effective clamping force F 02.00|ROTA NCK plus |en... - Page 23 According to VDI 3106: S ≥ 1.5. From this we can derive the calculation of the initial clamping force during shutdown: (+) for gripping from the outside inwards (–) for gripping from the inside outwards 02.00|ROTA NCK plus |en...
-
Page 24: Calculation Example: Required Initial Clamping Force Fsp0 For A Given Rpm N
Calculation example: Required initial clamping force Fsp0 for a given rpm n The following data is known for the machining job: • Gripping from the outside in (application-specific) • Machining force F = 3000 N (application-specific) 02.00|ROTA NCK plus |en... - Page 25 For the centrifugal torque of the top jaw, the following applies: Centrifugal torque for one jaw: The chuck has 3 jaws, the total centrifugal torque is: The total centrifugal force can now be calculated: Initial clamping force during shutdown that was sought: 02.00|ROTA NCK plus |en...
-
Page 26: Calculation Of The Permissible Rpm Nzul In Case Of A Given Initial Clamping Force Fsp0
Tolerances for run-out accuracy and axial run-out accuracy corre- spond to the Technical Supply Terms for lathe chucks as per DIN ISO 3089. Permissible imbalance The permissible imbalance for lathe chucks is quality class G 6.3 as per DIN ISO 1940-1. 02.00|ROTA NCK plus |en... -
Page 27: Mounting Of The Chuck To The Machine Spindle
It must also be ensured that the surface of the end face is cham- fered and clean at the bores. 02.00|ROTA NCK plus |en... -
Page 28: Threading Of Drawnut
5 Retighten the chuck drawing sleeve using the six screws. Screws ROTA-NCK 165: the spring clamping element is inte grated directly within the chuck piston Ring Draw nut (blank) Chuck Spring clamping element G will be achieved by boring the blank draw nut. 02.00|ROTA NCK plus |en... -
Page 29: Mounting
27). During this, proceed as described in figure B The chuck is mounted after the flange has been aligned. During this, it must be ensured that any contaminations on the flange and on the chuck contact surfaces are removed. 02.00|ROTA NCK plus |en... - Page 30 4 Next, screw the chuck tightly onto the chuck flange by means of the fastening screws using a torque wrench. During this, pay attention to the specified maximum tighten- ing torques ( 4, Page 17). 5 Next, check the radial and axial run-out again. 02.00|ROTA NCK plus |en...
-
Page 31: Mounting The Chuck By Means Of A Direct Mount
2 The flange must be slightly tightened on the chuck by means of the supplied screws and aligned towards the chuck body. 02.00|ROTA NCK plus |en... - Page 32 The following table shows the maximum attainable radial and axial run-out tolerances: Chuck size [mm] max. radial run-out max. axial run-out error [mm] error [mm] 0,01 0,01 0,02 0,03 0,02 0,05 0,04 0,06 0,05 1000 02.00|ROTA NCK plus |en...
-
Page 33: Mounting The Rota Nckplus Chuck With Straight Recess Mount
The protection sleeve (4) can be pressed off the chuck body by using the additional threads with the same screws (10). 1 Push the tension rod into its foremost position. 2 Push the chuck piston (3) into its foremost position. 02.00|ROTA NCK plus |en... - Page 34 If no protec- tion sleeve should be mounted onto the chuck, the chuck shouldn’t be actuated, or the chuck piston shouldn’t move! Never grasp into the uncovered chuck mechanics! 02.00|ROTA NCK plus |en...
- Page 35 Mounting of the Chuck to the Machine Spindle Bolt tightening steps. 02.00|ROTA NCK plus |en...
-
Page 36: Function
Tighten the jaw mounting screws (screw grade 12.9) with the spec- ified torque ( 4, Page 17). NOTE • Tighten the jaw fastening screws with a dynamometric key. Never carry out this work by using an extension rod or by ap- plying hammer blows. 02.00|ROTA NCK plus |en... -
Page 37: Disassembly And Assembly Of The Chuck
Clean all parts of dirt and grease and check for damage. Before mounting, grease well with lubricant LINO MAX. Only use SCHUNK original spares when replacing damaged parts. Mounting of the chuck follows in reverse order. 02.00|ROTA NCK plus |en... -
Page 38: Maintenance
If clamping force has dropped too low, or if base jaws and piston cannot be moved perfectly, it is necessary to disassemble the chuck to clean it and to relubricate it. Only use SCHUNK original spares when replacing damaged parts. 02.00|ROTA NCK plus |en... -
Page 39: Changing The Top Jaws
Maintenance Changing the top jaws When changing the top jaws the serration must be cleaned and greased with SCHUNK special grease LINO MAX. WARNING Danger of personal injury and property damage caused by flying parts in case of spiral fracture of soft top jaws! Soft top jaws must be hardened in the area of the screw’s coun-... -
Page 40: Disposal
• Dispose of the chuck's metal parts as scrap metal. Alternatively, you can return the chuck to SCHUNK for proper dis- posal. 02.00|ROTA NCK plus |en... -
Page 41: Assembly Drawing
Spare parts Assembly drawing 02.00|ROTA NCK plus |en... -
Page 42: Spare Parts
Designation Quantity Chuck body Base jaws Piston Protection sleeve Screws Screws Screws T-nut Grease nipple draw nut Retainer ring Spring clamping element Mounting wrench Locking bolt Eye bolt 02.00|ROTA NCK plus |en... -
Page 43: Translation Of Original Ec Declaration Of Incorporation
Directive 2006/42/EG, Annex II, Part 1.B of the European Parliament and of the Council on machinery. Manufacturer/ H.-D. SCHUNK GmbH & Co.Spanntechnik KG Distributor Lothringer Str. 23 D-88512Mengen We hereby declare that on the date of the declaration the following incomplete machine complied with all basic safety and health regulations found in the directive 2006/42/EC of the European Parliament and of the Council on machinery. - Page 44 The relevant technical documentation according to Annex VII, Part B, belonging to the partly completed machinery have been created. Person authorized to compile the technical documentation: Philipp Schräder, Address: see manufacturer's address Mengen,August2016 p.p. Alexander Koch; Director for Development / Design 02.00|ROTA NCK plus |en...
Need help?
Do you have a question about the ROTA NCK plus and is the answer not in the manual?
Questions and answers