Table of Contents
Advertisement
Quick Links
Advertisement
Table of Contents

Summary of Contents for Toa AM-CF1B
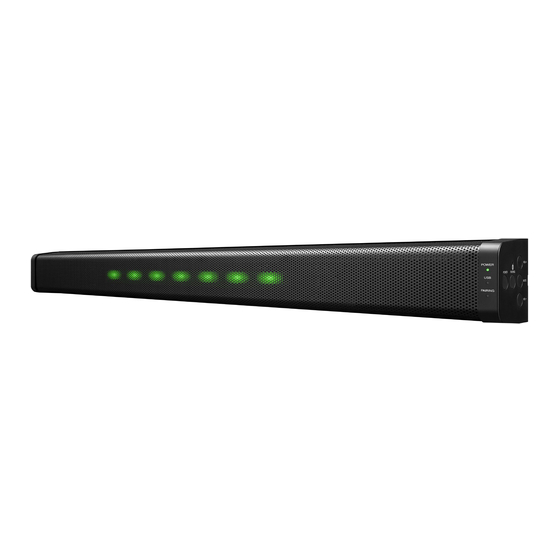
- Page 1 SETUP MANUAL INTEGRATED AUDIO COLLABORATION SYSTEM AM-CF1B, AM-CF1W Thank you for purchasing TOA’s Integrated Audio Collaboration System. Please carefully follow the instructions in this manual to ensure long, trouble-free use of your equipment.
-
Page 2: Table Of Contents
TABLE OF CONTENTS 1. OVERVIEW OF SYSTEM SETTINGS ........... 3 2. SYSTEM REQUIREMENTS ................ 3 3. CONNECTIONS ....................4 4. SETTINGS ......................5 4.1. Settings Screen Switching ..................5 4.2. Mixer Screen Settings ................... 5 4.3. How to Set the Audio Settings Screen .............. -
Page 3: Overview Of System Settings
1. OVERVIEW OF SYSTEM SETTINGS Connecting the AM-CF1 unit to a PC by way of a LAN cable allows the following function settings and maintenance to be performed using the PC’s browser: [Unit Settings] • Network settings • Clock settings •... -
Page 4: Connections
3. CONNECTIONS Step 1. Start up the web browser and enter “Unit’s IP address” in the address field. Example: 192.168.14.1 The login screen is displayed. Tip: The IP address is factory-preset to “192.168.14.1”. Step 2. Enter a user name and a password. The mixer screen is displayed. -
Page 5: Settings
4. SETTINGS 4.1. Settings Screen Switching Click the following screen name or icon to switch the settings screen to the desired screen. Perform necessary settings on each screen. Screen Name or Icon Setting Contents Mixer screen (Mixer) Used to set input and output gains, etc. Equalizer settings are possible for both speaker and AUX outputs. - Page 6 Name Description A Input gain display Input gains are displayed numerically. Numerical values can be changed with the arrows to the right of each value. Initial setting: 0 dB Tip: Linked to faders (C). B Input level indicators Display input levels. C Faders Used to change input gains.
- Page 7 [Equalizer Settings] Clicking the EQ button (see the previous page) displays the equalizer screen. Both speaker and AUX outputs allow equalizer settings on 5 points and PEQ (parametric equalizer) parameters can be set on all of the 5 points. In addition, PEQ or HPF (high-pass filter) settings can be performed on the leftmost point, and PEQ or LPF (low-pass filter) settings can be performed on the ringhtmost point.
- Page 8 (4) PEQ setting section Set Frequency, Gain and Q parameters. The setting range and initial settings are as shown in the table below: Initial Setting Setting Item Setting Contents Setting Range Speaker Output AUX Output Freq (Hz) 20 to 20000 C: 300 C: 630 D: 600...
-
Page 9: How To Set The Audio Settings Screen
4.3. How to Set the Audio Settings Screen Perform settings related to microphone sound collection. (1) Tracking Field Set the range of sound source tracking with the microphone position (AM-CF1) as a reference. Use distances to the left and right from the center of the microphone position (AM-CF1) and the distance directly in front of the microphone to set the range. - Page 10 (3) Steering Mode Set whether or not to track a sound source by clicking “Auto” or “Fixed.” The set mode is displayed in orange. “Auto”: Select this when tracking the sound source. “Fixed”: Select this when the sound source position is fixed and thus not being tracked. Initial setting: Auto (4) Echo Canceller (AEC) Name...
-
Page 11: Preset Data Loading And Storage Screen Settings
4.4. Preset Data Loading and Storage Screen Settings Preset data contents can be loaded from or stored to a PC. (1) Preset data setting section Either of two different preset data contents can be selected. Name Description A Preset data selection Select the preset contents to use by clicking either “1”... -
Page 12: Configuration Settings
4.5. Configuration Settings The configuration settings screen is displayed when the configuration icon is clicked. Perform settings related to the configuration of the AM-CF1 unit. The following three configuration settings screens are available. Click any one of the screen names shown in the screen below to switch the screen and perform all necessary settings. - Page 13 4.5.1. Network/User settings screen (1) Network settings Perform network settings for the AM-CF1 unit. Setting Item and Button Description A IP Address Enter the AM-CF1 unit’s IP address. Initial setting: 192.168.14.1 B Subnet Mask Enter the AM-CF1 unit’s subnet mask. Initial setting: 255.255.255.0 C Default Gateway Enter the AM-CF1 unit’s default gateway.
- Page 14 (3) Bluetooth name settings The name of the AM-CF1 unit as a Bluetooth device can be entered, confirmed and changed. Setting Item and Button Description H Device name Enter a new device name. The last 4 digits of the initial setting correspond to the last 4 digits of the device’s MAC address.
- Page 15 (2) LED Indicator settings Perform indication status settings for the AM-CF1 unit’s front panel-mounted LED indicators (multifunction indicator). Name Description C Tracking display ON/OFF Turn the Tracking display ON or OFF to perform settings. The selected settings mode is displayed in orange. Initial setting: ON D Mic Input Gain Level Turn the Mic Input Gain Level display ON or OFF.
- Page 16 4.5.3. Time/Firmware settings screen (1) Date and time settings (Time Setting) Set the AM-CF1 Unit’s date and time. Name Description A Date and time settings Set the date and time by changing their numerical values. When this screen is displayed, the set date and time of the PC connected to the AM-CF1 unit is first shown.
- Page 17 Click when downloading the AM-CF1 configuration data file for storage on a PC. The filename when downloading is “amcf1_config.zip”. Tip: Filenames can be changed after they are stored on a PC. Usable characters: Alphanumerics, space, [ _ ], and [ - ] Maximum number of characters: 32 URL: https://www.toa.jp/ 201910...


Need help?
Do you have a question about the AM-CF1B and is the answer not in the manual?
Questions and answers