Toa AM-1 Quick Setup Manual
Polycom video conferencing systems
Hide thumbs
Also See for AM-1:
- Operating instructions manual (12 pages) ,
- Installation manual (2 pages) ,
- Operating instructions manual (12 pages)
Advertisement
QUICK SETUP GUIDE
AM-1
AM-1 Setup Guide for the
Polycom® Video Conferencing Systems
*POLYCOM
®
and the names and marks associated with Polycom's products are trademarks and/or service marks
of Polycom, Inc., and are registered and/or common law marks in the United States and various other countries.
Advertisement
Table of Contents

Related Manuals for Toa AM-1


Summary of Contents for Toa AM-1
- Page 1 QUICK SETUP GUIDE AM-1 AM-1 Setup Guide for the Polycom® Video Conferencing Systems *POLYCOM ® and the names and marks associated with Polycom's products are trademarks and/or service marks of Polycom, Inc., and are registered and/or common law marks in the United States and various other countries.
-
Page 2: Table Of Contents
3. SETUP WITH “Group 500” ............... 4 4. SETUP WITH “Group 700” ............... 5 5. SETUP WITH “HDX 7000” ..............6 6. SETUP WITH “HDX 8000” ..............7 7. SETUP WITH “HDX 9000 Series” ............ 8 8. SPECIFICATIONS OF AM-1 ............10... -
Page 3: About This Setup Guide
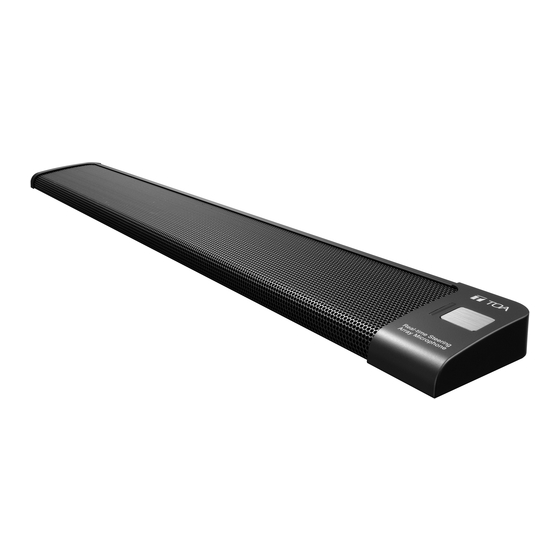
1. ABOUT THIS SETUP GUIDE This setup guide shows how to use TOA’s AM-1 Real-time Steering Array Microphone System with the Polycom® Video Conferencing Systems for better performance. The applicable models from Polycom® are; Polycom® RealPresence® Group Series (Group 500/700) Polycom®... -
Page 4: Setup With "Group 500
SETTINGS Step1. Confirm all devices are connected properly as shown above. Step2. Make sure that the audio output level of the AM-1 Control Unit is set to “-10dBv” and the volume control is set to “0”. Step3. In the web interface of Group 500, go to Admin Settings > Audio/Video > Audio >Audio Input. -
Page 5: Setup With "Group 700
SETTINGS Step1. Confirm all devices are connected properly as shown above. Step2. Make sure that the audio output level of the AM-1 Control Unit is set to “-10dBv” and the volume control is set to “0”. Step3. In the web interface of Group 700, go to Admin Settings > Audio/Video > Audio >Audio Input. -
Page 6: Setup With "Hdx 7000
SETTINGS Step1. Confirm all devices are connected properly as shown above. Step2. Make sure that the audio output level of the AM-1 Control Unit is set to “-10dBv” and the volume control is set to “0”. Step3. In the local interface of HDX 7000, go to Admin Settings > Audio. -
Page 7: Setup With "Hdx 8000
SETTINGS Step1. Confirm all devices are connected properly as shown above. Step2. Make sure that the audio output level of the AM-1 Control Unit is set to “-10dBv” and the volume control is set to “0”. Step3. In the local interface of HDX 8000, go to Admin Settings > Audio. -
Page 8: Setup With "Hdx 9000 Series
*Audio Input 1 is not associated with any particular video input, and it is not included in audio mix of output 1. HDX 9006 HDX 9004 HDX 9002 Audio Input1 (Phoenix) XLR(3P-Female) to Phoenix Control Unit 1: Ground AM-1 Microphone Unit 2: Hot 3: Cold... - Page 9 SETTINGS Step1. Confirm all devices are connected properly as shown above. Step2. Make sure that the audio output level of the AM-1 Control Unit is set to “-10dBv” and the volume control is set to “0”. Step3. In the local interface of HDX 9000, go to System > Admin Settings > Audio > Inputs/Outputs (select if necessary).
-
Page 10: Specifications Of Am-1
8. SPECIFICATIONS OF AM-1 MICROPHONE Power Source 24V DC/200mA (supplied from Control Unit) Maximum Input Sound Level 100dB SPL (at 20" distance) S/N Ratio 90dB or more (from Control Unit) Frequency Response 150 - 18,000Hz Directional Angle Horizontal: 50°(450 - 18,000Hz, Array mode), 180°(Cardioid mode) Vertical: 90°...
Need help?
Do you have a question about the AM-1 and is the answer not in the manual?
Questions and answers