
Related Manuals for Fimap GENIE E


Summary of Contents for Fimap GENIE E
- Page 1 USE AND MAINTENANCE MANUAL GENIE E ED. 09-2019 ORIGINAL INSTRUCTIONS Doc. 10004515 Ver.
- Page 2 The descriptions contained in this document are not binding. The company therefore reserves the right to make any modifications at any time to elements, details, or accessory supply, as considered necessary for reasons of improvement or manufacturing/commercial requirements. The reproduction, even partial, of the text and drawings contained in this document is prohibited by law.
-
Page 3: Table Of Contents
CONTENTS ON CONSIGNMENT OF THE MACHINE .................................. 4 SERIAL NUMBER PLATE ...................................... 4 INTRODUCTORY COMMENT ....................................4 INTENDED USE ........................................4 TECHNICAL DESCRIPTION ....................................5 SYMBOLS USED ON THE MACHINE ..................................6 GENERAL SAFETY REGULATIONS ..................................7 ... -
Page 4: On Consignment Of The Machine
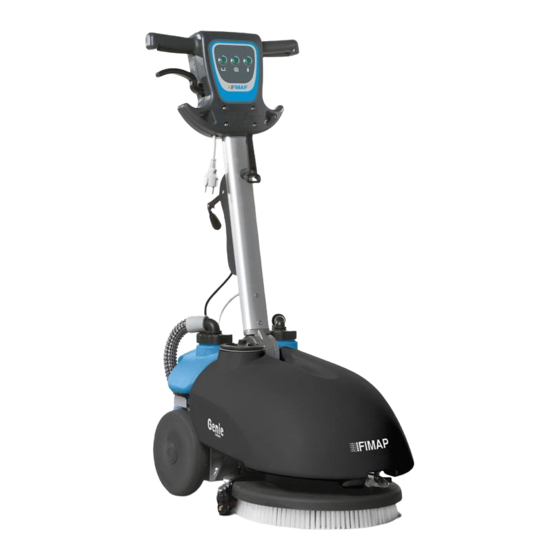
Introductory comment GENIE E is a floor scrubbing machine which, by means of the mechanical action of the rotating brush and the chemical action of a water/detergent solution, can clean any type of flooring. As it advances, it also collects the dirt that is removed as well as any detergent solution not absorbed by the floor. -
Page 5: Technical Description
Genie E Genie E TECHNICAL DESCRIPTION 230 V 110 V Nominal input power [IEC 60335-2-72; IEC 62885-9] 0,54 0,54 Working width Width of rear squeegee Working capacity 1335 1335 mm Brushes (diameter or length) Brush rpm Force exerted on the brushes Brush motor –... -
Page 6: Symbols Used On The Machine
SYMBOLS USED ON THE MACHINE Water system solenoid activation/deactivation switch symbol: Used on the control handlebars to indicate the switch that controls the solenoid valve within the machine's water system. Machine main switch symbol: Used on the control handlebars to indicate the machine's main switch. Suction motor activation/deactivation switch symbol: Used on the control handlebars to indicate the switch that controls the machine's suction motor. -
Page 7: General Safety Regulations
GENERAL SAFETY REGULATIONS Before using the machine, please read the following document carefully and follow the instructions contained herein, along with the instructions in the document supplied with the machine itself, "GENERAL SAFETY REGULATIONS" (document code 10083659). -
Page 8: Machine Preparation
Genie E is easy to transport even by car. Exploiting the full flexibility of the handlebars, you can fold it up (see the handlebars fixing section) and, with the help of a colleague, place it in the boot of the car without disassembling any components. -
Page 9: Instrument Panel Components
PREPARATION OF MACHINE 5. INSTRUMENT PANEL COMPONENTS The instrument panel components are identified as follows: 1. Main switch (1) 2. Suction switch (2) 3. Solenoid valve switch (3) FIXING THE HANDLEBARS For packaging purposes the handlebars are supplied folded; they must now be put in the working position. -
Page 10: Recovery Tank
PREPARATION OF MACHINE ATTENTION: Acid or alkaline maintenance detergent can be used with pH values between 4 and 10 and that do not contain: oxidising agents, chlorine or bromine, formaldehyde, mineral solvents. ATTENTION: Always use detergents whose manufacturer's label indicates their suitability for scrubbing machines. -
Page 11: Work
WORK 1. PREPARING TO WORK Certain operations must be carried out before starting any work: 1. Verify that the tanks are properly inserted in the housings and connected. 2. verify that the switches are in the off (“0”) position 3. connect the cable to the socket ATTENTION: Verify that the electricity socket has a protective conductor (or an earth conductor). -
Page 12: Forward Movement
WORK 3. FORWARD MOVEMENT The traction of these machines is obtained by means of the brush which, by working slightly inclined, is able to drag the machine forwards. ATTENTION: Ensure that the moving brush never comes into contact with the power supply cable. ATTENTION: when making even brief reverse movements, verify that the squeegee is raised. -
Page 13: At The End Of The Work
AT THE END OF THE WORK At the end of the work, and before carrying out any type of maintenance, perform the following operations: 1. turn off the solenoid valve switch (3). 2. raise the squeegee by means of the rear handle. 3. -
Page 14: Daily Maintenance
4. Disconnect the power cable from the socket 5. Disconnect the quick connector on the front of the solution tank 6. Insert the Genie E solution tank discharge pipe kit (optional) ATTENTION: This operation must be carried out wearing gloves to... -
Page 15: Cleaning The Squeegee
DAILY MAINTENANCE 3. CLEANING THE SQUEEGEE Verify that the squeegee rubbers are always clean, for a better drying action. To clean them you must: 1. raise the machine 2. carefully clean the inside 3. carefully clean the squeegee rubbers ATTENTION: This operation must be carried out wearing gloves to protect against contact with dangerous solutions. -
Page 16: Disassembling The Brush
DAILY MAINTENANCE 5. Unscrew the knobs on the squeegee that block the rubber-pressing blades and remove them 6. Remove the rubber-pressing blades 7. replace the rubbers 8. Reassemble everything, carrying out the above-mentioned operations in the reverse order. ATTENTION: This operation must be carried out wearing gloves to protect against contact with dangerous solutions. -
Page 17: Periodic Maintenance
4. Remove the recovery tank 5. Detach the quick connection to avoid breaking the connection itself. 6. Insert the Genie E solution tank discharge pipe kit (optional) 7. Loosen the solution tank cap 8. Remove the filter and clean it. -
Page 18: Troubleshooting
TROUBLESHOOTING 1. ELECTRICAL SAFETY The machine is fitted with a thermal trip unit with manual reset. The brush motor is reset by resetting the thermal trip unit located behind the handlebars. If the machine stops repeatedly in a short space of time, you must contact the technical assistance centre. -
Page 19: Choosing And Using The Brushes
TABLE FOR CHOOSING THE BRUSHES Machine Code Type of bristles Bristles Brush Notes No. of brushes 421701 GENIE E 422213 Pad holder – anchor 422001 Pad holder – bristles SUGGESTED POWER CABLE EXTENSION CAST SCHUKO PLUG CAST SCHUKO PLUG... -
Page 20: Machine Disposal
MACHINE DISPOSAL Proceed with scrapping the machine in accordance with the waste disposal regulations in force in the country in which the machine is being used. -
Page 21: Ec Declaration Of Conformity
Via Invalidi del Lavoro, 1 37059 Santa Maria di Zevio (VR) declares under its sole responsibility that the products FLOOR SCRUBBING MACHINES mod. Genie E 230V - Genie E 110V comply with the provisions of Directives: 2006/42/EC: Machinery Directive. 2014/35/EU: Low Voltage Directive. - Page 24 FIMAP - Via Invalidi del Lavoro, 1 - 37059 S. Maria di Zevio - Verona - Italy Tel. +39 045 6060411 - Fax +39 045 6060417 - E-mail: fimap@fimap.com www.fimap.com...
Need help?
Do you have a question about the GENIE E and is the answer not in the manual?
Questions and answers