
Subscribe to Our Youtube Channel
Related Manuals for PowerWalker VFI CPG PF1 3/3 Series


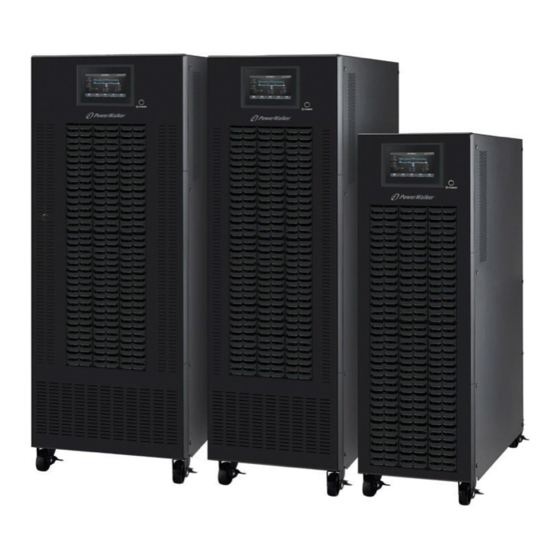
Summary of Contents for PowerWalker VFI CPG PF1 3/3 Series
- Page 1 PowerWalker VFI 10K-80K CPG PF1 3/3 Uninterruptible Power Supply System Version: 1.0 .1...
-
Page 2: Table Of Contents
Table of Contents 1. SAFETY AND EMC INSTRUCTIONS ............................1 1-1. T ..............................1 RANSPORTATION AND TORAGE 1-2. P .................................... 1 REPARATION 1-3. I ................................... 1 NSTALLATION 1-4. C ................................1 ONNECTION ARNINGS 1-5. O ....................................2 PERATION 1-6. S .................................... -
Page 3: Safety And Emc Instructions
1. Safety and EMC instructions All safety instructions in this document must be read, understood and followed. 1-1. Transportation and Storage ⚠ Please transport the UPS system only in the original packaging to protect against shock and damage. ⚠ The UPS must be stored in the room where the temperature is well regulated. Ambient temperature should not exceed 40°C. -
Page 4: Operation
can reasonably be expected to cause the failure of the life-sustaining equipment or to significantly affect its safety or effectiveness is not recommended. Do not use this equipment in the presence of a flammable mixture with air, oxygen or nitrous oxide •... -
Page 5: Installation And Operation
2. Installation and Operation These series is designed for 400VAC system. There are two different types of models: standard (BI – Battery Internal) and long-run (BX – Battery External) models. Please refer following table. Model Type Model Type 10K/15K/20K 10KL/15KL/20KL 10K/15K/20K DUAL 10KL/15KL/20KL DUAL Standard... -
Page 6: Wiring Terminal View
2-2. Wiring Terminal View Diagram 1: 10K/15K/20K(L) Diagram 2: 10K/15K/20K(L) Rear Panel DUAL Rear Panel Diagram 3: 10K/15K/20K(L) Diagram 4: 10K/15K/20K(L) Input/Output Terminal DUAL Input/Output Terminal... - Page 7 Diagram 5: 30K(L) Rear Panel Diagram 6: 40K(L) Rear Panel Diagram 7: 30K(L) / 40K(L) Dual Input Input/Output Terminal...
- Page 8 Diagram 8: 60KL front view Diagram 9: 80KL front view with door open with door open Diagram 10: 60KL/ 80KL Input/Output Terminal...
-
Page 9: Single Ups Installation
1. RS-232 communication port 2. USB communication port 3. Emergency power off function connector (EPO connector) 4. Share current port (only available for parallel model) 5. Parallel port (only available for parallel model) 6. Intelligent slot 7. External battery connector/terminal (Only available for long-run model) 8. - Page 10 Terminal block wiring diagram for 10K(L)/15K(L)/20K(L) Terminal block wiring diagram for 10K(L)/15K(L)/20K(L) Terminal block wiring diagram for 30K(L)/40K(L) Terminal block wiring diagram for 30K(L) /40K(L) Terminal block wiring diagram HV 60KL/80KL Terminal block wiring diagram for 60KL/80KL...
-
Page 11: Ups Installation For Parallel System
TO UPS BAT+ PBAT TO UPS BAT N NBAT TO UPS BAT- Battery wire connect schematic NOTE 1: Make sure that the wires are connected tightly with the terminals. NOTE 2: Please install the output breaker between the output terminal and the load, and the breaker should be qualified with leakage current protective function if necessary. - Page 12 Wiring diagram of parallel system for 10K(L)/15K(L)/20K(L) a Wiring diagram of parallel system for 10K(L)/15K(L)/20K(L) Wiring diagram of parallel system for 30K(L)/40K(L) Wiring diagram of parallel system for 30K(L) DUAL/ 40K(L) DUAL...
-
Page 13: Software Installation
Wiring diagram of parallel system for 60KL/80KL Wiring diagram of parallel system for 60KL/80KL 2-5. Software Installation For optimal computer system protection, install UPS monitoring software to configure UPS shutdown operation. Please download the newest version from https://viewpower.powerwalker.com... -
Page 14: Operations
3. Operations 3-1. Button Operation 1) Make sure that the two strings of batteries are connected correctly at UPS’s ”+,GND,-” terminals and the breaker of the battery pack is at “ON” position (only for long-run model). 2) Press the “Power On” button to set up the power supply for the UPS. UPS will enter into power on mode. After initialization, UPS will enter into “No Output mode”. - Page 15 Screen 0.0 Main presentation screen , with time and date indication. Initialization:After power on Enter the Icon home( ) from any screen of any submenu , we can go back to main screen (Screen 0.0). Screen 1.0 Control screen, with common control operation. Screens 1.1-1 to start and stop the unit through the control panel.
- Page 16 Screen 1.1-2: to order/cancel a battery test. Enter “YES” to start Battery Test. Entry ”BACK” or ”No” to come back to Screens 1.0. On the main screen possible messages about the battery test are: “Battery testing……“: The battery test is running. “Battery Test failed“: The battery test has been failed.
-
Page 17: Screen 4.0 Ups Information
Enter No Or Back Confirm YES Turn ON /OFF UPS ON/OFF Screen1.1-1 Enter No Or Back BATTERY Confirm YES DO Battery Test MAIN CONTROL TEST Screen1.1-2 Screen0.0 Screen1.0 MUTE Confirm YES DO MUTE ALL Enter No Or Back Screen1.1-3 Fig.1 The jump relationship of CONTROL menu (screen1.0) Screen 2.0 Measure screen. - Page 18 Screen 2.1-3 Input current phases to neutral for three phase or single phase(units A). Output current phases to neutral for three phase or single phase(units A). Screen 3.0 Setting screen, with basic and advance operation. Fig.14 Setting screen Screens 3.1.1-1 ...
- Page 19 Screens 3.1.1-2 You can program the Mute “ALL mute” and “Mode Mute”. Screens 3.1: At this level an authorized password will be required to modify some advanced parameters. Screens 3.1.2: Advance settings Screens 3.1.2-1 You can select the output voltage between the following options: “208V” / “220V” / “230V” / “240V”, ...
- Page 20 You can select Whether UPS is enable or disable CVCF mode, Bypass output. You can select the bypass voltage range. The range of voltage goes from 176 to 264. You can select the bypass frequency range. The range of frequency goes from 46Hz to 54Hz when UPS is 50Hz system and goes from 56 Hz to 64 Hz when UPS is 60Hz system.
- Page 21 Screens 3.1.2-2: this screen is used for battery setting. You can select the battery high and low warning voltage range. The range of high voltage goes from 13.0V to 15.0V. The range of shutdown voltage goes from 10.5V to 12V. The range of low voltage depends on shutdown voltage.
-
Page 22: Audible Alarm
Screen 5.0 UPS Data Log Figure 24 is showing just only one alarm as an example, but there could be some of them, the active ones. In 3-6 and 3-7 section, there are all the possible alarms displayed in the display LCD. 3-3. -
Page 23: Single Ups Operation
3-4. Single UPS Operation 1. Turn on the UPS with utility power (in AC mode) 1) After power supply is connected correctly, set the breaker of the battery pack at “ON” position (this step only necessary for long-run model). Then set the line input breaker at “ON” position. At this time the fan is running and the UPS enter to power on mode for initialization, several seconds later, UPS operates in Bypass mode and supplies power to the load via the bypass. -
Page 24: Parallel Operation
UPS will shut down automatically to protect the battery. This battery discharge protection can be enabled or disabled through LCD panel control. (Refer to 3-7 LCD setting section). 6. Test the batteries 1) If you need to check the battery status when the UPS is running in AC mode/CVCF mode, you could refer Screen 1.1-2 2) Users also can set battery self-test through monitoring software. - Page 25 setting value is less than 1.5V(typical 1V) with multimeter. If the difference is more than 1.5V, please calibrate the voltage by configuring inverter voltage adjustment(Refer to Program 15,16 and 17,section 3-7) in LCD setting. If the voltage remains more than 1.5V after calibration, please contact your local distributor or service center for help.
-
Page 26: Fault Code
5) Turn on the remaining UPS according to the previous section. Warning: (Only for the parallel system) ● Before turning on the parallel system to activate inverter, make sure that all unit’s maintenance switch at the same position. ● When parallel system is turned on, please do not operate the maintenance switch of any unit. ●... -
Page 27: 3-7.Warning Code
3-7.Warning Code Warning code Warning event Warning code Warning event Line situations are different in parallel Battery unconnected system Bypass situations are different in IP Neutral loss parallel system Locked in bypass after overload 3 times IP phase abnormal in 30 minutes Bypass phase abnormal Converter current unbalanced Over charge... -
Page 28: Storage And Maintenance
Symptom Possible cause Remedy Fan is locked or not working. Or The warning code 0A. Check fans and notify dealer. the UPS temperature is too high. Check and correct the input neutral connection. connection is ok and the warning is still displaying, please refer to the LCD setting section, to enter the neutral loss check menu, to input... -
Page 29: Specifications
6. Specifications MODEL 15K / 20K 15KVA / 15KW CAPACITY* 10KVA / 10KW 30KVA / 30KW 40KVA / 40KW 60KVA / 60KW 80KVA / 80KW 20KVA / 20KW INPUT 110 VAC(Ph-N) ± 3 % at 50% Load Low Line Loss 176 VAC(Ph-N) ±...
Need help?
Do you have a question about the VFI CPG PF1 3/3 Series and is the answer not in the manual?
Questions and answers