
Related Manuals for PowerWalker VFI 160K CPG 3/3 BX


Summary of Contents for PowerWalker VFI 160K CPG 3/3 BX
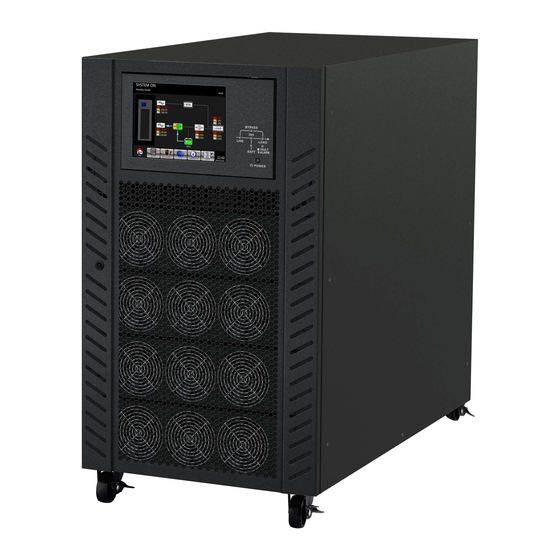
- Page 1 PowerWalker VFI 100-200K CPG 3/3 Manual Uninterruptible Power Supply System Version: 1.1...
- Page 2 Please comply with all warnings and operating instructions in this manual. This equipment should only installed, serviced, maintained by qualified personnel. Do not operate this unit before reading through all safety information and operating instructions carefully. Disclaimer We assumes no responsibility or liability for loss or damages, whether direct, indirect, consequential or incidental, which might arise out of the use of such information.
-
Page 3: Table Of Contents
Table of Contents 1. SAFETY AND EMC INSTRUCTIONS ....................1 1-1. T ......................1 RANSPORTATION AND TORAGE 1-2. P ..........................1 REPARATION 1-3. I ..........................1 NSTALLATION 1-4. C ........................2 ONNECTION ARNINGS 1-5. O ............................3 PERATION 1-6. S ............................3 TANDARDS 2. INSTALLATION AND OPERATION ....................4 2-1. - Page 4 8-1. S ............................. 59 TORAGE 8-2. M ..........................59 AINTENANCE 9. SPECIFICATIONS ......................... 60...
-
Page 5: Safety And Emc Instructions
1. Safety and EMC instructions All safety instructions in this document must be read, understood and followed. 1-1. Transportation and Storage Please transport the UPS system only in the original package to protect against shock and impact. The UPS must be stored in the room where the temperature is well regulated. Ambient temperature must not exceed 40°C 1-2. -
Page 6: Connection Warnings
Do not tilt the cabinets more than 10 degree. The disconnection device should be installed on the input current break line and neutral conductors - four poles for three phases. 1-4. Connection Warnings This UPS should be connected with TN grounding/earthing system. •... -
Page 7: Operation
1-5. Operation Do not disconnect the grounding/earthing conductor cable on the UPS or the building wiring terminals under any circumstance. In order to fully disconnect the UPS system, first press the “OFF” button and then disconnect the Mains/live wires. Ensure that no liquid or other foreign objects can enter into the UPS system. The UPS can be operated by any individuals with no previous experience. -
Page 8: Installation And Operation
2. Installation and Operation There are two different types of online UPS: single input and dual input models. Please refer to the following table. Model Type Model Type 100KVA 100KVA DUAL 120KVA 120KVA DUAL Single input Dual input 160KVA 160KVA DUAL 200KVA 200KVA DUAL 2-1. - Page 9 Unpack the package and check the package contents. The shipping package contains: User manual Monitoring software CD RS-232 cable USB cable NOTE: Before installation, please inspect the unit. Be sure that there is no physical damage to the unit. Do not turn on the unit and notify the carrier and dealer immediately if there is any damage or missing parts or accessories.
-
Page 10: Open Front Panel View
2-2. Open Front Panel View Each UPS comes equipped with a front door key. After opening the front door, you will see communication area and several power stages/modules inside. And from each power stage/module, you can easily identify their ID as shown below: Table 2-1 Power Stage/Module ID Install Parallel... - Page 11 Interface and Communication This UPS comes equipped with various communication devices. Please refer to chapter 4 Interface and Communication for further details. 1. Dry contact port X1 2. Dry contact port X2 optional 3. SNMP slot (SNMP card 4. Extended communication optional slot(Extra Comm.
-
Page 12: Rear Panel View
2-3. Rear Panel View There are several breakers located on the rear panel of the UPS. 100KVA/120KVA 160KVA/200KVA 1. Input breaker Q1 2. Input breaker Q2 (only available for Dual Input Models) 3. Output and maintenance bypass switch 4. Maintenance bypass breaker (Q4) 5. -
Page 13: Single Ups Installation
Item Function Description Connects to the critical loads Includes R, S, T and Neutral terminals. Output Block Bypass Input Block (Q2, Connects to bypass AC source Includes R, S, T and Neutral terminals. only available for dual input model) Connects to main AC source Includes R, S, T and Neutral terminals. - Page 14 4) Prepare wires based on the following table: Table 2-2 Power Cable Power cable (mm and AWG) Model Input(Ph) Output(Ph) Neutral Battery Ground 100KVA 70 mm 70mm 70mm 150 mm 70 mm (2/0AWG) (2/0AWG) (2/0AWG) (300 MCM) (2/0AWG) 120KVA 95 mm 95 mm 95 mm 240 mm...
-
Page 15: Ups Installation For Parallel System
● Make sure that the utility input & output wiring is correct. The current spec, color, position, connection and conductance reliability of the wires needed be checked carefully. Make sure the L/N is correct, not reverse or short-circuited. 2-6. UPS Installation for Parallel System The section introduces how to install and set up the multiple UPSs to run parallel UPS system. - Page 16 Single input wiring in parallel system 2-6-2. Parallel Board Setting 2-6-2-1. Install Parallel Board of UPS 1 1. Please set SW2 on the parallel board of the UPS 1 to the right side as shown in below figure.
- Page 17 SW2 position on UPS 1 2-6-2-2. Install Parallel Board of UPS2 1. Please set SW2 on the parallel board of the UPS 2 to the left side as shown in below figure. SW2 position on UPS 2...
- Page 18 2-6-3. Parallel Function Setting 1. For the input and output wiring, please be sure to follow the instruction in section 2-6-1. 2. For the parallel board setting, please be sure to follow the instruction in section 2-6-2. Once the two steps above have been completed correctly, and then set parallel function and battery configuration.
-
Page 19: Software Installation
UPS 2 Parallel Board Warning: The parallel cable of each UPS must to be connected correctly. Incorrect connection will result in abnormal operations. 2-6-5. Parallel System Turn On Procedure Please be sure that the sections 2-6-1 to 2-6-4 are correctly followed. Please confirm the input breaker and output breakers of each UPS have been turned “ON”. -
Page 20: Control Panel And Lcd Operation
3. Control Panel and LCD Operation 3-1. Introduction This control panel and display screen are located at the front panel of the UPS. This interface monitoring all measured parameters, UPS status, battery status and alarms. The control interface is divided into four sections: (1) LCD display, (2) LED indications, (3) Power Button, (4) Audible Alarm, as shown in Figure 3-1. -
Page 21: Screen Description
Table 3-3: Audible Alarm UPS condition Description Power on/off Buzzer sounds 2 seconds. Battery mode Buzzer sounds every 2 seconds. Low battery Buzzer sounds every 0.5 seconds. UPS alarm Buzzer sounds every 1 second. UPS fault Buzzer continuously sounds. 3-2. Screen Description 3-2-1. - Page 22 (3) Main menu: Touch each icon to enter submenu. Refer to Figure 3-4 for menu tree. Figure 3-4 Menu Tree (4) UPS power rating: It show UPS power rating. (5) Date and time: It shows current date and time. (6) UPS status: The meanings of each icon are listed as below. Icon UPS status UPS operates in Standby mode...
- Page 23 Figure 3-6 Control Screen Page Touch any option directly. Then, confirmation screen will pop up. Touch icon to confirm command or touch icon to cancel command as shown below. Figure 3-7 Confirmation Screen 3-2-4. Measurement Screen Touch icon to enter into the sub-menu. You may choose input, output, bypass, load or battery to monitor each detailed status.
- Page 24 Figure 3-9 System Measurement Screens Table 3-4: Measurement Items Submenu Item Explanation L-N Voltage (V) Input phase voltage (L1, L2, L3). Units 0.1V. Input Frequency (Hz) Input frequency (L1, L2, L3). Units 0.1Hz. L-N Voltage (V) Output phase voltage (L1, L2, L3). Units 0.1V. L-N Current (A) Output phase current (L1, L2, L3).
- Page 25 Capacity (%) The percentage of the battery capacity. Units 1%. Test Result Battery test result Charging Status Battery charging status Temperature 01(℃) Temperature of external battery pack. Units 0.1℃. Temperature of external battery pack through extra Temperature 02(℃) communication card T1. Units 0.1℃. Temperature of external battery pack through extra Temperature 03(℃) communication card T2.
- Page 26 Figure 3-11 Enter Password Screen There are two levels of password protection, user password and administrator password. The default password for user is “0000”. It could be changed by users. The administrator password is owned by trained service personnel. Different level of password can access to differnet settings. The setting can be changed in various operation modes.
- Page 27 Nominal Battery Voltage Battery Capacity in Ah Maximum Charging Current Battery Low/Shutdown Setting Periodic Battery Test Battery Test Interval Stop by Time Stop by Battery Voltage Stop by Battery Capacity Battery Age Alert Temperature Compensation Charging Voltage Auto-Restart Battery Voltage Line Voltage Range Line Frequency...
- Page 28 3-2-5-1. Setup-General Screen The Setup-General screen and setting options are shown in Figure 3-13 and Table 3-6. General Setting can be set in any operating mode. Figure 3-13 Setup-General Screen Table 3-6: Setup-General Setting List Setting Item Sub Item Explanation Set UPS Name (xxxxxxxxxx).
- Page 29 Restore to factory default setting Factory Reset Refer to Table 3-7 EEPROM Restore EEPROM to default setting Reset Refer to Table 3-7 Set EPO active status EPO Function Normal Close Active Normal Open Active (Default) Set New Password. Password 0000 (Default) Save all settings to EEPROM.
- Page 30 3-2-5-2. Setup-System Screen The Setup-System Screen and setting options are shown in Figure 3-14 and Table 3-8. System Setting can only be access when UPS is operated in certain mode. Please refer to Table 3-5 for the details. If an option is not available under specific mode, a warning screen will appear such as in Figure 3-15.
- Page 31 Set bypass Frequency range: Upper/ Lower limit Bypass Frequency Range +/- 1Hz +/- 2Hz +/- 4Hz (Default) Set converter mode Converter Disable (Default) Mode Enable Set ECO mode ECO Mode Disable (Default) Enable Set bypass mode ...
- Page 32 Figure 3-16 Setup-Battery Screen Table 3-9: Setup-Battery Setting List Setting Item Sub Item Explanation Set battery nominal voltage 16x12V (Default) Nominal Battery 18x12V Voltage 20x12V MUST be set after UPS installation Set battery capacity. (up to 999) Battery Capacity ...
- Page 33 Temperature Set battery temperature compensation. (0~-5 (mV/C/cl)) Compensation 0(mV/C/cl) (Default) Set battery charging voltage. (2.30~2.35V) 2.35V (Default) Charging Voltage Set battery float voltage. (2.23~2.35V) 2.29V (Default) Auto-Restart Set auto-restart battery voltage. (0 or 12.0V~13.0V) Battery Voltage 0V (Default) 3-2-5-4.
- Page 34 3-2-5-5. Setup-Parallel Screen Simply touch on the “PARALLEL” tab to show parallel function page as shown below. Figure 3-18 Setup-Parallel Screen Refer to Table 3-11 for Setup-Parallel Setting List. Table 3-11: Setup-Parallel Setting List Setting Item Sub Item Explanation Set UPS parallel UPS Parallel Disable (Default) ...
- Page 35 Figure 3-20 Identification Screen Page 3-2-6-2. INFORMATION - System Screen When System submenu tab is touched, information such as the system power, nominal voltage, nominal frequency … etc. will be displayed as shown in Figure 3-21 and Figure 3-22. Touch UP and DOWN arrows to switch between different pages.
- Page 36 Figure 3-22 INFORMATION System Screen Page 2 3-2-6-3. INFORMATION - Battery Screen When Battery submenu is selected, the information such as battery nominal voltage, capacity, charging current … etc. will be displayed as shown in Figure 3-23.. Figure 3-23 INFORMATION Battery Screen Page 3-2-7.
- Page 37 Figure 3-24 Alarm Warning Screen Figure 3-25 Events Menu 3-2-7-1. Current Events When an event occurs, it will display power stage/module ID* and alarm code in Current Events screen. It can save up to 50 events. Only 10 events can be listed per page. Therefore, if it exceeds more than 10, you have to touch to read other event as shown in Figure 3-26..
- Page 38 3-2-7-2. History Events The detailed event information is saved in history events. It can save up to 500 events. When warning occurs, it will display alarm code, alarm time and power stage/module ID*. When fault event occurs, it will display alarm description, alarm time and power stage/module ID*. (Refer to Table 3-12 Alarm List) In order to record more historical information about the UPS system, the important changes in setting (refer to Table 3-13 Warning List For Changing Important Settings), UPS operation mode changes (refer to Table 3-14 UPS Mode Changes) and control action execution (refer to Table 3-15 Control Execution) will be saved in History...
-
Page 39: Alarm List
Figure 3-29 Reset All Events Confirmation Screen 3-3. Alarm List In Table 3-12, it provides the complete list of UPS alarm messages. Table 3-12: Alarm List Messages in the LCD Explanation Fault! Bus Over Voltage DC bus voltage is too high Fault! Bus Under Voltage DC bus voltage is too low Fault! Bus Voltage Unbalance... -
Page 40: History Record
Line Fail Utility lost or abnormal Line Restore Utility recovered to normal Warning! EPO Active Check the EPO connector The load devices are demanding more power than the UPS Warning! Over Load Fail can supply. Line mode will transfer to Bypass mode. Warning! Communicate CAN Fail CAN communication error In Line mode, the load devices are demanding more power... - Page 41 Setup! Maximum Charging Current Setup! Battery Low Voltage Setup! Battery Low Capacity Setup! Battery Shutdown Voltage Setup! Periodic Battery Test Setup! Stop By Time Setup! BATTERY Age Alert Setup! Temperature Compensation Setup! Charging Voltage Setup! PRE-ALARM Setup! UPS Parallel Setup! Independent Battery Setup! Auto-Restart Battery Voltage Table 3-14: UPS Mode Changes Item...
-
Page 42: Interface And Communication
4. Interface and Communication As shown in Figure 4-1, there are Battery Temperature sensor port (X1), Emergency Power Off Port (X2), communication port (RS232/USB), SNMP Card slot and extra Comm. card slot on the front panel. Figure 4-1 Dry Contact Ports and Communication Ports Dry Contact No. -
Page 43: X2 - Remote Epo Input Port
4-2. X2 - Remote EPO Input Port The UPS is equipped with Emergency Power off (EPO) Function that can be operated by a remote contact assigned by the users. Users can set the logic (N.C or N.O) of this EPO Function through LCD panel. X2 is the remote EPO input port. -
Page 44: Operation Principles
5. Operation Principles 5-1. Block diagram of UPS Figure 5-1 Wiring diagram for dual inputs Figure 5-2 Wiring diagram for single input... -
Page 45: Operation Mode
5-2. Operation Mode This UPS is a three-phase, four-wire on-line, double-conversion and reverse-transfer UPS that permits operation in the following modes: Standby Mode Line Mode Battery Mode Bypass Mode ECO Mode Shutdown Mode Maintenance Bypass Mode (manual bypass) ... - Page 46 to the load. Line Mode Diagram 5-2-3. Battery Mode The UPS automatically transfers to Battery mode if the Utility fails. There is no interruption to the load upon failure. In battery mode, the rectifier delivers power from the battery and supplies DC power to the inverter. The inverter filters the DC power and converts it into pure and stable AC power to the load.
- Page 47 Battery Mode Diagram 5-2-4. Bypass Mode Upon connecting to utility input power, the UPS is in Bypass mode before UPS is turned on (if BYPASS enable setting is Enabled), and charger function will be active when battery is connected. After UPS has been turned on, if the UPS encounters abnormal situations (over-temperature, overload …, etc.), the static transfer switch will perform as a transference of the load from the inverter to the bypass source with no interruption.
- Page 48 5-2-5. ECO Mode The ECO Mode can be enabled through the LCD control panel. In ECO mode, the load is diverted to bypass when the bypass voltage and frequency are within the acceptable ranges. If the bypass is out of range, the UPS will transfer the power source of load from bypass to inverter.
- Page 49 Shutdown Mode Diagram 5-2-7. Maintenance bypass Mode A manual bypass switch is available to ensure continuity of supply to the critical load when the UPS becomes unavailable e.g. during a maintenance procedure. Before entering the maintenance bypass mode, make sure the bypass power source is normal.
- Page 50 Maintenance Bypass Mode Diagram...
-
Page 51: Ups Operation
6. UPS Operation Do not start the UPS until the installation is completed. Make sure the wiring is connected correctly and the power cables are fixed firmly. Make sure the power stage/module ID have been configured correctly. Refer to section 2-2 Power Stage/Module for details. -
Page 52: Cold Start Startup
Step 5: Make sure that there is no warning or fault event. If yes, please refer to Chapter 7 Troubleshooting to resolve it. Step 6: Press POWER button for two seconds to enter into Line Mode as shown below. After POST (Power-On Self-Test), the UPS will enter into the Line mode. Step 7: Switch ON the output breaker (Q3). - Page 53 Step 3: After pressing the “Battery Start” button, UPS will enter into Standby mode. Refer to the diagram below for LCD display. Step 4: Before UPS enters into shutdown mode, please press “POWER” button for 2 seconds immediately as shown in the diagram below. Step 5: Then, UPS will enter Battery Mode as shown in the diagram below.
-
Page 54: Maintenance Bypass Operation
6-3. Maintenance Bypass Operation If any fault occurs on any one of power stages/modules, please follow below steps to transfer to maintenance bypass for maintenance and UPS protection as below. 6-3-1. Transfer to maintenance bypass Step 1: Remove the mechanical lock plate of maintenance bypass. 100KVA/120KVA 160KVA/200KVA Step 2... - Page 55 Step 4 Single input model: Single input model: Switch OFF the Input1 Breaker (Q1) as Switch OFF the Input1 Breaker (Q1) as shown below. shown below. Dual input model : Dual input model : Switch OFF the Input1 Breaker (Q1) and Switch OFF the Input1 Breaker (Q1), Input2 Input2 Breaker (Q2) as shown below.
- Page 56 Dual input model : Dual input model : Switch ON the Input1 Breaker (Q1), Switch ON the Input1 Breaker (Q1) and Input2 Breaker (Q2) and Output Breaker Input2 Breaker (Q2) as shown below. (Q3) as shown below 100KVA/120KVA Step 3 Please enter LCD SETUP MENU and choose “SYSTEM”...
-
Page 57: Turn Off Operation
6-4. Turn off Operation 6-4-1. Turn Off Operation in Bypass Mode/ Standby Mode When the UPS is neither turned on or off, the UPS operates in the Standby Mode or Bypass Mode, depending on the “Bypass Mode” Setting. The LCD diagrams are shown below. Bypass Mode Setting is Disabled Bypass Mode Setting is Enabled Step 1: Switch OFF the Q1 Breaker. - Page 58 Step 3: Switch OFF the battery breaker if the UPS will disconnect from the AC power for a long time. 6-4-2. Turn Off Operation in Line Mode The LCD diagrams are shown below when the UPS operates in the Line Mode. Step 1: Press “POWER”...
- Page 59 After turning off, the UPS will tranfer to Standby Mode.
-
Page 60: Trouble Shooting
7. Trouble Shooting Most of the Fault and Warning need to be released by authorized service personnel. Few of them can be solved by users themselves. LCD Message Explanation Solution Fault! Bus Over Voltage DC bus voltage is too high Contact service personnel. - Page 61 Fault! EEPROM Fault EEPROM operation error Contact service personnel. Fault! Parallel Cable Loosen Check if the parallel cable is loose As stated. Fault and contact service personnel. Fault! DSP MCU Stop As stated. Contact service personnel. Communicate Check if the ambient temperature is As stated Fault! Bypass Temperature over specification.
- Page 62 Config. Wrong Warning! Maintenance Check if the connector is loose Enter maintenance Bypass when it acts abnormally. Check if the battery has been used Warning! Battery Age Alert Battery Life expiration over its service age. Or contact service personnel. Warning! Parallel UPS Cable Check if the Parallel UPS Cable is As stated.
-
Page 63: Storage And Maintenance
8. Storage and Maintenance 8-1. Storage Before storing, charge the UPS at least 7 hours. Store the UPS covered and upright in a cool, dry location. During storage, recharge the battery in accordance with the following table: Storage Temperature Recharge Frequency Charging Duration -25°C - 40°C Every 3 months... - Page 64 9. Specifications MODEL 100KL 120KL 160KL 200KL CAPACITY 100KVA / 90KW 120KVA / 108KW 160KVA / 144KW 200KVA / 180KW INPUT Nominal Voltage 380V/400V/415V (220V/230V/240V) Voltage Range 305V ~ 478V 100% load; (176V ~ 276V) Voltage (Full Load) Range Voltage Range 208V ~ 304V 70% Load Max(120V ~ 175V*) (De-rating) Voltage Comeback...
- Page 65 MODEL 100KL 120KL 160KL 200KL BATTERY Type Depending on applications Numbers 32 36 40 (adjustable) Maximum charging current* 24A** 32A** 40A** 48A** Floating Voltage 2.29V/cell Boost Charging 2.35V/cell Charger Voltage Regulation < 1% Ripple Voltage < 1% Ripple Current (% C10) <...
Need help?
Do you have a question about the VFI 160K CPG 3/3 BX and is the answer not in the manual?
Questions and answers