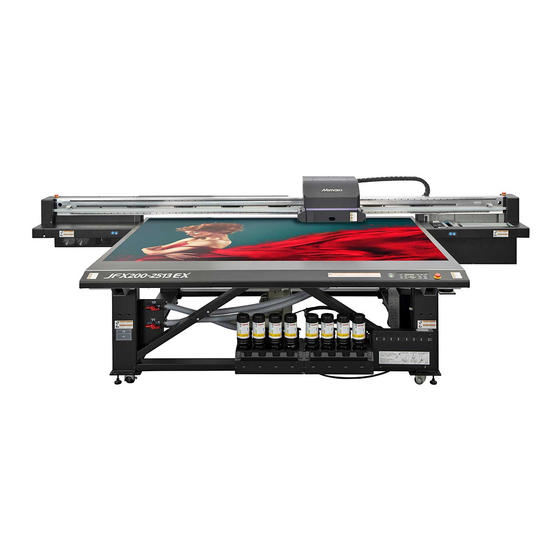
MIMAKI JFX200-2513EX Requests For Daily Care And Maintenance
Hide thumbs
Also See for JFX200-2513EX:
- Operation manual (176 pages) ,
- Safety precautions (28 pages) ,
- Manual (30 pages)
Table of Contents
Advertisement
Quick Links
Requests for Daily Care and Maintenance
Routine Maintenance
JFX200-2513EX (hereafter called "this machine") is a precision machine with extremely fine mechanisms.
Especially, the nozzle surface of the head from where the ink is discharged may get affected by even a small
amount of adhered dust or paper powder, making it impossible to get normal print results.
To use it with better conditions, we recommend performing the following daily maintenance.
Maintenance timing
Maintenance timing
Daily (after one day of work)
Weekly (after a week of work)
About once every one or two weeks
When an error occurs
Maintenance as necessary
F-200/LF-200 Washing Liquid (PN: SPC-0568)
Cotton swab
Soft cloth
JFX200-2513EX
Maintenance items (reference page)
"Maintenance of Head Surroundings"(P. 3)
"Cleaning wiper and cap"(P. 5)
"Cleaning the NCU"(P. 11)
"Maintenance of Machine Exterior"(P. 12)
"Table Maintenance"(P. 12)
"Washing the Ink Discharge Passage"(P. 12)
"Disposing of Waste Ink"(P. 13)
"Cleaning around the station"(P. 16)
"Replacing Carriage Filters"(P. 17)
"MBIS maintenance"(P. 18)
"Refilling the Coolant"(P. 20)
"Replacing the wiper"(P. 22)
"Cleaning LED UV Unit"(P. 23)
"Ionizer Maintenance"(P. 23)
Tools necessary for maintenance
Cleaning Stick for Head Surrounding (PN: SPC-0527)
Gloves
1
Advertisement
Table of Contents

Subscribe to Our Youtube Channel
Related Manuals for MIMAKI JFX200-2513EX


Summary of Contents for MIMAKI JFX200-2513EX
- Page 1 Requests for Daily Care and Maintenance Routine Maintenance JFX200-2513EX (hereafter called "this machine") is a precision machine with extremely fine mechanisms. Especially, the nozzle surface of the head from where the ink is discharged may get affected by even a small amount of adhered dust or paper powder, making it impossible to get normal print results.
-
Page 2: Precautions For Maintenance
Precautions for Maintenance When performing maintenance for this machine, note the following items. • LED UV unit becomes very hot. Turn off the LED UV unit and perform maintenance once the device cools down sufficiently. There is a risk of burns. •... -
Page 3: Daily Maintenance
lIn case of low usage ink (print head) • Ink discharge of less used print heads tends to become unstable as compared to other print heads. Increase the REFRESH level during plotting, then keep the head usage rate above certain value. (Operation Manual, Chapter 3: "Other Settings") lWhen printing on media that is prone to electrostatic charge lWhen printing in an environment with low humidity (in winters, etc.) - Page 4 Remove the cover on the right side of the Y-bar. • Remove the screws (2 places) and remove the cover. Press the [MAINT.] key in LOCAL. CARRIAGE OUT [ENT] Press the [ENTER] key. MOVE POSITION : STATION MAINT. Press to select [HEAD MAINT.]. MOVE POSITION : HEAD MAINT.
- Page 5 Wipe any ink on the sides of the head and carriage using a clean stick. • Never rub the nozzle part. Clean the side of the Nozzle part (Never touch) head (dark gray part) with a clean stick. Clean using a clean stick. •...
- Page 6 Press the [ENTER] key. MOVE POSITION : STATION MAINT. Press to select [STATION MAINT.]. MOVE POSITION : STATION MAINT. Press the [ENTER] key. • Carriage moves onto the table. Moving carriage Remove the wiper. • Pull out the wiper by holding the protrusions at both the ends. Protrusion...
- Page 7 Clean the wiper and the bracket. • Wipe off any ink on the wiper and the bracket using a clean stick soaked in washing liquid. Wipe it off properly so that there is no residual washing liquid. Wiper Bracket • Clean the wiper and the bracket until they look like the picture. •...
- Page 8 Clean the wiper cleaner. • Clean the tip of the wiper cleaner with a clean stick. Wiper cleaner • Lift the wiper cleaner up and clean the ink adhering to the inside with a clean stick. • Clean around the wiper cleaner. •...
- Page 9 Return the wiper to its original position. • Insert the wiper by holding both the ends. Protrusion Clean the cap rubber and cap rubber cover. • Wipe off any ink on the cap rubber and the cap rubber cover using a clean stick soaked in washing liquid.
- Page 10 l Performing station maintenance without [MAINT.] key You can select [STATION MAINT.] using the [FUNCTION] key under LOCAL, without pressing the [MAINT.] key. Press the [FUNCTION] key in LOCAL. Press to select [MAINTENANCE]. Press the [ENTER] key twice. • This will put the machine in the same state as when you press the [MAINT.] key in LOCAL.
- Page 11 Cleaning the NCU Ink and dust adhere to the NCU. The NCU cannot operate normally if there is ink or dust adhering to it. Press the [MAINT.] key in LOCAL. CARRIAGE OUT [ENT] Press the [ENTER] key. MOVE POSITION : STATION MAINT. Press to select [STATION MAINT.].
-
Page 12: Weekly Maintenance
Weekly Maintenance Maintenance of Machine Exterior Depending on the usage environment, trash and dust may stick to the exterior of the main unit. To prevent dust from entering the head moving part, soak a soft piece of cloth in water, wring it tightly and then wipe off the dust. -
Page 13: Disposing Of Waste Ink
Press the [ENTER] key. • Carriage moves onto the platen. • Repeat the dry suction operation until the washing is complete. DISWAY WASH COMPLETED (NEXT) [ENT] Take washing liquid in a dropper and fill the cap with it until it is full. •... - Page 14 Remove the waste ink tank. (1) Hold the handle of the waste ink tank and pull it to the front. (2) Raise the waste ink tank and take it out. Waste ink discharging spout Built-up waste ink...
- Page 15 Move the waste ink to a separate polyethylene tank and return the emptied waste ink tank to its original position. (1) As shown in the figure, move the waste ink collected in the waste ink tank to a separate polyethylene tank. (2) Insert by holding the handle of the waste ink tank.
-
Page 16: Maintenance
Select [InkTankExchange] from the MAINTENANCE menu. (1) Press the [FUNCTION] key in LOCAL. (2) Press to select [MAINTENANCE], and press the [ENTER] key. (3) Press to select [InkTankExchange]. MAINTENANCE InkTankExchange [ENT] Press the [ENTER] key to release. InkTankExchange EXCHANGE [ENT] Cleaning around the station We recommend that you clean the machine often to maintain the quality of the machine and the images. - Page 17 Use a cloth to wipe off the ink around the waste ink tray. • Clean the gray area shown in the figure below. • If the ink is stuck to the surface and cannot be wiped, use a spatula or another similar tool to scrape it off.
- Page 18 Move the carriage. Moving carriage Remove the used carriage filter. Carriage filter Install the new carriage filter (PN : SPC-0851). New carriage filter • Carriage filters are on the left, right, and back side of the carriage. Replace all the filters at same time. Once the replacement is complete, press the [ENTER] key.
- Page 19 Remove the bottle wiping filter. Bottle wiping filter Attach a new Bottle Wiping Filter (PN: SPC-0820). Maintenance for When Errors Occur About Refilling the Cooling Water To cool the LED UV unit, put anti freezing liquid mixed with water into the cooling water tank in the cooling device.
-
Page 20: Refilling The Coolant
• Dispose of the wastewater mixed with antifreeze pursuant to the regulations of your region. lPrecautions for handling antifreeze liquid • Always use an anti freezing liquid recommended by Mimaki. The cooling device may malfunction if any other product is used. (Supplied antifreeze liquid: 1000 cc x 1) •... - Page 21 Remove the cover of the left rear surface of Y-bar. • Remove the screw (1 place) indicated with a circle in the figure and remove the cover. Screw Remove the water supply/drainage cap. Water supply/ drainage Air purge Prepare mixed water solution (antifreeze liquid:1, water: 2) in the provided container and fill it into the provided syringe.
-
Page 22: Replacing The Wiper
Fill the mixed water solution until the buzzer sound stops. • Fill the mixed water solution through the water inlet using a syringe. • Fill an additional 100 CC after the buzzer stops. • The mixed water solution will leak from the tank if you inject it too much. Close the water inlet and air purge, and attach the cover of the left rear side of Y-bar. -
Page 23: Please Wait
Remove the wiper • Pull out the wiper by holding the protrusions at both the ends. Protrusion Insert a new wiper • Insert the wiper by holding the protrusions at both the ends. Protrusion Press the [ENTER] key. • After its initial operation, the machine returns to LOCAL. *Being Initialized* PLEASE WAIT Maintenance as Necessary... -
Page 24: Accessories Information
Storage of Ink Bottles Pay attention to the following points when storing ink bottles. • Store in a place with low humidity and no direct sunlight. • Do not drop or smash the ink bottle. • Avoid contamination or electrostatic discharge of the Ink IC chip. •... - Page 25 Part name Part No. Part name Part No. Electrode Needle cleaning KIT SPA-0237 Replacement Filter for Electrode Needle SPA-0238 cleaning KIT Inside electrode wall cleaning KIT SPA-0239 Replacement Filter for Inside electrode SPA-0240 wall cleaning KIT WIPER KIT 300TS (PN: SPA-0271) SPA-0271 Cap A assy SPA-0280...
- Page 26 MEMO...
- Page 27 MEMO...
- Page 28 D203433-11-22052019 © MIMAKI ENGINEERING CO., LTD.2019 FW : 1.10...
Need help?
Do you have a question about the JFX200-2513EX and is the answer not in the manual?
Questions and answers