Black Box SERVSWITCH KV3108SA-R4 Quick Install Manual
Black box switch user manual
Hide thumbs
Also See for SERVSWITCH KV3108SA-R4:
- Quick install manual (4 pages) ,
- Instruction manual (86 pages)
Table of Contents
Advertisement
Customer Support Information:
FREE tech support 24 hours a day, 7 days a week: Call 724-746-5500 or fax 724-746-0746.
Mailing address: Black Box Corporation, 1000 Park Dr., Lawrence, PA 15055-1018
World-Wide Web: www.blackbox.com • E-mail: info@blackbox.com
© Copyright 2000. Black Box Corporation. All rights reserved.
16
15
13
14
12
9
11
10
8
5
6
7
4
Power
3
1
2
KV3108SA-R4
JUNE 2000
SW721A-R4
SW722A-R4
SW723A-R4
SW724A-R4
SW725A-R4
Advertisement
Table of Contents

Related Manuals for Black Box SERVSWITCH KV3108SA-R4


Summary of Contents for Black Box SERVSWITCH KV3108SA-R4
- Page 1 Customer Support Information: FREE tech support 24 hours a day, 7 days a week: Call 724-746-5500 or fax 724-746-0746. Mailing address: Black Box Corporation, 1000 Park Dr., Lawrence, PA 15055-1018 World-Wide Web: www.blackbox.com • E-mail: info@blackbox.com © Copyright 2000. Black Box Corporation. All rights reserved.
- Page 2 Step-By-Step Quick Install Guide for the Pow er 1. Introduction This guide is designed to quickly show you how to attach cables and equipment in order to install a ServSwitch system. For just the basics, look over the diagrams on the next four pages. More detailed instructions begin on page 4.
- Page 3 SERVSWITCH™ QUICK INSTALL GUIDE Attach User Adapter Cable. MONITOR/KEYBOARD/MOUSE CPU 7 POWER CPU 3 ServSwitch Use CPU Adapter Cable to attach CPU this way (PS/2 CPU shown): CPU 1 Unlabeled Attach monitor (VGA type shown). HD15 Video.eps CPU 8 CPU 5 CPU 4 CPU 1 Labeled "MOUSE"...
- Page 4 Attach your keyboard and mouse this way (PS/2 equipment shown): Labeled "MOUSE" Unlabeled Plug in CPU. SERVSWITCH™ QUICK INSTALL GUIDE Plug in ServSwitch. POWER Turn on ServSwitch. Turn on monitor and all CPUs.
- Page 5 SERVSWITCH™ QUICK INSTALL GUIDE The rest of this guide is divided into five sections, one for each connection type: POWER Power Required: Section 2, User-Station Connections (see page 5). Optional: Section 3, Cascade Connections (see page 10). Required: Section 4, CPU Connections (see page 11). Optional: Section 5, The RS-232 Connection (see page 18).
- Page 6 2. User-Station Connections Which cables you use for these and how you connect them to the ServSwitch and to your user-station equipment will depend on what type of equipment you’re using: If your keyboard and mouse are this type (with this connector): ®...
- Page 7 Cable): • If your video resolution is not higher than 1024 x 768 pixels, and if your equipment is within 20 ft. (6.1 m) of the Switch, you can use the standard (non-coaxial) cable with the product code EHN054. • If your video resolution is higher than 1024 x 768, or if your equipment is farther than 20 ft.
- Page 8 Cable): • If your video resolution is not higher than 1024 x 768 pixels, and if your equipment is within 20 ft. (6.1 m) of the Switch, you can use the standard (non-coaxial) cable with the product code EHN052. • If your video resolution is higher than 1024 x 768, or if your equipment is farther than 20 ft.
- Page 9 CPU 7 CPU 8 POWER CPU 3 CPU 4 Figure 4. RS/6000 type user-station connections. , RS/6000 M EYBOARD AND OUSE connector into the Switch’s MONITOR/ CPU 5 CPU 6 CPU 1 CPU 2 MONITOR/KEYBOARD/MOUSE RS-232 EHN521-0001 ONITOR connector with the connector.
- Page 10 CPU 8 POWER CPU 3 CPU 4 Figure 5. SGI type user-station connections. SERVSWITCH™ QUICK INSTALL GUIDE , SGI M EYBOARD AND OUSE connector into the Switch’s MONITOR/ CPU 5 CPU 6 CPU 1 CPU 2 MONITOR/KEYBOARD/MOUSE RS-232 EHN501-0001 ONITOR connector with the connector.
- Page 11 Switch’s CPU 1 port. If this is the second submaster, plug the other end into the master Switch’s CPU 2 port, and so on. See Figure 6. (For more information about cascading, refer to Section 3.3 of your ServSwitch manual.)
- Page 12 4. CPU Connections Which cables you use and how you connect them will depend on what type of equipment you’re using: If your CPU’s keyboard and mouse ports are this type (with this connector): IBM PS/2 type (6-pin mini-DIN) IBM PC/AT keyboard (5-pin DIN), RS-232 serial mouse (DB9) IBM RS/6000 (PS/2 type,...
- Page 13 Adapter Cable: • If your video resolution is not higher than 1024 x 768 pixels, and if the CPU is within 20 ft. (6.1 m) of the Switch, you can use the standard (non- coaxial) cable with the product code EHN051.
- Page 14 SERVSWITCH™ QUICK INSTALL GUIDE CPU 7 CPU 8 CPU 5 POWER CPU 3 CPU 4 CPU 1 To kbd port To mouse port To video port Figure 7. PS/2 type CPU connections. CPU 6 CPU 2 MONITOR/KEYBOARD/MOUSE RS-232 EHN051 or EHN282...
- Page 15 HD15 connector, first choose your CPU Adapter Cable: • If your video resolution is not higher than 1024 x 768 pixels, and if the CPU is within 20 ft. (6.1 m) of the Switch, you can use the standard (non- coaxial) cable with the product code EHN048.
- Page 16 CPU 7 POWER CPU 3 Figure 8. PC/AT type CPU connections (standard cable). CPU 7 POWER CPU 3 Figure 9. PC/AT type CPU connections (coaxial cable). SERVSWITCH™ QUICK INSTALL GUIDE CPU 8 CPU 5 CPU 6 CPU 4 CPU 1 CPU 2 MONITOR/KEYBOARD/MOUSE RS-232...
- Page 17 • Plug the cable’s 13W3 POWER Figure 10. RS/6000 type CPU connections. EYBOARD AND OUSE ORTS connector into one of the Switch’s numbered connector with the “MOUSE” label on connector into the CPU’s video port. CPU 7 CPU 8 CPU 5...
- Page 18 POWER Figure 11. SGI type CPU connections. SERVSWITCH™ QUICK INSTALL GUIDE EYBOARD AND OUSE ORTS connector into one of the Switch’s numbered connector with the “MOUSE” label on connector into the CPU’s video port. CPU 7 CPU 8 CPU 5...
- Page 19 4-wire cable and the DB9 female adapter that came with the Switch, as shown in Figure 12. (If you lose the cable, you can replace it with our product code EL04MS. If you lose the adapter, you can replace it with our product code FA043.)
- Page 20 • If you are connecting the Switch to a computer at another site through a modem with a DB25 female EL06MS and the DB25 male adapter FA042, as shown in Figure 14. CPU 7 CPU 8 CPU 5 POWER CPU 3...
- Page 21 SERVSWITCH™ QUICK INSTALL GUIDE 6. The Power Connection Attach the outlet end of the included power cord into the Switch. Attach the plug end of the cord to a wall outlet. See Figure15. POWER Figure 15. The power connection. CPU 7...
- Page 22 NOTES...
- Page 23 © Copyright 2000. Black Box Corporation. All rights reserved. BLACK BOX and the logo are registered trademarks, and ServSwitch is a trademark, of Black Box Corporation. IBM, PC/AT, PS/2, and RS/6000 are registered trademarks of International Business Machines Corporation. Microsoft and IntelliMouse are trademarks or registered trademarks of Microsoft Corporation in the United States and/or other countries.
- Page 24 ® Macintosh multiple users with different access levels? Does your switch have to sit solidly on a worktable and use regular everyday cables? Or does it have to be mounted in an equipment rack and use convenient many-to-one cables? No matter how large or small your setup is, no matter how simple or how complex, we’re confident we...
-
Page 25: Trademarks Used In This Manual
SERVSWITCH™ TRADEMARKS USED IN THIS MANUAL BLACK BOX and the Ultra, Matrix ServSwitch, and ServManager are trademarks, of Black Box Corporation. Apple and Macintosh are registered trademarks of Apple Computer, Inc. ProComm is a registered trademark of DATASTORM TECHNOLOGIES, INC.™... -
Page 26: Fcc/Ic Statements
FCC/IC STATEMENTS FEDERAL COMMUNICATIONS COMMISSION INDUSTRY CANADA RADIO FREQUENCY INTERFERENCE STATEMENTS This equipment generates, uses, and can radiate radio frequency energy and if not installed and used properly, that is, in strict accordance with the manufacturer’s instructions, may cause interference to radio communication. It has been tested and found to comply with the limits for a Class A computing device in accordance with the specifications in Subpart J of Part 15 of FCC rules, which are designed to provide reasonable protection against such interference when the equipment is... -
Page 27: Instrucciones De Seguridad
SERVSWITCH™ NORMAS OFICIALES MEXICANAS (NOM) 1. Todas las instrucciones de seguridad y operación deberán ser leídas antes de que el aparato eléctrico sea operado. 2. Las instrucciones de seguridad y operación deberán ser guardadas para referencia futura. 3. Todas las advertencias en el aparato eléctrico y en sus instrucciones de operación deben ser respetadas. -
Page 28: Nom Statement
12. Precaución debe ser tomada de tal manera que la tierra fisica y la polarización del equipo no sea eliminada. 13. Los cables de la fuente de poder deben ser guiados de tal manera que no sean pisados ni pellizcados por objetos colocados sobre o contra ellos, poniendo particular atención a los contactos y receptáculos donde salen del aparato. - Page 29 SERVSWITCH™ Chapter 1. Specifications ... 10 2. Introduction ... 13 2.1 The Complete Package ... 13 2.2 Operating Features ... 13 2.3 The Front Panel ... 15 2.4 The Rear Panel ... 17 2.5 Cable Requirements ... 19 2.6 Equipment Requirements ... 19 3.
-
Page 30: Table Of Contents
Chapter 4.4 Using the RS-232 Port ... 44 4.4.1 Connecting Equipment to the Port ... 44 4.4.2 Switching Ports Remotely (Optional) ... 45 4.4.3 Upgrading the Firmware (Flash Memory) ... 46 4.4.3.A Upgrading the Firmware with Terminal-Emulation Software ... 46 4.4.3.B Upgrading the Firmware with the DOS COPY Command ... -
Page 31: Chapter Page
6.2.15 ServSwitch Doesn’t Work with Docking Station ... 76 6.2.16 ServSwitch Doesn’t Work with Dongle-Protected Software ... 76 6.2.17 ServSwitch Doesn’t Work with IBM ThinkPad ... 77 6.2.18 Lost Password ... 77 6.3 Calling Black Box ... 77 6.4 Shipping and Packaging ... 77 Contents (continued) Page... - Page 32 Appendix Appendix A: NVRAM Factory Defaults ... 78 A.1 Keyboard-Command Settings ... 78 A.2 On-Screen Configuration Settings ... 79 Appendix B: Cable Product Codes ... 81 Appendix C: Pinout of RS-232 Port ... 83 Appendix D: The LK461 Keyboard ... 84 Appendix E: Rackmounting Your ServSwitch ...
-
Page 33: Specifications
SERVSWITCH™ 1. Specifications Hardware Required — Monitor that supports your computers’ highest video standard (see Section 4.1.1) Compliance — CE, FCC Part 15 Subpart J Class A, IC Class/classe A Standards — With original Serv cabling: VGA (color or monochrome/ With original Serv cabling (minimal) or coaxial cabling With coaxial cabling: XGA (color or monochrome), Interfaces —... - Page 34 (3) Front-mounted pushbuttons: “ON/OFF” (power), “+” (switch to next port), and “–” (switch to previous port); (2) Front-mounted pushbuttons: “ ” (switch to next port) and “ ” (switch to previous port); (1) Rear-mounted rocker switch for power (8) POWER;...
- Page 35 SERVSWITCH™ SW721A-R4: Power — All other models; Maximum Altitude— 10,000 ft. (3048 m) Temperature 32 to 131˚F (0 to 55˚C) Tolerance— Humidity Tolerance— 5 to 80% noncondensing Enclosure — Steel Size — SW721A-R4: SW722A-R4, KV3108SA-R4: SW723A-R4, SW724A-R4, SW725A-R4: Weight — SW721A-R4: 2 lb.
- Page 36 Thank you for choosing a ServSwitch™. Designed with your needs in mind, your new Switch will simplify your job by helping you organize your multiple-computer application. With your Switch, you can use one keyboard, monitor, and mouse to access a number of IBM computers and current SGI equipment overhead and end keyboard and monitor clutter.
- Page 37 RS-232 ports. • Rackmount kits are available. • Full-size 8- and 12-port units can be expanded up to 16 ports by installing 4-Port Expansion Boards. Please contact Black Box Tech Support if you ever want us to do this for you.
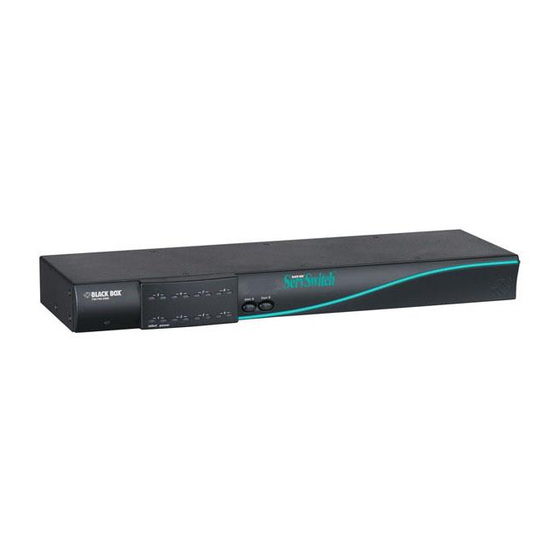
- Page 38 2.3 The Front Panel The front panels of the ServSwitch feature two or three pushbutton switches and several LED indicators. To familiarize yourself with these controls and indicators, refer to Figures 2-1, 2-2, and 2-3 below and the descriptions that follow on the next page.
- Page 39 2-port mini, 4-port slim, and the 8- and 12-port full- size models are left blank, but are protected by material mounted inside the chassis. Previous Port Button: Press this button to manually switch the – or shared monitor, keyboard, and mouse from the currently selected computer to the previous one in sequence.
- Page 40 CPUs’ ports and the monitor, keyboard, and mouse, and carry them between the CPUs’ ports and the Switch instead. You could also connect “submaster” Serv type switches to these ports using “ServSwitch-to- ServSwitch Expansion Cables.”...
- Page 41 You would also connect a computer to this port to upgrade the Switch’s firmware. Refer to Section 4.4. Flipping this switch turns the ServSwitch ON and OFF when the power cord is plugged into the unit and into a working outlet.
- Page 42 See Appendix B and the first Caution notice on page 22. To share an IBM 9515, 9517, or 9518 monitor on a ServSwitch, you will need special cabling. Call Black Box for technical support; we can give you a quote on these types of cable.
-
Page 43: Installation
SERVSWITCH™ 3.1 Quick Setup Guide Figure 3-1, below, shows a basic example of connecting a CPU, a submaster, a keyboard, a monitor, and a mouse to the ServSwitch unit. Connectors will vary depending on the types of equipment you are installing. Figure 3-1. - Page 44 3.2.1 R ACKMOUNTING If you want to mount the Switch in a rack, you will need a ServSwitch Rackmounting Kit. For the 2-port mini model (SW721A-R4), our product code for a 19", 23", or 24" Kit is RMK19M, RMK23M, or RMK24M respectively. For the slimline models, our product code for a 19", 23", or 24"...
- Page 45 To go even farther, you might want to use Station Extenders or CAT5 KVM Extenders (see Appendix B). 1. After you verify that the Switch is turned off and unplugged, plug the DB25 male connector of the first CPU’s CPU Adapter Cable into the lowest- numbered CPU port on the Switch’s rear panel that isn’t going to be...
- Page 46 MONITOR/KEYBOARD/MOUSE A ports, and the CPU ports of the other master to the submasters’ MONITOR/KEYBOARD/ MOUSE B ports. Before installing an advanced configuration, please call Black Box and discuss your application with a technician.
- Page 47 2. To power up the ServSwitch, push the ON/OFF button on its front panel (if it’s a 2-port unit) or move the ON/OFF switch on its rear panel to the “|” (ON) position (if it’s another type of unit). The ServSwitch should boot normally, but if the unit’s firmware has become corrupted—probably as the...
- Page 48 WITCHING FROM THE Your ServSwitch is now ready for operation using its default settings. To take full advantage of the Switch’s features, refer to Chapter 4, which gives detailed information about each of the ServSwitch commands, describing each command’s function and keystroke sequence. For your convenience, this info is summarized in Section 4.2.
- Page 49 SERVSWITCH™ 3.3 Cascading in ServSwitch Systems In a normal cascaded ServSwitch system, the shared monitor(s), keyboard(s), and mouse (mice) are directly attached to one or more “master” Serv-Switches, while all the CPUs are indirectly attached through “submasters” (subsidiary ServSwitches, ServSwitch Ultras, ServManagers, etc.) that provide port expansion but may or may not perform any control functions of their own.
- Page 50 say that CPUs 1 through 8 are “shared,” we mean that they can be accessed by either master at different times, not by both masters simultaneously.) Adding a third 4-port submaster unit would give you a total of 17 ports, and so on. (To reach all of the CPUs in cascaded systems like this, you must set Maximum computers, Width, and Units properly on the master unit;...
- Page 51 SERVSWITCH™ CPU 7 CPU 6 CPU 5 CPU 4 CPU 3 CPU 2 CPU 1 SUBMASTER UNIT CPU 16 CPU 15 CPU 14 CPU 13 SUBMASTER 4 CPU 12 CPU 11 CPU 10 CPU 19 SUBMASTER 3 CPU 8 CPU 7 CPU 6 CPU 5 SUBMASTER 2...
- Page 52 • You must not cascade submasters to more than one “layer.” That is, you may connect submasters to the CPU ports of one or (with Matrix ServSwitch submasters) two master ServSwitches, but do not connect any submasters to submasters’ CPU ports. To illustrate this restriction, let’s say you’ve installed a four-port submaster on a four-port ServSwitch master and you have a four-port submaster yet to install.
- Page 53 ServSwitch, and then set Width to 8 (and Units to 2 and Max Ports to 20—see Sections 5.2.3 and 5.2.4), you will be unable to scan or switch to the upper 4 ports on the 12-port submaster—the Switch has no way of knowing they are even there.
- Page 54 receive the file at 9600 baud (9600 bps). (In this case, you must download the file at 9600 bps.) 6. Turn ON the computer identified as CPU 1. Wait until the boot process is complete, then turn ON CPU 2, wait until it boots, turn ON CPU 3, etc., until all of your computers are powered up.
-
Page 55: Operation: Hardware And Keyboard Commands
ON. Unless it’s absolutely necessary, don’t disconnect and reconnect a mouse or keyboard from a ServSwitch while the Switch is ON; if you have to do this, issue the Reset command ([Ctrl] R—see Section 4.3.6) after you reconnect the mouse or keyboard. - Page 56 DOS commands, that change the settings of the mouse port after the driver has been loaded. • When you first switch between CPUs, you might notice wide variations in mouse sensitivity (how far or fast the mouse moves) from CPU to CPU. This is normal.
- Page 57 SERVSWITCH™ 4.1.3 M ONITOR At resolutions up to 800 x 600, the video quality for most ServSwitch applications will be excellent. At higher resolutions, however, you might see a little fuzziness on your monitor no matter how close to ideal your ServSwitch system is.
- Page 58 CHAPTER 4: Operation: Hardware and Keyboard Commands The ServSwitches will support SVGA (Super VGA) video, but with original Serv cables the video quality will decrease markedly at higher resolutions and distances. Table 4-2, below, illustrates this. The distances in the table are total cable lengths measured from the CPU to the monitor.
- Page 59 CPUs before installing this cable in lengths greater than 20 ft. (6.1 m). For CPU-to-monitor distances over 200 feet (61 m), Station Extenders or CAT5 KVM Extenders might be required. Call Black Box for technical support to discuss this option.
- Page 60 ServSwitch. To enter any command at the shared keyboard, first press and release the left Control key, represented by “[Ctrl].” (This cues the Switch to look for commands from that keyboard.) Then enter the command followed by any arguments you wish to specify (the port number, for example).
- Page 61 SERVSWITCH™ Table 4-4. The ServSwitch’s Keyboard Commands (continued) Command Keystroke Sequence Scan OFF [Ctrl] X Keep Setting [Ctrl] K Set Screen [Ctrl] Vxxx [Enter] (xxx = delay in seconds) Saver’s Delay Time Reset [Ctrl] R Send Null Byte [Ctrl] N Identify ROM [Ctrl] I Display Label...
- Page 62 1) or by pressing [Enter] after you press the single numeral key. If you press the key of only one digit, and do not follow it with [Enter], the Switch will wait two seconds for you to press [Enter] or another numeral key; then, if no key is pressed, it will switch immediately to the single-digit port.
- Page 63 SERVSWITCH™ 4.3.3 S To start scanning (switching from CPU to CPU in a continuous rotation) from the keyboard, press and release the left Control key ([Ctrl]), then press [S]. The ServSwitch will begin scanning sequentially from its currently selected port through the higher-numbered ports, then begin again at CPU Port 1.
- Page 64 CHAPTER 4: Operation: Hardware and Keyboard Commands 4.3.6 R ESET This command, along with the commands described in the next two sections, can come in handy when certain problems arise. It will reboot your keyboard and mouse without your having to power down the station or the system, and will also re-enable PS/2 mouse communication if the selected CPU has previously disabled it.
- Page 65 ServSwitch that require the assistance of technical-support personnel. One of the things technicians might want to know when they attempt to diagnose and correct your problem is the revision level of your Switch’s ROM. This command causes the ServSwitch to send the four-character “UPxx” ROM level to the currently selected CPU as ASCII keyboard data;...
- Page 66 (see Section 5.4.3). If this label is not on screen, you can use this command to cause the Switch to display the label for the length of time you have configured for the label’s “fadeout interval” (see Section 5.4.3.D), or, if fadeout is disabled, for five seconds.
-
Page 67: Using The Rs-232 Port
Switch. You’ll need a straight-through-pinned, flat-satin or twisted-pair serial cable with RJ-12 (“6-pin RJ-11”) connectors plus the appropriate adapter: for... -
Page 68: Switching Ports Remotely (Optional)
4.4.2 S WITCHING ORTS To switch ports on a ServSwitch from a remote computer or terminal attached to the Switch’s RS-232 port, take these steps: 1. Set your computer for serial communication at 9600 bps, no parity, 8 data bits, and 1 stop bit. -
Page 69: Upgrading The Firmware (Flash Memory)
ServSwitch will not let you load firmware intended for other Serv models (UxxP.HEX, UxxS.HEX, etc.). There are two ways to load the firmware into the Switch, as described in the following two subsections. - Page 70 5, but the firmware will remain unchanged. If the trouble recurs and you can’t pinpoint it, call Black Box for technical support. 5. If the file transfer is successful, press the space bar on the PC’s keyboard.
-
Page 71: B Upgrading The Firmware With The Dos Copy Command
It should then send the message: Hit enter to continue (If you get an error message at any time during this phase, call Black Box for technical support.) 7. Press the Enter (or Return) key again. The Switch should return to normal operation with port 1 selected (LED 1 lit). - Page 72 Once this phase is successfully completed, LED 3 will light. If, however, an error occurs, LED 3 will remain dark, and you’ll have to go back to step 3. If the second attempt doesn’t work, call Black Box for technical support.
-
Page 73: Operation: On-Screen Display
1. Configure the ServSwitch through a series of configuration menus (triggered with the [Ctrl] [F12] command, where [Ctrl] is the left Control key). 2. Switch to different computers from a window which shows a list of computer names (triggered with the [Ctrl] [ESC] command, where [Ctrl] is the left Control key). -
Page 74: Navigating The Configuration
(If no video is present, then the background is black.) If the display is not synchronized, then you should switch to a computer with active video and configure the resolution setting from the “Configure overlay” page. -
Page 75: The "Configure System" Page
You can choose between either “PC 101/102” (regular IBM PC compatible) or “PC 104/105” (IBM PC Windows compatible) keyboard. (If you power up a Switch when no shared keyboard is attached to it, this setting will default to “PC 104/105.”) -
Page 76: Configure System: Mouse
ONFIGURE YSTEM The ServSwitch will also autodetect the mouse type unless you boot the Switch without a mouse attached, in which it will default to the “PS/2” setting. To change the mouse type, press [Enter] while “Mouse” is highlighted. An input-selection box will pop up as shown in Figure 5-3 below. - Page 77 Certain commonly available serial mice made in Asia have the usual three buttons and a switch on the bottom. This switch is usually labeled “MS/PC”; when it is in the “MS” position, the mouse is compatible with the “serial 2-button” setting, and when it is in the “PC”...
-
Page 78: Configure System: Maximum Computers
Actually, the Switch will usually autodetect this value, but if for whatever reason you have no CPUs attached the first time you boot the Switch, it will use its factory- default values instead (“4” for 2-port units, the number of CPU ports on the box for other units). -
Page 79: Configure System: Expansion Units
SERVSWITCH™ 5.2.4 C ONFIGURE YSTEM This setting corresponds to the number of “submaster” (expansion) Serv units that are connected to the main master ServSwitch. It helps to determine which CPU number is associated with which physical connector. If you aren’t cascading, this number should be set to zero. -
Page 80: Configure System: Scan Mode
5.2.6 C ONFIGURE YSTEM This item determines the time, in seconds, that the ServSwitch will pause at each of the computers when scanning. The factory-default setting is 5 seconds. To change the scan time, press [Enter] while “Scan time” is highlighted. An “Input new value” box appears. -
Page 81: Configure System: Typematic Delay
SERVSWITCH™ Rate Value Actual Rate in Keystrokes per 5.2.10 C ONFIGURE YSTEM This item determines how soon keystrokes will begin to repeat after the operator begins holding down a key on the shared keyboard. There are four possible settings: slow (1 second), medium (750 msec.), fast (500 msec.—the factory default), and fastest (250 msec.). -
Page 82: The "Configure Computers" Page
5.3 The “Configure Computers” Page Use this page to set the name, keyboard type, and mouse type for each of the ServSwitch’s CPU ports. Access it from the main menu by hitting [Enter] when “Configure computers” is highlighted. The page is shown below in Figure 5-5. (The arrow in the column after the computer number points to the currently selected computer.) Configure computers... -
Page 83: Configure Computers: Computer Name
SERVSWITCH™ 5.3.1 C ONFIGURE OMPUTERS Each computer can be given a name consisting of up to 16 characters. These names appear as labels in the “Computer select” window (see Section 5.6). To change a computer name, press [Enter] while the corresponding “Computer name”... -
Page 84: Configure Computers: Keyboard
5.3.2 C ONFIGURE OMPUTERS Use this field to tell the ServSwitch what type of keyboard mode (PC mode 1, 2, or 3) a given CPU uses. To change a CPU port’s keyboard mode, press [Enter] while the corresponding “Keyboard” field is highlighted. A keyboard-mode input box appears, as shown in Figure 5-7 below. -
Page 85: Configure Computers: Mouse
SERVSWITCH™ 5.3.3 C ONFIGURE OMPUTERS Use this field to tell the ServSwitch what type of mouse a given CPU uses. The factory default is “PS/2” (non-wheel). To change a CPU port’s mouse type, press [Enter] while the corresponding “Mouse” field is highlighted. A mouse-type input box appears, as shown in Figure 5-8 below. -
Page 86: The "Configure Overlay" Page
ServSwitch-generated video, the type and timing of the Switch-generated screen saver, the appearance of the “Computer select” window, and the appearance of the Switch-generated computer label (see Section 5.4.3.A). Access this page, shown in Figure 5-9 below, from the main menu by hitting [Enter] when “Configure overlay”... -
Page 87: B Resolution
SERVSWITCH™ 5.4.1.B Resolution This item gives you maximum monitor-type flexibility by determining the resolution and refresh rate of the video signal that the ServSwitch sends to the shared monitor while the unit isn’t receiving any video from the CPU. The possible choices—all using 640 x 480 resolution—are “PC1”... -
Page 88: Configure Overlay: Computer Select Window
(In fact, the “clear” setting makes the background or text completely transparent; don’t set both to clear, or the window will become totally invisible, and you will probably have to reset the Switch to its factory defaults to get the window to reappear.) To change either of these colors, press [Enter] while “background color”... -
Page 89: Configure Overlay: Computer Label
5.4.3.A Background Color and Text Color These items determine the background and text colors of the computer label. The ServSwitch displays this label on the shared monitor’s screen as you switch between CPUs to identify individual CPUs. The “solid” colors available are black, red, green, yellow, blue, magenta, cyan, and white;... -
Page 90: C Show Computer Number
Display Label ([Ctrl] [D]) keyboard command (see Section 4.3.9). The Switch will display the label for five seconds if “Fade out” is set to 0, for the corresponding number of seconds if “Fade out” is set to 1 to 254, or always if “Fade out”... - Page 91 SERVSWITCH™ 5.5 The “Configure Security” Page Use this page to set security options for the ServSwitch. Access this page, shown in Figure 5-10 below, from the main menu by hitting [Enter] when “Configure security” is highlighted. Configure security Security Configuration password Configuration password Access password Access time...
- Page 92 Once you have successfully set these passwords, you should keep a record of them in a secure location; if nobody can remember a given password, you will have to call Black Box Technical Support for help to recover your system. To remove either of these passwords, delete the password and press Enter with no text in the “New password”...
- Page 93 [Enter] to immediately switch to that computer (its label will be shown). If you have more than 16 computers in your ServSwitch system, use the [PageUp] and [PageDown] keys to access the other computers, at up to 16 computers per window.
-
Page 94: Troubleshooting
Now reconfigure the box to your desired settings. If you’re still having difficulty, refer to Section 6.2. If it doesn’t help you to solve your problem, call Black Box for technical support. - Page 95 CPU that’s having the problem. If the CPU boots, the ServSwitch or submaster might be defective; call Black Box. H. If the CPU still doesn’t boot, the CPU’s keyboard or mouse port (or other components) might be defective.
- Page 96 Disconnect the keyboard and plug it back in. C. The keyboard might simply have gotten a little off kilter. If the Switch can see the keyboard at all, try reinitializing the keyboard with the Reset command, [Ctrl] R (see Section 4.3.6).
-
Page 97: Your Mouse Driver Doesn ' T Load
Make sure that all cables are properly seated and that the Switch and submaster are ON, then reboot the CPU. D. Your mouse driver might be old or incompatible with your mouse. Try the latest version of the Microsoft mouse driver. - Page 98 Station Extenders (our product codes AC253A etc.) or CAT5 KVM Extenders (our product codes ACU9001A etc.); call Black Box for technical support. See Section 4.1.3 and Appendix B. 6.2.11 Y IDEO A.
- Page 99 SERVSWITCH™ E. The CPU is sending video with sync on green, which the ServSwitch does not currently support. Call Black Box for technical support. F. If the video problem is not centered on the monitor, check the video strands of your cables.
- Page 100 ’ If you’ve lost your access password or configuration password and you have no record of what they are set to, you will have to call Black Box Technical Support. They will help you to recover your system. 6.3 Calling Black Box If you determine that your ServSwitch is malfunctioning, do not attempt to alter or repair the unit.
-
Page 101: Appendix A: Nvram Factory Defaults
ServSwitch is shipped from the factory. It also shows what commands or actions can change these settings for the Switch’s current operating period, as well as what commands or actions (if any) can save changed settings to NVRAM, so that they become the new defaults. - Page 102 A.2 On-Screen Configuration Settings The table below and on the next page shows, for the ServSwitch’s saveable on- screen display options, the default values stored in nonvolatile memory (NVRAM) when the ServSwitch is shipped from the factory. Option System Keyboard ...PC 104/105 Mouse ...PS/2 Maximum computers ...2-port models: 4;...
- Page 103 SERVSWITCH™ Option Computer label Background color...Transparent blue Text color...White Position...X=3, Y=90 Show computer number ...Yes Fade out ...5 seconds Font ...16 x24 modern Security Configuration password ...None Access password ...None Access time...999 seconds (16 hours, 39 minutes) Default setting...
-
Page 104: Appendix B: Cable Product Codes
CPUs as much as 200 ft. (61 m) away. If your monitor/keyboard/mouse-sharing system has cabling requirements that can’t be met by what you see here, call Black Box for a possible quote on custom cables or adapters. - Page 105 SERVSWITCH™ Video Type Keyboard Type (Connector on Cable) (Connector on Cable) VGA (HD15 male) IBM PC/AT (5-pin DIN male) VGA (HD15 male) IBM PS/2 (6-pin mini-DIN male) Video Type Keyboard Types (Connector on Cable) VGA (HD15 male) IBM PC/AT and PS/2 RS/6000 (13W3 male) IBM PS/2 (6-pin mini-DIN male) SGI (13W3 male)
-
Page 106: Appendix C: Pinout Of Rs-232 Port
Appendix C: Pinout of RS-232 Port The table below shows the pinout of the ServSwitch’s RJ-12 (“6-wire RJ-11”) female RS-232 port. Signal Name Data Set Ready Data Terminal Ready Transmit Data Signal Ground Receive Data Request to Send APPENDIX C: Pinout of RS-232 Port Abbrev. -
Page 107: Appendix D: The Lk461 Keyboard
SERVSWITCH™ Appendix D: The LK461 Keyboard Some of the computers manufactured by Compaq Corporation come with a special keyboard called the DEC LK461. The ServSwitch supports this keyboard by passing through unaltered the scan codes of certain proprietary keys (such as [Help] and [Do]) and remapping others (such as [PF1] through [PF4]). -
Page 108: Appendix E: Installing The 4-Port Expansion Board
Figure G-1 below: 1. Match up the two holes in the “Switch end” of each Kit ear with the two empty screwholes on the side of the Switch, then fasten the ear to the Switch with two of the screws included with the Kit. - Page 109 NOTES...
- Page 110 NOTES...
- Page 111 NOTES...
Need help?
Do you have a question about the SERVSWITCH KV3108SA-R4 and is the answer not in the manual?
Questions and answers