Table of Contents
Advertisement
Quick Links
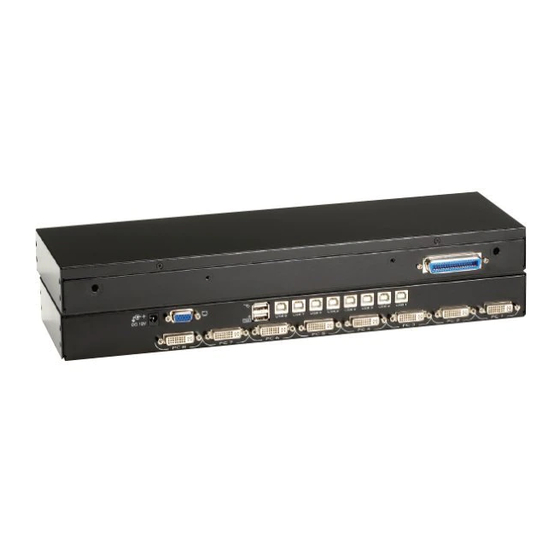
8-Port DVI USB Module
Control up to eight DVI and USB server computers
from a single KVT517A-WIDE.
Order toll-free in the U.S.: Call 877-877-BBOX (outside U.S. call 724-746-5500) •
Customer
FREE technical support 24 hours a day, 7 days a week: Call 724-746-5500 or fax
Support
724-746-0746 • Mailing address: Black Box Corporation, 1000 Park Drive, Lawrence,
Information
PA 15055-1018 • Web site: www.blackbox.com • E-mail: info@blackbox.com
BLACK BOX
March 2010
KVT8DVIU
®
Advertisement
Table of Contents

Related Manuals for Black Box KVT8DVIU


Summary of Contents for Black Box KVT8DVIU
-
Page 1: Black Box
Order toll-free in the U.S.: Call 877-877-BBOX (outside U.S. call 724-746-5500) • Customer FREE technical support 24 hours a day, 7 days a week: Call 724-746-5500 or fax Support 724-746-0746 • Mailing address: Black Box Corporation, 1000 Park Drive, Lawrence, Information PA 15055-1018 • Web site: www.blackbox.com • E-mail: info@blackbox.com... - Page 2 8-Port DVI USB Module FEDERAL COMMUNICATIONS COMMISSION AND INDUSTRY CANADA RADIO FREQUENCY INTERFERENCE STATEMENTS This equipment generates, uses, and can radiate radio-frequency energy, and if not installed and used properly, that is, in strict accordance with the manufacturer’s instructions, may cause inter ference to radio communication. It has been tested and found to comply with the limits for a Class A computing device in accordance with the specifications in Subpart J of Part 15 of FCC rules, which are designed to provide reasonable protection against such interference...
- Page 3 NOM Statement Normas Oficiales Mexicanas (NOM) Electrical Safety Statement INSTRUCCIONES DE SEGURIDAD 1. Todas las instrucciones de seguridad y operación deberán ser leídas antes de que el aparato eléctrico sea operado. 2. Las instrucciones de seguridad y operación deberán ser guardadas para referencia futura.
- Page 4 8-Port DVI USB Module 13. Los cables de la fuente de poder deben ser guiados de tal manera que no sean pisados ni pellizcados por objetos colocados sobre o contra ellos, poniendo particular atención a los contactos y receptáculos donde salen del aparato.
- Page 5 Trademarks Used in This Manual Trademarks Used in This Manual Black Box and the Double Diamond logo are registered trademarks, and ServSwitch and ServTray are trademarks of BB Technologies, Inc. Centronics is a registered trademark of Centronics Corporation. PS/2 is a registered trademark of International Business Machines Corporation.
-
Page 6: Table Of Contents
4.4 Switching Computers Using Monitor Controls (KVT517A-WIDE) ..19 4.5 Control Selection ................20 Appendix. Troubleshooting ................22 A.1 Problems/Possible Causes/Solutions ..........22 A.2 Calling Black Box ................24 A.3 Shipping and Packaging ................25 Page 6 724-746-5500 | blackbox.com... -
Page 7: Specifications
Windows Vista , Linux , and Mac OSX ™ ® Connectors: All: (1) barrel connector for power; KVT8DVIU: Computer end: (8) DVI-I; (8) USB Type B; Console end: (1) VGA; (1) USB Type A 2-layer; ServTray: (1) Centronics 36-pin female ®... -
Page 8: Overview
8-Port DVI USB Module 2. Overview 2.1 Introduction The 8-Port DVI USB Module allows you to control up to eight servers or computers with DVI monitors and USB keyboards and mice from a single KVT517A-WIDE. The module is not designed to be used by itself. It functions in the same way as a ServSwitch does when used with a ServTray ™... -
Page 9: Rear Panel
Link to computer’s DVI monitor port 2.3 What’s Included The package should contain the following items. If anything is missing or damaged, please contact Black Box. • 8-Port DVI USB Module • Rackmount brackets (not required when mounting within tray) •... -
Page 10: Cables That You'll Need To Supply
8-Port DVI USB Module 2.4 Cables That You’ll Need to Supply ServSwitch 2-in-1 Cable (EHN900024U-XXXX): These cables connect to PCs that have DVI monitor and USB keyboard and mouse connectors. The cables are avail- able in 6-, 10-, and 15-foot (1.8-, 3-, and 4.5-m) versions (EHN900024U-0006, EHN900024U-0010, and EHN900024U-0015). -
Page 11: Installation
Chapter 3: Installation 3. Installation 3.1 Module/ServTray Placement The 8-Port DVI USB Module units are 1U high and are designed to fit in a KVT517A-WIDE ServTray. When deciding where to put the module (attached to a ServTray), consider the following questions: •... - Page 12 8-Port DVI USB Module USB keyboard/ mouse connection Computer DVI monitor connection Figure 3-1. 2-in-1 USB cable connections. 3. Repeat Steps 1 and 2 for all computers that you want to connect to the module. 4. Power on all computers that are attached to the module. Page 12 724-746-5500 | blackbox.com...
-
Page 13: Operation
Chapter 4: Operation 4. Operation 4.1 Powering Up the System Once all cables have been connected and all computers have been powered on, the module emulates mouse and keyboard signals on each port, allowing your computer to boot normally. The module is now ready for use. You can configure the module in two ways: by activating the On-Screen Display (OSD) window or by typing hotkey commands. - Page 14 8-Port DVI USB Module Figure 4-2. OSD slave screen. In Figures 4-1 and 4-2, the color of a device name is green if it has power and is ready for operation, or the color is white if it has no power. The OSD menu updates the color when the device’s power is activated.
- Page 15 Chapter 4: Operation The F2 key allows you to switch a computer’s eyemark on or off. First, use the up- arrow and down-arrow keys to highlight a computer, then press F2 to switch its eyemark on or off. If Scan Type (described on the following page) is Ready PC + eyemark, only the powered-on and eyemark-selected computers will be displayed sequentially in Scan mode.
- Page 16 8-Port DVI USB Module Manual Scan Scan through powered-on computers one by one using the keyboard control. You can press F4, then select More\Scan Type to determine if scanned computers must also be eyemark selected. Press the up-arrow key to select the previous com- puter and the down-arrow key to select the next computer.
-
Page 17: Selecting Computers Using Keyboard Hotkey Commands
Chapter 4: Operation Position The actual display position of the selected computer and/or OSD shifts because of different video resolution; the higher the resolution, the higher the display posi- tion. Use the F4 key (More/Position) to select the position of the OSD menu on the screen. -
Page 18: Switching Computers Using Monitor Controls (Kvt517A-Wide)
8-Port DVI USB Module 4.4 Switching Computers Using Monitor Controls (KVT517A-WIDE) When using the KVM module with a ServView V Tray (KVT517A-WIDE), you can switch computers via monitor controls. These controls are shown in Figure 4-3 and described in Table 4-2. Figure 4-3. - Page 19 Chapter 4: Operation Table 4-3. LCD monitor function buttons. Button or Function Description LCD power button Press this button to turn on power. When power is on, the LCD lights. Auto key Press this dual-function button to automatically adjust the best set- ting for the current display signal.
-
Page 20: Control Selection
8-Port DVI USB Module 4.5 Control Selection The KVM module supports all current wireless keyboards and mice, extends your keyboard and mouse control without obstructive cable, is free to move where you want, and controls and manages all of your servers in a cabinet within the range of a couple of meters. - Page 21 Chapter 4: Operation Plug the keyboard/mouse into the USB Type A connector on the side edge of the drawer as shown in Figure 4-5. Plug USB (KB/MS) here Figure 4-5. Plugging in the keyboard/mouse. Page 21 724-746-5500 | blackbox.com...
-
Page 22: Appendix. Troubleshooting
8-Port DVI USB Module Appendix. Troubleshooting A.1 Problems/Possible Causes/Solutions Problem: The mouse does not work. Possible Cause #1: Too many mouse drivers are installed in the computer. Solution #1: Make sure there is only one mouse driver installed in each computer. Possible Cause #2: The wrong mouse driver is installed. - Page 23 Appendix: Troubleshooting Problem: Alphabet symbols on the computer’s monitor are blue or have shad- ows. Possible Cause: Resolution settings are incorrect. Solution: Under Windows Control Panel, set the computer’s video output to match the highest resolution for the monitor with a large font for best performance.
-
Page 24: Calling Black Box
Possible Cause: The computer was in the shifted state when last switched. Solution: Press both Shift keys on the keyboard. Problem: I forgot the password. Solution: Contact Black Box Technical Support at 724-746-5500 or info@blackbox.com. Problem: The keyboard-mouse-monitor does not work. -
Page 25: Shipping And Packaging
• Package it carefully. We recommend that you use the original container. • If you are shipping the 8-Port DVI USB Module for repair, make sure you include everything that came in the original package. Before you ship, contact Black Box to get a Return Authorization (RA) number. - Page 26 724-746-5500 or blackbox.com. About Black Box Black Box Network Services is your source for more than 118,000 networking and infrastructure products. You’ll find everything from cabinets and racks and power and surge protection products to media converters and Ethernet switches all supported by free, live 24/7 Tech support available in 20 seconds or less.
Need help?
Do you have a question about the KVT8DVIU and is the answer not in the manual?
Questions and answers