
Subscribe to Our Youtube Channel
Related Manuals for Kval DL-2


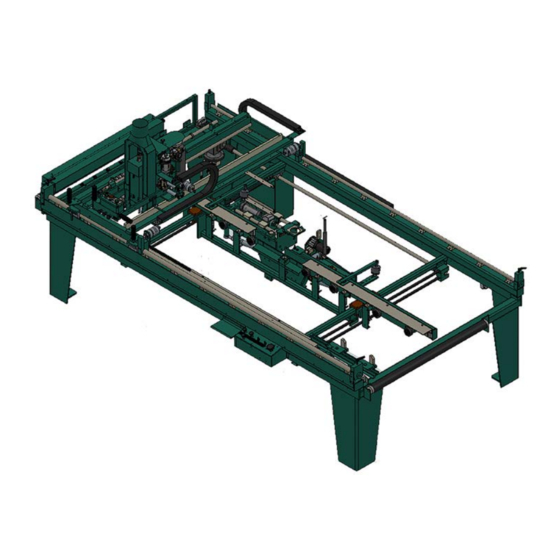
Summary of Contents for Kval DL-2
- Page 1 Innovation, Quality & Honesty DL-2 Door Light Cut-Out Machine Operation and Service Manual Published: 7/21/16...
- Page 2 Proprietary Notice This Manual is confidential and contains proprietary information and intellectual property of KVAL Inc., and is to be used solely by Customer as an operating manual for KVAL Inc. machines. Neither this Manual nor any of the information contained herein may be reproduced or disclosed under any circumstances without the express written permission of KVAL Inc.
- Page 3 KVAL DL-2 Operation/Service Manual Your Feedback is Welcome: To help us design products that make your job easier and your business more successful, we'd like to gain your perspective about your user experience with our product - that is, the manual, the machinery, the software, etc.
- Page 4 KVAL DL-2 Operation/Service Manual...
-
Page 5: Table Of Contents
Standard ....................2-2 Option D: Edge Prep................2-2 Option G: About Air Nozzles..............2-3 About the Electrical Panels............. 2-4 Description of the Six Light Panel ........... 2-5 Quick Start Description ............2-6 Powering Up and Down the DL-2 ........... 2-7 KVAL DL-2 Operation/Service Manual... - Page 6 Pneumatic Table Controls..............2-10 Pneumatic Table with Edge Prep Controls (Option) ......2-10 Edge Prep Controls (Option) ..............2-12 Motor Controls ..................2-13 Head Controls..................2-13 DL-2 Setting Up for a Cut ............2-15 Door Stop....................2-15 Face Bore Templates................2-15 Edge Detailing Machine..............2-15 Cutter Head Stops ................2-16 Cutter Head ..................2-16...
- Page 7 Adjusting Cylinder Extend Speed ............4-3 Adjusting Cylinder Retraction Speed ............4-3 Typical Contactor Control ............4-4 About Contactor Troubleshooting ............4-5 Troubleshooting Electrical Problems ........4-6 If the Power Stops During Normal Operation........4-6 Troubleshooting with the Status Light Panel ......4-8 KVAL DL-2 Operation/Service Manual...
- Page 8 DL-2 Door Light Machine...
-
Page 9: Introduction To The
Chapter 1 at a Glance CHAPTER 1 Introduction to the DL-2 This chapter provides an overview of the KVAL DL-2 machine and important safety information to follow when operating the machine. Chapter 1 at a Glance Section Name Summary Page This section provides an overview of the DL-2. -
Page 10: Overview Of The Dl-2
The standard pass line height of the DL-2 is 33-1/2”. If the DL-2 is to be used in a line with a Handler Door Feeder or any Kval assembly machine option P may added specified to raise the feed height to 38-1/2"... -
Page 11: Options Available
Also includes all air pipe, pipe fittings, clamps, flexible hose, and bracket bolted to the DL-2 frame to support the dust collection piping. 13 foot ceiling height required for dust collection piping. Customer is responsible suspending the overhead dust collection pipe to the build- ing. -
Page 12: About This Manual
High-Frequency Route 11 HP High-Frequency 3-phase motor replaces belt driven spindle. Option Tooling and Lubricant Package Please review with your KVAL consultant to determine your needs. Option Spare Parts Package Please review with your KVAL consultant to determine your needs. -
Page 13: Safety First
See “Safety Sign-Off Sheet” on page 1-17. Safety Terminology of Labels In addition to the nameplate, KVAL machines may have other warning labels or decals that pro- vide safety information to operators. Safety labels should be clearly visible to the operator and must be replaced if missing, damaged, or illegible. - Page 14 Before performing any mainte- nance or repairs on this machine turn off the main air disconnect. Lockout and tagout this connection. See “Lockout Tagout Procedure” on page 1-10. KVAL DL-2 Series Operation/Service Manual...
- Page 15 This should be done in accordance with applicable state and/or federal code requirements. Laser Warnings On some machines, laser indicators are used to set boundaries. Follow the manufacturers safety precautions. KVAL DL-2 Series Operation/Service Manual...
- Page 16 Safety First! Compliance with Codes and Regulations KVAL advises that you request an on-site state safety review of your installation of this machine. This is to ensure conformance to any additional specific safety and health regula- tions which apply in your geographic area.
-
Page 17: Lockout-Tagout Guidelines
O..OFF! Shut off all power sources and isolating devices P..Place lock and tag E..ENERGY: Release stored energy to a zero-energy state R ..Recheck controls and test to ensure they are in the “OFF” state KVAL DL-2 Series Operation/Service Manual... -
Page 18: Lockout Tagout Procedure
Lock and Tag out Insert Lock into hole. OFF position Note: When multiple people are working on the machine, each person needs to have a lock on the handle in the extra holes provided. KVAL DL-2 Series Operation/Service Manual 1-10... -
Page 19: Lockout Tagout Air Supply
The lock and tag can now be removed (only by the person(s) who placed them), and the machine can be re-energized. The tags must be destroyed and the locks and keys returned to the lockout center. KVAL DL-2 Series Operation/Service Manual 1-11... -
Page 20: Zero-Energy To Start-Up
Replace Guards Replace all equipment guards. If part of equipment cannot be properly adjusted after start-up with guard on, contact the KVAL Service team. See “Getting Help from KVAL” on page 1-14. Check Controls Confirm that all switches are in the “OFF”... - Page 21 Be sure to follow the P-R-O- P-E-R lockout/tagout procedures, and that those around you do also. Close the Cage Gate Verify all cage gates are securely closed. Ensure all safety protocols are in effect. KVAL DL-2 Series Operation/Service Manual 1-13...
-
Page 22: Getting Help From Kval
Ask about this procedure when calling are service team Product Return Procedure If you’ve contacted Kval for help and it is determined that a return is necessary, use the procedure below to return the machine or part. - Page 23 • With what equipment is the unit interfaced? • What was the application? • What was the system environment (temperature, spacing, contaminants, etc.)? Call Kval customer support for a Return Material Authorization (RMA). When you call: • Have the packing slip or invoice numbers available.
- Page 24 Getting Help from KVAL Page Intentionally Left Blank KVAL DL-2 Series Operation/Service Manual 1-16...
-
Page 25: Safety Sign-Off Sheet
Note: It is recommended you make a copy of this sheet for new operators. If a copy is needed, you may download a PDF at the KVAL website (http://www.kvalinc.com). You may also contact our Service Department at (800) 553-5825 or email at service@kvalinc.com. - Page 26 Safety Sign-Off Sheet KVAL DL-2 Series Operation/Service Manual 1-18...
-
Page 27: Operation Of The
CHAPTER 2 Operation of the DL-2 This chapter describes components, assemblies, and the user interface of the KVAL DL-2 System. The content is geared to help operators understand the basic operation of the DL-2 Chapter 2 at a Glance Section Name... -
Page 28: Operator's Tour
Operator’s Tour Operator’s Tour This section contains a general overview of the assemblies and options on the DL-2. Standard Back Side Head Motor Cutting Head Controls Cutting Controls Stop Head Back Side Cutting Head Stop Front Side Infeed Cutting Head... -
Page 29: Option G: About Air Nozzles
The automatic blow off consists of a bank of high-pressure air nozzles to clean dust and debris as the door feeds out of the DL-2. To manually turn off the air, use the slide value located on the side of the machine. -
Page 30: About The Electrical Panels
About the Electrical Panels About the Electrical Panels The DL-2 has a Main Electrical Panel and Nodes on the Cutter Head and the Frame. This section is an overview of the electrical components. Refer the machine's electrical prints for in-depth information. -
Page 31: Description Of The Six Light Panel
Description of the Six Light Panel Description of the Six Light Panel The six lights on this panel indicate the status of the DL-2 system. See “Troubleshooting with the Status Light Panel” on page 4-8., for information Note: on using this panel for troubleshooting. -
Page 32: Quick Start Description
Quick Start Description Quick Start Description Ensure factory air is present at machine and the DL-2 main air supply valve is turned on. Install tooling Set up the door positioning. Set up the cuts: • Set up the edge prep (optional) •... -
Page 33: Powering Up And Down The Dl-2
Powering Up and Down the DL-2 Powering Up and Down the DL-2 This section describes how to power up and to power down the DL-2 Powering up the system includes: • Applying power to the entire system. • Starting the Control Circuit. -
Page 34: Momentary Stop
Powering Up and Down the DL-2 Momentary Stop The momentary stop switch is activated by pressing the Stop button located on the motor carriage Momentary Stop Start Button When an Momentary Stop is activated, cutting stops, power is no longer supplied to the cutter motor. -
Page 35: Operator Controls
Operator Controls Operator Controls Set of Y Template Bars: 10 included. See “About Y Axis Tem- plate Bar(s)” on page 2-17. Stop Motor Controls Edge Prep Controls Pneumatic Controls Head Controls KVAL DL-2 Series Operation/Service Manual... -
Page 36: Pneumatic Table Controls
The Pneumatic Controls move the Clamps and Carriage on the table and the Edge Prep Router and Drill. The Edge Prep Controls operate the motors of the router and drill. The Edge Prep is an option. KVAL DL-2 Series Operation/Service Manual 2-10... - Page 37 • Carriage Open: Releases the clamps and moves the movable fence away from the fixed fence. • Carriage Close: Brings the movable fence closer to the fixed fence. • Clamps: Applies the door clamps KVAL DL-2 Series Operation/Service Manual 2-11...
-
Page 38: Edge Prep Controls (Option)
• “Push” the switch to the right and the router will tilt in to do the bolt plate. Joy Stick: Move up, to the right, sown, and to the left to drill a faceplate. KVAL DL-2 Series Operation/Service Manual 2-12... -
Page 39: Motor Controls
• Cutter Up: Pushing the button in moves the cutter up out of the cutting position. • Locks: The X and Y lock switches control the X and Y movement of the cutting head. Switch positions are defined on the next page KVAL DL-2 Series Operation/Service Manual 2-13... - Page 40 Y axis move only. Y Axis X Axis Locked Y DOWN, X UP: X and Y both unlocked. Y Axis X Axis Y UP, X DOWN: X and Y both locked. Y Axis Locked X Axis Locked KVAL DL-2 Series Operation/Service Manual 2-14...
-
Page 41: Dl-2 Setting Up For A Cut
Measuring from the top of the door to your height is key to the set up, due to the face bore’s loca- tion in the center of the machine. The standard DL-2 has one stop set to customer deadbolt speci- fications, (You may order a second stop for face bore location as an option.) Both doorstops are... -
Page 42: Cutter Head Stops
Door Thickness The DL-2 is equipped to handle 1 3/8” and 1 ¾” thick doors. If you run 2 ¼” thick doors, the red hold up wheel bars, and the end rolls need to be adjusted downwards. All of these brackets have slots for this purpose. -
Page 43: About Set Collars And Templates
• Tighten the set collars. • Make a test cut, and adjust as necessary. If you have templates for rectangular lights. • Place the template in the DL-2. • With power off guide the carriage along the pattern. • At the four corners of the light pattern position a set collar, and tighten. -
Page 44: About Face Bore Templates
2-3/8" and 2-3/4" backsets. Y- Axis Template Bar Set-up Kval recommends that only one door light set-up be used per template bar. However, it is possible to set the template bar up for different door widths with the same cutout dimensions in some cases. -
Page 45: Adjusting A Y Template Bar
Sample Y Axis Template Bar Adjusting a Y Template Bar Adjust first set collar with inboard edge approx. 1-1/8" from end of shaft. Place bar in index assembly with collar butted against out-board face of shaft holder. KVAL DL-2 Series Operation/Service Manual 2-19... - Page 46 Trap bar in place by adjusting a second collar on opposite face of shaft holder. Col- lars must be 1" apart center-line to center-line Kval recommends one set-up per shaft. There may be problems setting up a single shaft to accommodate more than one door width.
- Page 47 Set collar using steps 4 & 5 for the out-board edge of the 2nd light. Setting-up for only one light opening is just a matter of not installing the two center collars that create the space between lights. KVAL DL-2 Series Operation/Service Manual 2-21...
-
Page 48: Using Templates
Using Templates Using Templates The DL-2 is designed to use templates provided by Windows manufacturers. Templates are typically 1/2” plywood cut the same size as the door. The templates are also typi- cally made for 1-1/2” nose follower and a 1/2” bit. -
Page 49: Positioning The Template (Index Holes)
Using the wrong index holes will result in an off centered light cut-out Index Holes 2-10 Custom Illustration shows a standard DL-2, Stops can be located at the feed in as well. KVAL DL-2 Series Operation/Service Manual 2-23... -
Page 50: Template Drill Jig
Place the template jig squared to the bottom comer (closest to the operator) of the template. Cut off or notch the template jig at the point the top of the door intersects with the jig. KVAL DL-2 Series Operation/Service Manual 2-24... - Page 51 Using Templates KVAL DL-2 Series Operation/Service Manual 2-25...
-
Page 52: Maintenance Of The
CHAPTER 3 Maintenance of the DL-2 This chapter describes preventative maintenance steps for KVAL DL-2. The content is geared to guide technicians to keep a regular maintenance schedule for your KVAL machine. Keeping your KVAL machine maintained is an important piece for successful operation of your door production process. -
Page 53: Maintenance Schedule
This should be done in accor- dance with applicable state and/or federal code requirements To view a video of the maintenance process, visit the KVAL website. Select the Video Tab to view videos. http://www.kvalinc.com/... - Page 54 Clean inside hopper with WD-40 and a 3M Scotchbrite pad. Wipe dry with a clean dry rag.(990 Series Specific) 72,000 Cycles Inspect Inspect all nuts and bolts for tightnesses Tighten is necessary. Inspect Check that there is a smooth transition with a door feeding into and out of machine. Back-up Backup computer software. Clean Wash filter and lubricator bowls with soapy water. KVAL DL-2 Series Operation/Service Manual...
-
Page 55: Maintenance No-Goes
• Do not adjust air PSI above or below factory settings • Do not adjust any and all flow controls from factory settings • Do not remove shim stock KVAL DL-2 Series Operation/Service Manual... -
Page 56: Lubrication Schedule
Lubrication Schedule Lubrication Schedule KVAL recommends the following lubrication schedule to ensure that the machine operates prop- erly. Recommended Lubrication Schedule TABLE 3-1. Type of Assembly Recommended Schedule Recommended Lubrication Type Linear Bearing Pillow Block Bearing Every 250 Hours of Machine Operation... -
Page 57: Lubrication Requirements
If the bearing is equipped with a grease fitting (Zerk Fitting), it should receive 1 Gram (one pump from grease gun) of Dura-Lith Grease (KVAL P/N Lube EP-2) every 250 hours of operation. Bearings without grease fittings have been pre-lubricated at the factory and do Note: not require further lubrication. -
Page 58: Gear Motor Lubrication Requirements
MOBILUBE HD 80 W-90 or equivalent. Ball Screws All ball screws should be lubricated Dura-Lith Grease (KVAL P/N Lube EP-2) for every 80 hours of operation. At each lubrication grease should be pumped into the fitting until clean grease comes out around the ball screw. -
Page 59: Adjusting The Air Line Lubricator
Repeat this same procedure for the back section and other trouble areas. It is recommended to check the lines every week to two weeks. KVAL DL-2 Series Operation/Service Manual... -
Page 60: Changing Or Adjusting Bits
Loosen the collet in the spindle holding either ½” wood or metal bits, using the wrenches included with the DL-2. Use the 7/8” wrench on the spindle flats just above the pulley, and the second wrench on the top hex. Unscrew the draw bar by turning it counter- clockwise. -
Page 61: Adjusting Drill Unit
• Insert a 5/8” stop pin on each side of the horizontal cylinder. • BOLT PLATE ROUTER is now set up to cut a 1 X 2 -¼” BOLT PLATE in a wood rail. KVAL DL-2 Series Operation/Service Manual 3-10... - Page 62 Adjusting Drill Unit KVAL DL-2 Series Operation/Service Manual 3-11...
- Page 63 Troubleshooting the DL-2 This chapter describes troubleshooting steps to help technicians solve issues that may occur with your KVAL machine. If help is needed, call or contact our KVAL Service team at (800) 553-5825 or http://www.kvalinc.com. Refer to the Air and Electrical drawings provided with delivery of the machine.
-
Page 64: Dl-2 Sensors
How Sensors Work On the DL-2, sensors provide input to the PLC as part of the automation of the door cutting pro- cess, including feed through, door clamping, and door location. The application in the machine is similar to a micro-switch. It is important to keep the sensors cleaned and aligned to keep the door process running smoothly. -
Page 65: Important Notice About Adjusting Cylinder Speed
Adjusting Cylinder Extend Speed Adjusting Cylinder Retraction Speed Note: If Installing a new flow control assembly, shut down the flow control and back out 4 to 5 turns. this position is a good starting point for kine adjust. KVAL DL-2 Series Operation/Service Manual... -
Page 66: Typical Contactor Control
Common DC - Thermal Control Coil for OverLoad 120 Vac. Should measure Line Voltage here Motor Schematic Drawing of Contactor and Thermal Overload Block Diagram of a Common Contactor Circuit FIGURE 4- 4. KVAL DL-2 Series Operation/Service Manual... -
Page 67: About Contactor Troubleshooting
If the same overload keeps tripping, verify condition. Follow circuit path using the E-Drawing as a reference. a.Common issues: Check for bad wire, bad motor, or if load is too great for cur- rent draw. KVAL DL-2 Series Operation/Service Manual... -
Page 68: Troubleshooting Electrical Problems
Refer to Air and Electrical Schematics provided with delivery of the machine. Schematics are located in the Electrical Panel. If copies NOTE: are unavailable, contact the KVAL Service Department. Have model number and serial number of machine readily available. Warning The following checks require the electrical panel to be energized. - Page 69 Note: Most electrical problems are related to mechanical malfunction (e.g., stuck motors, jammed chain, blocked photo sensors etc.) Note: If a solenoid valve is suspected, and not cleared in the air checks section (see), it can be electri- cally jumped to check operation. KVAL DL-2 Series Operation/Service Manual...
-
Page 70: Troubleshooting With The Status Light Panel
STEP 4: Stop (Amber) If light is OFF go to item page 4-10. STEP 5: Start (Amber) If light is OFF go to item page 4-11. STEP 6: 24VDC (Green light is OFF go to item page 4-12. KVAL DL-2 Series Operation/Service Manual... - Page 71 X1 and X2. If no power is measured it is a bad transformer. b.If there is power at X1 and X2, check the other side of the fuse. If now power, replace the fuse. KVAL DL-2 Series Operation/Service Manual...
- Page 72 Start button. If no voltage, check the Stop button to make sure it is all the way out and not stuck in, then check the contact to make sure it is closed. If still no voltage, check the wiring. KVAL DL-2 Series Operation/Service Manual 4-10...
- Page 73 #2 and #5. If there is 120 VAC, replace the ACR relay. If there is no voltage while the button is held in, check the wiring or the contact on the Start button. KVAL DL-2 Series Operation/Service Manual 4-11...
- Page 74 Check for +24VDC at between any –DC and +DC terminal on the DC Terminal block. Reinstall the (+ 24V positive) wires one by one, checking for +24VDC after installing each. If at any point no voltage is found trace the last reinstalled wire and check for shorts. KVAL DL-2 Series Operation/Service Manual 4-12...
- Page 75 Troubleshooting with the Status Light Panel KVAL DL-2 Series Operation/Service Manual 4-13...
- Page 76 2-12 electrical panels description pillow block bearing, maintenance schedule e-stop light pneumatic table controls 2-10 description Pneumatic Table with Edge Prep Controls (Option) power flange block bearing, maintenance schedule lock out procedure 1-10 power up KVAL DL-2 Operation/Service Manual...
- Page 77 1-14 clean up 1-12 inspect 1-12 quick start return material authorization (RMA) 1-14 returning the product to Kval 1-14 safety guidelines Safety Sign Off Sheet Safety Concerns 1-17 sensors types voltage levels service center, contacting information...
- Page 78 Notes: ------------------------------------------------------------------------------------------------------------- ------------------------------------------------------------------------------------------------------------- ------------------------------------------------------------------------------------------------------------- ------------------------------------------------------------------------------------------------------------- ------------------------------------------------------------------------------------------------------------ ------------------------------------------------------------------------------------------------------------ ------------------------------------------------------------------------------------------------------------ ------------------------------------------------------------------------------------------------------------ ------------------------------------------------------------------------------------------------------------- ------------------------------------------------------------------------------------------------------------- ------------------------------------------------------------------------------------------------------------- ------------------------------------------------------------------------------------------------------------- ------------------------------------------------------------------------------------------------------------- ------------------------------------------------------------------------------------------------------------- ------------------------------------------------------------------------------------------------------------- ------------------------------------------------------------------------------------------------------------- ------------------------------------------------------------------------------------------------------------- ------------------------------------------------------------------------------------------------------------- ------------------------------------------------------------------------------------------------------------- ------------------------------------------------------------------------------------------------------------- ------------------------------------------------------------------------------------------------------------- ------------------------------------------------------------------------------------------------------------- -------------------------------------------------------------------------------------------------------------...
- Page 80 Contacting KVAL Customer Service Phone and Fax: Mailing address: In the U.S and Canada, call (800) 553-5825 or fax Customer Support Department (707) 762-0485 Kval Incorporated Outside the U.S. and Canada, call (707) 762-7367 825 Petaluma Boulevard South or fax (707) 762-0485 Petaluma, CA 94952 Email: service@kvalinc.com...
Need help?
Do you have a question about the DL-2 and is the answer not in the manual?
Questions and answers