
Related Manuals for Intel SE7501BR2


Summary of Contents for Intel SE7501BR2
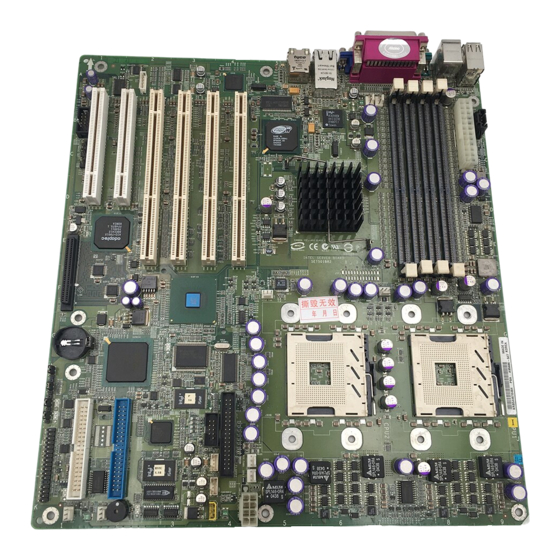
- Page 1 Server Installation and Integration Guide ® Using the Boxed Intel Xeon Processor and ® Boxed Intel SE7501BR2 Server Board...
- Page 2 Intel and others where appropriate. Limited License Grant. Intel hereby grants you a limited copyright license to copy this document for your use and internal distribution only. You may not distribute this document externally, in whole or in part, to any other person or entity.
-
Page 3: Table Of Contents
Intel Server Board SE7501BR2 Installation and Integration Guide Table of Contents Introduction ..................5 Document Overview ................5 Target Audience ..................5 Thank you ....................5 Troubleshooting Guide ................6 Minimum Hardware Requirements ............6 Hardware Integration................7 Prepare for Assembly ................7 Important Safety Information .............. - Page 4 Making Required Connections to the Server Board ........ 18 Making Optional Connections to the Server Board ......... 19 Installing the Serial B Cable ..............20 Cable Routing – Intel SC5200 Chassis, Base version ......20 IDE or SCSI Cables ................20 Floppy and Front Panel Cables ............20 Cable Routing –...
-
Page 5: Introduction
By following the steps outlined in this document, you will be able to integrate an Intel SE7501BR2 Server Board with an Intel SC5200 Server Chassis in a timely and effective manner. -
Page 6: Troubleshooting Guide
If you are still unable to resolve the issue, go to the next step. 2. Send e-mail including as much information on the issue as possible to Intel customer support using the form available at this URL: http://supportmail.intel.com/scripts-emf/welcome.asp?id=37... -
Page 7: Hardware Integration
(hard drives, floppy disk drive, CD/DVD). 4. Verify that the components chosen for installation are listed as validated for use with the Intel SE7501BR2 Server Board. This information is available from the Intel Support Web site: http://support.intel.com/support/motherboards/server/se7501br2/... -
Page 8: Important Safety Information
Intel Server Board SE7501BR2 Installation and Integration Guide Important Safety Information Safety Instructions and Information To avoid personal injury or property damage, the following safety instructions apply whenever working inside the chassis: 1. Turn off all peripheral devices connected to this product. -
Page 9: Chassis Preparation And Server Board Installation
Intel Server Board SE7501BR2 Installation and Integration Guide Chassis Preparation and Server Board Installation About the I/O Shield An ATX 2.03-compliant I/O shield is provided with your server board. The shield is required by Electromagnetic Interference (EMI) regulations. It minimizes EMI and helps obtain proper cooling of the server. -
Page 10: Installing Chassis Standoffs
Your chassis may be different from the illustration, but you must still arrange the standoffs properly. When using an Intel Server Chassis SC5200, positions 1, 4, 6 20, 23, and 26 come preinstalled. You must install sta ndoffs in positions 16 and 19. -
Page 11: Installing Memory
Intel Server Board SE7501BR2 Installation and Integration Guide Installing Memory The server board supports only DDR266- compliant DIMMs. The minimum supported memory configuration is 256 MB, using two 128- MB DIMMs. The maximum configurable memory DIMM 1A DIMM 1B size is 8 GB using four 2-GB DIMMs. -
Page 12: Installing The Boxed Intel Xeon Processor
Intel Server Board SE7501BR2 Installation and Integration Guide Installing the Boxed Intel Xeon Processor - Intel SC5200 Chassis, Base version Choosing the Processor Socket Use these instructions for installing your processor instead of the instructions that came with your boxed processor unless you are using the Hot-Swap Redundant Power version of ... -
Page 13: Installing The Retention Mechanism
Intel Server Board SE7501BR2 Installation and Integration Guide Installing the Retention Mechanism 1. Insert the retention brackets. 2. Tighten the four retention screws. Applying Thermal Grease Apply thermal grease to the processor as shown. Attaching the Heat Sink and Retention C lips 1. -
Page 14: Installing The Boxed Intel Xeon Processor
Intel Server Board SE7501BR2 Installation and Integration Guide Insta lling the Boxed Intel Xeon Processor – Int C5200 Server Chassis, Hot-Swap Redundant Power Version Choosing the Processor Socket Use these instructions for installing your processor when using the Hot-Swap Redundant ... -
Page 15: Installing The Retention Mechanism
Intel Server Board SE7501BR2 Installation and Integration Guide Installing the Retention Mechanism 1. Insert the retention brackets. 2. Tighten the four retention screws. Applying Thermal Grease Apply thermal grease to the processor as shown. Attaching the Heat Sink and Retention Clips 1. -
Page 16: Installing The Processor Wind Tunnel
The following instructions apply to the base Intel Server Chassis SC5200 and reference chassis installations. If you are installing your server board in the Intel SC5200 Server Chassis, Hot-Swap Redundant Power version, do not install the processor wind tunnel. The ducting in this Server Chassis eliminates the need for a processor wind tunnel. -
Page 17: Attaching The Wind Tunnel
Intel Server Board SE7501BR2 Installation and Integration Guide Attaching the Wind Tunnel 1. Spread the tabs outward slightly (1a). Lower the wind tunnel assembly onto the retention mechanism (1b). 2. The tabs on the fan assembly (2a) slide into slots (2b) on the inner side of the retention mechanism. -
Page 18: Making Required Connections To The Server Board
Intel Server Board SE7501BR2 Installation and Integration Guide Making Required Connections to the Server Board Make these connections regardless of the chassis used. Refer to your chassis documentation for additional connection requirements. Intel SC5200 Server Chassis Base Version: • Connect the front system fans to the system fan connections 3 and 4 on the server board. -
Page 19: Making Optional Connections To The Server Board
Intel Server Board SE7501BR2 Installation and Integration Guide Making Optional Connections to the Server Board These connections are required only when the corresponding component is installed. System Fan 6 (upper connection) Secondary IDE System Fan 5 (lower connection) Low Voltage Differential (LVD) SCSI... -
Page 20: Installing The Serial B Cable
Intel Server Board SE7501BR2 Installation and Integration Guide Installing the Serial B Cable For the Intel Server Chassis SC5200, you can connect the Serial Port B cable to either the back of the chassis or, on a rack-mount system, to the front of the chassis. -
Page 21: Cable Routing - Intel Sc5200 Server Chassis, Hot-Swap Redundant Power Version
Intel Server Board SE7501BR2 Installation and Integration Guide Cable Routing – Intel SC5200 Server Chassis, Hot-Swap Redundant Power Version Route the floppy drive cable and the hot-swap drive bay ICMB cable between the chassis wall and the hot- swap fan holder as shown at location A. -
Page 22: Installing The Chassis Feet (Pedestal Mode)
Intel Server Board SE7501BR2 Installation and Integration Guide Installing the Chassis Feet (Pedestal Mode) Installing the Chassis Feet (Pedestal Mode) 1. If you are installing this server into a rack system, s 1. If you are installing this server into a rack system, s these steps and go to “Installing into a Rack (Rack... -
Page 23: Finishing Up
Intel Server Board SE7501BR2 Installation and Integration Guide Finishing Up WARNING Install the chassis access cover before finishing up (See ”Installing the Access Cover” on page 21.) An electrical shock hazard exists if the chassis access cover is not replaced before connecting the chassis AC power. -
Page 24: Software Installation
System Update Package Intel highly recommends that you go to the Intel Server Board SE7501BR2 support Web site and download and install the latest system update package for your operating system. The Intel Server Board SE7501BR2 support Web site is: http://support.intel.com/support/motherboards/server/SE7501BR2. -
Page 25: Intel Server Management
The information here describes installation on a system running a Microsoft Windows operating system. Installing Intel Server Management You can install Intel Server Management on a local server or on a remote workstation that is used to manage a LAN/WAN. ®... -
Page 26: Intel Smart Tool
Agreement and click Accept. When installation is complete, launch Intel SMaRT Tool. 8. On the Welcome page, click Systems. 9. Select System > Servers > Xeon > SE7501BR2 SC5200, and then follow the on- screen instructions to download the SE7501BR2 SC5200 server system module. You must have internet access to download the server system module.
Need help?
Do you have a question about the SE7501BR2 and is the answer not in the manual?
Questions and answers