Advertisement
Quick Links
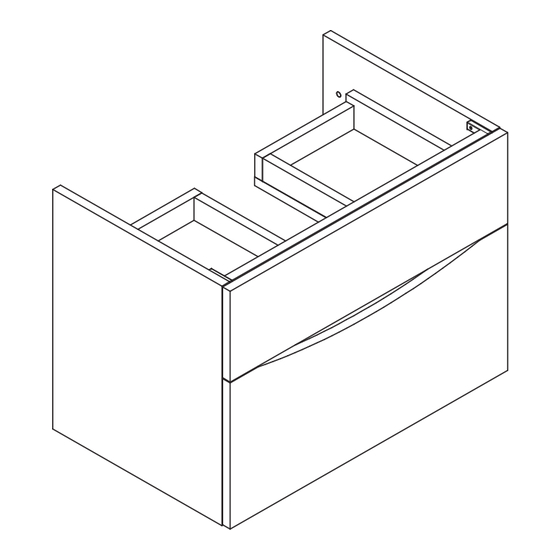
MPRO BATHROOM VANITY
24''Two-Drawer Vanity
and basin
Basin US-PRO24
33-
/
lbs
1
2
Vanity US-PRO24D
55-
/
lbs
1
2
x2
Tools & equipment needed:
IMPORTANT - Advice and safety - Please read before installation
Please read these instructions carefully before starting
installation and keep in a safe place for future reference.
Important! Risk of product damage. Do not modify the vanity.
Doing so will compromise structural stability and warranty.
This instruction manual contains information on how install the
MPRO collection.
Note. This series comes in several sizes and one semi-column;
the installation procedures remain the same. Observe all local
building codes.
Two people should install this product.
This vanity series needs specific site preparation. Do not install
vanities until all support framing and plumbing rough-ins have
been completed and wall surface has been finished.
Secure the vanity to stud framing. When possible, provide 2X6
timber behind the finished wall for additional support. To ease
installation, remove drawers from the vanity before fitting. Refer
to the section in this guide for proper removal.
January 2019
28'' Two-Drawer Vanity
and basin
Basin US-PRO28
36-
1
Vanity US-PRO28D
64 lbs
x2
x8
39'' Two-Drawer Vanity
and basin
/
lbs
2
x8
x2
Advice & Safety
This product should only be installed by a suitably qualified
plumber/installer. Should the installation be completed by a non-
qualified person any product guarantee maybe considered invalid.
Ensure the room is well heated and ventilated.
Warning! Please check for any hidden pipes or electrical cables
before drilling holes in the floor or walls.
Do not over tighten tap or waste fittings, doing so may result in
damaging the basin.
The vanity units CAN ONLY BE installed using the fitting
brackets supplied. Before installing a wooden bathroom product
into a new property extension or recently plastered room we
strongly advise the building/room is completely dry, well ventilated
and adequately heated prior to installation.
Save these instructions for future use and reference. An improper
installation voids the warranty. Installed vanities cannot be returned.
If you experience any problems with your vanities, contact your
dealer or Crosswater directly.
48'' Two-Drawer Vanity
and basin
Basin US-PRO39
55-
/
lbs
1
2
Vanity US-PRO39D
81-
/
lbs
3
4
x8
x2
Basin US-PRO48
58 lbs
Vanity US-PRO48D
121-
/
lbs
1
2
x8
Advertisement

Related Manuals for Crosswater MPRO


Summary of Contents for Crosswater MPRO
- Page 1 MPRO BATHROOM VANITY 48’’ Two-Drawer Vanity 24’’Two-Drawer Vanity 28’’ Two-Drawer Vanity 39’’ Two-Drawer Vanity and basin and basin and basin and basin Basin US-PRO24 Basin US-PRO28 Basin US-PRO39 Basin US-PRO48 58 lbs Vanity US-PRO24D Vanity US-PRO28D Vanity US-PRO39D Vanity US-PRO48D...
-
Page 2: Installation Instructions
INSTALLATION INSTRUCTIONS Two-Drawer Vanity Step 1 Step 2 Plan unit position Decide on the position and height of the vanity.The recommended sink height is between 34’’ and 35’’ from floor to top of basin. Pull out the drawer to its full extension by gently squeezing the locking levers 34"... - Page 3 Step 5 Wall hanger installation Place vanity in desired position on wall, mark wall hanger fixing points. Drill 5/16’’ (Ø 8mm) holes. Important: If the vanity unit and/or basin are not fitted level this may result in the basin not draining correctly. 2"...
- Page 4 Step 8 Re-fit drawers: 1: Pull drawer runners fully out. 2: Set the drawer down onto the runners. 3: Push the drawer fully in. Test to make sure the drawers operate correctly and there are no obstructions behind the drawer. DRAWER RUNNER ADJUSTMENT - Grass Dynapro Soft-close Step 1 Front height adjustment...
- Page 5 The following are the terms and conditions of Crosswater London USA‘s (“Crosswater London’s”) exclusive written warranty. No warranty by any person in addition to or different from those made in this limited warranty shall be binding on Crosswater London. LIMITED COMMERCIAL WARRANTY Crosswater London products used commercially are warranted by Crosswater London to be free from manufacturing defects for a period of one (1) year from the date of acquisition by original purchaser.
-
Page 6: Warranty Claims
To the maximum extent permitted by law, Crosswater London is providing this limited warranty in lieu of all other warranties, expres- sed or implied. To the maximum extent permitted by law, any implied warranty, including the implied warranties of merchantability or fitness for a particular purpose, are limited in duration to the duration of this warranty, or the applicable limitations period set by your state or province, whichever is shorter.
Need help?
Do you have a question about the MPRO and is the answer not in the manual?
Questions and answers