
Related Manuals for Seiko MPU-L465-17


Summary of Contents for Seiko MPU-L465-17
- Page 1 USER’S GUIDE Thermal Printer MPU-L465 Read this manual carefully before use. Keep this manual in a place where it can be accessed quickly. Seiko Instruments Inc.
- Page 2 August 2010 Second Edition: April 2011 Copyright 2010, 2011 by Seiko Instruments Inc. All rights reserved. The information contained herein is the property of SII and shall not be reproduced in whole or in part without prior written approval of SII.
- Page 3 Federal Communications Commission (FCC) compliance statement This equipment has been tested and found to comply with the limits for a Class B digital device, pursuant to part 15 of the FCC Rules. These limits are designed to provide reasonable protection against harmful interference in a residential installation.
-
Page 4: Table Of Contents
INTRODUCTION Thank you for purchasing the MPU-L465 thermal printer. This USER’S GUIDE explains how to handle MPU-L465 thermal printer (hereinafter referred to as printer), specified AC adapter, specified battery charger, specified battery pack and specified AC cable (hereinafter, omit “specified”). Read through the SAFETY PRECAUTIONS and OPERATING PRECAUTIONS carefully before using the printer. -
Page 5: Safety Precautions
SAFETY PRECAUTIONS The following symbols are used in this manual in order to make proper use of the printer and avoid incidental damages. Follow the guidelines marked with each individual symbol. Failure to follow the guidelines marked with this symbol could result in serious personal injury or death. - Page 6 Warning on the Printer WARNING If you find any of the following abnormalities in the printer, power off the printer, unplug the AC cable, and remove the battery pack from the printer. When an unusual state was not returned to the normal’s. ...
- Page 7 CAUTION When not in use for long periods of time, power off the printer, unplug the AC cable, and remove the battery pack from the printer. If not, it might cause fire or an electric shock. When you clean the printer, power off the printer, unplug the AC cable, and remove the battery pack from the printer.
- Page 8 When the AC adapter is used WARNING If you find any of the following abnormalities in the AC adapter, unplug the AC cable. When the AC adapter gave out a nasty smell or smoke, or generated noise. When the printer case was broken. If not, it might cause fire or an electric shock.
- Page 9 CAUTION Unplug the AC cable when cleaning the AC adapter. If not, it might cause an electric shock. Keep the AC adapter away from children. If not, it might cause injury. Keep the AC adapter away from direct sun and high temperature. If not, it might cause fire or a failure.
- Page 10 When the battery pack is used WARNING If you find any of the following abnormalities in the battery pack, remove the battery pack from the printer and keep away from fire. When the battery pack gave out a nasty smell, reached an extraordinarily high temperature or showed any unusual sign.
- Page 11 CAUTION If liquid inside the battery pack enter your eyes, immediately wash it away with clean water and take a physician's medical treatment. If not, your eyesight might be damaged. Keep the battery pack away from children. If not, it might cause injury. Keep the battery pack away from direct sun and high temperature, especially in a car.
- Page 12 When the charger is used WARNING When you find any of the following abnormalities in the charger, unplug the AC cable from the wall socket. When the charger gave out a nasty smell, reached an extraordinarily high temperature or showed any unusual sign. ...
- Page 13 CAUTION For North American – “Use only CSA/UL Certified power supply cord set, Polarized, Type SPT-2 or heavier, minimum No. 18 AWG copper, rated 125 or 250 V, minimum 1 A, minimum 6 ft (1.8 m),maximum 10 ft (3 m) long.” For Other Country –...
- Page 14 When the AC cable is used WARNING Unplug the AC cable if the AC adapter or the charger is damaged. If not, it might cause fire, an electric shock, or a failure. Keep the AC adapter and the AC cable of the charger away from dust and metallic powders.
- Page 15 CAUTION When you unplug the AC cable of the AC adapter or the charger from the respective wall socket or the plug, remove it while holding the connecting area. Exposure or disconnection of the cable might cause fire or an electric shock. - 12 -...
-
Page 16: Operating Precautions
OPERATING PRECAUTIONS Please follow the precautions shown below to ensure full functionality of the printer and thermal paper. ■ Printer Switch the power off when not in use. DO NOT give a shock intentionary by dropping or hitting the printer. The printer with a rubber cover has an excellent structure against impact on each surface. - Page 17 When storing the battery pack for long periods of time, keep it in a cool place. If possible, avoid long-term storage in the fully charged state. It may affect the battery life. Clean the terminals of the battery pack regularly (wipe them with a dry cloth). ...
- Page 18 ■ Thermal Paper Store the paper in a cool, dry, and dark place. DO NOT rub the paper with hard objects. DO NOT leave the paper near organic solvents. DO NOT allow the paper to touch plastic film, eraser, or adhesive tape for long periods of time. ...
-
Page 19: Preparation
1. PREPARATION Once you have opened the carton, make sure it contains the printer and its User’s Guide. Please notice that printer functions and package contents differ depending on the printer model. Main unit (Standard printer) Main unit (Peeler mounted User’s Guide (this manual) (-02/-16) printer) (-17) -
Page 20: Names Of Parts
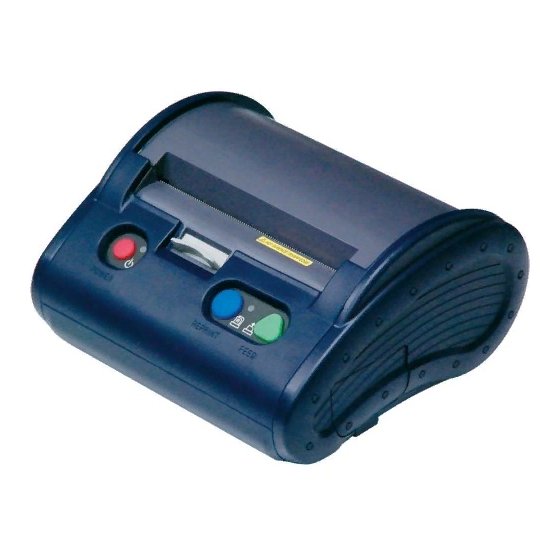
2. NAMES OF PARTS (11) (10) (12) (13) (12) (14) (16) (15) Standard printer (-02/-16) (1) POWER button (3) REPRINT button This button is used to turn the printer ON and This button is used to print the previous print OFF. - Page 21 (5) REPRINT lamp (11) Paper guide unit The REPRINT lamp lights in case the previous This unit is used to install paper. Paper with print can be reprinted. various width can be installed. (6) Interface cover (12) Paper guide This cover is used to connect the interface cable This guide releases the paper guide lock via lever and the AC adapter, and insert the connector.
- Page 22 (11) (18) (19) (17) (12) (13) (12) (10) (15) (14) (16) Peeler mounted printer (-17) (1) POWER button lights. When the button print is valid, the REPRINT button has the function to start the next This button is used to turn the printer ON and OFF. print.
- Page 23 (7) Battery rubber cover (13) Paper guide lock lever This cover is used to mount and secure the battery This lever is used to release the paper guide lock pack. Open the rubber cover and then attach and when changing the position of the left and right detach the battery pack.
- Page 24 [POWER Lamp Indication] The POWER lamp comes in three colors - - -green, red, and orange. Indication POWER lamp Power OFF Power ON (print ready) Green On Standby Dark Green On Charging Orange On Power voltage failure Red On No paper, paper cover open Green blinks Battery voltage low (needs charge) Orange blinks...
-
Page 25: Power Connecting
3. POWER CONNECTING The printer can be powered by either battery pack or AC adapter. ■ Attaching and Detaching the Battery Pack The battery pack should be fully charged. See Section 9, Charging the Battery Pack, for details on the charging method. - Page 26 Detaching the battery pack Power the printer off. Remove the hook located on the lower part of the battery cover from the projection of the printer and open the battery cover. When the battery release lever is released in the arrow direction, the battery pack is pushed out due to its spring force.
- Page 27 ■ Connecting the AC Adapter (Optional Unit) (1) Connect the AC cable to the AC adapter. (2) Open the interface cover and insert the DC jack of the AC adapter into the power connector of the printer. (3) Insert the AC plug of the AC cable into the electric outlet. (4) The printer turns on automatically.
-
Page 28: Paper Setup
4. PAPER SETUP The printer supports both thermal paper roll and thermal label roll. The printer function setting differs depending on paper type. See Section 7, Function Settings, for details. Only roll type media is fit to the printer. ■ Mounting/Removing the Paper Roll Adapter The printer supports internal diameters of 8 mm, 12.0 mm, and 25.4 mm. - Page 29 (3) When using the paper roll of 25.4 mm: Mount both paper roll adapters of 12.0 mm φ25.4 mm φ12.0 mm and 25.4 mm. Assemble both paper roll adapters and secure both paper roll adapters to the paper guide in the same manner as (2).
- Page 30 ■ Paper Setup (Standard printer (-02/-16)) ■ Step 1: Installing Paper to the Paper Guide Unit (1) Press the paper cover open lever in the arrow direction and open the paper cover. (2) Widen the paper guide space while pressing the paper guide lock lever in the arrow direction. (3) Position the control projection part of the paper guide (paper roll adapter) so that it can be accommodated in the paper roll tube.
- Page 31 ■ Paper Setup (Peeler mounted printer (-17)) ■ Step 1: Setting paper in the paper guide unit (1) Press the paper cover open lever in the arrow direction and open the paper cover. (2) Widen the paper guide space while pressing the paper guide lock lever in the arrow direction. (3) Position the control projection part of the paper guide (paper roll adapter) so that it can be accommodated in the paper roll tube.
- Page 32 ■ Step 3: Installing the Liner in the Peeler Unit (Using automatic peeling function (1) Press the roller cover open lever in the arrow direction to open the roller cover. (2) Peel the first label, and let the liner through a gap between roller cover and paper cover. (3) Close the roller cover while holding the paper by hand to prevent the paper from skewing or shifting to the left or right.
- Page 33 Hints The printer function setting for the marked paper is different from that for non-marked paper. See Section 7, Function Settings, for details. The printer also supports the paper roll of max. 58 mm external diameter. If the internal diameter of the paper roll is different from that of the paper roll adapter, it is necessary to reduce the external diameter of the paper roll against its loose-fitting.
-
Page 34: Attaching And Detaching The Belt Clip And Strap
5. ATTACHING AND DETACHING THE BELT CLIP AND STRAP The belt clip is provided with the grooves to attach the shoulder belt. When using the shoulder belt, it is necessary to attach the belt clip to the printer. ■ Attaching and Detaching the Belt Clip Attach the belt clip using screws (3 positions). -
Page 35: Test Printing
6. TEST PRINTING After setting the paper roll, proceed to test printing. During test printing, the printer function setting data and character strings for testing are printed. (1) Make sure that the paper is loaded and the printer is off. If the paper is not loaded, load the paper as instructed in Section 4, Paper Setup, and turn the printer off. -
Page 36: Function Settings
7. FUNCTION SETTINGS The printer allows for numerous function settings according to the operating conditions and applications. The settings are saved in the software DIP switches (non-volatile memory) mounted on the printer. The setting can be controlled by the buttons or commands. The following describes how to set functions by using buttons. - Page 37 (4) If the message shown below is printed, press the FEED button. [SETTING MODE] Yes: FEED/No: REPRINT Hint If you press the REPRINT button at this time, the printer exits from the function setting mode and is automatically turned off. The printer is now in the function setting mode.
- Page 38 ■ Changing Settings In the function setting mode, you can initialize or modify settings. To initialize the settings to the default, follow step (1) shown below. To change the settings, follow step (2) shown below. (1) Initializing software DIP switch settings 1.
- Page 39 Operation 1: Transmission selection If you press the FEED button when the following message is printed, the printer moves to the transmissions selection mode. When the REPRINT button is pressed, the printer moves to the paper selection mode without changing the setting. DIP Switch setting mode.
- Page 40 Operation 2: Paper selection If you press the FEED button when the following message is printed, the printer moves to the paper selection mode. When the REPRINT button is pressed, the printer moves to the exit of the function setting mode without changing the setting. DIP Switch setting mode.
- Page 41 Operation 3: Exit function setting mode If you press the FEED button when the message shown below is printed, you can return to “Operation 1:Transmission selection” (page 31) and set transmission selection again. DIP Switch setting mode. Continue: FEED/Quit: REPRINT If you press the REPRINT button, the message shown below is printed.
- Page 42 ■ Software DIP Switch Setting : Factory settings Interface selection DIP switch Posi- Function Setting tion Bit7 Not used Bit6 Even Serial Parity Bit5 None Bit4 Serial Busy Xon/Xoff Flow control Bit3 Serial 115200 57600 38400 19200 Baud rate Bit2 Bit1 Transmission Auto...
- Page 43 Paper selection DIP switch Posi- Function Setting tion Bit7 Paper Mark 1 Non Mark 0 Mark Bit6 Print speed 1 High 0 Low Bit5 Print density Bit4 Bit3 Bit2 Paper See the following table. Bit1 Bit0 Paper type Bit2 Bit1 Bit0 Paper type Setting prohibition...
-
Page 44: Connecting To The Host Computer
8. CONNECTING TO THE HOST COMPUTER The MPU-L465 thermal printer supports serial and USB transmissions via an interface cable. The Bluetooth-mounted printer supports Bluetooth (Ver.2.0+EDR, Serial port profile) conformity wireless transmission. The printer function setting differs depending upon a transmission method to be used. See Section 7, Function Settings, for details. - Page 45 ■ Bluetooth-based Wireless Transmission (Bluetooth-mounted Printer) (1) Power the printer off. (2) Select a transmission method to be used. See Section 7, Function Settings, for details. (3) Power the printer on and send data from the host computer to the printer. (4) Verify that the data is correctly printed.
-
Page 46: Charging The Battery Pack
9. CHARGING THE BATTERY PACK Immediately after purchasing or leaving the printer unused for long periods of time, charge the battery pack before use. This battery pack does not need to be used up or discharged before charging. The battery pack can be charged when it is installed in the printer connected with an AC adapter. The battery pack can also be charged by a dedicated battery charger. - Page 47 ■ Charging by a Dedicated Battery Charger (Optional Unit) Dedicated battery charger Follow the steps shown below to charge: (1) Connect the AC cable to the battery charger. (2) Put the AC cable plug into the inlet. (3) Mount the battery pack on the battery charger so that the electrodes of the battery pack can be aligned with the metallic terminals of the battery charger.
- Page 48 CHARGE lamp (Recharge state indication) Battery state CHARGE lamp Not connected During charging Red on Charge completion Green on Error Red blinks Hints If the CHARGE lamp does not light for a few minutes after start of charging, the battery pack is out of order.
-
Page 49: Thermal Head/Platen Roller Maintenance
10. THERMAL HEAD/PLATEN ROLLER MAINTENANCE If paper dust accumulates, wipe and clean the thermal printhead and the platen roller to ensure the print quality for long periods of time. ■ Cleaning the Thermal Printhead and the Platen Roller (1) Power the printer off. (2) Open the paper cover. -
Page 50: Troubleshooting
11. TROUBLESHOOTING Please check the following points before asking for repair. ■ Power does not turn on: Make sure the recommended AC adapter or battery pack is used. Make sure the AC cable and AC adapter are correctly connected. ... -
Page 51: Specifications
12. SPECIFICATIONS ■ Printer Specifications Peeler mounted printer (-17) Standard Printer (-02/-16) Item Specification Print method Thermal Item Specification Print speed 85 mm/s maximum Printing method Thermal Dots available 1280 dots Print speed 85 mm/s maximum Printable width 108.4 mm maximum Dots available 1280 dots Dot density... - Page 52 ■ Interface Specifications ■ Battery Pack (BP-L0720-A1-E) Specifications (Optional unit) Serial interface (conforms to RS-232C) Item Specification Item Specification Battery Lithium ion Synchronizing method Asynchronous Rated voltage 7.4 VDC Baudrate 19200, 38400, 57600, 115200 bps Rated capacity 2000 mAh Data length 8 bits Operating temperature range: Parity...
- Page 53 ■ Single-Battery Charger (PWC-L07A1-W1-E) Specifications (Optional unit) Item Specification Input voltage 100 - 240 VAC, 50/60 Hz Rated output 8.4 VDC,1.0A Specified battery BP-L0720-A1-E Charge slot Operating temperature range 0C to 35C / 32F to 95F Operating humidity range: 20 to 85%RH (no condensing) Dimensions (W ...
-
Page 54: Optional Units And Consumables
13. OPTIONAL UNITS AND CONSUMABLES ■ Optional units ■ Paper Name Model Name Model Thermal paper TP-L465CXH Specified Battery pack BP-L0720-A1-E Thermal paper TP-L465CAH Specified AC adapter PW-0904-W2-E Label thermal paper TL-L465NS Specified Single-battery charger PWC-L07A1-W1-E Label thermal paper TL-L465NP Specified AC cable* Label thermal paper DTH9500 (MACtac) - Page 55 Seiko Instruments Inc. 1-8, Nakase, Mihama-ku Chiba-shi, Chiba 261-8507, Japan Print System Division Telephone: +81-43-211-1106 Facsimile: +81-43-211-8037 Seiko Instruments USA Inc. Thermal Printer Div. 2990 Lomita Blvd., Torrance CA 90505, USA Telephone:+1-310-517-7778 Facsimile:+1-310-517-8154 Seiko Instruments GmbH Siemensstrasse 9 D-63263 Neu-lsenburg, Germany Telephone:+49-6102-297-0 Facsimile:+49-6102-297-222 (Specifications are subject to change without notice.)
Need help?
Do you have a question about the MPU-L465-17 and is the answer not in the manual?
Questions and answers