
Related Manuals for Seiko MP-B20 SERIES


Summary of Contents for Seiko MP-B20 SERIES
- Page 1 USER'S GUIDE Thermal Printer MP-B20 SERIES Read this USER'S GUIDE carefully before using the printer. Keep this USER'S GUIDE in a place where it can be accessed quickly.
- Page 2 MP-B20 SERIES THERMAL PRINTER USER'S GUIDE Rev.01 April 2017 Rev.02 November 2017 Rev.03 June 2018 Rev.04 November 2018 Copyright 2017-2018 by Seiko Instruments Inc. All rights reserved. The information contained herein is the property of SII and shall not be reproduced in whole or in part without prior written approval of SII.
- Page 3 Federal Communications Commission (FCC) compliance statement NOTE: This equipment has been tested and found to comply with the limits for a Class A digital device, pursuant to part 15 of the FCC Rules. These limits are designed to provide reasonable protection against harmful interference when the equipment is operated in a commercial environment.
-
Page 4: Table Of Contents
Keep this manual in a place where it can be accessed quickly. See "MP-B20 SERIES THERMAL PRINTER TECHNICAL REFERENCE" for more detailed function and specifications on the printer. This manual consists of the following sections. -
Page 5: Safety Precautions
2. SAFETY PRECAUTIONS In this SAFETY PRECAUTIONS, the following symbols are used to ensure safe and proper use of products and prevent from damaging devices. WARNING Failure to follow the instructions marked with this symbol could result in severe personal injury or death. CAUTION Failure to follow the instructions marked with this symbol could result in minor personal injury or property damage. - Page 6 OPERATING PRECAUTIONS The "products" shall collectively mean the printer, the cradle, the battery pack and the USB cable. WARNING Never attempt the followings. Failure to follow the instructions leads to fire, electric shock, or accident. DO NOT disassemble or reconstruct the products. Take care not to spill liquid on the products.
- Page 7 Procedures to take when in trouble Follow the instructions in the following cases. Failure to follow the instructions may lead fire, electric shock, or accident. Turn off the printer, and unplug the USB cable from the printer in any of the following cases. And then, remove the battery pack from the printer.
- Page 8 NEVER touch the thermal head immediately after printing because it may get hot. Be sure to allow it to cool down before clearing a paper jam or cleaning its head. The printer has 2 paper cutters on the paper outlet: one is on the printer side, and the other is on the paper cover side.
-
Page 9: Operating Precautions
0°C to 40°C 30%RH to 75%RH (32°F to 104°F) (Non condensing) See "MP-B20 SERIES THERMAL PRINTER TECHNICAL REFERENCE" for the certifiable humidity range at each temperature. DO NOT install the products near devices that generate strong electromagnetic fields such as a ◆... - Page 10 When the battery pack is used at low temperature, the operating time of the printer can be used ◆ may be shortened. The indicator of battery remaining capacity displayed in the POWER LED is for reference. The ◆ battery level may be changed depending on the printer operation, so charge the battery pack before the battery becomes low.
- Page 11 Precautions for storing Turn off the printer when not in use. ◆ In addition, when the printer is not used for a long time, ・Set thermal paper to protect the platen. ・Avoid storing the printer for a long time with fully charged condition as much as possible because it may shorten the life span of the battery pack.
-
Page 12: Preparation
4. PREPARATION Make sure that the printer and its accessories are contained. Keep the package and packing materials for future transportation or long-term storage. Printer USB Cable (Battery pack installed) Safety Precautions: 1 set Sample thermal paper Quick Start Guide (3 sheets) - Page 13 The available accessories are shown below. See "18. SPECIFICATION" and "19. ACCESSORIES AND CONSUMABLE PARTS", and be sure to purchase our specified products listed on these references. Cradle Battery Pack USB Cable It is installed in the printer at the factory shipment. It is included with the printer at the factory shipment.
-
Page 14: Identifying Model Type
5. IDENTIFYING MODEL TYPE The printer model is identified as follows: MP-B20-B02JK1 Series Name... -
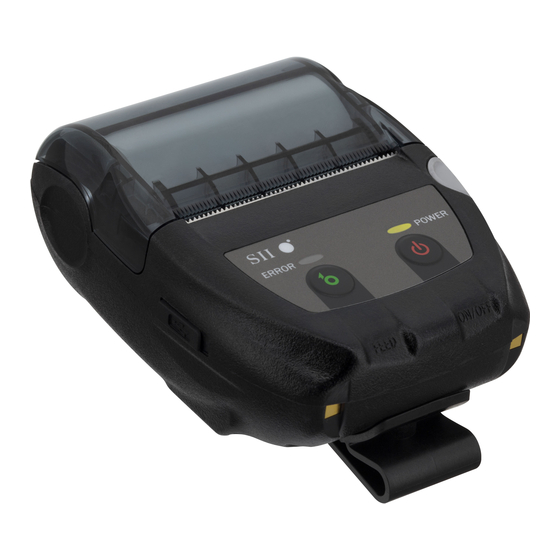
Page 15: Each Part Of Printer
6. EACH PART OF PRINTER Each Part of Printer... - Page 16 9 Paper outlet 1 POWER Switch The POWER Switch turns the power on or off. Thermal paper is ejected from here. Two paper The POWER LED lights when turning on the cutters are installed: one is on the printer side, power.
-
Page 17: Led Display Of Printer
7. LED DISPLAY OF PRINTER LED Display of Printer The ERROR LED and the POWER LED show the printer status. Table 7-1 Printer Status ERROR LED POWER LED Description Printer Status Lighting Lighting Color Color Pattern Pattern Power off Battery remaining capacity: Green... - Page 18 Table 7-2 Blink Pattern Status Pattern 0.3s Blink-1 0.7s 0.1s 0.7s Blink-2 0.1s 0.2s Blink-3 0.3s 0.1s 0.3s Blink-4 0.1s 0.1s Blink-5 0.1s 0.7s Blink-6 0.3s Table 7-3 Guide of Battery Remaining Capacity Battery Status Battery Remaining Capacity Battery remaining capacity level: Full Approx.
- Page 19 Error and Recovery Procedure When an error occurs, the printer stops printing operation. However, the data receiving is enabled. The table below lists errors and their recovery procedures. Table 7-4 Error and Recovery Procedure Priority Error Detail Recovery Procedure ERROR POWER Output buffer of the printer is Read response data from the...
-
Page 20: Charging Battery Pack
8. CHARGING BATTERY PACK The battery pack can be charged using the printer or the cradle. When a battery remaining capacity falls down the battery level: Middle or less, recharging starts automatically. This battery pack does not need to be used up or discharged before charging. For the battery remaining capacity and the error status, see "7. - Page 21 NOTE ◆ DO NOT remove the battery pack during charging. ◆ The battery pack should be charged at 0°C to 40°C (32°F to 104°F). HINT • The printer can print or receive data while charging. During printing, the POWER LED displays the battery remaining capacity continuously and the printer pauses charging.
- Page 22 Charging by Cradle Using the cradle, the battery pack installed in the printer can be charged. See "14. ATTACHING CRADLE" for each part of the cradle. Connect the USB cable plug to the USB connector of the cradle as shown in Figure 8-2. Figure 8-2 Cradle and USB Cable Connection Connect the other USB cable plug to the USB port of your PC or your USB battery charger.
- Page 23 When charging is successfully complete to full charge, the printer goes into one of the following statuses. • When the printer is off at the start of charging: The printer is automatically turned off. • When the printer is on at the start of charging, or the printer is operated during charging: The POWER LED changes to green.
- Page 24 Error Handling Procedure Table 8-1 Error Handling Procedure Phenomenon Possible Cause Corrective Action POWER LED doesn't light up The USB cable is not connected. Securely connect the USB cable to receive the power. The USB cable is broken. Replace the USB cable with a new one.
-
Page 25: Thermal Paper Setting
9. THERMAL PAPER SETTING The printer uses the thermal paper roll (hereinafter referred to as thermal paper). Use the thermal paper with printing surface rolled outwards. The function settings of the printer differ depending on the thermal paper. See "11. FUNCTION SETTINGS"... - Page 26 Set the thermal paper into the paper holder with its printing surface facing to the thermal head. If the setting direction is wrong, the printer cannot print. Figure 9-2 Thermal Paper Setting NOTE ◆ The printer has 2 paper cutters on the paper outlet: one is on the printer side, and the other is on the paper cover side.
- Page 27 Push firmly the center of the paper cover (the arrow in Figure 9-4) to close the paper cover. Figure 9-4 Paper Cover NOTE ◆ When the paper cover is closed, the top of thermal paper may be colored because of the friction with a part of the printer.
- Page 28 Thermal Paper Shape Always use the specified thermal paper. See "19. ACCESSORIES AND CONSUMABLE PARTS" for details. NOTE ◆ Use the thermal paper whose maximum diameter is 40 mm or less. ◆ Use the thermal paper whose maximum width is equal or less than each paper width +0.5 mm including winding deviation.
-
Page 29: Test Print
10. TEST PRINT The printer can perform a test print. In the test print, the firmware version, setting values of the function settings, etc. are printed. Test Print Procedure Install the thermal paper in the printer as instructed in "9. THERMAL PAPER SETTING". Ensure that no error occurs, and then turn off the printer. - Page 30 After the test print, the mode selection message is printed as shown in Figure 10-3. To return to the print-ready status, select "0 : Normal Mode". (Press the POWER Switch without pressing the FEED Switch.) To select other modes, press the FEED Switch the number of times corresponding to the selected mode number, and then press the POWER Switch.
-
Page 31: Function Settings
Otherwise, the printer may not work correctly or may crash. HINT • See "MP-B20 SERIES THERMAL PRINTER TECHNICAL REFERENCE" for details of the function settings by using the switches and other methods. • When neither switch is pressed within 30 seconds after the message is printed, the printer exits the Setting Mode and returns to the print-ready status. - Page 32 When the printer enters the Setting Mode, a message for selecting MS to be set is printed as shown in Figure 11-2. Press the FEED Switch the number of times corresponding to the selected MS number, and then press the POWER Switch. [MS Selection] 0 : Exit 1 : MS1 Setting...
- Page 33 A message for selecting the setting value of the selected function is printed as a sample shown in Figure 11-4. Press the FEED Switch the number of times corresponding to the selected setting value number, and then press the POWER Switch. [Interface] 0 : Return to function selection 1 : USB...
-
Page 34: Connecting To Host Device
12. CONNECTING TO HOST DEVICE The printer supports the USB interface and the Bluetooth interface. The function settings of the printer differ depending on the interface to use. See "MP-B20 SERIES THERMAL PRINTER TECHNICAL REFERENCE" for details. The communication speed may be decreased depending on processing by software or print contents. - Page 35 Bluetooth Interface Turn on the printer and pair it with the host device. In the factory shipment state, the printer enters pairing mode for about 60 seconds by pushing the power switch for 7 seconds or more. When the pairing mode starts, the POWER LED blinks in green 5 times per second.
-
Page 36: Attaching/Detaching Belt Clip
13. ATTACHING/DETACHING BELT CLIP The belt clip convenient for carrying the printer can be attached to this printer. The belt clip is already attached to the printer at the factory shipment. When using the printer as a stand-alone type, detach the belt clip, attach the spacer that is an attachment of the cradle, and fix the printer to the cradle. -
Page 37: Attaching Cradle
14. ATTACHING CRADLE The cradle for using the printer as a stand-alone type or using as the charging stand can be attached to this printer. The cradle is an optional accessory. See "18. SPECIFICATIONS" and "19. ACCESSORIES AND CONSUMABLE PARTS", and be sure to purchase our specified products listed on these references. NOTE ◆... - Page 38 Attaching Cradle Turn over the printer, and remove the belt clip from the printer. See "13. ATTACHING/DETACHING BELT CLIP" for removing the belt clip. Align the spacer with the screw hole of the belt clip attaching part in the direction of the arrow 1 in Figure 14-2.
-
Page 39: Replacing Battery Pack
15. REPLACING BATTERY PACK The battery pack is already installed in the printer at the factory shipment, however, it needs to replace with new one in case of the battery failure or end of life. The battery pack is an optional accessory. See "18. SPECIFICATIONS" and "19. ACCESSORIES AND CONSUMABLE PARTS", and be sure to purchase our specified products listed on these references. - Page 40 Insert the connector of a battery pack to be installed. Figure 15-4 Installing Battery Pack (1) Install the battery pack as shown in Figure 15-5. Place the projection "c" and the lead wire "d"of the battery pack into the recess "C" and the space "D"...
-
Page 41: Printer Maintenance
16. PRINTER MAINTENANCE The thermal head of the printer does not require user maintenance. When paper powder accumulates, cleaning the thermal head can maintain the print quality for an extended period of time. Cleaning Thermal Head / Platen Turn off the printer. Remove the battery pack from the printer. -
Page 42: Troubleshooting
17. TROUBLESHOOTING Check the following points before requesting for repair: The power does not turn on • Is the specified battery pack being used? • Is the battery pack sufficiently charged? • Is the battery pack installed correctly? The printer does not print or connect •... -
Page 43: Specifications
(including battery pack, excluding belt clip and thermal paper) *1: The number is for 1-byte character, and when character spacing is 0 dots. *2: See "MP-B20 SERIES THERMAL PRINTER TECHNICAL REFERENCE" for the certifiable humidity range at each temperature. Battery Pack Specifications... - Page 44 Dimensions (W × D × H) 81 mm × 128 mm × 50 mm Mass Approx. 100 g *: See "MP-B20 SERIES THERMAL PRINTER TECHNICAL REFERENCE" for the certifiable humidity range at each temperature. USB Cable Specifications (Specified Accessories) Item...
-
Page 45: Accessories And Consumable Parts
19. ACCESSORIES AND CONSUMABLE PARTS Specified Accessories Name Model Cradle CDL-B01K-1 Battery Pack BP-B0326-B1 USB Cable IFC-U03-1 *: It is included with the printer at the factory shipment. Specified Thermal Paper Model Manufacturer TF50KS-E2D Nippon Paper TF50KS-EY Nippon Paper PD160R-63 Oji Paper AF50KS-E... -
Page 46: Ms Settings List
20. MS SETTINGS LIST : Default value General Setting 1 Value Function Interface Selection (Interface) Wireless 1-2 to 8 Reserved Fixed General Setting 3 Value Function Automatic Status Response Selection Enable Disable (Auto Status Back) Initialized Response Selection Enable Disable (Init. - Page 47 General Setting 5 Value Function 00000000B: TF50KS-E2D 00000001B: TF50KS-EY 00000011B: PD160R-63 Thermal paper selection 00000101B: AF50KS-E 5-1 to 8 (Thermal Paper) 00000110B: KT55F20 00000111B: F5041 00001000B: KT48PF Other than those above: Prohibition Auto Power Off Time Setting (Lower 8 bits) Value Function Set in seconds...
- Page 48 International Character Setting Value Function 00000000B: USA 00000001B: France 00000010B: Germany 00000011B: United Kingdom 00000100B: Denmark I 00000101B: Sweden 00000110B: Italy 00000111B: Spain I 00001000B: Japan International Character Selection 00001001B: Norway (International Character Select) 00001010B: Denmark II 00001011B: Spain II 00001100B: Latin America 00001101B: Prohibition 00001110B: Prohibition...
- Page 49 Seiko Instruments Inc. 1-8, Nakase, Mihama-ku, Chiba-shi, Chiba 261-8507, Japan Print System Division Telephone:+81-43-211-1106 Facsimile:+81-43-211-8037 Seiko Instruments USA Inc. Thermal Printer Div. 21221 S. Western Avenue, Suite 250, Torrance, CA 90501, USA Telephone:+1-310-517-7778 Facsimile:+1-310-517-7779 Seiko Instruments GmbH Siemensstrasse 9, D-63263 Neu-lsenburg, Germany Telephone:+49-6102-297-0 Facsimile:+49-6102-297-222 info@seiko-instruments.de...
Need help?
Do you have a question about the MP-B20 SERIES and is the answer not in the manual?
Questions and answers