
Related Manuals for Kogan SmarterHome KASHFNGDLKA

Summary of Contents for Kogan SmarterHome KASHFNGDLKA
- Page 1 QUICK START GUIDE SmarterHome™ IP54 Battery Powered Fingerprint Smart Wi-Fi Door Lock (KASHFNGDLKA)
-
Page 2: Table Of Contents
CONTENTS Before starting ........02 Installation ..........03 Operation ..........12 Using the app ......... 14 Troubleshooting ........16 Specifications ...........17... -
Page 3: Before Starting
• If it does not work properly, please check if there has been an error during installation, and consult the Installation Troubleshooting steps on page 11. If still experiencing difficulty, head online to Kogan.com’s help centre at help.kogan.com... -
Page 4: Installation
INSTALLATION Installation overview 9. Battery cover 16. Latch-bolt Front panel 2. Connection 10. Battery cover 17. Lock body screws 18. Connection column screw 3. Square steel 11. Back handle column 4. Lock body 12. Connection 19. Keyhole 5. Connection line 20. - Page 5 1. Confirming door configuration This smart lock is suitable of 4 kinds of door opening directions. Identify the correct configuration of your door before commencing installation. Left-hand door configurations From the outside, the door swings inwards to the left. From the outside, the door swings outwards to the left.
- Page 6 Following the hole installation template, drill the holes in your door to facilitate installation. If you require another installation template, these are available as a free download from kogan.com 3. Changing the handle direction Check if the handle direction is appropriate for the door (facing left or right).
- Page 7 4. Installing lock body Set the installation direction of the latch-bolt in the lock body according to the door opening direction. Check back to step 1 if you are unsure. To change the direction of the lock body: a. Push the reversing block to the other side. b.
- Page 8 INSTALLATION (cont’d) 5. Select parts Choose the suitable parts according to the following table. Connection Square steel Connection Door thickness column screw length column length length 40-51 mm 80mm 35mm 30mm+50mm 52-60mm 80mm 35 or 55mm 50mm+70mm 61-80mm 100mm 55mm 50mm+70mm 81-100mm 120mm...
- Page 9 b. Adjust the dot direction on the square steel sleeve with reference to the sticker on the rubber mat: • Left-hand door configurations: set the dot left or right • Right-hand door configurations: set the dot at the top or bottom Check back to step 1 to ensure you’ve selected the correct dot position for your door configuration.
- Page 10 INSTALLATION (cont’d) 6. Installing the lock (continued) 6.2 Rear panel a. Press the front panel and connect the connection line with the corresponding interface of the back panel, then insert the excess line into the door hole. b. Insert the back-locking paddle into the lock body. You can cut off one or two sections of the back-locking paddle according to the thickness of the door.
- Page 11 7. Installing buckle plate and buckle box Following the hole installation template (see Step 2), drill the holes in your door frame for the buckle box. Position the buckle box first, before the following with the buckle plate. Ensure the buckle plate is installed with the door guard facing door’s swing direction.
-
Page 12: Operation
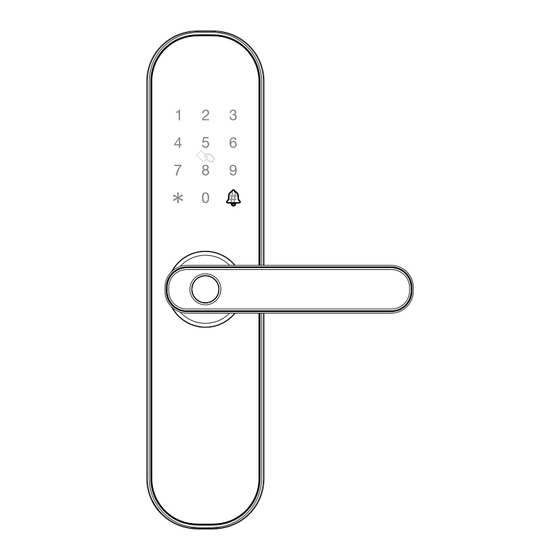
OPERATION Deadbolt function To activate the dead-bolt, lift up on the door handle. Adding administrators The first 2 added users will be classified as administrators and cannot be removed unless lock is reset. is used as the back and sign out button, while is used as the confirm button. - Page 13 Change password 1. Press 7 and , you will hear a long beep from the lock. 2. Enter the old password that is to be changed. The voice will prompt “Please add user.” 3. Enter the new password, followed by . The voice will then say “Successful.”...
-
Page 14: Using The App
USING THE APP Installing the app Download the Kogan SmarterHome app from the Play Store (Android) or App Store (iOS). Creating SmarterHome account If you do not have a Kogan SmarterHome account, register or sign in with a verification code sent by SMS. - Page 15 NOTES • Once paired, a voice will say “Added successfully.” • If pairing has failed, the voice will say “Add failure.” If this occurs, attempt to connect again. Using the app After successfully configuring, the lock will be shown on the app’s home page.
-
Page 16: Troubleshooting
Cannot enter the Wi-Fi pairing mode • Ensure at least one administrator has been added. • Follow steps to pair device with Kogan SmarterHome app. • Please make sure that you are connecting with 2.4G Wi-Fi network, 5G Wi-Fi networks are not supported at the moment. -
Page 17: Specifications
SPECIFICATIONS Dimensions Dimensions 270 x 63 x 24mm Weight 1.9kg General Capacity Up to 100 fingerprints or PINs Water Resistant IP54 Sensor Semiconductor Performance Battery 4 x AA (not included) Identify time 0.3s Power Battery Life ~12 months (10 entries per day) Supply voltage Low voltage warning 4.6v... - Page 18 NOTES...
- Page 20 This is a Quick Start Guide, and we hope that this has given you the assistance needed for a simple set-up. For the most up-to-date guide for your product, as well as any additional assistance you may require, head online to help.kogan.com...
Need help?
Do you have a question about the SmarterHome KASHFNGDLKA and is the answer not in the manual?
Questions and answers