
Related Manuals for natus Camino ICP


Summary of Contents for natus Camino ICP
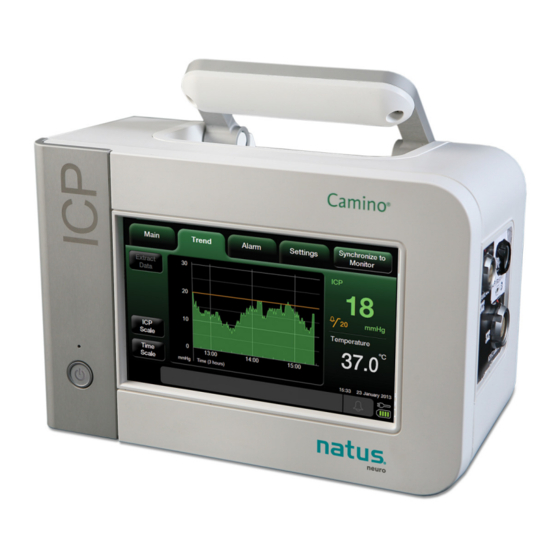
- Page 1 ® Camino ICP Monitor Intracranial Pressure and Temperature Monitor User’s Manual 025870 Rev 00 (01/2019)
-
Page 3: Trademark Acknowledgements
Trademark Acknowledgements Natus, Natus Neuro, the Natus Neuro logo, and Camino are registered trademarks of Natus Medical Incorporated or its subsidiaries in the United States and/or other countries. Delta-Cal is a trademark of Utah Medical Products, Inc. Sani-Cloth is a registered trademark of Professional Disposables International, Inc. -
Page 4: Contact Information
Contact Information If the Camino ICP Monitor fails to perform as specified, and the cause cannot be determined, do not use or attempt to repair it. Instead, contact Natus Neuro for technical service: Domestic Natus Neurology Incorporated 3150 Pleasant View Road... -
Page 5: Table Of Contents
Contraindications ...................................... 17 Intended User ......................................17 Intended Patient Population ..................................17 Description of the Camino ICP Monitor ..............................18 Key Functions of Monitor ..................................18 Reviewing the User’s Manual ................................... 18 List of Warnings for Using the Monitor ..............................19 Parts of the Monitor .................................... - Page 6 Using the Battery for Power .................................. 38 Battery Power Indicator ..................................39 Storing the Battery ....................................40 About the Natus Neuro Catheters ................................41 Connecting the Camino Fiber Optic Catheters (110-4 Series)........................42 Connecting the Camino Flex Catheters ..............................46 Transient Pressure Changes During Implantation or Removal of Catheter May Trigger Alarm ............
- Page 7 CHAPTER 4 – Monitoring the patient’s ICP and Temperature ......................57 About the Touch Screen.................................... 57 About the Synchronize to Monitor Button ............................. 58 Reviewing the Status Bar ..................................58 Verifying Status of Battery and AC Power ............................. 58 Verifying Amount of Battery Charge Available ............................59 About the Alarms ......................................
- Page 8 CHAPTER 5 – Responding to physiological and technical alarms ....................75 About the two alarm types ..................................75 About the Technical Messages ................................. 75 Understanding the Alarm Symbols ................................76 How the Monitor Prioritizes the Alarms ..............................77 Audio and Visual Indicators for Medium and Low Priority Alarms ......................77 Priorities of Physiological and Technical Alarms ...........................
- Page 9 CHAPTER 6 – Extracting trend data for remote evaluation ....................... 87 About Data Extraction ....................................87 Extracting Data to USB Drive ................................... 88 How the Monitor Stores Trend Data for Up to 5 Days ........................... 89 Extract Data via Digital Streaming ................................90 Conditions That Reset Trend Data During Recording ..........................
- Page 10 Inserting a New Battery ..................................129 Determining Software Version ................................. 130 Testing Synchronizing to Patient Bedside Monitor ..........................130 CHAPTER 10 – Contacting Natus Neuro for Technical Support and Annual Maintenance ............131 About Technical Support ..................................131 About Annual Maintenance ..................................132...
- Page 11 APPENDIX A – Technical Specifications ............................133 List of Technical Specifications ................................133 Classifications and Standards ................................. 135 Manufacturer’s Declaration Table ................................136 General Notes ....................................136 APPENDIX B - Natus Medical Incorporated Warranty ........................143...
- Page 12 Blank page.
-
Page 13: List Of Symbols And Abbreviations
List of Symbols and Abbreviations Packaging and Label Symbols Symbol Definition Symbol Definition Follow instructions for use Defibrillation-proof type CF applied part Catalog number Direct current Caution: Federal (USA) law restricts this device to Class II equipment sale by or on the order of a physician. Serial number Waste Electronics and Electrical Equipment... -
Page 14: Software Symbols
Software Symbols Symbol Description Symbol Definition Active alarm On/Off power Audio paused AC power not being used/available Inactive alarm Battery charge indicator Alarm Off No battery connected or faulty battery High ICP alarm limit Battery being charged AC power being used System information panel... -
Page 15: List Of Abbreviations
List of Abbreviations Abbreviation Definition Alternating Current º C Celsius CAMCABL Preamplification cable used with Natus fiber optic catheters Comma-separated values Computer tomography Decibels Direct Current Digital Multimeter Ethylene oxide º F Fahrenheit FLEX Flex Catheter FLEXEXT Flex Extension Cable... - Page 16 Blank page.
-
Page 17: Chapter 1 - System Overview
Intended User The Camino ICP Monitor is intended to be used by the following qualified medical and biomedical professionals: • A qualified physician should perform the placement and handling of the catheters. • Designated qualified hospital staff (e.g. neurosurgeon, nurse, intensivist, trauma physician, or physician’s assistant) should perform the operation of the monitor. -
Page 18: Description Of The Camino Icp Monitor
• Camino Flex Catheter for measuring ICP values. All Natus Neuro catheters measure their respective values at the tip of the catheter. This design eliminates the need for a fluid-filled system to communicate pressure (and carry pressure waves) to an external transducer. -
Page 19: List Of Warnings For Using The Monitor
• Do not block the alarm speaker with any materials that might muffle the alarm sound. • To reduce the risk of electric shock, do not disassemble the Camino ICP Monitor. Refer all servicing to qualified service personnel at Natus Neuro. - Page 20 AC power adapter, and USB-to-R232 adapter cable. • If the Camino ICP Monitor loses power and shuts down while it is connected to a patient bedside monitor, do not use the ICP values on the patient bedside monitor for patient measurements; the ICP values on the patient bedside monitor will be invalid.
- Page 21 ICP measurements. • The Camino ICP Monitor will only store the Mean ICP data from the most recent 5 days. All stored trend data older than 5 days will be lost. If monitoring is continued for more than 5 days, placement of a new catheter under sterile conditions is recommended.
-
Page 22: Parts Of The Monitor
Parts of the Monitor The Camino ICP Monitor contains hardware, software, and electrical components that support specific Natus Neuro catheters for monitoring the patient’s ICP and temperature. The following section provides information on the different parts of the monitor. About the Front Panel... -
Page 23: About The Rear Panel
AC Power Adapter Port Connection port for the AC power cord. Connection port for PMIO cable. This cable is used to PMIO Port connect the Camino ICP Monitor to a patient bedside monitor. Clamping system for securing monitor to an equipment Pole Clamp pole. -
Page 24: About The Right Panel
Connection port for the temperature connector on the Fiber Optic Temperature Port Catheter Cable. Connection port for the ICP connector on the Natus Camino Flex Pressure Port Extension Cable (pressure only). Connection port for the ICP connector on the Fiber Optic Pressure Port Catheter Cable. -
Page 25: About The Bottom Panel
About the Bottom Panel The bottom panel contains: Number Item Description Removable cover for accessing/replacing the 14.4V lithium ion Battery Door Cover battery. Grated opening that allows air being circulated by the internal Air Vent cooling fan to leave the monitor. -
Page 26: About The Left Panel
About the Left Panel The left panel does not contain any usable connector ports or buttons. -
Page 27: Chapter 2 - Setting Up The System For The First Time
Remove the contents from the Camino ICP Monitor shipping box and verify the following items are included. Warning Only use Natus Neuro supplied accessories on the Camino ICP Monitor. This applies in particular to catheters, catheter cables, battery, AC power adapter, and USB-to-R232 adapter cable. - Page 28 Natus PMIO patient bedside monitor cable REF # 025420 Quantity = 1 Camino Fiber Optic Catheter Cable REF # CAMCABL Quantity = 1 Camino Flex Extension Cable REF # FLEXEXT Quantity = 1 USB-to-RS232 adapter cable REF # 025440 Quantity = 1...
-
Page 29: Step 2: Install The Battery
Step 2: Install the Battery Perform the following steps with a Phillips screwdriver and the Natus Neuro supplied 14.4 V lithium ion battery. 1. Make sure the monitor is unplugged and turned off. 2. Turn the monitor upside down so the handle is facing downward. -
Page 30: Step 3: Prepare The Ac Power Adapter With Region-Specific Plug
Step 3: Prepare the AC Power Adapter with Region-Specific Plug Remove the AC power adapter from the package and attach the region-specific adapter plug to the backside of the AC power adapter. Backside of AC power adapter. Australia Europe A. Align the two slots on the adapter plug over the two prongs on the AC power adapter. B. - Page 31 C. Gently slide the adapter plug forward until it snaps into place. To remove the adapter plug, press the release button on the AC power adapter and pull the plug away from the adapter.
-
Page 32: Step 4: Plug The Monitor Into Ac Power
B. Insert the plug end of the AC power adapter into a grounded AC wall outlet. 3. Turn on the monitor. On the front of the monitor, press the power button; the Camino ICP Monitor will display the Natus Neuro logo before initiating the monitor setup process. -
Page 33: Step 5: Set The Time And Date
2. Press Set Language. 3. In the displayed Language: menu, use the arrows to select the desired language. 4. Press Accept; the Camino ICP Monitor will display all of the text that appears on the touch screen in the selected language. -
Page 34: Step 7: Use Ac Power To Charge The Battery To Full Capacity
1. Turn off the monitor. On the front of the monitor, press the Power button. 2. Keep the Camino ICP Monitor on AC power with the monitor turned off for 5 hours. This will re-charge the battery to full capacity. -
Page 35: Chapter 3 - Setting Up The System For Clinical Use
Positioning the Monitor The Natus Camino ICP Monitor is intended to be positioned on a hard flat surface or securely clamped to an equipment pole or bed support next to the patient. The distance between the patient and the monitor is restricted by the length of the Natus catheter cable. -
Page 36: Attaching To Equipment Pole (If Applicable)
Attaching to Equipment Pole (if applicable) The Camino ICP Monitor includes a clamp for attaching the monitor to an equipment pole. To attach: On the rear of the monitor, fit the pole clamp around the equipment pole. Tighten the knob on the pole clamp to secure the monitor to the equipment pole. -
Page 37: Powering The System On And Off
Turning On the System Warning To prevent electrical shock, only use the AC power adapter supplied by Natus Neuro (REF # 025430). Using a different AC power adapter may not provide protection against electric shock. 1. Plug the monitor to an AC power outlet: A. -
Page 38: Turning Off The System
Using the Battery for Power The Camino ICP Monitor includes a rechargeable 14.4 V lithium ion battery that supplies power to the monitor for at least 1.5 hours when the battery is fully charged; the battery is only intended for use during patient transport. -
Page 39: Battery Power Indicator
Notice The Camino ICP Monitor has been designed to operate during use while a battery is installed in the unit (even if the battery is not being used for power). As a result, always use the monitor with a battery installed. -
Page 40: Storing The Battery
Notice If the Camino ICP Monitor is not used for a long duration of time, the battery will lose charge. Always make sure the battery is charged to full capacity prior to use. The Camino ICP Monitor will charge the battery while the monitor is plugged into AC power. -
Page 41: About The Natus Neuro Catheters
Warning Do not connect a Fiber Optic Catheter and a Flex Catheter simultaneously to the monitor. The Camino ICP Monitor is designed to report ICP measurements with either the Flex Catheter or Fiber Optic Catheter connected to the monitor, but not... -
Page 42: Connecting The Camino Fiber Optic Catheters (110-4 Series)
Connecting the Camino Fiber Optic Catheters (110-4 Series) Connecting the Fiber Optic Catheters (110-4 series) to the Camino ICP Monitor requires the Camino Fiber Optic Catheter Cable (REF # CAMCABL): Warning To prevent possible patient injury resulting from incorrect ICP measurements, always perform each of the following steps before implanting a new Fiber Optic Catheter into the patient. - Page 43 A. Attach the cable’ s ICP connector (P) into the port labeled ICP (CAMCABL). To attach: • Align the red dot on the cable connector with the red triangle on the monitor’s port and push firmly. • Verify the cable is completely connected to the monitor before proceeding. B .
- Page 44 4. Note that when the temperature catheter is first connected and in open air (room temperature), the Camino ICP Monitor will: • Sound an alarm; and • Display "Temperature out of accuracy range" on the status bar. To silence the alarm temporarily (3 minutes) while the catheter is still in air, press the yellow alarm button. 5.
- Page 45 Warning Once the Fiber Optic Catheter has been zeroed to the Camino ICP Monitor, do not replace the Fiber Optic Catheter Cable being used for patient measurement. Replacing the Fiber Optic Catheter Cable with a different cable after the ICP catheter has already been zeroed may result in inaccurate patient measurements.
-
Page 46: Connecting The Camino Flex Catheters
Connecting the Camino Flex Catheters Connecting the Camino Flex Catheter to the Camino ICP Monitor requires the Camino Flex Extension Cable (REF # FLEXEXT). Warning To prevent possible patient injury resulting from incorrect ICP measurements, always perform each of the following steps before implanting a new Camino Flex Catheter into the patient. - Page 47 Male end of Flex Catheter Female end of Flex Extension Cable 4. When attached correctly, the Camino ICP Monitor will display "Catheter is initializing" in the status bar. 5. Verify the following message appears to ensure that the initialization (i.e. autozero) process has successfully completed: If the monitor reports a "Catheter failure"...
- Page 48 Warning Once the Flex Catheter has been initialized (i.e. autozeroed) by the Camino ICP Monitor, do not replace the Flex Extension Cable being used for patient measurement. Replacing the Flex Extension Cable with a different cable after the Flex Catheter has already been initialized may result in inaccurate ICP measurements.
-
Page 49: Transient Pressure Changes During Implantation Or Removal Of Catheter May Trigger Alarm
Transient Pressure Changes During Implantation or Removal of Catheter May Trigger Alarm If the Flex Catheter is connected to the monitor during the implantation or removal of a catheter, a sudden change in ICP measurements may occur while the catheter is traveling. Depending on the level of pressure change, the ICP measurements may temporarily exceed the ICP accuracy range for the monitor (between -10 mmHg and 125 mmHg) and trigger one of the following alarms: •... -
Page 50: Connecting To A Patient Bedside Monitor (If Applicable)
To determine which monitor adapter cables are required for your particular patient bedside monitor, contact Natus Neuro. Warning Read the user’s manual from the patient bedside monitor’s manufacturer before connecting the Camino ICP Monitor to a patient bedside monitor. Warning... -
Page 51: Procedures For Synchronizing The Two Monitors
CT or OR), and then needs to be re-connected. • If, during use, the reported ICP values between the Camino ICP Monitor and the patient bedside monitor differ by more than ± 1 mmHg or 1 % of monitor reading (whichever is greater). - Page 52 A. On the rear panel of the Natus Neuro monitor, attach the connector end of the PMIO cable to the port labeled PMIO. • Align the red dot on the PMIO cable connector with the red triangle on the monitor’s port and push firmly.
- Page 53 "Complete the Synchronization Process" in Chapter 3 A. On the Camino ICP Monitor’s touch screen, press the Check Additional Values button to transmit an ICP value at 25 mmHg for up to one minute to the patient bedside monitor.
-
Page 54: About Pressure And Temperature Measurements On The Patient Bedside Monitor
Warning If the Camino ICP Monitor loses power and shuts down while it is connected to a patient bedside monitor, do not use the ICP values on the patient bedside monitor for patient measurements; the ICP values on the patient bedside monitor will be invalid. -
Page 55: Storing The System
Storing the System If the Camino ICP Monitor will not be used for several months or longer, remove the battery from the monitor prior to storing the monitor. During storage, keep the monitor in a dry location that meets the following environmental conditions: •... - Page 56 Blank page.
-
Page 57: Chapter 4 - Monitoring The Patient's Icp And Temperature
CHAPTER 4 – Monitoring the patient’s ICP and Temperature About the Touch Screen The Camino ICP Monitor includes a touch screen for evaluating and controlling parameters for monitoring the patient’s ICP and temperature. The touch screen provides the following tabs for accessing and activating different parameter: Description Provides tools for evaluating the patient’s Mean ICP (mmHg) and temperature... -
Page 58: About The Synchronize To Monitor Button
For instructions on synchronizing the monitors, see Chapter 4. Reviewing the Status Bar When using the Camino ICP Monitor, the status bar on the bottom of the touch screen will display messages to indicate the current states of alarms, catheters, and AC/battery power. -
Page 59: Verifying Amount Of Battery Charge Available
Verifying Amount of Battery Charge Available The Camino ICP Monitor displays the following symbols on the status bar to indicate battery charge levels Symbol Color Available Charge Green 75% to 100% Green 50% to 75% Green 25% to 50% Green... -
Page 60: Monitoring The Patient's Icp And Temperature
Monitoring the Patient’s ICP and Temperature Press the Main tab to view the patient’s Mean ICP and temperature values as numerical data. The ICP may also be viewed as an animated waveform. The information on this screen includes: Parameter Description Displays a graph showing the ICP in mmHg versus time as an animated waveform (solid or line). -
Page 61: About The Numerical Display Of Mean Icp Values
About the Numerical Display of Mean ICP Values The numerical ICP value that is displayed on the touch screen is the patient’s Mean ICP value, which is a time- averaged representation of the continuously measured ICP. This displayed value is rounded to the nearest 1 mmHg. -
Page 62: Monitoring Trend Data
Press the Trend tab to view a graph of recorded Mean ICP trend data in mmHg at one-minute intervals. The Camino ICP Monitor stores up to five days of trend data that may be viewed in specific ranges of time. This data may also be extracted from the monitor to other media types by either USB transfer or by digital streaming. -
Page 63: Scaling Time Ranges For Trend Data
Scaling Time Ranges for Trend Data Press the Time Scale button to specify different time ranges to view the trend data. The time ranges include: • 3 hours • 12 hours • 24 hours • 48 hours • 120 hours Pressing the Time Scale button each time advances to the next time range. -
Page 64: Setting The High Icp Alarm Limit
Setting the High ICP Alarm Limit Press the Alarm tab to specify settings for controlling the physiological alarm. This panel includes arrows for specifying the high ICP alarm limit value, turning the alarm on and off, and restoring the high ICP alarm limit from a customized setting to the factory default setting (20 mmHg). -
Page 65: About The High Icp Alarm Limit Calculation
About the High ICP Alarm Limit Calculation The Camino ICP Monitor bases the high alarm limit on the patient’s Mean ICP value, which is represented by the numerical ICP value that appears on the touch screen. The high ICP alarm is triggered if the patient’s displayed... -
Page 66: Specifying The High Icp Alarm Limit
Specifying the High ICP Alarm Limit Warning Always verify the high ICP alarm limit is set appropriately for each patient prior to treatment. 1. On the touch screen, press the Alarm tab. 2. Press the Alarm On button; this will activate the alarm settings. 3. -
Page 67: Touch Screen Labels Indicating High Icp Alarm Limit
Touch Screen Labels Indicating High ICP Alarm Limit Note that the alarm limit specified in step 3 appears in the Main and Trend screens as the following indicator labels: • A horizontal line in the graph corresponding to the specified high ICP alarm limit •... -
Page 68: Disabling The High Icp Alarm
Disabling the High ICP Alarm To turn off the high ICP alarm and prevent the Camino ICP Monitor from sounding a physiological alarm, press Alarm Off and then Accept If this option is selected, the monitor will display ICP Alarm Off in the status bar. The monitor will also remove the corresponding high ICP alarm limit indicator labels from the Main and Trend screens. -
Page 69: Customizing The User Settings
Specifies the language that is displayed on the software interface. System Information Displays information regarding the system’s software and firmware. Service Mode Provides diagnostic information for errors. This mode appears on the System Information panel. This mode is password protected and is only accessible by Natus staff. -
Page 70: Specifying Waveform Type
Specifying Waveform Type The Camino ICP Monitor provides options for displaying the ICP waveform as either a line or filled graph. Waveform set to Fill mode. 1. On the touch screen, press the Settings tab. 2. Press Set Waveform. 3. Specify the waveform type by selecting either Line or Fill. -
Page 71: Specifying Time And Date
Specifying Time and Date The Camino ICP Monitor provides tools for setting the current time and date that appears on the touch screen. To set this information: 1. On the touch screen, press the Settings tab. 2. Press the Set Time and Date button. -
Page 72: Specifying Languages
2. On the left side of the panel, press Set Language. 3. In the displayed Language: menu, use the arrows to select the desired language. 4. Press Accept; the Camino ICP Monitor will display all onscreen text to the selected language. -
Page 73: Determining System Information
About Extract Log and Service Mode Buttons The Extract Log button only appears on the System Information panel if a USB drive is connected to the Natus Camino ICP Monitor. Note that when attaching a USB drive, this button may take several seconds to appear. - Page 74 Blank page.
-
Page 75: Chapter 5 - Responding To Physiological And Technical Alarms
The alarm speaker with any materials that might muffle the alarm sound. About the Technical Messages In addition to the technical alarms, the Camino ICP Monitor also displays technical messages on the status bar to indicate problems with: • Low battery level (15 minutes or less) •... -
Page 76: Understanding The Alarm Symbols
Understanding the Alarm Symbols On the status bar, the Camino ICP Monitor displays different variations of the alarm bell symbol to indicate three different alarm states: Active, Audio Paused, and Inactive: Description Symbol State Active Indicates an active physiological or technical alarm. -
Page 77: How The Monitor Prioritizes The Alarms
Audio and Visual Indicators for Medium and Low Priority Alarms Depending on the clinical priority of the error condition that is causing the alarm, the Camino ICP Monitor activates audio and visual indicators to alert the user of the condition:... -
Page 78: Priorities Of Physiological And Technical Alarms
Priorities of Physiological and Technical Alarms The Camino ICP Monitor includes one medium priority physiological alarm that gets activated if a patient’s Mean ICP value exceeds the user specified limit for more than 5 seconds; there are no other physiological alarms. If two or... -
Page 79: List Of Priorities For Each Alarm
If any of the software, firmware, or electrical components inside the monitor suffers a serious malfunction during a physiological alarm, the Camino ICP Monitor will activate an irreversible technical alarm that will override the physiological alarm and indicate a system failure. If this irreversible technical alarm is activated, the monitor will no longer report patient values and the user will need to contact Natus Neuro for service. -
Page 80: Responding To The Physiological Alarm (Icp Above Alarm Limit)
Responding to the Physiological Alarm (ICP above alarm limit) If the patient’s Mean ICP value exceeds the specified limit for more than 5 seconds, the Camino ICP Monitor will activate a medium priority physiological alarm that will: • Sound an alarm containing a burst of three pulses •... -
Page 81: Responding To Technical Alarms
For a complete list of error codes, see Chapter 8. Please note that each of these alarm conditions are irreversible. If any of these alarms occur, tend to the patient’s need, note the specific error code, and contact Natus Neuro for service. -
Page 82: Responding To Temperature Sensor Failure Alarm
15 Minutes or Less of Remaining Power If the battery power level drops to 15 minutes or less of remaining charge, the Camino ICP Monitor will display the following message on status bar: "Battery is low" If this occurs, plug in the monitor to an AC power outlet. This... -
Page 83: Minutes Or Less Of Remaining Power
5 Minutes or Less of Remaining Power If the battery power level drops to 5 minutes or less of remaining charge, the Camino ICP Monitor will activate a medium priority alarm that will: • Sound an alarm containing a burst of three pulses •... -
Page 84: Responding To Monitor Overheating Alarm
Responding to Monitor Overheating Alarm If the temperature inside the Camino ICP Monitor exceeds 80 °C, the monitor will activate a medium priority alarm that will: • Sound an alarm containing a burst of three pulses • Display the following error message on status bar: "Monitor overheating, check vent"... -
Page 85: Responding To Accuracy Range Alarm
Responding to Accuracy Range Alarm The Camino ICP Monitor is designed to measure ICP and tissue temperature between specific clinical ranges: Measurements Range Between -10 to +125 mmHg that includes the following levels of accuracy depending on catheter type: Fiber Optic Catheter: •... -
Page 86: Responding To Battery Failure Alarm
• Turn off the monitor and then turn it back on. • Replace the battery. If this alarm condition persists, contact Natus Neuro for service. Silencing the Battery Failure Alarm Temporarily Press the yellow alarm symbol on the touch screen. This will silence the alarm for 3 minutes. If the monitor... -
Page 87: Chapter 6 - Extracting Trend Data For Remote Evaluation
Notice The USB connector port on the Camino ICP Monitor is only intended for connecting a USB drive and USB-to-RS232 adapter cable for extracting ICP trend data. The USB port is not intended to be connected to a network connection (e.g. USB... -
Page 88: Extracting Data To Usb Drive
Use the Extract Data feature to export up to 5 days worth of Mean ICP trend data from the monitor to an external USB drive. When using this feature, the Camino ICP Monitor copies the data to the USB drive as a comma separated value (.csv) file. -
Page 89: How The Monitor Stores Trend Data For Up To 5 Days
Warning The Camino ICP Monitor will only store the Mean ICP data from the most recent 5 days. All stored trend data older than 5 days will be lost. If monitoring is continued for more than 5 days, placement of a new catheter under sterile conditions is recommended. Note... -
Page 90: Extract Data Via Digital Streaming
Extract Data via Digital Streaming Use the streaming data feature to export Mean ICP trend data digitally from the Camino ICP Monitor to a remote device via a USB-to-RS232 adapter cable. Note that the Natus Neuro supplied USB-to-RS232 adapter cable is required to use this feature. -
Page 91: Conditions That Reset Trend Data During Recording
Depending on the catheter type being used to record the patient’s Mean ICP trend data, the following conditions will result in trend data being reset for that patient: Catheter Conditions Natus Camino Fiber Optic (110-4 • Monitor is turned off and then turned back on. Series) • Battery discharges completely, resulting in the monitoring being turned off and then turned back on. - Page 92 Blank page.
-
Page 93: Chapter 7 - Cleaning And Sterilizing The System
CHAPTER 7 – Cleaning and Sterilizing the System Cleaning the System and Components Before cleaning the surface and touch screen of the Camino ICP Monitor, note the following: • Turn off the monitor before cleaning. • To reduce the risk of shock, follow all safety notices and never open the monitor case. -
Page 94: Cleaning Guidelines
Warning Do not autoclave or immerse the Camino ICP Monitor in liquid as damage may occur. If the monitor is exposed to liquids, turn off the unit, remove the AC power adapter, dry the unit thoroughly, and send to biomed staff for evaluation before reapplying power. - Page 95 After each reprocessing event, visually inspect the Natus Camino ICP Monitor and any of its system Functional Testing components for any wear and tear. Containment and It is recommended that the Natus Camino ICP Monitor and any of its system components be cleaned Transportation and disinfected as soon as is reasonably practical after use.
-
Page 96: Sterilizing The Camino Fiber Optic Catheter Cable
Sterilizing the Camino Fiber Optic Catheter Cable The Fiber Optic Cable (REF # CAMCABL) is provided non-sterile. Notice The Fiber Optic Catheter Cable must be sterilized whenever it is to be used in the sterile field. Prior to sterilization, clean this cable using the guidelines listed in Chapter 7. -
Page 97: Sterilization Cycle Parameters For The Fiber Optic Cable
Sterilization cycle parameters for the fiber optic cable EtO Sterilization Cycle Sterrad 100S Cycle Parameters for Fiber Optic Cable ® Parameters for Fiber Optic Cable Temperature 55 ±3 ºC Pre-Conditioning Pre-Plasma 10 minutes Injection 6 minutes Exposure Time Phase 1 - Exposure 1 60 minutes Diffusion 2 minutes... -
Page 98: Steam Pre-Vacuum Sterilization Parameters
Steam Pre-Vacuum Sterilization Parameters Parameters Option 1 (US) Option 2 (EU) Option 3 (EU) Specifications Temperature 132 º C (270 º F) 134 º C to 137 º C 134 º C (273 º F) (273 º F to 279 º F ) Exposure Time 4 minutes 3 minutes... -
Page 99: About Single-Use Only Catheters
About Single-Use Only Catheters Natus Neuro catheters are intended for single use only. Reuse of the device can result in contamination and/or disease transmission. This product should not be re-sterilized. Re- sterilization may affect the performance characteristics and the safety of the device. - Page 100 Blank page.
-
Page 101: Chapter 8 - Troubleshooting The System
Recommendation Battery failure Battery’s control system has failed. Plug Camino ICP Monitor into AC power outlet. After patient treatment, turn off Camino ICP Monitor and then turn back on. Replace the battery. If problem persists, contact Natus Neuro. Battery is low Battery has 15 minutes or less of charge. - Page 102 ICP measurements until the Mean ICP value falls within the accuracy range. Monitor overheating, Temperature inside Camino ICP Monitor has Check air vent on rear panel of Camino ICP Monitor. If exceeded 80 °C. anything is blocking vent, remove it. check vent...
- Page 103 Remove the ICP catheter that will not be used during patient are connected simultaneously. treatment. connected. No catheter is connected No ICP catheter is connected to Camino ICP Connect ICP catheter (see Chapter 3). Monitor. Temperature is out of Temperature value has fallen under range that...
-
Page 104: Responding To Problems During Use
Responding to Problems During Use The following table provides guidelines for responding to technical problems that may occur with the Camino ICP Monitor during use. Problem Cause Recommendation Camino ICP Monitor does not AC power adapter not connected Attach AC power adapter to Camino ICP Monitor. - Page 105 • Press the power button. The Mean ICP value on the touch Poor connection between Fiber Optic Catheter Make sure the cable is properly connected to the Camino ICP screen displays two dashes (- -). Cable and Camino ICP Monitor.
- Page 106 On touch screen, press Settings tab and select Set Language to specify language. Discrepancy of ICP Patient bedside monitor is not synchronized to On the Camino ICP Monitor, press Synchronize to measurements between the Monitor to re-calibrate the two monitors. the Camino ICP Monitor correctly.
- Page 107 Replace PMIO cable or patient bedside monitor adapter cable. adapter cable is faulty. PMIO cable or patient bedside monitor Check cable connections between Camino ICP Monitor and adapter cable is loose. patient bedside monitor. Patient bedside monitor has malfunctioned. Refer to manufacturer’s troubleshooting guide for the patient bedside monitor.
- Page 108 Verify confirmation message appears that indicates successful USB transfer. USB drive is corrupted. • Connect new USB drive to Camino ICP Monitor. • On touch screen, press Trend tab and select Extract Data button. Verify confirmation message appears that indicates successful USB transfer.
-
Page 109: Responding To System Failure Messages
Responding to System Failure Messages If a system failure occurs, the Camino ICP Monitor will display a message window that identifies an error code and description of the problem. The following table lists each error code associated with a system failure:... - Page 110 Blank page.
-
Page 111: Chapter 9 - Testing And Preventative Maintenance
The procedures in this chapter are intended for the hospital’s biomedical engineering staff. Perform the following operational checks to verify that the Camino ICP Monitor is operating safely and effectively. Some checks may be helpful to diagnose problems that may occur with the system. None of these checks require disassembling the monitor. -
Page 112: Testing Pressure Input
• New Natus Camino Fiber Optic Catheter (110-4 series, ICP measurements only) • I.V. bag with water • I.V. pole • Y-hemostasis valve • Ruler Notice Before performing this test, verify that the Camino ICP Monitor is turned off and not connected to any cables. - Page 113 1. Plug the Camino ICP Monitor to an AC wall outlet. 2. On the right side of the monitor, attach the Fiber Optic Catheter Cable and a functional Fiber Optic Catheter to the ICP (CAMCABL) port. 3. Fill half of the I.V. bag with water.
- Page 114 5. Insert the tip of the Fiber Optic Catheter into the Y-hemostasis valve through the duckbill valve. 6. Open the valve from the I.V. bag and remove the end of the cap from the Y-hemostasis valve. Let water flow until the tubing and Y-hemostasis valve fill with water. 7.
- Page 115 10. Raise the I.V. bag 4 inches. The water level should be leveled with the 6-inch mark of ruler. Note the following unit conversion: 1 inch H20 = 1.8683 mmHg On the touch screen, verify the ICP value reads 7 ± 2 mmHg. 11.
-
Page 116: Using A Pressure Simulator (Preferred Method)
Maintenance Interval Once every three months is suggested. Equipment • Natus Camino Fiber Optic Catheter Cable • New Natus Camino Fiber Optic Catheter (part #110-4BT, ICP/temperature measurements) • Pressure simulator, between 0 and 125 mmHg (e.g. Delta-Cal™ 650-950) • Tubing and manifold assembly... - Page 117 5. Connect the other end of the manifold to the pressure simulator. 6. If necessary, adjust the pressure simulator to 0 mmHg. 7. Verify that the ICP values on both the pressure simulator and the Natus monitor’s touch screen read 0 mmHg.
-
Page 118: Testing Pressure Output
• DC bench power supply (10 V DC) Notice Before performing this test, verify that the Camino ICP Monitor is turned off and not connected to any cables. 1. Plug the Camino ICP Monitor to an AC wall outlet. 2. On the rear of the monitor, connect a PMIO cable to the PMIO connector, but not to an external patient bedside monitor. -
Page 119: Testing Temperature Input
• Potentiometer (10KΩ x1, 10 turn) Notice Before performing this test, verify that the Camino ICP Monitor is turned off and not connected to any cables. 1. Plug the Camino ICP Monitor to an AC wall outlet. 2. On the right side of the monitor, connect a Fiber Optic Catheter Cable to the ICP and Temperature connectors. -
Page 120: Temperature Transducer Connector Test Circuit Diagram
Temperature Transducer Connector Test Circuit Diagram Ω Adjust the 10K pot for the voltages at Pin 2 above 8. Turn on the monitor, and adjust the 10KΩ potentiometer to produce a reading on the DMM of 0.350 VDC. On the touch screen, the Temperature value should read 30.0 ± 0.3 °C. 9. -
Page 121: Testing Temperature Output
• PMIO cable (part # 025420) Notice Before performing this test, verify that the Camino ICP Monitor is turned off and not connected to any cables. 1. Plug the Camino ICP Monitor to an AC wall outlet. 2. On the right side of the monitor, connect a Fiber Optic Catheter Cable to the ICP and Temperature connections of the Camino. - Page 122 6. Fill a water bath or beaker with warm water at approximately 32 °C and do the following: A. Place the Fiber Optic Catheter in the water. B. If necessary, place thermometer in water. C. On the touch screen, press the Main tab and verify the Temperature value matches the thermometer reading to ±...
- Page 123 Temperature vs. Resistance Table Output Temperature Range: 31 °C to 33 °C Output Temperature Range: 37 °C to 39 °C 1727 1751 1337 1367 31.1 1718 1751 37.1 1335 1361 31.2 1709 1742 37.2 1330 1359 31.3 37.3 1692 1742 1325 1354 31.4...
-
Page 124: Testing High Icp Alarm Limit
(minimum) Notice Before performing this test, verify that the Camino ICP Monitor is turned off and not connected to any cables. 1. Plug the Camino ICP Monitor to an AC wall outlet. 2. On the right side of the monitor, connect a Fiber Optic Catheter Cable to the ICP and Temperature connectors. - Page 125 7. On the touch screen, press the Main tab and verify the ICP value displays approximately 10 ± 2 mmHg. After about 5 seconds, verify the monitor: • Sounds an alarm containing a burst of three pulses • Displays the following error message on status bar: "ICP above alarm limit" •...
-
Page 126: Testing Ac Power And Battery Charge
Testing AC Power and Battery Charge AC Power Natus Neuro recommends performing this test once every three months: 1. Plug the Natus Camino ICP Monitor to an AC power outlet. 2. Press the Power button to turn on the monitor. 3. Verify the following: •... -
Page 127: Low Battery Alarm
Natus Neuro recommends performing this test once every three months: Low Battery 1. Run the Camino ICP Monitor on battery power until the following message appears: "Battery is low", Alarm indicating that the battery has 15 minutes or less of remaining charge before the monitor shuts off. Note a fully charged battery will take over an hour before falling to the charge level that displays the Battery is low message. -
Page 128: Battery Charge
Battery Charge 1. Run the Camino ICP Monitor on battery power until the remaining battery charge is depleted. Note the when the battery power falls to approximately 5 minutes or less of remaining charge, the monitor will activate an audible alarm. After the alarm sounds for approximately 5 minutes, the monitor will automatically shut down. -
Page 129: Inserting A New Battery
Inserting a New Battery The Camino ICP Monitor requires the Natus Neuro-supplied 14.4 V lithium ion battery (REF # 026950) to provide battery power to the monitor during transport. To order a replacement battery, contact Natus Neuro. To insert the battery: 1. -
Page 130: Determining Software Version
Determining Software Version On the touch screen, press the Settings tab and select System Information. Testing Synchronizing to Patient Bedside Monitor Perform the procedures for synchronizing the Camino ICP Monitor to a patient bedside monitor in Chapter 4. -
Page 131: Chapter 10 - Contacting Natus Neuro For Technical Support And Annual Maintenance
Support and Annual Maintenance About Technical Support If the Camino ICP Monitor fails to perform as specified, and the cause cannot be determined, do not use or attempt to repair it. Instead, contact Natus Neuro for technical service: Domestic and International... -
Page 132: About Annual Maintenance
About Annual Maintenance The Camino ICP Monitor requires annual maintenance to be performed by Natus Neuro at their service center to ensure proper function and calibration of the monitor. During this process, Natus Neuro will also evaluate the battery’s usage, number of re-charge cycles, and calibration status and replace it with a new one if necessary. -
Page 133: Appendix A - Technical Specifications
• The numeric parameters displayed on the touch screen can be read from a distance of 10 feet, up to a 30° angle off center. Power Supply Use only Natus Neuro-supplied AC power adapter, REF # 025430, 18 V DC , 1.67 A, 30 W Battery Use only Natus Neuro-supplied 14.4 V lithium ion battery, REF # 026950. - Page 134 Item Specification Operating Pressure 700 to 1060 hPa Shipping / Storage Pressure 500 to 1060 hPa Operation Limits • Temperature = 15 °C to 40 °C • Humidity = 30% to 75% relative humidity, non-condensing Shipping / Storage Limits • Temperature = -20 °C to 50 °C •...
-
Page 135: Classifications And Standards
Classifications and Standards The Camino ICP monitor has been designed for continuous operation. The Camino ICP Monitor meets the electrical safety requirements for: • IEC 60601-1 4th edition and applicable particular and collateral standards EMI / EMC • IEC 60601-1-2:2014 •... -
Page 136: Manufacturer's Declaration Table
Camino ICP Monitor uses a mains plug as a means of isolation to the mains power supply. Do not position the monitor in a place difficult to operate the mains plug. - Page 137 Guidance and manufacturer’s declaration - electromagnetic emissions The Natus Camino ICP Monitor is intended for use in the electromagnetic environment specified below. The customer or the user of the Natus Camino ICP Monitor should assure that it is used in such an environment.
- Page 138 Guidance and manufacturer’s declaration - electromagnetic immunity The Natus Camino ICP Monitor is intended for use in the electromagnetic environment specified below. The customer or the user of the Natus Camino ICP Monitor should assure that it is being used in such an environment.
- Page 139 RF transmitters, an electromagnetic site survey should be considered. If the measured field strength in the location in which the Natus Camino ICP Monitor is used exceeds the applicable RF compliance level above, the Natus Camino ICP Monitor should be observed to verify normal operation. If abnormal performance is observed, additional measures may be necessary, such as re-orienting or relocating the Natus Camino ICP Monitor.
- Page 140 Test specifications for ENCLOSURE PORT IMMUNITY to RF wireless communications equipment Test frequency Maximum Distance Immunity Test level Band Service Modulation Power (MHz) (V/m) (MHz) 380-390 TETRA 400 Pulse Modulation 18 Hz 430-470 GMRS 460, FRS 460 ± 5 kHz deviation 1 kHz sine 704 –...
- Page 141 Camino ICP Monitor. The Natus Camino ICP Monitor is intended for use in an electromagnetic environment in which radiated RF disturbances are controlled. The customer or the user of the Natus Camino ICP Monitor can help prevent electromagnetic interference by maintaining a minimum distance between portable and mobile RF communications equipment (transmitters) and the Natus Camino ICP Monitor as recommended below, according to the maximum output power of the communications equipment.
- Page 142 Blank page.
-
Page 143: Appendix B - Natus Medical Incorporated Warranty
DAMAGES IN CONN ECTION WITH THE ACQUISITION OR USE OF ANY NATUS MEDICAL INCORPORATED PRODUCT. Further, this warranty shall not apply to, and Natus Neuro shall not be responsible for, any loss arising in connection with the purchase or use of any Natus... - Page 144 2.3 Notification. In order to avail itself of its rights under the Warranty, Customer must immediately notify Natus Neuro of any defects and provide Natus Neuro every opportunity to inspect and remedy defects.
- Page 145 5.3 Force Majeure. Notwithstanding anything to the contrary herein contained, if the performance of the Warranty by Natus Neuro or Customer or any obligation of Natus Neuro or Customer hereunder is prevented, restricted or interfered with by reason of fire, explosion, act of God, labor...
- Page 146 Blank page.
- Page 147 Index Abbreviations, 15 Customizing the User Settings, 69 Accuracy ranges - ICP and Temperature, 85 Data Extraction, 87 Alarm Off, 64 Disposal of the Monitor System and Components, 99 Alarm On, 64 Extract Data via Digital Streaming, 90 Alarms Extract Log and Service Mode Buttons, 73 About the Alarms, 59 Extracting Data to USB Drive, 88 Alarm Off, 14...
- Page 148 Storing Trend Data for Up to 5 Days, 89 Temperature, 65 Symbols Testing and Preventative Maintenance, 111 AC power being used, 14 Temperature Transducer Connector Test Circuit Diagram, AC power not being used/available, 14 Active alarm, 14 Testing AC Power and Battery Charge, 126 Audio paused, 14 Testing High ICP Alarm Limit, 124 Battery charge indicator, 14...
Need help?
Do you have a question about the Camino ICP and is the answer not in the manual?
Questions and answers