BodyCraft F438 RFT Owner's Manual
Rack functional trainer
Hide thumbs
Also See for F438 RFT:
- Assembly instructions manual (36 pages) ,
- Assembly instructions manual (36 pages)

Related Manuals for BodyCraft F438 RFT


Summary of Contents for BodyCraft F438 RFT
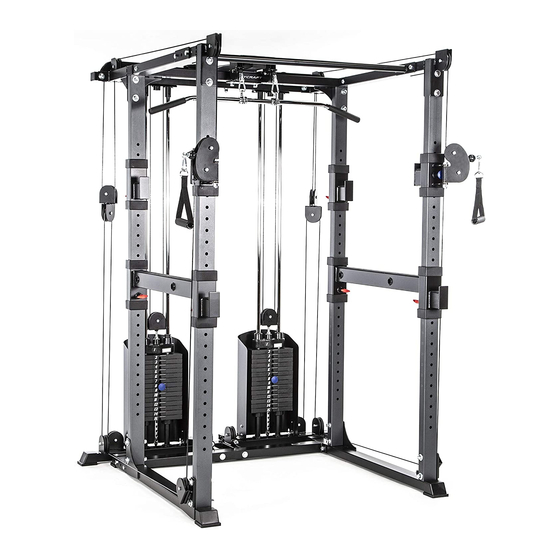
- Page 1 F438 RFT Rack Functional Trainer Scan this QR code with your Portable Device to link to additional product information. www.bodycraft.com/F438-qr.html...
- Page 2 BODYCRAFT offers a complete array of high-quality fitness equipment. Please refer to our website at www.bodycraft.com to view more ways to enhance your lifestyle. Your BODYCRAFT machine has all the quality and design elements to make your workout extremely efficient and comfortable. Your new RFT is a serious strength machine that will keep you motivated, challenged and within reach of your fitness goals.
-
Page 3: Table Of Contents
- Detailed Parts List …………..… ......….……...…..… 21 IF YOU ALREADY OWN AN ASSEMBLED F430 POWER RACK, PLEASE START ON PAGE 24. Assembly of F438 RFT onto existing F430 .………………………Pages 24 - 25 Maintenance …….…………………………….…….………….……Pages 26 - 28 - Inspection & Maintenance …………..….…...….....….….. 26 - Maintenance &... -
Page 4: Product Safety
● are legible and intact. Replacement Assembly Instructions and labels are available from BODYCRAFT. If you are unsure about the proper use of the BODYCRAFT strength machine call your local BODYCRAFT dealer or our Customer Service Department. 800-990-5556 or support@bodycraft.com... -
Page 5: F438 Rft Rack Functional Trainer
& T - F438 PECS OOLS EEDED WALL 65" HEIGHT 59" 83.2" Important Notes and Tips: Recommended Tools for Assembly 1. Do not tighten bolts until instructed. 2. Two people are required for the safe assembly of this Rack Functional Trainer. 3. -
Page 6: Parts List & Torque Specs
F430 P & T ARTS ORQUE PECS NOTE: IF YOU SEEM TO BE MISSING A PART, DO NOT WORRY, IT LIKELY HAS BEEN PRE-INSTALLED FOR QUALITY CONTROL NO. DESCRIPTION QTY. TUBE REAR STABILIZER RIGHT BASE FRAME LEFT BASE FRAME FRONT UPRIGHT 78.2"(1987mm) REAR UPRIGHT 76.5"(1942mm) (Short upright with tube at top end) REAR TOP FRAME... - Page 7 F438 P ARTS NOTE: IF YOU SEEM TO BE MISSING A PART, DO NOT WORRY, IT LIKELY HAS BEEN PRE-INSTALLED FOR QUALITY CONTROL (202) CONNECTOR (201) CONNECTOR REAR (203) CONNECTOR REAR TOP FRAME STABILIZER TOP FRAME (205) LAT BAR (206) CURL BAR (207) LINK PLATE (208L) LEFT (209R) RIGHT...
- Page 8 F438 P ARTS NOTE: IF YOU SEEM TO BE MISSING A PART, DO NOT WORRY, IT LIKELY HAS BEEN PRE-INSTALLED FOR QUALITY CONTROL (233) PULLEY (224) STACK (225) CHAIN (226) SINGLE (227) ANKLE STRAP GUARDS X 2pcs X 34pcs X 2pcs HANDLE X 2pcs (228) TOP CABLE X 2pcs (229) LOW CABLE X 2pcs...
-
Page 9: Product Assembly
RODUC T SSEMBLY- IMPORTANT! If you are installing the F438 RFT on an already assembled F430 Power Rack, please skip this portion and go to page 24. NOTE: DO NOT tighten bolts until Step # 5 1. Slide four 45mm X 75mm Cap (12) onto Base Frame. - Page 10 F438 - S RODUC T SSEMBLY- NOTE: DO NOT tighten bolts until Step # 5 1. Attach Rear Uprights (5) (shorter) to Base Frame using four 1/2" X 4" Hex Bolts (17), eight washers (21) and four Nylon Nuts (23). Make sure the inside welded tube is on top.
- Page 11 F438 - S RODUC T SSEMBLY- NOTE: DO NOT tighten bolts until Step # 5 Step # 3 Assembled...
- Page 12 F438 - S RODUC T SSEMBLY- NOTE: DO NOT tighten bolts until Step # 5 1. Attach Chin Up Bar (8) to the Top Frames (7) using Backing Plates (11) as shown, using four 1/2" X 4" Hex Bolts (17) and four 1/2"...
- Page 13 F438 - S RODUC T SSEMBLY- 1. Attach Left & Right Top Cable Connectors (208L & 209R) to Connector Rear Top Frame (202) using four 1/2” X 4” Hex Bolts (254), eight 1/2” Larger Washers (266) and four 1/2” Nylon Nuts (268). 2.
- Page 14 F438 - S RODUC T SSEMBLY- If you have 19 Weight Plates, DO NOT install the IMPORTANT two Stack Spacers (24), See figure 2 & 3. 1. Insert the four Plastic Guide Rod Holders (248) and four Rubber Cushions (247) to the Connector Rear Stabilizer (201), and slide the Guide Rod (204) into it.
- Page 15 F438 - S RODUC T SSEMBLY- Fig.1 Step # 6 Assembled Fig.2 Fig.3 150 lbs stack 200 lbs stack...
- Page 16 F438 - S RODUC T SSEMBLY- 1. Attach Top Frame Pulley Bracket (219) to the Top Frame (203) as shown, using two 1/2” X 6” Hex Bolts (252), four 1/2” Smaller Washers (265) and two 1/2” Nylon Nuts (268). 2. Attach two Rotating Pulley Holders (218) to Left & Right Pulley Height Adjuster (211L &...
- Page 17 F438 - S RODUC T SSEMBLY- Top Cable (228) Hook End Ball End Simultaneously assemble the cables and pulleys. 1. Perform the follow procedures 2 - 4 for the Right side first. 2. Insert the Hook End of the Top Cable (228) between 2 Pulleys (233) in the Rotating Pulley Holder (218) as shown in Figure T1,T2.
- Page 18 F438 - S RODUC T SSEMBLY- Low Cable (229) Bolt End Ball End 1. Perform the follow procedures 2 - 4 for the Right side first. 2. Insert the Bolt End of the Low Cable (229) into the vertical pulley holder of the Rear Stabilizer (201), see Figure L1, then route the cable 90 degrees through the horizontal pulley holder as shown in Figure L2 and then the vertical pulley holder as shown in the Figure L3.
- Page 19 F438 - S # 10 RODUC T SSEMBLY- 1. Attach two Stack Guards (224) to Connector Rear Stabilizer (201) using eight 5/16” X 1/4” Hex Socket Dome Bolts (261) and eight 5/16” Washers (267). 2. Remove all slack in the cables by adjusting the Cable Bolts on the Pulley Height Adjusters (211L, 212R), and the Pulleys Blocks (213) located on the Top Plates of the stack.
- Page 20 F438 - C RODUC T SSEMBLY- OMPLETE NOTE: IF YOU SEEM TO BE MISSING A PART, DO NOT WORRY, IT LIKELY HAS BEEN PRE-INSTALLED FOR QUALITY CONTROL Assembly is complete! Please take the following steps before using the RFT Rack Functional Trainer: 1.
-
Page 21: Exploded View
- F438 XPLODED... -
Page 22: Detailed Parts List
- F430 P ETAILED ARTS OWER NO. DESCRIPTION QTY. TUBE REAR STABILIZER RIGHT BASE FRAME LEFT BASE FRAME FRONT UPRIGHT 78.2"(1987mm) REAR UPRIGHT 76.5"(1942mm) ----- -- welded tube on top end REAR TOP FRAME TOP FRAME CHIN UP BAR SAFETY ARM BAR CATCH BACKING PLATE 45mm X 75mm CAP... - Page 23 - F438 RFT 1/2 ETAILED ARTS NO. DESCRIPTION QTY. CONNECTOR REAR STABILIZER CONNECTOR REAR TOP FRAME CONNECTOR TOP FRAME GUIDE ROD LAT BAR CURL BAR LINK PLATE 208L LEFT TOP CABLE CONNECTOR 209R RIGHT TOP CABLE CONNECTOR TOP GUIDE ROD HOLDER...
- Page 24 - F438 RFT 2/2 ETAILED ARTS NO. DESCRIPTION QTY. STACK GUARDS CHAIN SINGLE HANDLE ANKLE STRAP TOP CABLE LOW CABLE 1" X 200mm L HAND GRIP SLEEVE 1-1/4 X 130" HAND GRIP PULLEY 45 X 75mm PLUG 45 X 75mm END CAP...
-
Page 25: Assembly Of F438 Rft Onto Existing F430
F438 T F430 - S SSEMBLED NOTE: DO NOT tighten bolts until Step # 5 TORQUE SPECS Step # 1 Assembled... - Page 26 F438 TO A F430 - S SSEMBLED...
-
Page 27: Maintenance
& M NSPECTION AINTENANCE General Inspection and Cleaning The Frame should be wiped down with a damp cloth and dried on a daily basis. The powder coat finish should be polished with a good car wax on a yearly basis. For Vinyl Upholstery use Lanolin hand cleaner to dissolve sweat and lubricate the vinyl, maintain- ing its natural flexibility. -
Page 28: Maintenance & Lubrication
& L AINTENANCE UBRICATION Lubrication Bearing and linear bearing systems have advanced over the years, but they must be maintained on a regular basis if you expect them to last and perform efficiently. BODY- CRAFT uses only the highest quality bearings and linear motion components that are virtually trouble-free but requires the regular preventive maintenance to ensure long-lasting performance. -
Page 29: Warranty
If the item exhibits such a defect, BODYCRAFT will, at its option, repair or replace it without cost for parts. Shipping and handling charges may apply. (BODYCRAFT may require return of the part(s) or photographic evidence of the damaged part(s) prior to replacement.) Serial number is required. - Page 30 This page intentional left blank...
-
Page 31: Product Warranty Registration
RODUCT ARRANTY EGISTRATION...
Need help?
Do you have a question about the F438 RFT and is the answer not in the manual?
Questions and answers