Advertisement
HD PTZ Camera
Quick Start Guide
■ Please read this instruction carefully before using the product
and keep it for further reference.
■ All the examples and pictures used here are for reference only.
■ The contents of this manual are subject to change without
notice.
1
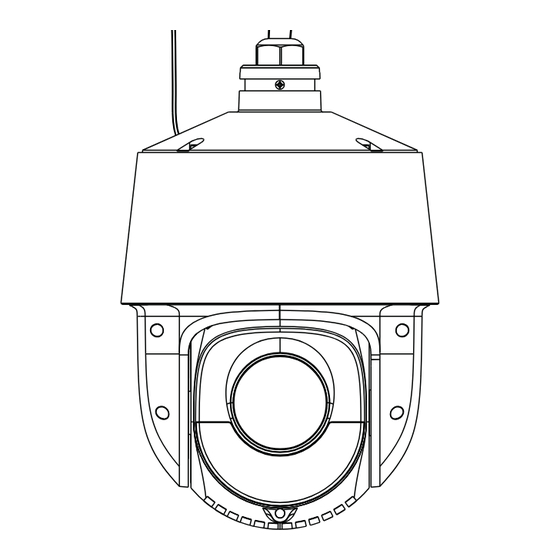
Overview
3
2
Cable Connection
► Connecting Network Cable
1
① Loosen the nut from the main element.
② Run the network cable (without RJ 45 connector) through the
both elements. Then crimp the cable with RJ 45 connector.
③ Connect the cable to the hermetic connector. Then tighten the
nut and the main cover.
1
2
3
Installation
Please make sure the wall is strong enough to bear the dome
camera's weigh and the camera is powered off during
1 Ethernet connector
installation.
2
Power connector
3 Safety wire
This PTZ camera supports wall or ceiling mounting. Please select
a way to install as needed. The following instructions are for
reference only.
Micro SD Card Installation
1. Loosen the four screws of
the cover and then remove
the cover.
2
3
Insert a micro
SD card
2. Insert a micro SD card as indicated
above and then install the cover back.
Wall Mounting
2. Secure the PTZ camera to the
1. Pull the cables through the
bracket with screws.
bracket.
3. Drill the screw holes on the wall
4. Fix two screws to the holes as
according to the drill template. Then
indicated by the arrows (left)
insert the plastic plugs into the holes.
and leave 12mm clearance.
6. Fix the bracket to the wall
5. Connect the cables and then
with four screws.
hang the bracket on the wall.
12
Advertisement
Table of Contents

Related Manuals for TVT TD-8423IS


Summary of Contents for TVT TD-8423IS
- Page 1 Wall Mounting ► Connecting Network Cable HD PTZ Camera 2. Secure the PTZ camera to the 1. Pull the cables through the bracket with screws. Quick Start Guide bracket. ■ Please read this instruction carefully before using the product and keep it for further reference. ■...
- Page 2 Ceiling Mounting For example, the IP address of your computer is 192.168.1.4. So the Network Connection IP address of the camera shall be changed to 192.168.1.X. After . Install the ceiling mounting bracket according to the following modification, please enter the password of the administrator and click instruction.
Need help?
Do you have a question about the TD-8423IS and is the answer not in the manual?
Questions and answers