Table of Contents
Advertisement
Advertisement
Table of Contents

Related Manuals for Keysight 82357B


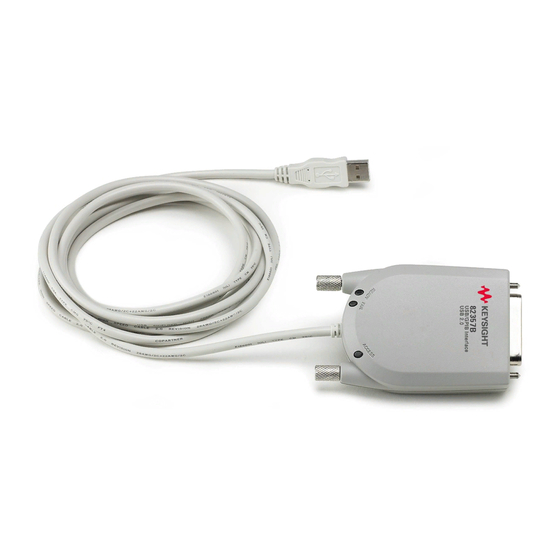
Summary of Contents for Keysight 82357B
-
Page 1: Environmental Conditions
Keysight 82357B USB/GPIB Interface User’s Guide... -
Page 2: Table Of Contents
......20 Connecting the 82357B to a USB hub ..... . .21 Step 4: Connecting GPIB Instruments . - Page 3 ......46 Verify Keysight IO Libraries Suite installation ....46 Software Configuration Checks .
-
Page 4: Keysight 82357B User's Guide
Connecting the 82357B to Your PC ....20 Figure 1-5 Connecting the 82357B to a USB Hub ... .21 Figure 1-6... - Page 5 THIS PAGE HAS BEEN INTENTIONALLY LEFT BLANK. Keysight 82357B User’s Guide...
-
Page 6: 1 Installing The Keysight 82357B
Keysight 82357B USB/GPIB Interface User’s Guide Installing the Keysight 82357B This chapter shows a suggested five-step process to install the 82357B and the Keysight IO Libraries Suite, to connect the 82357B to your PC and to program GPIB instruments via the 82357B. -
Page 7: Installing The Keysight 82357B
82357B matches the serial number shown on the serial number label of the 82357B Kit Box and on the 82357B Certificate of Calibration. If the Serial Numbers do not match, contact Keysight. If all Serial Numbers match, you may want to record the Serial Number for future reference. -
Page 8: Step 2: Installing Keysight Io Libraries Suite
Save disk space by not installing interface manuals. c Use Keysight 32- bit VISA with another vendor's VISA on the same PC in side- by- side mode. Details on side- by- side mode are available at www.keysight.com/find/side-by-side-install or in the IO Libraries Suite help. - Page 9 Installing the Keysight 82357B 4 After the IO Libraries suite is successfully installed, you will see the IO icon on the Windows taskbar notification area. Figure 1-2 IO icon on the Windows taskbar notification area Keysight 82357B User’s Guide...
-
Page 10: Step 3: Connecting The 82357B
Step 3: Connecting the 82357B After the Keysight IO Libraries Suite software has been installed, you can connect the 82357B to any USB port on your PC or you can connect the 82357B via standard USB hubs. If the Keysight IO Libraries Suite software have not been installed on your PC, NOTE STOP. -
Page 11: Connecting The 82357B To Your Pc
Installing the Keysight 82357B Connecting the 82357B to your PC This section shows steps to connect the 82357B to a USB port on your PC or to your PC via a USB Hub. 1 Connect to a USB Port. Make sure the PC is ON and plug the 82357B USB cable into any available USB port on your PC. -
Page 12: Connecting The 82357B To A Usb Hub
Installing the Keysight 82357B Connecting the 82357B to a USB hub This section shows steps to connect the 82357B to a USB port on your PC via a standard USB hub. Any USB hub used with the 82357B MUST be self-powered (must not be NOTE bus-powered or powered from the USB bus). - Page 13 Installing the Keysight 82357B 4 Observe the LEDs on the 82357B for at least 10 seconds. See Chapter 2, “Using the Keysight 82357B” for a description of the normal LED sequence during an initial installation of the 82357B. a Initially, only the red FAIL LED should be ON. After a few seconds, all three LEDs should be ON.
-
Page 14: Step 4: Connecting Gpib Instruments
Installing the Keysight 82357B Step 4: Connecting GPIB Instruments After the 82357B has been installed, the next step is to connect GPIB instruments to the 82357B. This step includes: – Connecting a Single GPIB instrument OR ... – Connecting Multiple GPIB Instruments To avoid damage to the connectors, only finger-tighten the connectors. -
Page 15: Connecting Multiple Gpib Instruments
Installing the Keysight 82357B Connecting multiple GPIB instruments Figure 1-7 shows a typical way to connect three GPIB instruments to an 82357B. When you have made the connections for your system, go to Step 5: Programming via the 82357B. You may want to record the primary GPIB address of each attached instrument for future programming use. -
Page 16: Step 5: Programming Via The 82357B
Installing the Keysight 82357B Step 5: Programming via the 82357B After you have connected your GPIB instrument(s) to the 82357B, the next step is to establish communication between your PC and the instruments using Interactive IO. After communication has been established, you can begin programming the instruments using VISA, VISA COM, or SICL. - Page 17 Installing the Keysight 82357B Figure 1-8 Keysight Interactive IO 5 When communication has been established to each GPIB instrument, you can begin to program the instruments using VISA, VISA COM, or SICL. See the next section, Programming GPIB instruments. Keysight 82357B User’s Guide...
-
Page 18: Programming Gpib Instruments
VISA COM, and SICL, see the IO Libraries Suite Online Help. Accessing VISA and SICL manuals You can access .pdf copies of the Keysight VISA User’s Guide and the Keysight SICL User’s Guide for Windows from the IO icon on the Windows taskbar. Adobe Reader is required to view these manuals. - Page 19 Connection Expert utility is used to associate a unique software interface ID with a hardware interface. The Keysight IO Libraries Suite uses an Interface ID or Logical Unit (LU) Number to identify an interface. This information is passed in the parameter string of the viOpen function call in a VISA program or in the iopen function call in an SICL program.
-
Page 20: Figure 1-9 Typical System Installation - 82357B Usb/Gpib Interface
Installing the Keysight 82357B Figure 1-9 Typical System Installation - 82357B USB/GPIB Interface Keysight 82357B User’s Guide... - Page 21 Installing the Keysight 82357B THIS PAGE HAS BEEN INTENTIONALLY LEFT BLANK. Keysight 82357B User’s Guide...
- Page 22 Keysight 82357B USB/GPIB Interface User’s Guide Using the Keysight 82357B This chapter describes normal operating states and modes for the 82357B and provides the guidelines to use the 82357B, including: – Initial 82357B operating states – Introduction to 82357B operating modes –...
-
Page 23: Using The Keysight 82357B
Using the Keysight 82357B Initial 82357B Operating States Figure 2-1 shows the sequence of initial operating states when the 82357B is first connected to a USB port on a PC or on a USB hub. Figure 2-1 Sequence of Initial Operating States... -
Page 24: Introduction To 82357B Operating Modes
82357B serial number is “bound” to its operating parameters. In multiple mode operation, if you add a new 82357B or if you unplug an 82357B and plug in a new 82357B in its place, the newly installed 82357B, will be assigned a new (unique) set of operating parameters. -
Page 25: Single 82357B Operation
Using the Keysight 82357B Single 82357B operation When an 82357B is first installed, a default VISA Interface ID, SICL Interface ID, Logical Unit (LU) number and GPIB Address are automatically assigned to the serial number associated with this specific 82357B. -
Page 26: Multiple 82357B Operation
In multiple mode of operation, each 82357B is “bound” to its related IO Configuration for that Serial Number. This is a different mode of operation than the single mode of operation in that the configuration is not reused if you replace an 82357B with another 82357B. -
Page 27: Setting Configuration Parameters
Cancel will cause the configuration set in the preceding dialog box to be used. Although you can change the Logical Unit (LU) Number and GPIB Address NOTE values for an 82357B, this is generally not necessary and may cause running applications to fail or stop running. Keysight 82357B User’s Guide... -
Page 28: Changing Modes Of Operation
1 Unplug all 82357Bs from the system. 2 Run Connection Expert (click the IO icon, then click Keysight Connection Expert). 3 Delete all 82357B configurations by selecting each USB/GPIB icon in the explorer view, then clicking Delete (or delete all except one configuration). -
Page 29: Setting Timeout Floor Values
Using the Keysight 82357B Setting timeout floor values The 82357B has a default timeout “floor” value that is an internal requirement to ensure reliable USB communication. The 82357B will not allow timeouts less than the floor value. (By default, VISA/SICL timeouts are set to infinite time). -
Page 30: Setting 82357B High-Performance Operation
To use this value, you must ‘#define AGVISA_ATTRIBUTES’ before the ‘#include ‘visa.h’‘ in your C or C++ source file. The 82357B supports T1 delays from 357 ns to <max_value> in steps of 40 ns. You can find out the actual value by calling viGetAttribute(). - Page 31 Using the Keysight 82357B THIS PAGE HAS BEEN INTENTIONALLY LEFT BLANK. Keysight 82357B User’s Guide...
- Page 32 Keysight 82357B USB/GPIB Interface User’s Guide Troubleshooting the Keysight 82357B This chapter provides troubleshooting guidelines of the 82357B including hardware and software checks and also the service and support information for the 82357B.
-
Page 33: Troubleshooting The Keysight 82357B
82357B problems, based on the LED states. You can use the LED states to help diagnose and troubleshoot the 82357B whenever the LED states do not match expected normal states. See Chapter 2, “Using the Keysight 82357B”... - Page 34 Troubleshooting the Keysight 82357B START All LEDs OFF Red Fail LED ON ALL LEDs ON READY FAIL ACCESS READY FAIL ACCESS READY FAIL ACCESS Typical Cause Typical Cause Typical Cause No power on USB bus or Keysight IO Libraries not...
-
Page 35: Hardware Checks
Troubleshooting the Keysight 82357B Hardware Checks If all LEDs are still off for 10 or more seconds after plugging the 82357B USB cable into a USB port, and all Windows Plug-and-Play Manager activity and the Connection Expert refreshes have ceased, start your troubleshooting sequence by performing hardware checks. -
Page 36: Check Device Manager
From the Device Manager, select 82357 and then Properties. Tab to Driver and click Reinstall Driver. This will allow the Windows Plug-and-Play Manager to begin searching for a driver for the 82357B. Since the Device Manager may have disabled the 82357B USB device, click Enable to restart the 82357B. -
Page 37: Software Installation Checks
Troubleshooting the Keysight 82357B Software Installation Checks When only the red FAIL LED is still on after 10 seconds, the 82357B has been detected by the host computer. Check suspend/resume operation Some Windows operating systems support Power Management which can suspend the PC while the 82357B is in operation. - Page 38 Figure 3-2 IO icon on the Windows taskbar notification area a If the IO icon is displayed, click the icon and select About Keysight IO Control to display the version. The version must be 15.0 or greater. b If the IO icon is not displayed, a version of the IO Libraries Suite may still be installed.
-
Page 39: Software Configuration Checks
Troubleshooting the Keysight 82357B Software Configuration Checks If all three LEDs remain on for more than 10 seconds after the 82357B is connected to a USB port, the 82357B has been installed. Start your troubleshooting sequence by checking IO Control operation. If any... -
Page 40: Check Usb Scanner
In general, USB scanners do not cause problems with the 82357B. However, if you do have problems with 82357B operation and have a scanner installed on your system that uses a USB port, unplug the scanner and then plug the 82357B into the port. -
Page 41: Service And Support Information
Troubleshooting the Keysight 82357B Service and Support Information There are no user-serviceable parts for the Keysight 82357B USB/GPIB interface. If you suspect a hardware failure for the 82357B, contact Keysight for instructions to return the unit. See the following Contacting Keysight section for telephone numbers/website address. -
Page 42: Product Specifications
Keysight 82357B USB/GPIB Interface User’s Guide Product Specifications For the characteristics and specifications of the 82357B USB/GPIB Interface, refer to the datasheet at http://literature.cdn.keysight.com/litweb/pdf/5989-1889EN.pdf.
Need help?
Do you have a question about the 82357B and is the answer not in the manual?
Questions and answers