Bartscher 590LW Instruction Manual
Hide thumbs
Also See for 590LW:
- Original instruction manual (24 pages) ,
- Instruction manual (172 pages) ,
- Manual (26 pages)
Table of Contents
Advertisement
Quick Links
Advertisement
Table of Contents

Subscribe to Our Youtube Channel
Related Manuals for Bartscher 590LW


Summary of Contents for Bartscher 590LW
- Page 1 590LW 700800 Original-Gebrauchsanleitung V1/0216...
-
Page 2: Table Of Contents
5.1 Installation ......................34 5.2 Reversing the door ....................36 5.3 Operation ......................40 6. Cleaning and care ....................45 7. Possible Malfunctions .................... 46 8. Waste disposal ......................48 Bartscher GmbH Franz-Kleine-Str. 28 D-33154 Salzkotten phone: +49 (0) 5258 971-0 Germany fax:... -
Page 3: Safety
Read these instructions before using and keep them available at all times! This instruction manual contains information about the installation, operation and maintenance of the device and should be consulted as an important source of information and reference guide. Awareness of the safety instructions and instructions for use in this manual will ensure the safe and correct use of the device. - Page 4 • Prevent access of children to the package materials like plastic bags and foamed polystyrene elements. Suffocation hazard! • This device may only be operated in technically proper and safe condition. • Only a qualified technician and using original spare parts and accessories should carry out repairs and maintenance of the device.
- Page 5 • The supply cable must be disconnected from the socket only by pulling the plug. • Never carry or lift the device by the supply cable. • In any case do not open the device housing. In case of electrical or mechanical modifications the electric shock hazard will occur.
-
Page 6: Key To Symbols
1.2 Key to symbols In this manual, symbols are used to highlight important safety instructions and any advice relating to the device. The instructions should be followed very carefully to avoid any risk of accident, personal injury or material damage. WARNING! This symbol highlights hazards which could lead to injury. -
Page 7: Proper Use
1.3 Proper use The operational safety of the device is assured only in case of proper use, according to the operation manual. All technical activities like installation and maintenance must be performed by the qualified service personnel only. The refrigerator is designed only for cooling and storing relevant food and beverages. -
Page 8: General Information
2. General information 2.1 Liability and Warrantees All the information and instructions in this manual take into account standard safety regulations, current levels of technical engineering as well as the expertise and experience we have developed over the years. The instruction manual was translated with all due care and attention. However, we do not accept liability for any translation errors. -
Page 9: Transport, Packaging And Storage
3. Transport, packaging and storage 3.1 Delivery check Please check the delivery upon completeness and transport damage immediately after receipt. In case of visible damage do not accept or accept the delivery with reservation only. Note the extent of damage on the carrier’s bill of delivery. Trigger off the complaint. Hidden damages should be reclaimed immediately after notice, as claims for damages can only be asserted within the effective period for complaints. -
Page 10: Technical Data
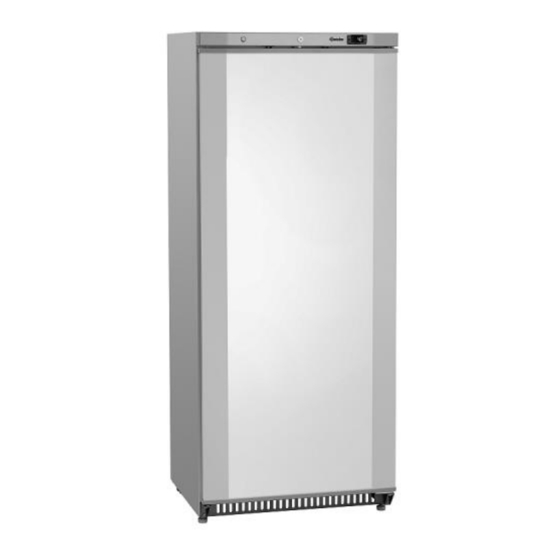
4. Technical data 4.1 Overview of parts Lock Digital temperature control Door Feet (4), height adjustable Grid trays (4) Exterior ON/OFF switch - 33 -... -
Page 11: Technical Specification
4.2 Technical specification Name Refrigerator 590LW 700800 Code-no.: Material: exterior lacquered steel, interior ABS plastic • colour: white • forced-air cooling • digital control • automatic defrost function Equipment: • for ambient temperatures up to max. 30° C • ON/OFF switch with indicator light •... - Page 12 • To avoid damage of the condenser during positioning or transportation, do not lean the device at angle more than 45º. • Do not place the device close to open fire, electric stoves, heating stoves or other sources of heat such as sunshine. High temperature may damage the surface of the device and have adverse impact on cooling capacity or energy consumption.
-
Page 13: Reversing The Door
5.2 Reversing the door • You can modify the refrigerator door opening direction from right to left, if needed. • To modify the door opening direction, it is recommended to get help of another person. CAUTION! To reverse the door, do not place the refrigerator in a horizontal position. Follow the instructions: 1. - Page 14 3. Remove the door. 4. Unscrew hinge 1. Hinge 2 Hinge 1 5. Reverse both hinges. Hinge 2 Hinge 1 - 37 -...
- Page 15 6. Attach hinge 1. 7. Unscrew hinge 4 from the bottom door attachment. 8. Unscrew hinge 3 from the bottom door attachment. - 38 -...
- Page 16 9. Reverse hinges 3 and 4. Hinge 4 Hinge 3 Hinge 3 Hinge 4 10. Secure hinges 3 and 4 to the door. Hinge 3 Hinge 4 - 39 -...
-
Page 17: Operation
11. Rotate the door and attach it to the top door attachment. 12. Screw hinge 2 tight. 5.3 Operation Preparation • Before you start using the device, clean it thoroughly according to the instructions in point 6 “Cleaning”. • Secure the grid trays to the rails in the device at a desired height. •... - Page 18 Control panel, indicators Compressor LED indicator LED glows: the compressor is on LED blinks: - setting of cooling mode parameters is in progress - compressor security is active Defrosting LED indicator LED glows: defrosting in progress LED blinks: condensation in progress Safe energy mode LED indicator LED glows and the display is on: safe energy mode is activated LED glows and the display is off: the device is in the “snooze”...
- Page 19 Tips for the user General information The device may have the following status: - ON: the device is connected to the electric power supply and switched on by the ON/OFF switch. You can set the temperature with the temperature control. - Standby: the device is connected to the electric power supply, but has been switched off by the program, the temperature control is off.
- Page 20 Automatic defrosting Defrosting of the device is performer automatically by water evaporation. At the default setting, the automatic defrosting is performed every 6 hours. The first defrosting circle starts when you switch on the device for the first time. Defrosting lasts 20 minutes. The next defrosting circle starts after 6 hours. Activation of manual defrosting 1.
- Page 21 To initiate, briefly press the button or do not make any modifications in 15 seconds: the LED will stop glowing and the device will finish the setting mode. NOTE! Contact the service if you need to modify any other parameters. Tips for user To fully benefit from the performance capabilities of the device follow the instructions listed below.
-
Page 22: Cleaning And Care
6. Cleaning and care CAUTION! Before cleaning, switch the device off via ON/OFF switch and disconnect it from the power supply (pull the plug out the socket!). The device is not designed to be rinsed with running water. Do not use a pressure washer to clean the device! Be careful and do not let the water into the device. -
Page 23: Possible Malfunctions
7. Possible Malfunctions In case of malfunction, disconnect the device from its power source. Before contacting the service or sales agent, verify - based on the table below - whether it is possible to eliminate disruption in operation. Problem Cause Solution •... - Page 24 Problem Cause Solution • Loose screws/nuts • Screw the screws/nuts tight The device works • The device is not placed • Place the device on an even worryingly loud on an even and stable and stable surface surface If the problems in operation cannot be eliminated: do not open the body, inform the service or contact the supplier providing: kind of a problem;...
-
Page 25: Waste Disposal
CAUTION! For the disposal of the device please consider and act according to the national and local rules and regulations. Bartscher GmbH Franz-Kleine-Str. 28 D-33154 Salzkotten phone: +49 (0) 5258 971-0 Germany...
Need help?
Do you have a question about the 590LW and is the answer not in the manual?
Questions and answers