Table of Contents
Advertisement
Available languages
Available languages
Quick Links
R
BEFORE YOU BEGIN
NOTES
S
Observe all local plumbing and
building codes.
S
Prior to installation, unpack the new
lavatory and inspect it for damage.
Return the lavatory to its protective
carton until you are ready to install it.
ROUGHING-IN
(S) 10" (25.4cm) (Based on 12" (30.5cm)
risers which may require cutting).
(T)
Pop-up
drain
typically
(36.8cm); grid drain typically 13-5/8"
(34.6cm).
K-2258-1
8-1/4" (21cm)
MOUNTING
HOLE
27" (68.6cm)
22-1/8" (56.2cm)
(S)
(T)
3/8" HOT
1-1/4" OUTLET
Español, Página 5
A
1007275-2-
Français, Page 9
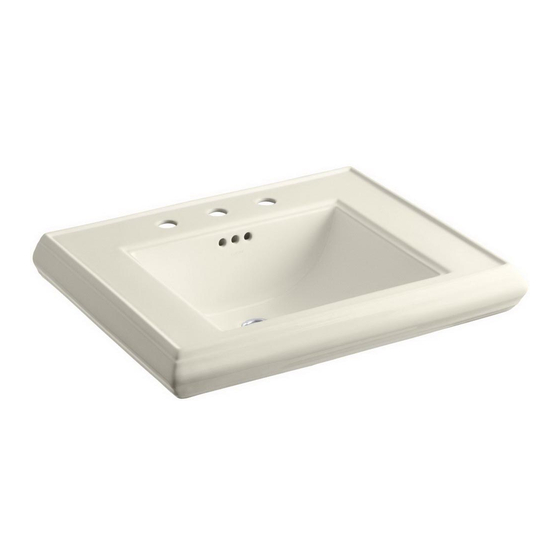
PEDESTAL LAVATORY
K-2258, K-2259
S
These instructions are for installing
the lavatory to wood frame
construction. For other installations,
supply suitable bracing and
fastening devices of sufficient size
and strength.
S
The walls and floor must be square,
plumb, and level.
Fixture dimensions are nominal and
conform to tolerances in ASME Standard
A112.19.9M.
14-1/2"
FINISHED WALL
2-3/8"
8"
(6cm)
(20.3cm)
22" (55.9cm)
4" (10.2cm)
1/2" (1,3cm) D.
MOUNTING HOLE
IN PEDESTAL
2-3/4"
8-7/8"
(7cm)
(22.5cm)
1/2" (1.3cm) D.
ANCHOR HOLES IN
LAVATORY
35"
(88.9cm)
3/8" COLD
4" (10.2cm)
MEMOIRS
K-2258-4
4" (10.2cm)
2-3/8"
(6cm)
K-2258-8
4" (10.2cm)
2-3/8"
(6cm)
3-1/4" (8.3cm)
E2001 Kohler Co.
1 1
Advertisement
Table of Contents

Related Manuals for Kohler MEMOIRS Series


Summary of Contents for Kohler MEMOIRS Series
- Page 1 27” (68.6cm) MOUNTING HOLE 22-1/8” (56.2cm) IN PEDESTAL 2-3/4” 8-7/8” (7cm) (22.5cm) 1/2” (1.3cm) D. ANCHOR HOLES IN 3/8” HOT LAVATORY 35” (88.9cm) 3-1/4” (8.3cm) 3/8” COLD 1-1/4” OUTLET 4” (10.2cm) Español, Página 5 E2001 Kohler Co. 1007275-2- Français, Page 9...
-
Page 2: Tools And Materials Required
Here hole on the wall, and mark the floor Center of through the hole in the pedestal Anchoring bottom. Holes Carefully remove the lavatory from the pedestal. Then move the pedestal from the area. 1007275-2- Kohler Co., Kohler, WI U.S.A. - Page 3 Secure the pedestal to the floor with Wood Screw the wood screw and washer. Tighten the wood screw until it is snug. Washer CAUTION: Risk product damage. overtighten. Overtightening may cause damage to the product. Kohler Co., Kohler, WI U.S.A. 1007275-2-...
-
Page 4: Important Consumer Information
First review the installation instructions to ensure correct installation. For additional assistance in the USA, call our Customer Service Department for direct help. You may also contact us at our web site listed below. Call 1-800-4-KOHLER within the U.S. Call 001-877-680-1310 within Mexico Call 1-800-964-5590 within Canada www.kohlerco.com... -
Page 5: Antes De Comenzar
22-1/8” (56,2cm) DI M. EN EL PEDESTAL 2-3/4” 8-7/8” (7cm) (22,5cm) HUECOS DE SUJECIÓN DE 1/2” (1,3cm) D. EN EL 3/8” CALIENTE LAVABO 35” (88,9cm) 3-1/4” (8.3cm) 3/8” FRÍA Salida de 1-1/4” 4” (10,2cm) Kohler Co., Kohler, WI U.S.A. 1007275-2-... -
Page 6: Herramientas Ymateriales Requeridos
Centro de los marque el piso a través del orificio hoyos del en el fondo del pedestal. sujetador Con cuidado, remueva el lavabo del pedestal. Luego, remueva el pedestal de su posición. 1007275-2- Kohler Co., Kohler, WI U.S.A. - Page 7 No fije demasiado los acabada tapones roscados. El asegurar en exceso puede dañar el producto. Pedestal Conecte y asegure el sifón. Conecte Tapón los suministros del agua fría y roscado caliente al grifo. Arandela Kohler Co., Kohler, WI U.S.A. 1007275-2-...
-
Page 8: Cuidado Y Limpieza
CUIDADO Y LIMPIEZA Para mantener su lavabo de Kohler como nuevo, es necesario enjuagarlo después de cada uso. NO UTILICE LIMPIADORES ABRASIVOS en este producto, pues pueden rayar y opacar la superficie. Las manchas difíciles de quitar, la pintura y el alquitrán se pueden limpiar con aguarrás y diluyente de pintura. -
Page 9: Avant De Commencer
LA COLONNE 2-3/4 po 8-7/8 po (7cm) (22,5cm) TROUS D’ANCRAGE DE 1/2 PO (1,3cm) 3/8 po CHAUD 35 po DIA. DU LAVABO (88,9cm) 3-1/4 po (8,3cm) 3/8 po FROID SORTIE 1-1/4 po 4 po (10,2cm) Kohler Co., Kohler, WI U.S.A. 1007275-2-... -
Page 10: Outils Et Matériaux Requis
Centre des plancher à travers l’ouverture du bas trous de la colonne. d’ancrage Enlever le lavabo du dessus de la colonne. Retirer la colonne de la zone de travail. 1007275-2- Kohler Co., Kohler, WI U.S.A. - Page 11 à bois et la rondelle. Serrer la vis à bois jusqu’à ce qu’elle Rondelle soit en appui. ATTENTION Risque d’endommagement du produit. Ne pas trop serrer. Le serrage excessif peut endommager le produit. Kohler Co., Kohler, WI U.S.A. 1007275-2-...
-
Page 12: Entretien Et Nettoyage
Revoir d’abord la notice d’installation pour s’assurer d’une installation correcte. Pour toute assistance additionnelle, contactez notre département de service à la clientèle. Vous pouvez aussi nous joindre sur notre site Web à l’adresse donnée ci-dessous. Aux É.-U., composer le 1-800-4-KOHLER Au Mexique, composer le 001-877-680-1310 Au Canada, composer le 1-800-964-5590 www.kohlerco.com...
Need help?
Do you have a question about the MEMOIRS Series and is the answer not in the manual?
Questions and answers