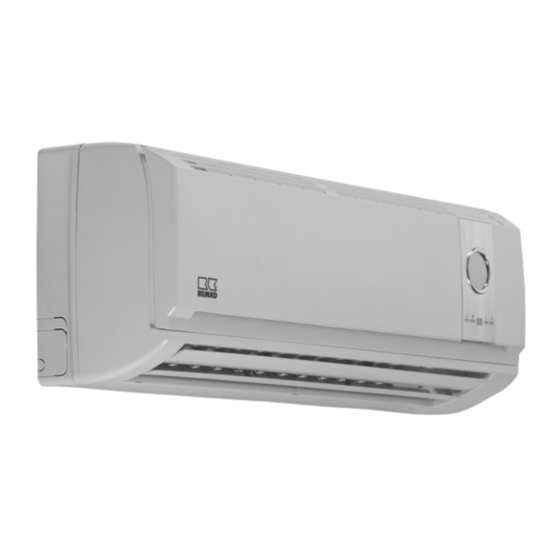
Summary of Contents for REMKO RXW 350
- Page 1 REMKO RXW 350 / 480 Wall units Operation Technology Spare Parts REMKO – powerful like a bear. Edition GB – R05...
-
Page 3: Table Of Contents
Our guarantee becomes null and void if the unit is used, set up or maintained improperly, or if modifications are made to the supplied unit without our prior consent. Subject to changes! Wall units REMKO RXW 350 / 480 Content Content Page Page... -
Page 4: Safety Instructions
Description of Device and outlet openings. Do not insert foreign objects into the air intake or The air conditioners in the REMKO RXW 350 / 480 se- outlet openings of the unit. ries are split-design, wall-mounted, direct-condensing Do not place any objects on top of the unit. -
Page 5: Operation
Operation ON/OFF button Two to four seconds after the indoor unit has been con- nected to the power supply, operation can begin. unit switched with this button. The settings appear on the display. Inserting batteries into the remote control TEMP UP/DN button Prior to initial operation, the batteries supplied with the This button is used to decrease the temperature unit (2 type AAA batteries) must be inserted into the re-... - Page 6 Button functionality The following settings can be made using the remote control at a distance of no more than 7 m. Point the remote control at the receiver on the right side of the indoor unit. The unit beeps to confirm that a button has been pressed and the signal has been correctly received.
- Page 7 MODE button Use the MODE button to select the individual operating modes. There are 5 modes available: 1. Automatic, automatic selection of cooling or heating mode 2. Cooling, operating mode primarily for summer 3. Dehumidifying, summer or winter operating mode 4.
- Page 8 Heating mode In heating mode, you can heat the room in spring and autumn. The selected room tempera- ture is set in 1°C increments with the TEMP UP/DN button. If the room temperature falls 1° C below the selected target temperature, the indoor unit begins to heat the room air. If the room temperature exceeds the set room temperature by approx.
-
Page 9: Shutting Down The Unit
RESET button By pressing the lower RESET button, the remote control can be reset. Afterwards, the time must be programmed (see “CLOCK button“). Functional process RESET 5 sec. Clock setting Display on the indoor unit Manual air distribution The display is lit up depending on the current settings. There are individually adjustable air directing plate fins During operation, the on / off display and the selected on the air outlet side for horizontally distributing the air. -
Page 10: System Structure
To clean the air filters, proceed as follows: 1. Open the front of the unit by pushing the grille up Cooling and heating and locking it into place. RXW 350 RXW 480 2. Lift the filters up and then RKS 435 H pull them out. -
Page 11: Troubleshooting
Is the collector filled with water and the Have pump checked by authorised float regulator is defective pump is not working? service centre Should the unit still not work after performing these functional checks, please contact the closest dealer or REMKO GmbH & Co KG. directly. -
Page 12: Technical Data
Room temperature DB 27, WB 19 °C; outside temperature DB 35 °C, WB 24 °C in combination with RKS 435 H or RKS 448 H Room temperature DB 20, WB 14 °C; outside temperature DB 7 °C, WB 6 °C in combination with RKS 435 H or RKS 448 H *** Distance 1m Dimensions RXW 350 / RXW 480... -
Page 13: Assembly Instructions For Service Personnel
Make sure that the electrical lines have been prop- erly attached in the electrical terminals. The indoor unit and outdoor unit of the REMKO air conditioner have been adjusted to one another from Installation a technical standpoint. - Page 14 Lead-through options 3. When assembling the unit, observe the bending radii Prior to installation, take a look at the various options of the refrigerant pipes and never bend the hose in for lead-throughs of the refrigerant and condensation the same place twice. This may cause the pipe to pipes and control lines (see figure below).
-
Page 15: Electrical Connection
Outdoor unit Indoor unit Power supply trol line. If the lines are not used or extended, a five- wire (RXW 350) and a six-wire (RXW 480) can be used. Compressor control All electrical installations may only be performed by 230 V~,... -
Page 16: Prior To Initial Operation
Initial Operation Follow the instructions below to lay the condensation hose: Once all components have been connected and checked, the unit can be put into operation. Initial opera- The condensation drainage pipe is generally tion must be performed using the certificate and must be placed in the same guideway as the refrigerant documented. -
Page 17: Customer Service And Guarantee
"guarantee certificate" ing the remote control. enclosed with all units and send it back to REMKO GmbH in a timeframe that coincides with purchase & Co. KG 3. -
Page 18: Certification For Initial Operation
Certification for Initial Operation Date 01/2005 Initial Operation Subsequent Operation of a REMKO air-conditioning system Unit data Outdoor unit Indoor unit Type of unit Unit number Refrigerant pipe length/height ———– Oil elevation arcs ———– unit Additional refrigerant amount ———– Condensation pump ———–... - Page 20 REMKO GmbH & Co. KG Air-Conditioning and Heating Technology D-32791 Lage Im Seelenkamp 12 • D-32777 Lage P.O. Box 1827 • Phone: +49 52 32 606 - 0 Fax: +49 52 32 606- 260 E-mail: export@remko.de Internet: www.remko.de...


Need help?
Do you have a question about the RXW 350 and is the answer not in the manual?
Questions and answers