Table of Contents
Advertisement
Advertisement
Table of Contents

Related Manuals for Juniper Mesa 3


Summary of Contents for Juniper Mesa 3
- Page 1 mesa O W N E R ’ S M A N U A L...
- Page 2 Bluetooth word mark is owned by the Bluetooth SIG, ® Inc. Any use of such marks by Juniper Systems, Inc. is under license. The names of other companies and products mentioned herein may be the trademarks of their respective owners.
-
Page 3: Table Of Contents
CONTENTS Getting Started Perform Initial Tasks Turn the Mesa 3 on and Off Standard Features Operating System Keypad Features Light Sensor Power Management Data Storage Options Sensors Bluetooth Wireless Communication ® Wi-Fi Wireless Networking NFC Short-Range Wireless Technology GPS/GNSS Camera... - Page 4 Warnings, Regulatory Information, Licensing 45 Product Warnings Certifications and Standards Licensing Information Specifications Index Mesa 3 Rugged Tablet Powered by Android...
-
Page 5: Getting Started
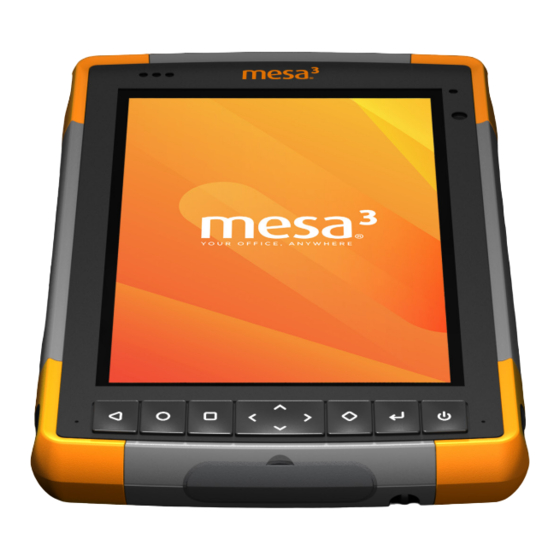
GETTING STARTED... - Page 6 Getting Started The standard features for the Mesa 3 Rugged Tablet™ powered by Android from Juniper Systems include a 7” display, capacitive touchscreen, keypad, Bluetooth technology, Wi-Fi, NFC, GPS/GNSS, camera, and 4G LTE data modem. Standard accessories include a removable...
- Page 7 Battery Compartment and Card Slots 4 Flexible Card Retainer 1 Battery Pack, Removable 5 Battery Compartment 2 Battery Door 6 Docking Port Connections 3 Micro SIM Card Slot and Micro SD/SDHC Card Slot 7 Hand Strap Attachment (underneath card retainer) Point (2 on each side) Connector Ports 9 10 11...
-
Page 8: Perform Initial Tasks
Perform Initial Tasks When you receive your Mesa 3, perform the tasks outlined in this section before first use. Review Documentation Documents like release notes, quick start guides, manuals, certification information, and accessory instructions are available on our website at: www.junipersys.com/support/... - Page 9 5. Attach the appropriate plug for your country into the AC wall charger and plug it into a wall socket. Plug the other end into the DC power jack on the Mesa 3. Note: Use the AC wall charger that came with the Mesa 3 or an approved charger.
- Page 10 Mesa 3. Hand Strap To attach the hand strap to the Mesa 3, follow the images below. You can attach it to the right or left side of the tablet: Mesa 3 Rugged Tablet Powered by Android...
-
Page 11: Turn The Mesa 3 On And Off
When startup is complete, the Lock screen is shown. Swipe up from the bottom of the screen to unlock it. The Home screen is shown. To power the Mesa 3 off, press the power key for a few seconds until a menu is shown with these selections: Power off „... - Page 12 Mesa 3 Rugged Tablet Powered by Android...
-
Page 13: Standard Features
STANDARD FEATURES... -
Page 14: Operating System
(178 mm). Accessing Information When you turn the Mesa 3 on, a Lock screen is shown. Swipe up from the bottom of the screen to unlock it. The Home screen is shown. From the top of the Home screen, swipe... -
Page 15: Keypad Features
Profiles choices include: Finger, Stylus or Finger, Glove, Stylus, or Wet. You can try different profiles to see which one works best for the conditions the Mesa 3 is being used in. To adjust the Touch Control setting, swipe down from the top twice to see all of the Quick Settings and tap and hold Touch Settings. -
Page 16: Light Sensor
You can enable this process by going to Settings > Display > Adaptive brightness. Power Management The Mesa 3 runs on battery power, using a removable, rechargeable, Li-Ion battery pack. A non-removable, internal battery pack is an option. The tablet operates on either one or both battery packs. - Page 17 Battery Status and Management Battery icons on the Status bar shows the status of installed batteries. The large battery icon represents the removable battery while a smaller battery icon represents an optional internal battery. The status of these icons follows: If both the internal and the removable batteries are „...
- Page 18 2. A menu appears with Power off, Restart, and Screenshot options. Tap Power off. Powering Off for Long-Term Storage To power off the Mesa 3 for long-term storage (two weeks or more), follow these steps: 1. Power off the Mesa 3 as described in the previous section, Short-term Storage.
-
Page 19: Data Storage Options
„ Data Storage Options SD Cards The Mesa 3 has a slot for a micro SD card located in the battery compartment. The card slot and flexible card holder are designed to hold the card securely in place so it will not come out or disconnect if the tablet is dropped. - Page 20 USB 2.0 host port: Attach a USB storage device like a „ thumb drive to transfer data to and from the Mesa 3. You can also use this port to plug in a mouse or keyboard. USB-C port: This port can be used to attach a computer „...
-
Page 21: Sensors
3. Make Bluetooth technology discoverable on both devices. It is off on the Mesa 3 by default. You can quickly check on the status by swiping down from the top of the screen to view the Quick Settings. If the Bluetooth icon is gray, it is off. -
Page 22: Wi-Fi Wireless Networking
NFC Short-Range Wireless Technology NFC tags can be scanned by holding the tag against the Mesa 3 NFC antenna located inside the back of the unit under the regulatory symbols on the serial number label. Note: NFC does not support secure transactions. -
Page 23: Camera
Camera The Mesa 3 has a front facing camera that is 2 MP and a rear facing camera that is 16 MP. By default the camera application can be accessed by quickly pressing the hardware power button twice. - Page 24 2. Remove the battery door and battery pack as outlined in Chapter 1. CAUTION: The Mesa 3 is not sealed against water and dust when the battery door is not installed properly. 3. An image on the battery compartment label shows the correct location and orientation for the SIM card.
-
Page 25: Optional Features And Accessories
OPTIONAL FEATURES AND ACCESSORIES... -
Page 26: Barcode Imager
RFID reader. Barcode Imager The Mesa 3 with a barcode imager allows you to read 1D and 2D barcodes and easily import barcode data into custom or standard programs running on the Mesa 3. - Page 27 This menu gives you access to several setting screens. User Settings From the menu, select User to open the User Settings screen. From this screen, set up options like Barcode Scan Time and which button to use to scan barcodes. Data Format and Barcode Types On the Data Format screen, you can set up a prefix and suffix.
- Page 28 3. The barcode imager is located on the top of the Mesa 3 when in portrait mode. Aim the barcode imager at the barcode.
- Page 29 3. Go to the User Settings screen and tap Reset Settings to restore the settings to the default operating parameters. 4. Close the Barcode Connector utility. 5. Launch the Barcode Connector utility again and verify that correct functionality has been restored. Sample Barcodes 1D Barcodes Code 39...
-
Page 30: Rfid Reader
Maxicode MicroPDF417 QR Code RFID Reader The Mesa 3 Rugged Tablet with an RFID reader allows you to read UHF RFID tags and easily import data into custom or standard programs running on the Mesa 3. RFID Connector Utility The RFID Connector utility is a wedge program provided ™... - Page 31 RFID tag directly away from the back of the Mesa 3. Tap Scan on the screen or press the scan button on the keypad. After a tag is successfully read, the Scan Data is shown on the screen.
-
Page 32: Rs-232 Port
3. For best read performance, hold the Mesa 3 with the display facing you, and the tag directly away from the back of the Mesa 3. The RFID reader is internal and roughly 2” to the right of the camera when looking at the back of the Mesa 3. - Page 33 Enable RS-232 port: When this option is off, it powers „ down. When it is on, it powers up the RS-232 hardware. It then displays the assigned COM port number. Note: If you do not have a device plugged into the RS- 232 port, the port pins corrode more quickly when left powered up.
-
Page 34: Office Docking Station
9 Power Input Jack 7 8 9 Ports The USB ports are for attaching devices to the Mesa 3 „ such as a mouse, keyboard, or external storage device. The HDMI port is for connecting a 1920 x 1080 resolution „... - Page 35 How to Use the Dock 1. On the Mesa 3, make sure Auto-rotate is turned on (see Chapter 2, Auto-rotate the Screen). 2. Provide power to the dock using the 30 W AC wall charger provided with your Mesa 3 (the ports require external power).
-
Page 36: Mesa 3 Vehicle Dock
The Mesa 3 docking pin contacts are always powered „ on when it is docked. If you are using the Mesa 3 in a potentially corrosive location when it is not docked, the pin contacts can be turned off in Settings > Doc Control. - Page 37 4. Press the lock bar down until it engages the Mesa 3. 5. Push the lock button in. The Mesa 3 is now locked in the dock and cannot be accidentally removed. 6. To remove the Mesa 3, turn the key until the lock button pops out.
-
Page 38: Battery Charger
The Mesa 3 docking pin contacts are always powered „ on when it is docked. If you are using the Mesa 3 in a potentially corrosive location when it is not docked, the pin contacts can be turned off in Settings > Dock Control. -
Page 39: Storage, Maintenance, And Recycling
STORAGE, MAINTENANCE, AND RECYCLING... -
Page 40: Storing The Mesa 3 And Battery Pack
5. Place the battery pack in a cool, dry location. CAUTION: Read the battery warnings in Appendix C. 6. The AC wall charger must be plugged in and connected to the Mesa 3 in order to turn it on after storage. Protecting the Touchscreen Protect the touchscreen from impact, pressure, or abrasive substances that could damage it. -
Page 41: Recycling The Mesa 3 And Batteries
Recycling the Mesa 3 and Batteries When the Mesa 3 and Li-Ion battery packs for your Mesa 3 reach the end of their service life, they must not be disposed of with municipal waste. - Page 42 Mesa 3 Rugged Tablet Powered by Android...
-
Page 43: Warranty And Repair Information
WARRANTY AND REPAIR INFORMATION... -
Page 44: Limited Product Warranty
Warranty and Repair Information Limited Product Warranty Two Year Warranty Juniper Systems, Inc. (“JS”) warrants that the Mesa 3 Rugged Tablet and optional internal battery shall be free from defects in materials and workmanship, under normal intended use, for a period of 24 months from the date of shipment. - Page 45 (viii) the product has been opened or tampered with in any way (such as the tamper evident VOID label indicating certified IP [Ingress Protection] seal area has been tampered with or removed). Parts that are excessively worn are not covered under warranty.
-
Page 46: Repairs
Repairs CAUTION: Do not attempt to repair the Mesa 3 yourself. This action voids the warranty. Information about warranties, repairs, and Complete Care service plans is located on our website at www.junipersys. - Page 47 Services and Materials Provided Under Warranty Analysis of problem by service technician „ Labor and materials required to fix defective parts „ Functional analysis performed after repair „ Shipping costs to return device to customer „ JS strives to provide continued full repair services for our products for 3 to 5 years from the end of life announcement of a product model.
- Page 48 System Information for your Mesa 3 You might be asked to provide additional information about your Mesa 3 when you contact a repair center. To view information like the operating system edition, OS build and serial number, go to Settings > About Tablet.
-
Page 49: C Warnings, Regulatory Information, Licensing
WARNINGS, REGULATORY INFORMATION, LICENSING... -
Page 50: Product Warnings
Warnings, Regulatory Information, Licensing Product Warnings Follow the warnings listed below to use the Mesa 3 batteries and AC wall charger. Battery Warnings WARNING! This device comes with a lithium-ion rechargeable battery pack. To reduce the risk of fire or burns, do not disassemble, crush, puncture, short external contacts, or expose the battery pack to fire. -
Page 51: Certifications And Standards
12 VDC and a minimum 2.5 A, and be certified or listed by a nationally recognized testing laboratory. The AC wall charger provided with the Mesa 3 meets these criteria. Using any other external power source can damage your product and void your warranty. - Page 52 United States In compliance with the FCC rules 47 CFR 15.19(a)(3), the statements that follow must appear on the device or in the user documentation. This device complies with Part 15 of the FCC Rules. Operation is subject to the following two conditions: 1.
- Page 53 Only approved accessories may be used with this equipment. In general, all cables must be high quality, shielded, correctly terminated, and normally restricted to two meters in length. Wall chargers approved for this product employ special provisions to avoid radio interference and should not be altered or substituted.
- Page 54 Cables connecting to the USB host port must use a ferrite core/bead on the cable. The ferrite core must be placed on the cable near the end that connects to the Mesa 3. Mesa 2 Rugged Tablet Powered by Android Owner’s Manual...
- Page 55 Declaration of Conformity The Declaration of Conformity for CE Marking is available www.junipersys.com/doc European Radio Power BAND LOWER BAND UPPER BAND CONDUCTED EDGE (MHz) EDGE (MHz) POWER (dBm) 4G Data Modem GSM900 GSM1800 1710 1785 UMTS B1 1920 1980 UMTS B8 LTE B1 1920 1965...
-
Page 56: Licensing Information
MPEG-2 patent portfolio, which license is available from MPEG LA, LLC, 6312 S. Fiddlers Green Circle, Suite 400E, Greenwood Village, Colorado 80111 U.S.A. Mesa 3 Rugged Tablet Powered by Android... -
Page 57: D Specifications
SPECIFICATIONS... - Page 58 Configuration technology, NFC, 6 GB RAM, 64 flash storage, front and rear cameras, GNSS receiver, and 4G LTE modem Optional features that can be integrated with the Mesa 3: Internal battery pack „ Barcode 1D/2D imager „ UHF RFID reader, antenna „...
- Page 59 FEATURE SPECIFICATION Display Active viewing area: 7” (178 mm) „ WXGA 800 x 1280 pixel resolution „ Backlit LCD „ Outdoor viewable „ Portrait or landscape orientation „ Touchscreen Capacitive multi-touch interface for „ use with gloves, small tip stylus, and in wet conditions Chemically-strengthened „...
- Page 60 FEATURE SPECIFICATION Audio Mono speaker, loud and clear „ Microphone, low noise „ LED Activity Red: power applied/charging status „ Indicators Green: Custom programmable by „ customer applications Blue: Android notifications „ Standard Ambient light sensor „ Sensors/ Compass „ Features Accelerometer „...
- Page 61 FEATURE SPECIFICATION Certifications FCC Class B „ and Standards CE Marking „ Industry Canada „ Australia (ACMA) „ IEC/EN 62368 safety „ Bluetooth SIG qualification „ IP68 waterproof and dustproof „ Designed to MIL-STD 810G „ RoHS 2 compliant „ Camera Resolution: 16 MP rear, 2 MP front „...
- Page 62 FEATURE SPECIFICATION UHF RFID Optional built-in UHF RFID module „ (Option) and antenna Region-specific frequency „ configurations (859–873 MHz & 915– 930 MHz) EPCglobal Gen 2 (ISO 18000-6C) „ protocol support Wide output range (0 dBm to +27 „ dBm) Barcode 1D/2D Imager and Decoder: Motorola/ „...
- Page 63 - Output: 12 VDC, 1.67 A Capacitive fine tip stylus with tether „ Quick Start Guide „ Owner’s Manual (on our website) „ Two year warranty on Mesa 3 „ Optional Survey/GPS pole clamp and mount „ Accessories Vehicle charger cable, 12 V vehicle „...
- Page 64 FEATURE SPECIFICATION Warranties 24 months for Mesa 3 „ 90 days for accessories „ Extended service and maintenance „ plans are available * 4G LTE Data Modem - Additional Information Mode Frequency Bands B1, B2, B3, B4, B5, B6, B7, B8, B12, B13, B14, B17, B20, B28...
-
Page 65: Index
INDEX... - Page 66 Battery Status Icons 13 , 13 , 47 Charge 6 Install 4–5 Internal 13–14 , 4 , 12–13 Removable 3 Specifications 55 Status 13 Storage 36 Warnings 46 , 55 Bluetooth Wireless Communication 17 Mesa 3 Rugged Tablet Powered by Android...
- Page 67 Camera 19 Specifications 57 Care and Maintenance Cleaning 37 Storage 36 , 20 , 36 , 37 , 42 , 47 Cautions 15 Certifications and Standards 47 Canada 49 CE Marking, European Union 50 European Radio Power 51 Licensing Information 52 Radio Frequency Safety 50 United States 48 Cleaning 37...
- Page 68 NFC Short Range Wireless Technology 18 Office Docking Station 30 Operating System 10 Physical Features 54 Powering Off and On 14 Product Warnings 46 Recycling the Mesa 3 and Batteries 37 , 12–13 Removable Battery Pack 3–5 Repairs 43 RFID Reader 26–28 , 55...
- Page 69 Screen Protector 59 , 15 SD Card 4 Sensors 17 Accelerometer 17 Compass 17 Service Plans 44 Set up Tasks, Initial 4 , 4 , 20 SIM Card 3 Speaker 2 Specifications 54–61 , 36 Storing the Mesa 2 14 Stylus 3 Stylus Storage Slot 2 Tether 6...
- Page 70 , 13 , 47 Wall Charger 5 Warnings 46–47 Battery Warnings 46–47 Wall Charger Warnings 47 Warranty 40–43 Exclusions 40 Limitation of Liability 42 Remedy 41 Repairs 42 Services 43 Warranty Exclusions 40 Wi-Fi Wireless Communication 18 Connecting to a Wi-Fi Network 18 Mesa 2 Rugged Tablet Owner’s Manual...
Need help?
Do you have a question about the Mesa 3 and is the answer not in the manual?
Questions and answers