
Related Manuals for Barbecook NINHO 2.0


Summary of Contents for Barbecook NINHO 2.0
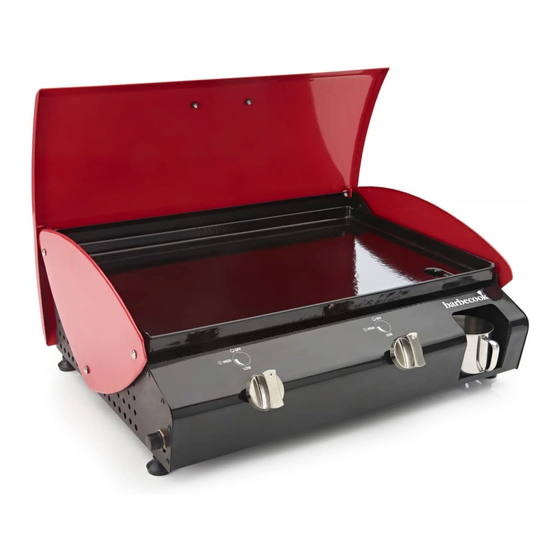
- Page 1 NINHO 2.0 BERO 2.0 # 223.7620.200 # 223.7820.200 www.barbecook.com www.barbecook.com MAN_NINHO_BERO_DE_BBC130808_A.indd 1 12/08/13 10:34...
- Page 2 MAN_NINHO_BERO_DE_BBC130808_A.indd 2 12/08/13 10:34...
-
Page 3: Installation Instructions
Przed montażem grilla należy dokładnie zapoznać się z instrukcją. Grill należy montować na płaskiej i czystej powierz- chni. Uwaga: Podczas montażu grilla należy zachować ostrożność. Narzędzia mogą uszkodzić powierzchnię emaliowaną. Po zakończeniu montażu może pozostać kilka zbędnych śrub. www.barbecook.com MAN_NINHO_BERO_DE_BBC130808_A.indd 3 12/08/13 10:34... - Page 4 2277620070 NINHO 2.0 #223.7620.200 2277620080 2277620010 2277620090 2277620020 2232000000 2277620030 2277820120 2277620240 2279022650 2277620050 2279020635 2277620060 www.barbecook.com MAN_NINHO_BERO_DE_BBC130808_A.indd 4 12/08/13 10:34...
- Page 5 2277620070 BERO 2.0 #223.7820.200 2277620080 2277620011 2277620090 2277620020 2232000000 2277620030 2277820120 2278620244 2279022650 2277620050 2279020635 2277620060 www.barbecook.com MAN_NINHO_BERO_DE_BBC130808_A.indd 5 12/08/13 10:34...
- Page 6 MAN_NINHO_BERO_DE_BBC130808_A.indd 6 12/08/13 10:34...
- Page 7 M6x2PCS(A) www.barbecook.com MAN_NINHO_BERO_DE_BBC130808_A.indd 7 12/08/13 10:34...
- Page 8 MAN_NINHO_BERO_DE_BBC130808_A.indd 8 12/08/13 10:34...
- Page 9 We recommend: PROPANE www.barbecook.com MAN_NINHO_BERO_DE_BBC130808_A.indd 9 12/08/13 10:34...
- Page 10 Assemble the connector supplied! DE - CH - AU A = Standard connector 50 mbar 1. Installare il connettore fornito in dotazi- DE - CH - AU one con l’apparecchiatura. Inizialmente, effettuare il serraggio manualmente. www.barbecook.com MAN_NINHO_BERO_DE_BBC130808_A.indd 10 12/08/13 10:34...
- Page 11 • Injecteur des brûleurs principaux: 0,75 Marking of the injectors • Injector main burners: 0,75 Markierung der Einspritzdüsen • Einspritzdüse Hauptbrenner: 0,75 Indicazioni relative agli iniettori • Iniettore bruciatori principali: 0,75 Oznaczenia wtryskiwaczy • Wtryskiwacz palników głównych: 0,75 www.barbecook.com MAN_NINHO_BERO_DE_BBC130808_A.indd 11 12/08/13 10:34...
- Page 12 HANDLEIDING VOOR MONTAGE, GEBRUIK EN ONDERHOUD NOTICE DE MONTAGE, D’UTILISATION ET D’ENTRETIEN INSTALLATION, USE AND MAINTENANCE INSTRUCTIONS ANLEITUNG ZU MONTAGE, GEBRAUCH UND PFLEGE ISTRUZIONI DI INSTALLAZIONE, USO E MANUTENZIONE WSKAZÓWKI DOTYCZĄCE MONTAŻU, UŻYTKOWANIA I KONSERWACJI www.barbecook.com MAN_NINHO_BERO_DE_BBC130808_A.indd 12 12/08/13 10:34...
- Page 13 Houd de slang GANGEN OF ANDERE INGESLOTEN de aanlsuiting van de gasdruk regelaar zo kort mogelijk. RUIMTEN rechtsom op de tank te draaien. Draai daarna stevig vast met een Engelse • Sluit de barbecue nooit aan op een sleutel niet-gereguleerde gastoevoer. Pro- www.barbecook.com MAN_NINHO_BERO_DE_BBC130808_A.indd 13 12/08/13 10:34...
- Page 14 Een lekkagetest moet uitgevoerd worden : BECUE NIET. Verdelers kan u terugvinden • Alvorens de barbecue de eerste keer via onze website. te ontsteken Meld u aan op www.barbecook.com • Telkens wanneer de gasfles wordt vervangen of een gasonderdeel • Wanneer u op lekkage heeft ge- gewijzigd wordt controleerd, draait u de gastoevoer • Tenminste één maal per jaar, bij dicht, spoelt u de aansluitingen met...
- Page 15 De vonk zal u brander ontste- Bij iedere ontsteking van de barbecue, • Of gebruik de Barbecook verstuiver ken. dient u de vlammen te controleren. (Fig. I) om de bakplaat in te oliën • Als de brander niet na 3 pogingen Een goede vlam dient bijna volledig blauw • Draai het voedsel niet te snel nadat...
-
Page 16: Garantie
Gebruik de daarna een niet schurende vervangen worden. borstel of de ‘Barbecook Bamboe’ borstel Meer info op www.barbecook.com onder om de bakplaat schoon te schrobben. Om de rubriek service. het spoelwater te verwijderen zet u het vet recuperatie bakje terug op zijn plaats en HET TOESTEL OPBERGEN haalt u de ‘Plancha stop’ uit het gat. U kan... - Page 17 De garantie is geldig mits het voorleg- gen van een kasticket + vermelding van Deze garantie beperkt zich tot de herstel- Bij Barbecook® respecteren we de gege- het serienummer, dit kunt u vinden op de ling of vervanging van onderdelen die vens die we registreren. Barbecook staat volgende plaatsen: gebreken vertonen bij normaal gebruik.
-
Page 18: Informations Relatives A La Securite
BECUE A L’EXTERIEUR DANS UN ESPACE BIEN VENTILE ET A MINI- MUM 3 M DE TOUTE HABITATION OU TUYAU ET DETENDEUR BATIMENT. • N’UTILISEZ PAS CET APPAREIL SOUS Le flexible et le régulateur sont fournis UNE CONSTRUCTION QUI LE SUR- par le fabricant. Vous pouvez uniquement PLOMBE OU SOUS LES BRANCHES utiliser une combinaison de flexible et D’UN ARBRE www.barbecook.com MAN_NINHO_BERO_DE_BBC130808_A.indd 18 12/08/13 10:34... -
Page 19: Essai D'étanchéité
S’il y a une fuite, coupez le gaz et serrez la connexion. Ouvrez la soupape à gaz et vérifiez à nouveau la connexion avec l’eau savonneuse. Si la fuite n’a pas été réparée, contactez un distributeur dans votre région. N’UTILISEZ PAS L’APPAREIL. Vous trou- ESSAI D’ÉTANCHÉITÉ verez une liste de distributeurs sur notre 2. La connexion avec l’appareil site web. Effectuez un essai d’étanchéité : Connectez-vous sur www.barbecook.com • Avant d’allumer l’appareil pour la première fois • Une fois que vous avez vérifié • Chaque fois que la bouteille de gaz l’absence de fuites, coupez le gaz, est changée ou qu’un composant de rincez les connexions à l’eau et gaz est remplacé. séchez-les pour prévenir la forma- • Au moins une fois par an, de préfé- tion de rouille. -
Page 20: Allumage Des Brûleurs
• Le couvercle de la Plancha doit toujours être ouvert lorsque vous La Plancha doit être préchauffée en posi- allumez les brûleurs. tion HIGH (haute) pendant au moins dix • Ne vous penchez pas directement minutes avant d’y placer vos aliments. au-dessus de la Plancha lorsque Si vous souhaitez cuisiner à une tempé- vous allumez les brûleurs. rature inférieure à HIGH (haute), tournez • Les boutons de commande de la le bouton de commande à la position Plancha doivent être en position correcte avant de mettre les aliments sur la OFF (arrêt). Ouvrez lentement le Plancha. robinet de la bouteille de gaz. Avant d’actionner le bouton de commande sur un brûleur, attendez environ 10 www.barbecook.com MAN_NINHO_BERO_DE_BBC130808_A.indd 20 12/08/13 10:34... - Page 21 Les brûleurs et les tubes de Venturi doivent Pour faciliter le nettoyage de votre plaque, DE COLLER À LA PLAQUE être déposés pour un nettoyage au moins il est préférable de la nettoyer après cha- deux fois par an. que utilisation pendant qu’elle est encore • Enduisez légèrement les aliments • Déposez les brûleurs comme illustré à la chaude. Barbecook a mis au point un « d’huile avant de les placer sur la fig. F. bouchon Plancha » qui simplifie grande- plaque. • Nettoyez minutieusement les tubes de ment l’entretien. Placez tout d’abord le • Ou utilisez le spray Barbecook pour Venturi. Dégagez toute ouverture ob- « bouchon Plancha » dans la sortie des graisser la plaque.
-
Page 22: Rangement De L'appareil
Cette garantie est limitée à la réparation ou Achetez une couverture Barbecook pour des fixations par vis. au remplacement des pièces qui dévelop- protéger votre appareil et rangez-le sous pent des défauts au cours de l’utilisation abri ou dans un endroit sec. normale. Mesures de précaution spéciales pour les Vous pouvez ranger l’appareil à l’intérieur pièces en acier inoxydable Cette garantie ne s’appliquera pas aux à condition que la bouteille de gaz ait été défauts dus à une installation incor- débranchée et rangée à l’extérieur dans un (la garantie sera annulée en cas de non- recte, à une mauvaise utilisation, à des endroit bien ventilé. - Page 23 • NEVER LEAVE THE BARBECUE you notice any damage or wear, UNATTENDED WHEN IN USE replace the hose before using the • DO NOT OBSTRUCT THE FLOW OF barbecue, in accordance with the COMBUSTION AND VENTILATION AIR national standards TO THE BARBECUE • Fat (or any other hot substance) must never fall onto the hose, and www.barbecook.com MAN_NINHO_BERO_DE_BBC130808_A.indd 23 12/08/13 10:34...
-
Page 24: Test For Leaks
Open the gas safety information and cleaning of valve and check the connection again with the burners) the soapy water. If the leak has not been • None of the gas supply hoses can repaired, contact a distributor in your area. come into contact with a hot surface DO NOT USE THE APPLIANCE. You can • Your barbecue is installed in a safe find a list of distributors on our web site. place Log in on www.barbecook.com www.barbecook.com MAN_NINHO_BERO_DE_BBC130808_A.indd 24 12/08/13 10:34... - Page 25 Before using your Plancha for the first time, Then use a non-abrasive brush or the allow the unit to ‘run in’ by operating it for a Barbecook Bamboo brush to scour the short period of time without food. To ‘run in’ griddle clean. To remove the water, replace your Plancha, ignite the appliance. the grease recovery trap and remove the Keep the temperature on ‘HIGH’ for ‘Plancha plug’ from the opening. You can...
-
Page 26: Storing The Appliance
Buy a Barbecook cover to protect your appliance, and store under shelter or in a dry place. You can store the appliance indoors... - Page 27 • S alt on burner • C lean burner • T he product is connected to Buthane. • C onnect the product to Propane with the right connector. Flames behind control panel • B locked venturi tubes • S hut off gas immediately, allow barbecue to cool down and clean venturi tubes Regulator humming • T emporary situation caused by high outside temperature or • T his is not a defect or a hazard full cylinder Incomplete flame • B locked, pierced or rusted burner • C lean / replace burner www.barbecook.com MAN_NINHO_BERO_DE_BBC130808_A.indd 27 12/08/13 10:34...
- Page 28 TETEN ORT MIT EINEM ABSTAND Leitung modifiziert werden. VON MINDESTENS 3 M ZU EINER WOHNUNG ODER EINEM GEBÄUDE. • VERWENDEN SIE DIESES GERÄT SCHLAUCH UND DRUCKMINDERVENTIL NICHT UNTER EINER ÜBERHÄNGEN- DEN KONSTRUKTION ODER UNTER Für Schlauch und Regler ist der Hersteller EINER BELAUBUNG. zuständig. Eine Schlauch-/Reglerkombina- tion dürfen Sie nur dann einsetzen, wenn www.barbecook.com MAN_NINHO_BERO_DE_BBC130808_A.indd 28 12/08/13 10:34...
- Page 29 Vertretung in Ihrer Nähe. DAS GERÄT NICHT IN BETRIEB NEHMEN. Eine Liste der Vertretungen finden Sie auf unserer Website. Melden Sie sich bei 2. Die Verbindung mit dem Gerät www.barbecook.com an. LECKAGETEST • Nach dem Überprüfen auf Gaslecks Führen Sie einen Leckagetest durch: stellen Sie die Gaszufuhr ab, spülen • Bevor das Gerät zum ersten Mal Sie die Verbindungen mit Wasser gezündet wird...
- Page 30 Die tatsächliche Garzeit hängt von mehre- Sie den Regler eines Brenners dre- ren Faktoren ab, unter Anderem von Ihrem hen, warten Sie etwa 10 Sekunden, Geschmack, der Umgebungstemperatur bis sich die Gasflamme stabilisiert und vom Wind. Zum Einschätzen dieser hat. www.barbecook.com MAN_NINHO_BERO_DE_BBC130808_A.indd 30 12/08/13 10:34...
- Page 31 Brenner und Venturirohre aus dem Gerät • Beim Montieren emaillierter Teile jedem Gebrauch gesäubert werden, genommen werden. immer die mitgelieferten Glasfaser- solange es noch heiß ist. Barbecook hat • Nehmen Sie die Brenner wie in Abb. F scheiben benutzen, um Schäden an einen “Plancha Stopfen” entwickelt, mit gezeigt heraus. der Emaille um die Verschraubun- dem sich die Instandhaltung ganz unkom- • Reinigen Sie die Venturirohre gründlich.
-
Page 32: Fehlersuche
Nähe eines offenen fehler anerkannt; sie sind die logische Kon- Feuers oder einer Wärmequelle, wenn die sequenz des Gerätegebrauchs. Dement- Gasflasche angeschlossen ist. sprechend entsteht bei den Brennern etc. Kaufen Sie eine Barbecook Abdeckung, im Laufe der Zeit etwas Rost. Es ist ganz um das Gerät zu schützen, und stellen Sie normal, dass diese Teile ausgewechselt es unter einen Unterstand oder an einen werden müssen. - Page 33 2. MOLTO IMPORTANTE GARAGE, CAPANNI, CORRIDOI O • Non collegate mai il barbecue ad ALTRE ZONE CHIUSE Collegare il regolatore di pressione del una bombola non regolata. Non gas alla bombola serrando il connettore del regolatore sul lato destro del serba- www.barbecook.com MAN_NINHO_BERO_DE_BBC130808_A.indd 33 12/08/13 10:34...
-
Page 34: Sostituzione Della Bombola
ZARE L’APPARECCHIATURA. L’elenco specifico per il rilevamento delle perdite. dei distributori di zona è riportato sul nostro sito web. Effettuare l’accesso al link: ATTENZIONE www.barbecook.com Non effettuare la ricerca di perdite utilizzan- do accendini o fiammiferi! Assicurarsi che • Una volta completata la verifica delle nelle vicinanze dell’area di esecuzione dei perdite, chiudere l’erogazione del test di rilevamento delle perdite non siano gas, risciacquare i collegamenti con presenti scintille o fiamme vive. - Page 35 Prima di utilizzare il vostro barbecue Prima di ruotare la manopola di Plancha per la prima volta, è necessario regolazione del gas dei bruciatori, effettuate un breve “rodaggio”, facendolo www.barbecook.com MAN_NINHO_BERO_DE_BBC130808_A.indd 35 12/08/13 10:34...
- Page 36 (Fig. F). Dopo la non abrasiva, oppure l’apposita spazzola Se si desidera effettuare una cottura a una pulitura, i tubi di Venturi devono essere Barbecook Bamboo, per sfregare la piastra temperatura inferiore a quella massima, ricollegati alle valvole di erogazione del fino alla completa pulitura. Per rimuovere (posizione HIGH), è...
-
Page 37: Garanzia
L’apparecchiatura può essere anche con- Barbecook® ha il massimo rispetto per i servata in un locale chiuso, a condizione dati personali dei clienti. Barbecook ga- che sia scollegata dalla bombola del gas, e rantisce che nessuna informazione fornita che tale bombola sia stoccata in un luogo dai clienti verrà mai venduta, condivisa o... -
Page 38: Risoluzione Dei Problemi
• P ulire il bruciatore • L ’unità è collegata a butano • C ollegare l’unità a propano utilizzando un idoneo regolatore di pressione. Fiamme dietro al pannello di controllo • T ubi di Venturi bloccati • S pegnere immediatamente il gas, lasciare raffreddare il barbecue e pulire i tubi di Venturi Ronzio del regolatore • S ituazione temporanea causata da un’alta temperatura • N on si tratta di un difetto o di un pericolo esterna o da una bombola piena Fiamma incompleta • Bruciatori ostruiti, forati o arrugginiti • P ulire / sostituire il bruciatore www.barbecook.com MAN_NINHO_BERO_DE_BBC130808_A.indd 38 12/08/13 10:34... - Page 39 Podłączyć regulator ciśnienia gazu do • NIE KORZYSTAĆ Z GRILLA NA gazu / ciśnienia nominalnego podawanego cylindra, dokręcając złączkę regulatora ŁODZIACH I INNYCH POJAZDACH na urządzenie. Wąż powinien być możliwie po prawej stronie zbiornika. Następnie za REKREACYJNYCH. krótki. www.barbecook.com MAN_NINHO_BERO_DE_BBC130808_A.indd 39 12/08/13 10:34...
-
Page 40: Wymiana Butli
PRÓBA SZCZELNOŚCI Listę dystrybutorów można znaleźć na naszej stronie internetowej. Zaloguj się na Wykonać próbę szczelności: 2. przyłącze do urządzenia stronie www.barbecook.com • przed pierwszym użyciem urządzenia • Po sprawdzeniu szczelności, • każdorazowo po wymianie butli z ga- wyłączyć dopływ gazu, przepłukać... - Page 41 • Odkręcić zwór butli z gazem. przeczytać rozdział „Rozwiązywanie pro- • Można także spryskać płytę prepa- • Wcisnąć jedno z dwóch pokręteł blemów”. ratem Barbecook. i przestawić w położenie HIGH. Płomienie należy kontrolować po każdym • Po umieszczeniu jedzenia na płycie Kliknięciu będzie towarzyszyć odgłos rozpaleniu grilla.
-
Page 42: Przechowywanie Urządzenia
środkiem uniwer- brze wentylowanym miejscu. Jeśli butla z salnym „Barbecook all cleaner” i delikatną gazem jest podłączona, nie przechowywać Uwaga: gwarancja nie obejmuje zniszc- szczoteczką. Spłukać dużą ilością wody i w garażu, szopie lub innych pomieszcze-... - Page 43 Urządzenie Barbecook® nie jest przeznac- jego demontażu, normalnego zużycia dawania, nieudostępniania oraz nieprzeka- zone do użytku komercyjnego. Zużycie i lub niewłaściwej konserwacji. zywania ich stronom trzecim. otarcia, rdzewienie, odkształcenie i odbar- wienie części narażonych na bezpośredni Odwiedź stronę www.barbecook.com/regis- Zarejestruj swoje urządzenie kontakt z ogniem i gorącem jest normalne...
- Page 44 ® ® SAEY Home & Garden N.V. Industrielaan 4 / B-8501 Heule (Kortrijk) Belgium www.barbecook.com www.barbecook.com MAN_NINHO_BERO_DE_BBC130808_A.indd 44 12/08/13 10:35...
Need help?
Do you have a question about the NINHO 2.0 and is the answer not in the manual?
Questions and answers