Table of Contents
Advertisement
Quick Links
Advertisement
Table of Contents

Subscribe to Our Youtube Channel
Related Manuals for Zimmer Persona Trabecular Metal Femoral Component


Summary of Contents for Zimmer Persona Trabecular Metal Femoral Component
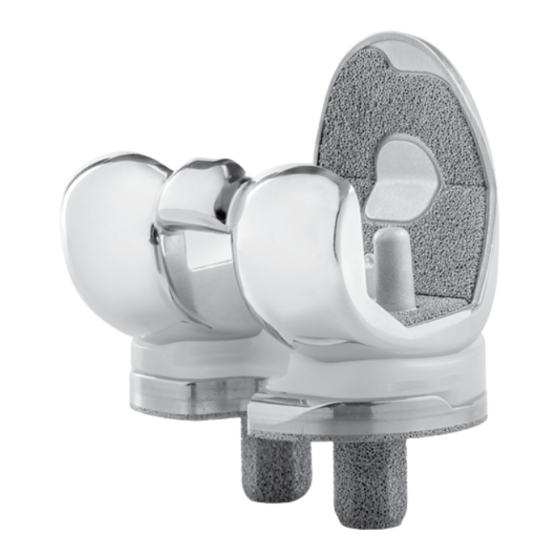
- Page 1 Trabecular Metal ™ Femoral Component Surgical Technique...
-
Page 2: Trabecular Metal
2. Patient Bone Quality The Persona Trabecular Metal Femoral component should only be used on patients with good bone quality to ensure in-growth will occur. Stable fixation may be compromised if used on soft, osteoporotic bone quality. - Page 3 Trabecular Metal Femoral Component ™ INTRO Surgical Technique • Cut Guide Stability Two oblique pins are required for proper stability of the 4-in-1 Cut Guide. A well fixed and stable Cut Guide will help ensure precise bone cuts for proper femoral fit. Follow the order of femoral cuts as described in the technique.
- Page 4 Trabecular Metal Femoral Component ™ INTRO Surgical Technique Magnet Usage Warning: Some instruments in the Persona System contain magnets. All Persona magnetic instruments should be kept at a safe distance from a patient’s active implantable medical device(s) (i.e. pacemaker). These types of devices may be adversely affected by magnets. Instruments containing magnets should be kept on an appropriate table or stand when not in use at the surgical site.
-
Page 5: Table Of Contents
Trabecular Metal Femoral Component ™ Surgical Technique Persona Table of Contents Trabecular Metal Femoral Component Establish Femoral Alignment Surgical Technique Resect Distal Femur Size Femur and Establish External Rotation Complete Femoral A/P and Chamfer Resections CR Femoral Finishing PS Femoral Finishing and PS Box Preparation Implant Femoral Component TOC. -
Page 6: Establish Femoral Alignment
SECTION Establish Femoral Alignment Establish Femoral Alignment Please refer to the appropriate surgical technique if other distal femoral alignment and distal femoral resection instrumentation is to be used to accomplish the distal femoral resection. • After attaining the desired soft tissue exposure, use the 8mm IM Step Drill to make a starter hole (Fig. - Page 7 SECTION Establish Femoral Alignment • Retract the spring-loaded button on the top of the Femoral Valgus Alignment Guide and rotate the valgus adjustment dial to the desired valgus angle and release the button to lock the valgus angle from 0° to 9°, ensuring that the proper left or right setting is attained (Fig.
-
Page 8: Resect Distal Femur
SECTION Resect Distal Femur Resect Distal Femur • Attach the 0° Captured Cutting Head to the Distal Femoral Resection Guide (Fig. 7). The adjustment dial on the resection guide can be set from “-2” to “+4”. The “0” represents a 10mm distal resection (Fig. - Page 9 SECTION Resect Distal Femur • Squeeze the button on the resection guide (Fig. 11) release and remove the alignment guide and resection guide assembly from the cutting head. The modular T-handle is used Oblique Hole to remove the IM Rod, prior to the distal femoral resection. •...
-
Page 10: Size Femur And Establish
SECTION Size Femur and Establish External Rotation Size Femur and Establish External Rotation • Rotate the feet of the Anterior Referencing Sizer so the Side Designation appropriate “Left” or “Right” markings are visible as the (Fig. 13). Anterior Referencing Sizer is placed on the bone External rotation can be set at 3°... - Page 11 SECTION Size Femur and Establish External Rotation • Slightly extend the knee and retract soft tissues to expose the anterior femoral cortex. Clear any soft tissue from the anterior cortex. Ensure that the leg is in less than 90° of flexion (70°-80°).
-
Page 12: Complete Femoral A/P And Chamfer Resections
SECTION Complete Femoral A/P and Chamfer Resections Complete Femoral A/P and Chamfer Resections • By hand, place the 4-in-1 Cut Guide on the femur by aligning the 2 pins on the back of the guide with the previously drilled positioning holes (Fig. - Page 13 SECTION Complete Femoral A/P and Chamfer Resections TECHNIQUE TIP If there is a risk of anterior notching, the 4-in-1 cut guide can be removed, rotated 180° and be replaced on the distal femur. Holes can 3. Extract then be drilled through the 2mm shift holes on the face of the 4-in-1 guide.
-
Page 14: Cr Femoral Finishing
SECTION CR Femoral Finishing CR Femoral Finishing Release Lever TECHNIQUE TIP Reference the orientation and size etched and/or engraved markings to identify the correct provisional. • Assemble the Femoral CR Impactor Pad to the Femoral Inserter/Extractor. Hold the Femoral Inserter/Extractor with the handle in the open position and insert the Femoral Alignment Arrows CR Impactor Pad, aligning the "CR"... - Page 15 SECTION CR Femoral Finishing • Remove any posterior osteophytes or overhanging bone on the femur to facilitate maximum knee flexion. Attach the Femoral Inserter/Extractor to the correct CR Femoral Provisional by inserting the tab on the Femoral Inserter/ Extractor arm into the anterior notch in the CR Femoral Provisional and close the handle on the Femoral Inserter/ Extractor to secure the CR Femoral Provisional (Fig.
-
Page 16: Ps Femoral Finishing And Ps Box Preparation
SECTION PS Femoral Finishing and PS Box Preparation PS Femoral Finishing Release Lever and PS Box Preparation TECHNIQUE TIP Reference the orientation and size etched and/or engraved markings to identify the correct provisional. • Assemble the Femoral PS Impactor Pad to the Femoral Inserter/Extractor. - Page 17 SECTION PS Femoral Finishing and PS Box Preparation TECHNIQUE TIP Do not impact the anterior flange of the PS Femoral Provisional. Do not impact the medial or lateral aspects or the release lever of the Femoral Inserter/Extractor. • Remove any posterior osteophytes or overhanging bone on the femur to facilitate maximum knee flexion.
- Page 18 SECTION PS Femoral Finishing and PS Box Preparation • Make the anterior to posterior PS box cut with a 1.27mm (.050 in.) thick, ½" wide oscillating or reciprocating saw blade, by resting the saw blade in a parallel manner on the front surface of the PS Box Cut Guide.
-
Page 19: Implant Femoral Component
SECTION Implant Femoral Components Implant Femoral Components After the implants have been chosen, make a final check to ensure that the size chosen for the femoral, tibial, and articular surface are compatible. Cementless Implantation Option • With the knee in 70°-90° of flexion, retract the soft tissue in Fig. - Page 20 SECTION Implant Femoral Components Cemented Implantation Option TECHNIQUE TIP Prior to cementing implants remove provisionals and use pulse lavage to remove unwanted debris from the resected bone surfaces and the joint space. • Cement may be used to fix the Persona Trabecular Metal Femoral Component.
- Page 21 SECTION Implant Femoral Components Implant the Tibial Component and Articular Surface • Refer to the "Implant Components" section of the Persona Knee Surgical Technique for tibial and articular surface insertion instructions. • If the tibial component is already in place prior to femoral component insertion, take care to ensure the posterior condyles do not contact the tibial component upon impaction...
- Page 24 Please refer to the package inserts for important product information, including, but not limited to, contraindications, warnings, precautions, and adverse effects. Contact your Zimmer representative or visit us at www.zimmer.com 97-5026-070-00 Rev. 1 MC122924 8-14-14 ©2014 Zimmer, Inc.
Need help?
Do you have a question about the Persona Trabecular Metal Femoral Component and is the answer not in the manual?
Questions and answers