Table of Contents
Advertisement
Quick Links
Advertisement
Table of Contents

Related Manuals for Zimmer PhySys


Summary of Contents for Zimmer PhySys
- Page 1 Instructions for Use PhySys...
- Page 2 Illustrations Front of the device and transducers Fig. 1 Selection and Mains switch operating elements Slot for SD card Intensity regulator channel I Display Intensity regulator channel II Fig. 2 Transducers 17 Ultrasound transducer, large, 5 cm² 18 Ultrasound transducer, small, 1 cm²...
- Page 3 Illustrations Back of the device Fig. 3 9 10 Ports Port for ultrasound transducer 0.8/2.4 MHz Port for patient cable channel II Connection for power cable Port for patient cable channel I 10 Port for ultrasound transducer 0.8/2.4 MHz 11 Port without function 12 Identification plate...
- Page 4 Illustrations Screens / display Fig. 5 Display views 13 Status line 14 Buttons on the screen 15 Heading 16 Navigation menu Fig. 6 Navigation menu (A) Home Switch to start-up screen (B) Back Moves one step back (C) Scroll forwards Goes forward one page (D) Scroll backwards Goes back one page...
- Page 5 Explanation of symbols In the instructions for use this symbol indicates “Danger”. In the instructions for use this symbol indicates “Caution“ with regard to possible Caution damage of the device. Applied part type BF Instructions for use Follow instructions for use. Serial number Item number Manufacturer...
-
Page 6: Table Of Contents
1.4 Contraindications - ultrasound therapy Side effects Application information 3.1 General 3.2 Electrotherapy 3.3 Ultrasound Warnings 4.1 General 4.2 Electrotherapy PhySys – in brief Intended use Device set-up Default settings 8.1 General 8.2 Therapy Operation instructions 9.1 Electrotherapy 9.2 Ultrasound therapy 9.3 Combined therapy... - Page 7 Error messages / troubleshooting / disposal Manufacturer's EMC declaration Valid for the device PhySys, SD edition. These instructions for use are an integral part of the device. They must be stored with the device and kept accessible at all times for anyone authorised to operate this device.
-
Page 8: Indications / Contraindications
Indications / Contraindications 1.1 Indications - Electrotherapy Circulation-promoting Functional circulatory disorders • therapy Angiopathy in diabetes mellitus • Angioneuropathy (Raynaud's disease) • Acrocyanosis • Venous vascular diseases • Chronic venous insufficiency • Reflex sympathetic dystrophy • Sudeck's syndrome (stage II) •... - Page 9 Indications / Contraindications 1.1 Indications - Electrotherapy Muscle-relaxing therapy Muscular overload • Painful muscle tension • Myofascial pain syndrome • Tendon and muscle ruptures • Contractures • Experiences from clinical Periarthropathy and insertional tendinopathy (acute, subacute) • practice have also Periarthropathy and insertional tendinopathy (chronic) •...
-
Page 10: Contraindications - Electrotherapy
Indications / Contraindications 1.2 Contraindications - Electrotherapy General Unclear pain symptoms • Contraindications Acute inflammation (local, systemic) • (Suspected) cardiovascular diseases • (Suspected) epilepsy • Peripheral arterial occlusive disease, stage IIb or higher according to Fontaine • Purulent processes • Fever •... -
Page 11: Indications - Ultrasound Therapy
Indications / Contraindications 1.3 Indications - Ultrasound therapy Indications from Vertebrogenic pain syndrome, e.g. cervical syndrome • orthopaedics, surgery, Ankylosing spondylitis (only during the inflammation-free interval) • traumatology Joint diseases • rheumatology Rheumatoid arthritis (if heat treatment is indicated) • Osteoarthritis •... -
Page 12: Contraindications - Ultrasound Therapy
Indications / Contraindications 1.4 Contraindications - Ultrasound therapy General Unclear pain symptoms • contraindications Diseases for which heat should not be used, such as acute inflammatory diseases • Diseases in which mechanical influences are contraindicated, such as phlebothrombosis • Limited blood flow •... -
Page 13: Side Effects
Side effects Side effects of No side effects are known if used correctly. electrotherapy Side effects of ultrasound No side effects are known if used correctly. therapy Page 6... -
Page 14: Application Information
Inspect the device before use. If there is any damage, it must not be used. Caution! Only accessories provided by Zimmer MedizinSysteme GmbH may be used. Caution! The device may cause malfunctions or may interfere with the operation of equipment in the vicinity. -
Page 15: Electrotherapy
Application information 3.2 Electrotherapy Electrode positioning and the selection of treatment parameters should always be coordinated to the treatment specifications. For currents for which there is a risk of chemical burns (for example, galvanic current, diadynamic currents, currents with a galvanic component), the recommended maximum current density is 2 mA eff/cm²... -
Page 16: Ultrasound
Application information 3.3 Ultrasound Handle transducer gently; rough handling can alter its characteristics. Do not allow sharp or pointed objects to come into contact with the ultrasound transducer since the aluminium head can be easily scratched. The use of coupling agents other than the special Sono plus ultrasound gel can damage the ultrasound transducer. -
Page 17: Warnings
Warnings 4.1 General This device is intended to be used exclusively by medical professionals. It must always be ensured that two patients are never simultaneously connected to the device during a treatment session! The patient must not be left unattended during therapy. Any treatment instructions regarding treatment location, duration and intensity require medical knowledge and should be given by authorised physicians, therapists and medical paraprofessionals. -
Page 18: Electrotherapy
Warnings 4.2 Electrotherapy Electrotherapy Placing electrodes near the chest can increase the risk of ventricular fibrillation. When performing iontophoresis, the drug used may have an analgesic effect and pain sensitivity is reduced as a result. Stimulation current can have a stimulating effect on insulin release. This may result in hypoglycaemia in diabetic patients. -
Page 19: Physys - In Brief
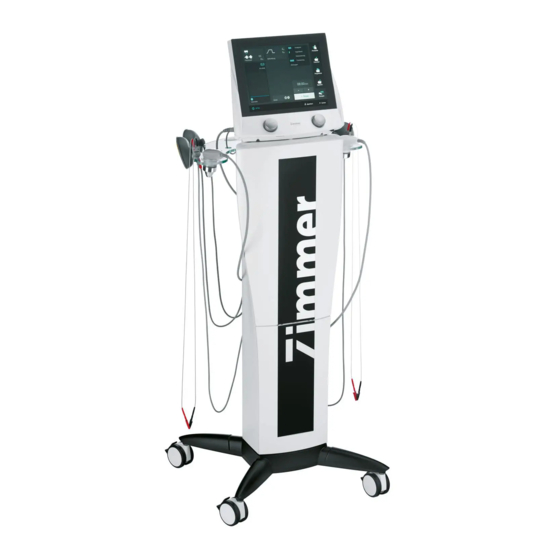
PhySys – in brief What is PhySys? An ultramodern, innovative combination device for electro- and ultrasound therapy with the option of additionally using a vacuum unit. What does PhySys do? The emission of monophasic, biphasic and medium-frequency currents for nerve stimulation and muscle therapy in single-channel and dual-channel operation as well as the emission of therapeutic ultrasound. -
Page 20: Intended Use
Intended use Intended use PhySys is a combination device for therapeutic ultrasound and electrotherapy with the option of a vacuum unit for electrode application and supportive massage. Page 13... -
Page 21: Device Set-Up
Connect the transducers to the intended ports (6 and/or 10). Note: The vacuum unit is integrated in the column as a slide-in module. Please see the separate assembly instructions for securing the PhySys tabletop device to the column and installing the vacuum unit in the column. Vacuum unit Connect the red vacuum suction line to the provided port at the back of the column at “circuit 1,... -
Page 22: Default Settings
Default settings Note: The descriptions below always refer to therapy with one channel and are based on the factory default settings. Note: Changes to the default settings can only be made from the start-up screen. Start-up screen After the device has been switched on and the self-test performed, the start-up screen opens. Select settings Activating the “Settings”... -
Page 23: General
Default settings 8.1 General Settings – General The setting options are described below. The default settings are pre-programmed in the factory as shown on the screen. (1) Start Settings Options to individually select the start settings. (2) Start picture Option to select from two start pictures. The selection is made directly in the corresponding line. - Page 24 Default settings 8.1 General (8) Touch Calibration Activating the “Touch calibration” button opens the screen to perform a touch calibration. This can lead to an improvement in the event of insufficient accuracy during touch input. The left knob must be briefly pushed for the touch calibration. It is important not to touch the screen while doing so.
-
Page 25: Therapy
Default settings 8.2 Therapy Settings – Activating the “Therapy” field opens the “Therapy settings” screen. therapy Therapy-related settings can be applied here. (1) Electrotherapy The display mode of the electrotherapy programs can be set. The selection is made directly in the corresponding line. (2) Polarity reversal cycle The polarity can be adjusted using the two arrow buttons. -
Page 26: Operation Instructions
Operation instructions 9.1 Electrotherapy Note: The following information applies for all forms of therapy available in the system. If the therapy times are individually extended, this may cause a change in the mode of action and the patient must be observed more closely during the application. Program start Using the button (1), the “Programmes - Electrotherapy”... - Page 27 Operation instructions 9.1 Electrotherapy Therapy screen After selecting the current form, the therapy screen automatically opens on channel I. Start of therapy By adjusting the intensity using the left intensity regulator, the display in the lower status line changes from “Ready” to “Active” and therapy proceeds. The present current flow is shown in the bar graph (1) and the therapy time decreases every second.
- Page 28 Operation instructions 9.1 Electrotherapy (1) Intensity Displays the intensity adjusted. (2) Parameters Shows the parameters of the current therapy program. The following parameters are displayed: Impulse and impulse pause time and thus the frequency • Polarity, CC/CV, galvanic proportion • Activation of the “Parameters”...
-
Page 29: Ultrasound Therapy
Operation instructions 9.2 Ultrasound therapy Program start Using the “Start” button, the “Programmes – Electrotherapy” window opens. Ultrasound programs Using the button (1), the “Programmes - Ultrasound” window opens. Select program The desired ultrasound therapy program is selected directly in the corresponding line. Therapy screen After the ultrasound therapy program has been selected, the therapy screen opens. - Page 30 Operation instructions 9.2 Ultrasound therapy Description of the display elements and buttons (1) / (2) Thermal effect / The bar graph displays (1) indicate the set intensity. Mechanical effect The programs US 00, US 01, US 02 and US 09 emit the unpulsed ultrasound output and therefore exclusively have a thermal effect.
-
Page 31: Combined Therapy
Operation instructions 9.3 Combined therapy Program start Using the “Start” button, the “Programmes – Electrotherapy” window opens. Programmes - Combined Using the button (1), the “Programmes - Combined” window opens. Select program The desired combined therapy program is selected directly in the corresponding line. Therapy screen After the combined therapy program has been selected, the therapy screen opens. -
Page 32: Vacuum Unit (Vacop)
Operation instructions 9.4 Vacuum unit (VacoP) Program start Using the “Start” button, the “Programmes – Electrotherapy” window opens. Vacuum window Using the “Vacuum” button, the Vacuum window opens. Vacuum screen Activate base vacuum A base vacuum of 16 kPa is set as a default (3). The drawing in of the vacuum electrodes is activated using the “Start”... - Page 33 Operation instructions 9.4 Vacuum unit (VacoP) Description of the display elements and buttons (1) Base Vacuum Displays the base vacuum set as default. The base vacuum can be increased or decreased up to 12 kPa using the two arrow buttons. (2) Pulse Shows the parameters of the current program.
-
Page 34: Electrotherapy In Combination With A Vacuum Unit (Vacop)
Operation instructions 9.5 Electrotherapy in combination with a vacuum unit (VacoP) Open Vacuum menu Activating the field (1) opens the Vacuum menu (2). Therapy screen Select vacuum The vacuum is adjusted using the two arrow buttons (3). After adjusting the vacuum, the current vacuum level is displayed in the bar graph (4). Therapy start –... - Page 35 Operation instructions 9.5 Electrotherapy in combination with a vacuum unit (VacoP) Description of the display elements and buttons Note: After the “Vacuum” button is activated, the parameter window opens. (1) Start / Stop Activating the button activates the base vacuum to draw in the electrodes. Activating the button deactivates the vacuum.
-
Page 36: Information On The Operation Of Vacop
Operation instructions 9.6 Information on the operation of VacoP The VacoP integrated in the column contains a water separator which collects moisture emitted from the sponges and thus protects the vacuum unit from calcification. Note: Before you empty the water separator, remove any Vaco electrode from the tube. Emptying the water Empty the water separator by opening the discharge tap. -
Page 37: Indication Menu
Operation instructions 9.7 Indication menu The indication menu is used for support during therapy selection. Indications Activating the “Indications” button opens the “Indications” menu. Note: In the “Indications” menu there are two options available to select the desired application: through selecting a body region •... - Page 38 Operation instructions 9.7 Indication menu Select clinical picture After selecting the desired body region or making a selection via the list (here: “Shoulder”), the window (5) opens with various indications in the shoulder region. The desired clinical picture is selected directly in the corresponding line (here: Shoulder-arm syndrome).
-
Page 39: Saving Programs
Operation instructions 9.8 Saving programs Note: To save programs, the SD card must be correctly inserted in the SD card slot. Otherwise it will not be possible to save programs. The programs can also be saved unchanged. The procedure for saving is the same for all forms of therapy. The procedure for saving an electrotherapy program is described below. -
Page 40: Favourites / Memory List Retrieve Programs, Edit List
Operation instructions 9.9 Favourites / Memory list Retrieve programs, edit list The individually saved programs are listed in the Favourites and Memory list. Here these can be: retrieved for therapy or edited (moved in the sequence and deleted). Note: The steps to retrieve and edit the Favourites / Memory list are identical, so only the retrieving and editing the favourite list is described. -
Page 41: Sequence Programs
Operation instructions 9.10 Sequence programs Sequence programs are a compilation of up to three electrotherapy programs which are run consecutively in sequence. In the program family “currents for sports rehabilitation”, a variety of default programs are predefined. They generally consist of the warm-up, training or strengthening and stretching phases. -
Page 42: Program Free Sequence Program
Operation instructions 9.11 Program free sequence program In the “currents for sports rehabilitation” program family, an individual sequence program can be defined by selecting “SR 07“. Note: Sequence programs can be performed in monostim as well as in twinstim mode. The freely definable sequence program is defined in monostim mode as default. -
Page 43: Technical Information
150 VA Power consumption max. 50 VA VacoP Protection class Mains fuse 2 x 2.0 A T (PhySys) 1 x T 200 mA (VacoP) Applied part Type BF Operating mode Interval operation- 30 minutes on, 10 minutes off Dimensions... -
Page 44: Stimulation Current
Technical information 10.2 Stimulation current Emitted output (max.) At a load resistance of 500 Ohm Galvanisation (mA eff) Diadynamic currents (mA eff) High voltage currents (mA peak) Medium-frequency 140/100 currents (mA peak/mA eff) Interference currents (mA eff) Microstimulation current (mA peak) Low-frequency 80/80 square-wave currents... -
Page 45: Ultrasound
Technical information 10.3 Ultrasound Transducers Frequency 0.8 MHz and 2.4 MHz Ultrasound transducer, 1 cm² , ERA = 0.67 cm² at 0.8 MHz, small 0.65 cm² at 2.4 MHz Maximum output 1.0 W at 0.8 MHz, 0.6 W at 2.4 MHz Intensity levels 0.1 to 1 W/cm²... -
Page 46: Vacuum
Technical information 10.4 Vacuum Underpressure 12 – 60 kPa Pulsed operation Period duration 1 to 8 s can be adjusted in intervals of 0.5 seconds; duty cycle 1:1 Accuracy ± 20% Applied part Vacuum suction cups and sponges Page 39... -
Page 47: Cleaning Disinfection
Cleaning Disinfection – Before starting any maintenance and cleaning measures the device must always be switched off at the main switch and the mains cable must be disconnected. – Make sure that during cleaning or disinfection no liquid penetrates the device. Do not use sprays. - Page 48 Cleaning Disinfection Vaco electrodes Cleaning: In the event of visible contamination, the Vaco electrodes can be cleaned using commercially available alcohol-free plastic cleaners. Unplug the Vaco electrodes from the electrode tube and turn the suction cup completely inside out. Immerse the Vaco electrode in a cleaning solution according to the information from the manufacturer of the cleaning agent and clean the electrode thoroughly using a hard brush.
-
Page 49: Electrodes
Disposable electrodes are particularly suitable for therapy with bipolar currents; for therapy with monopolar pulse currents or currents with a galvanic component, a moist sponge should additionally be used with the disposable electrodes as padding. All conventional electrotherapy electrodes can be connected to the PhySys using an insulated cable clip. Note: The disposable electrode is for one-time use only and can be disposed of with household waste without any problems. -
Page 50: Ce Mark / Manufacturer
CE mark / manufacturer The devices have a CE mark in accordance with the EC directive on medical devices 93/42/EEC. Manufacturer Zimmer MedizinSysteme GmbH Junkersstraße 9 89231 Neu-Ulm, Germany Tel. +49 731. 9761-291 Fax +49 731. 9761-299 www.zimmer.de Page 43... -
Page 51: Scope Of Delivery And Accessories
Scope of delivery Accessories Scope of delivery Complete PhySys system, consisting of: Electro-ultrasound therapy unit, VacoP and column Item no.* 2 pc. patient cable 1 pair electrode cables, grey, incl. 1 black and 1 red crocodile clamp 1 pair electrode cables, white, incl. 1 black and 1 red crocodile clamp 1 ultrasound transducer 28 mm 1 pair Vaco electrode tubes, red, 2.10 m long... - Page 52 You may order this any time from your sales representative. Electrotherapy Patient cable PhySys SD 1 pair electrode cables, grey, incl. 1 black and 1 red crocodile clamp 1 pair electrode cables, white, incl. 1 black and 1 red crocodile clamp...
- Page 53 Vaco electrode, ø 60 mm, self-closing Vaco electrode tube, red, 2.1 m long Vaco electrode tube, black, 2.1 m long PhySys column Shelf plate for transducer made of glass, PhySys column 66890317 Glass plate, top, PhySys column 66890010 Glass plate, middle, PhySys column...
-
Page 54: Device Combination
Device combinations The device can be used in combination with VacoP. Please refer to the instructions for use of the device. Anyone who combines devices against these guidelines and thus creates a medical system does so under his / her own responsibility. When combining devices, observe the specifications of standard DIN EN 60601-1. -
Page 55: Safety And Maintenance
Device service may only be performed by trained staff. All descriptions required for service can be seen in the PhySys service manual or can be requested from the manufacturer. Upon request, Zimmer MedizinSysteme will provide wiring diagrams, lists of components, descriptions, calibration instructions or other documents. -
Page 56: Functional Test
Functional test After being switched on, PhySys performs a self-test which checks all internal components. If an error occurs, an error message will appear. In addition, an enhanced function test can be performed for all three operating modes. These tests should be performed monthly or if the proper functioning of the device is in doubt. -
Page 57: Legal Notice
Legal notice The PhySys device and the optionally available VacoP are listed in attachment 1 of the MPBetreibV (Medical Device Operator Ordinance). Please observe the measures which are necessary as a result. The devices are not listed in attachment 2 of the MPBetreibV. - Page 58 Check the mains and socket; if necessary, have fault at mains or socket repaired by a professional (electrician). Possible cause 2: Mains fuse (PhySys) Remedy for cause 2: Check the mains fuse. Replace the fuse only with one with the exact same name / equal rating.
-
Page 59: Error Messages / Troubleshooting / Disposal
You may get in touch with them via the sales representative or via the main office in Neu-Ulm. The device may only be returned to the factory in its original packaging. Main office Zimmer MedizinSysteme GmbH Junkersstraße 9 89231 Neu-Ulm, Germany Tel. -
Page 60: Manufacturer's Emc Declaration
Portable and mobile HF communication devices (such as mobile phones, cell phones) can affect medical electrical devices. PhySys may only be operated with the original power cable indicated in the list of the scope of delivery and accessories. Operation of the device with a different power cable can lead to increased emissions or reduced interference immunity of the device! Guidelines and manufacturer's declaration –... - Page 61 Guidelines and manufacturer's declaration – Electromagnetic immunity The PhySys device is intended to be operated in the electromagnetic environment as indicated below. The customer or user of the PhySys device should ensure that it is used in such an environment.
- Page 62 Guidelines and manufacturer's declaration – Electromagnetic immunity The PhySys device is intended to be operated in the electromagnetic environment as indicated below. The customer or user of the PhySys device should ensure that it is used in such an environment.
- Page 63 If the measured field strength in the location in which the PhySys device is used exceeds the above compliance level, the PhySys device must be observed to verify normal operation. If abnormal performance is observed, additional measures may be necessary, such as re-orienting or relocating the PhySys device.
- Page 64 PhySys Instructions for Use Zimmer MedizinSysteme GmbH Junkersstraße 9 89231 Neu-Ulm, Germany Tel. 07 31. 97 61-291 Fax 07 31. 97 61-299 export@zimmer.de www.zimmer.de...
Need help?
Do you have a question about the PhySys and is the answer not in the manual?
Questions and answers