
Related Manuals for AT&T CL83519


Summary of Contents for AT&T CL83519
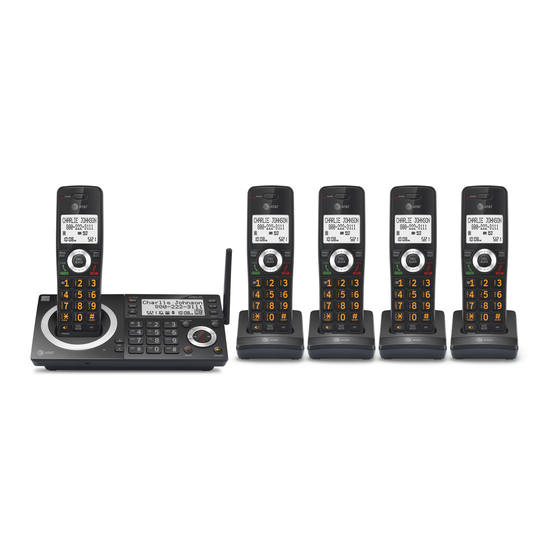
- Page 1 Abridged user’s manual CL83519 DECT 6.0 cordless telephone/ answering system with caller ID/call waiting...
- Page 2 This Abridged user’s manual provides you with basic installation and major operation instructions. A limited set of features are described in an abridged form. Please refer to the online CL83519 DECT 6.0 cordless telephone/ answering system with caller ID/call waiting Complete user’s manual for a full set of installation and operation www.telephones.att.com/manuals...
- Page 3 Parts checklist Your telephone package contains the following items. Save your sales receipt and original packaging in the event warranty service is necessary. Abridged user’s manual CL83519 DECT 6.0 cordless telephone/ answering system with caller ID/call waiting CL83519 Quick start guide...
-
Page 4: Table Of Contents
Abridged user’s manual CL83519 DECT 6.0 cordless telephone/ answering system with caller ID/call waiting For more detailed instructions, refer to the Complete user’s manual at www.telephones.att.com/manuals. Table of contents Getting started Set speed dial voicemail number ............17 Quick reference guide - handset ..1... - Page 5 Telephone operation Caller ID Telephone operation ........ 27 Caller ID .............43 Making a call ..........27 Missed (new) call indicator .....43 Answering a call ........27 Review the caller ID log .....43 Ending a call ..........27 View dialing options ......43 Handset speakerphone .....
- Page 6 Answering system Important safety information ..105 Safety information ......105 Answering system settings ....80 Especially about cordless Announcement ........80 telephones ..........106 ..........83 Precautions for users of Voice guide to set Answering implanted cardiac system ............84 pacemakers ..........107 Call screening ...........85 Pacemaker patients......107 Number of rings ........85...
-
Page 7: Getting Started
Getting started Quick reference guide - handset REDIAL/PAUSE CALL BLOCK Press to block the incoming call when Press repeatedly to view the last ten the telephone is ringing (page 78). numbers dialed (page 28). When on a call, press to block the call While entering numbers, press and (page 79). - Page 8 Getting started Quick reference guide - handset Press and hold while the telephone PHONE/FLASH is not in use to erase the missed call indicator (page 43). Press to make or answer a call (page 27). During a call, press to answer an incoming call when you receive a call While reviewing a caller ID log entry, waiting alert (page 29).
- Page 9 Getting started Quick reference guide - handset While reviewing the caller ID log, QUIET# (pound key) directory, redial memory, allow list, Press repeatedly to display other block list, or star name list, press to dialing options when reviewing a caller delete an individual entry.
-
Page 10: Quick Reference Guide - Telephone
Getting started Quick reference guide - telephone base When the telephone base is ringing, press to mute the ringer temporarily. Microphone When the telephone base is not in use, press and hold to erase the missed call /VOL/ indicator. During message playback or call screening, press to adjust the FLASH/PTT listening volume (page 28). - Page 11 Getting started Quick reference guide - telephone base REDIAL/PAUSE Press repeatedly to view the last 10 Press to display the caller ID log when numbers dialed (page 28). the phone is not in use (page 43). While entering numbers, press and hold to Press to scroll down while in menus insert a dialing pause.
- Page 12 Getting started Quick reference guide - telephone base MUTE/DELETE TONE /a>A While reviewing the caller ID log, Press to switch to tone dialing directory, redial memory, allow list, temporarily during a call if you have block list, and star name list, press to pulse service.
-
Page 13: Telephone Base And Charger Installation
Getting started Telephone base and charger installation Install the telephone base and charger, as shown below. Telephone base installation Plug one end of the telephone line cord Plug the large end of the telephone base power adapter into a power outlet not controlled by a wall switch. - Page 14 Getting started Telephone base and charger installation IMPORTANT INFORMATION Use only the power adapter(s) supplied with this product. To order a replacement www.telephones.att.com power adapter, visit our website at or call 1 (800) 222-3111 1 (866) 288-4268 In Canada, dial For more detailed instructions, refer to the online Complete user’s manual at www.telephones.att.com/manuals...
-
Page 15: Battery Installation And Charging
Getting started Battery installation and charging Once you have installed the battery, the screen indicates the battery status (see the following table). For best performance, keep the handset in the telephone base or charger when not in use. The battery is fully charged page 116 for battery operating times. - Page 16 Getting started Battery installation and charging Step 2 it clicks into place. Step 3 Charge the handset by placing it face forward in the telephone base or charger. The CHARGE light on the handset is on during charging.
- Page 17 Getting started Battery installation and charging SET DATE a power outage, the handset and the telephone base will MM/DD/YY prompt you to set the date and time. For instructions, see Set date/time on page 15 or page 22. To skip setting the date and time, press on the handset or CANCEL on the telephone base.
-
Page 18: Battery Backup Mode
Getting started Battery backup mode Battery backup mode allows your telephone system to function in the event of a power outage. The telephone system uses stored power from the handset’s battery to operate. To activate the mode Out of range OR enough charge placed in the telephone base, the telephone No pwr at base system enters battery backup mode automatically. -
Page 19: Installation Options
Getting started Installation options Your telephone base is ready for tabletop use. If you want to mount your telephone on a wall, follow the steps, as mentioned below, to connect the telephone base with a standard dual-stud telephone wall-mounting plate. You may need a professional to install the mounting plate. -
Page 20: Telephone Settings
Telephone settings Handset settings Use the menu to change the telephone settings. >Play messages 1. Press MENU on the handset when it is not in use SELECT Answering sys to enter the main menu. 2. Press to scroll to the feature to be changed. When scrolling through the menu, the >... -
Page 21: Set Date/Time
Telephone settings Handset settings Set date/time The answering system announces the day and time of each message prior to playing it. Before using the answering system, set the date and time as follows. If you subscribe to caller ID service, the day, month and time are set automatically with each incoming call. -
Page 22: Lcd Language
Telephone settings Handset settings LCD language You can select the language used for all screen displays. 1. Press MENU/ in idle mode to enter the main menu. SELECT 2. Press to scroll to Settings, then press /SELECT. MENU 3. Press /SELECT to choose LCD language. -
Page 23: Set Speed Dial Voicemail Number
Telephone settings Handset settings Set speed dial voicemail number This feature lets you save your voicemail number for quick access when you press and hold the 1 key. To save your voicemail number: 1. Press MENU/ in idle mode to enter the main menu. SELECT 2. -
Page 24: Clear Voicemail Indication
Telephone settings Handset settings Clear voicemail indication Use this feature when the telephone indicates there is new voicemail but there is none. For example, when you have accessed your voicemail while away from icon; it does not delete your voicemail messages. As long as you have new voicemail messages, your telephone service provider continues to send the signal to turn on the indicators. -
Page 25: Home Area Code
Telephone settings Handset settings Home area code If you dial seven digits to make a local call (no area code required), enter your area code into the telephone as the home area code. When you receive a call from within your home area code, the caller ID log only displays the seven digits of the telephone number. -
Page 26: Quiet Mode
Telephone settings Handset settings QUIET mode When QUIET mode is turned on, the telephone silences all sounds during the set period of time (1-12 hours). However, the handset locator paging tone and any sound-generating operations initiated by users, such as making calls using on QUIET mode, this feature activates immediately and the answering system turns on automatically. -
Page 27: Telephone Base Settings
Telephone settings Telephone base settings Use the menu to change the telephone settings. 1. Press MENU/ on the telephone base when it is not SELECT >Play messages in use to enter the main menu. Answering sys 2. Press to scroll to the feature to be changed. -
Page 28: Set Date/Time
Telephone settings Telephone base settings Set date/time The answering system announces the day and time of each message prior to playing it. Before using the answering system, set the date and time as follows. If you subscribe to caller ID service, the day, month and time are set automatically with each incoming call. -
Page 29: Lcd Language
Telephone settings Telephone base settings LCD language You can select the language used for all screen displays. 1. Press MENU/ in idle mode to enter the main menu. SELECT 2. Press to scroll to Settings, then press /SELECT. MENU 3. Press /SELECT to choose LCD language. -
Page 30: Set Speed Dial Voicemail Number
Telephone settings Telephone base settings Set speed dial voicemail number This feature lets you save your voicemail number for easy access when you press and hold the 1 key. To save your voicemail number: 1. Press MENU/ in idle mode to enter the main menu. SELECT 2. -
Page 31: Clear Voicemail Indication
Telephone settings Telephone base settings Clear voicemail indication Use this feature when the telephone indicates there is new voicemail but there is none. For example, when you have accessed your voicemail while away from New voicemail and the icon; it does not delete your voicemail messages. As long as you have new voicemail messages, your telephone service provider continues to send the signal to turn on the indicators. -
Page 32: Home Area Code
Telephone settings Telephone base settings Home area code If you dial seven digits to make a local call (no area code required), enter your area code into the telephone as the home area code. When you receive a call from within your home area code, the caller ID log only displays the seven digits of the telephone number. -
Page 33: Telephone Operation
Telephone operation Telephone operation Making a call Using a cordless handset: Press PHONE/ /SPEAKER, then enter the telephone number. FLASH Using the telephone base: Press /SPEAKER, then enter the telephone number. Answering a call Using a cordless handset: Press PHONE/ /SPEAKER. -
Page 34: Last Number Redial
Telephone operation Telephone operation Last number redial Each handset and the telephone base stores the last ten telephone numbers dialed (up to 30 digits each). Using a cordless handset: Press REDIAL/ , then or REDIAL/ repeatedly to view up to PAUSE PAUSE ten recently called numbers. -
Page 35: Call Waiting
Telephone operation Telephone operation Call waiting If you subscribe to call waiting service from your telephone service provider, and someone calls while you are already on a call, you hear two beeps. Press /FLASH on the handset or /FLASH on the telephone base to PHONE put your current call on hold and take the new call. -
Page 36: Options While On Calls
Telephone operation Options while on calls Chain dialing Use this feature to initiate a dialing sequence from the numbers in the directory, caller ID log or redial memory while you are on a call. Using a cordless handset: To access the directory or caller ID log while on a call: 1. -
Page 37: Blind Transfer
Telephone operation Options while on calls Blind transfer device without notifying them. To transfer an outside call from a cordless handset: 1. During the call, press MENU/ SELECT Press to scroll Transfer, then press /SELECT. MENU If you have one handset and no other registered devices, the outside call is put on hold and your handset shows Transferring call.. - Page 38 Telephone operation Options while on calls If you have other registered device(s) or more than one handset, the telephone base shows TRANSFER TO:. Use the dialing keys to enter a specific handset number (1-9 for handsets 1-9, TONE followed by 0-2 for handsets 10-12, or TONE followed by # for all devices), or press to scroll to the desired device and press /SELECT.
-
Page 39: Multiple Handset Use
Multiple handset use Multiple handset use Handset locator The handset locator feature is useful if you misplace any handsets. To start the paging tone: Press FIND HS on the telephone base to start the paging tone on all handsets for 60 seconds. -
Page 40: Intercom
Multiple handset use Intercom Use the intercom feature for conversations between two handsets, a handset and the telephone base, or a handset/telephone base and a cordless headset/ speakerphone (sold separately). You can buy additional expansion handsets (model AT&T CL80119), cordless headsets and speakerphones for this telephone base to expand your telephone system (up to 12 handsets or 10 cordless handsets and two cordless headsets/speakerphones). - Page 41 Multiple handset use Intercom Using the telephone base: 1. When the telephone base is not in use, press MENU/ to enter the main SELECT menu. Press to scroll to Intercom, then press /SELECT. MENU If you have one handset and no other registered devices, the telephone base shows Calling HANDSET X.
-
Page 42: Push-To-Talk (Ptt)
Multiple handset use Push-to-talk (PTT) You can directly broadcast messages to the speakerphone of any device. Press and hold PTT on a handset or PTT/ on the telephone base to begin FLASH two-way communication. Only one device can talk at a time. To do so, press and hold PTT on the handset or PTT/ on the FLASH... -
Page 43: Ptt Call To Multiple Devices
Multiple handset use Push-to-talk (PTT) Using the telephone base: 1. There are a few ways to begin a PTT call to a single handset. When the telephone base is not in use: If you have one handset, press and hold PTT/ FLASH If you have more than one handset, press PTT/ . -
Page 44: Answer A Ptt Call
Multiple handset use Push-to-talk (PTT) Answer a PTT call You can respond to a PTT call, as described below. 1. When your device receives a PTT call, it beeps and shows Press and hold [PTT] to talk. 2. When the other party is speaking, your speakerphone light is on, and your device shows: PTT From HS X To HS X X represents the initiating handset... -
Page 45: Directory
Directory Directory The directory can store up to 50 entries, shared by all handsets and the telephone base. Create a new directory entry 1. Press MENU/ in idle mode to enter the main menu. SELECT 2. Scroll to select Directory, then scroll to select Add contact. 3. -
Page 46: Review The Directory
Directory Review the directory Review directory entries Press DIR when in idle mode. Press to browse through the directory. Search by name 1. Press 2. When an entry appears, press the dialing keys (0-9) to start a name search. The dialing key, if there is an entry in the directory beginning with that letter. -
Page 47: Edit A Directory Entry
Directory Review the directory Edit a directory entry 1. When a directory entry displays, press /SELECT. The screen shows MENU EDIT NUMBER along with the phone number to be edited. If you only want to edit the name, skip to Step 3. 2. -
Page 48: Speed Dial
Directory Speed dial The telephone system has nine speed dial locations (2-9, 0) and a voicemail access location 1 where you can store the telephone numbers you wish to dial more quickly. You can store up to 30 digits in each location. Speed dial assignments can only be selected from the existing directory entries. -
Page 49: Caller Id
Caller ID Caller ID providers. The telephone stores caller ID information for the last 50 incoming calls in the telephone base. This information is common to all handsets and the telephone base. Missed (new) call indicator When a handset or the telephone base is in idle mode and has new or missed calls, its screen shows XX Missed calls. -
Page 50: Dial A Caller Id Log Entry
Caller ID Caller ID Dial a caller ID log entry 1. When in the caller ID log, press to browse. 2. Press PHONE/ /SPEAKER on the handset, or /SPEAKER on the FLASH telephone base to dial the displayed entry. Save a caller ID log entry to the directory 1. -
Page 51: Smart Call Blocker
Smart call blocker About Smart call blocker* If you have subscribed to caller ID service, then you can use Smart call blocker welcome calls to get through. You can set up your lists of welcome callers and unwelcome callers. Smart call blocker allows calls from your welcome callers to get through, and it blocks calls from your unwelcome callers. -
Page 52: Call Categories
Smart call blocker About Smart call blocker Call categories Welcome calls Welcome calls are calls with telephone numbers saved in your allow list or directory, and not in your block list. Welcome calls also include calls with caller names saved in your star name list. important information to you. -
Page 53: Call Controls
Smart call blocker About Smart call blocker Call controls Smart call blocker is set to on, and to allow all incoming calls by default. When Smart call blocker is on, the first ring of all incoming calls will be muted. If your directory, allow list, star name list and block list are empty when Smart call blocker is on, and you have set to screen calls, the telephone will screen all incoming calls and asks callers to announce their names or press the... - Page 54 Smart call blocker About Smart call blocker Call category Call control Calls without numbers Screening with caller name If you have selected this option, You can set to screen, allow, or the telephone plays the screening block all calls of this call category, announcement, and then asks the or to send these calls to the caller to say his/her name before the...
-
Page 55: Call Block Settings
Smart call blocker Call block settings The Smart call blocker feature is set to on by default. Using a cordless handset or the telephone base: 1. Press CALL BLOCK when it is not in use, and then press /SELECT to select MENU -OR- Press MENU/... -
Page 56: Control Calls Without Numbers (Customized Settings)
Smart call blocker Call block settings Block only (default setting) - allow all calls to ring, except calls with numbers on the Block list. Screen robot - screen robocalls. ring, but to screen uncategorized calls and ask the caller to press the pound key (#) before putting the call through to you. -
Page 57: Control Uncategorized Calls (Customized Settings)
Smart call blocker Smart call blocker Call block settings 5. Press to choose one of the following options, then press /SELECT. MENU Screening - ask the caller to press the pound key (#) or to say his/her name before the call rings on your telephone. Allow - allow the calls to get through and ring. - Page 58 Smart call blocker Call block settings 5. Press to choose one of the following options, then press /SELECT. MENU Screening - ask the caller to press the pound key (#) or to say his/her name before the call rings on your telephone. Allow - allow the calls to get through and ring.
-
Page 59: Block List
Smart call blocker Call block settings Block list Add numbers that you want to prevent their calls from ringing through. The block list stores up to 1,000 entries. Add a block entry: Using a cordless handset or the telephone base: 1. - Page 60 Smart call blocker Call block settings 6. When the screen displays ENTER NAME, use the dialing keys to enter a name (up to 15 characters). Press a key repeatedly until the desired character Press Press 0 to add a space. Press /DELETE to erase a character.
- Page 61 Smart call blocker Call block settings Save a caller ID log entry to block list: Using a cordless handset or the telephone base: 1. Search for the desired caller ID log entry (see Review the caller ID log on page 43). 2.
- Page 62 Smart call blocker Call block settings Edit a block entry: Using a cordless handset or the telephone base: 1. Search for the desired entry in the block list (see Review block list on page 54). 2. When the desired entry displays, press /SELECT.
- Page 63 Smart call blocker Call block settings Delete a block entry: 1. Search for the desired entry in the block list (see Review block list on page 54). 2. When the desired entry displays, press /DELETE on the handset. The MUTE screen shows Delete entry?.
-
Page 64: Allow List
Smart call blocker Call block settings Allow list Add numbers that you want to allow their calls to get through to you. The allow list stores up to 200 entries. Add an allow entry: Using a cordless handset or the telephone base: 1. - Page 65 Smart call blocker Smart call blocker Call block settings 6. When the screen displays ENTER NAME, use the dialing keys to enter a name (up to 15 characters). Press a key repeatedly until the desired character Press Press 0 to add a space. Press /DELETE to erase a character.
- Page 66 Smart call blocker Call block settings Save a caller ID log entry to allow list: Using a cordless handset or the telephone base: 1. Search for the desired caller ID log entry (see Review the caller ID log on page 43).
- Page 67 Smart call blocker Smart call blocker Call block settings Edit an allow entry: Using a cordless handset or the telephone base: 1. Search for the desired entry in the allow list (see Review allow list on page 59). 2. When the desired entry displays, press /SELECT.
- Page 68 Smart call blocker Call block settings Delete an allow entry: Using a cordless handset or the telephone base: 1. Search for the desired entry in the allow list (see Review allow list on page 59). 2. When the desired entry displays, press /DELETE on the handset.
-
Page 69: Star Name List
Smart call blocker Call block settings Star name list There are many organizations like schools, medical offices, and pharmacies that use robocalls to communicate important information to you. Robocall uses an autodialer to deliver pre-recorded messages. By entering the name of the organizations into the star name list, it ensures these calls will ring through when you only know the caller names but not their numbers. - Page 70 Smart call blocker Call block settings Review star name list: Using a cordless handset or the telephone base: 1. Press CALL BLOCK when it is not in use. -OR- Press MENU/ to enter the main menu when it is not in use. Press SELECT to scroll to Smart call blk, then press /SELECT.
- Page 71 Smart call blocker Call block settings Edit a star name entry: Using a cordless handset or the telephone base: 1. Search for the desired entry in the star name list (see Review star name list on page 64). 2. When the desired entry displays, press /SELECT.
-
Page 72: Screening Announcement
Smart call blocker Call block settings Delete all star name entries: Using a cordless handset or the telephone base: 1. Press CALL BLOCK when it is not in use. -OR- Press MENU/ to enter the main menu when it is not in use. Press SELECT to scroll to Smart call blk, then press /SELECT. - Page 73 Smart call blocker Call block settings Play your current announcement of screening with caller name: Using a cordless handset or the telephone base: 1. Press CALL BLOCK when it is not in use. -OR- Press MENU/ to enter the main menu when the it is not in use. Press SELECT to scroll to Smart call blk, then press /SELECT.
- Page 74 Smart call blocker Call block settings Record your name for all screening announcements: Using a cordless handset or the telephone base: 1. Press CALL BLOCK when it is not in use. -OR- Press MENU/ to enter the main menu when the handset is not in SELECT use.
-
Page 75: Voice Guide To Set Smart Call
Smart call blocker Call block settings Voice guide to set Smart call blocker This feature is an easy and alternative way for you to do the basic setup of Smart call blocker. You can follow the voice guide to set your telephone system to allow or to screen all incoming calls, or to screen calls that do not display a phone number. -
Page 76: Allowed Calls
Smart call blocker Allowed calls If Smart call blocker is on, the following types of incoming calls can get through to you and ring on your telephone system: Calls with numbers saved in your allow list. Calls with numbers saved in your directory, but not in your block list. Calls with caller ID names saved in your star name list. -
Page 77: Block Calls Without Numbers
Smart call blocker Blocked calls If Smart call blocker is on, incoming calls with numbers saved in your block list will not ring. The telephone plays the block announcement “Calls to this number are being screened by Smart call blocker. The number you are calling is not accepting your call. -
Page 78: Screen Calls Without Numbers
Smart call blocker Screen calls without numbers If Smart call blocker is on, and your telephone is set to screen calls without number, the telephone will not ring when receiving incoming calls that are “out of area“ or with numbers set to “Private“. It plays a screening announcement to the caller and asks the caller to respond before putting the call through to you. - Page 79 Smart call blocker Screen calls without numbers Notes: The telephone announces to the caller with “Hello. Calls to this number are being screened by Smart call blocker...” If you have recorded your name in the screening announcements, your recorded name will replace “this number” in the announcements. See Screening announcement on page 66.
-
Page 80: Screen Calls Without Numbers
Smart call blocker Screen calls without numbers Send call to answering system 1. When the telephone starts ringing, and the screen displays Screened call, press /SPEAKER to pick up the call. If you have turned on the caller ID announce feature, the telephone announces “ call from... -
Page 81: Screen Uncategorized Calls
Smart call blocker Screen uncategorized calls If Smart call blocker is on, and your telephone is set to screen uncategorized calls, the telephone will not ring when receiving the following incoming calls: Incoming calls with absent caller ID numbers; Incoming calls with numbers that are not in your directory, allow list, nor block list;... - Page 82 Smart call blocker Screen uncategorized calls Notes: You can set Smart call blocker to screen and filter all uncategorized calls from numbers or names that are not saved in your directory, allow list, block list, or star name list. You can easily add incoming phone numbers to your allow list and block list. This allows you to build up your lists of allowed and blocked numbers, and Smart call blocker will know how to deal with these calls when they come in again.
-
Page 83: Allow Call Once
Smart call blocker Screen uncategorized calls Allow call once 1. When the telephone starts ringing, and the screen displays Screened call, press /SPEAKER to pick up the call. If you have turned on the caller ID announce feature, the telephone announces “ call from... -
Page 84: Block Call
Smart call blocker Screen uncategorized calls Block call 1. When the telephone starts ringing, and the screen displays Screened call, press /SPEAKER to pick up the call. If you have turned on the caller ID announce feature, the telephone announces “ call from... -
Page 85: Option While On A Call
Smart call blocker Option while on a call When you are on a call and speaking to the caller, and you do not want to continue the call, you can press the CALL BLOCK button on the handset to end the call. The telephone plays the block announcement “The number you are calling is not accepting your call. -
Page 86: Answering System
Answering system Answering system settings Use the answering system menu of a system handset or the telephone base or message alert tone, activate call screening, or change the number of rings, system and you change any setting in the answering system setup menu, the answering machine automatically turns on again. - Page 87 Answering system Answering system settings To record a new outgoing announcement: Using a cordless handset: 1. When the handset is in idle mode, press MENU/ to enter the SELECT main menu. 2. Press to scroll to Answering sys, then press /SELECT.
- Page 88 Answering system Answering system settings To delete or reset your outgoing announcement: Using a cordless handset: 1. When the handset is in idle mode, press MENU/ SELECT 2. Press to scroll to Answering sys, then press /SELECT. MENU 3. Press /SELECT again to select Announcement.
- Page 89 Answering system Answering system settings Unless you change it, the answering system is on and ready to record messages. does not answer calls and record incoming messages. Using a cordless handset: 1. When the handset is in idle mode, press MENU/ to enter the main SELECT menu.
-
Page 90: Voice Guide To Set Answering System
Answering system Answering system settings Voice guide to set Answering system This feature is an alternative way for you to do the basic setup of the answering system. You can follow the voice guide to record your own announcement, set the number of rings, and set the message alert tone. -
Page 91: Call Screening
Answering system Answering system settings Call screening Use this feature to choose whether incoming messages can be heard over the speaker when they are being recorded. If you turn call screening on, you hear the incoming message. To change the setting: Using a cordless handset or the telephone base: 1. -
Page 92: Remote Access Code
Answering system Answering system settings Remote access code To access your answering system remotely from any touch-tone phone, you need to enter a two-digit number (00-99). By default, the remote access code is To change the remote access code: Using a cordless handset or the telephone base: 1. -
Page 93: Message Recording Time
Answering system Answering system settings Message recording time You can set the recording time allowed for incoming messages. The message length is three minutes by default. To change the setting: Using a cordless handset or the telephone base: 1. When the handset or telephone base is in idle mode, press MENU/ to enter SELECT the main menu. -
Page 94: Answering System And Voicemail Indicators
Answering system About the answering system Answering system and voicemail indicators your telephone service provider’s voicemail (fees may apply). Your telephone’s built-in digital answering system messages and voicemail messages are and XX New messages show on the handset and the HANDSET telephone base, there are new messages in the built-in 1 New message... -
Page 95: About The Answering System
Answering system About the answering system Using the answering machine and voicemail together You can also use your telephone answering system and voicemail together by setting your built-in answering system to answer before voicemail answers, as described below. To learn how to program your voicemail settings, contact your telephone service provider. -
Page 96: Call Intercept
Answering system About the answering system Options while a message is being recorded: Press VOL or VOL on the handset to adjust the call screening volume. Press /CANCEL to temporarily silence the call screening. Press /SELECT to temporarily turn on the call screening if call screening MENU Press /SPEAKER to broadcast the announcement and the incoming message... -
Page 97: Message Playback
Answering system Message playback To listen to messages at the telephone base: Press /PLAY/ . Press /STOP again to end the message STOP PLAY playback. If there are new and old messages, press to select Play new msgs or Play old msgs, then press SELECT or /PLAY/STOP. - Page 98 Answering system Message playback When messages are playing on the handset: Press VOL or VOL to adjust the message playback volume. Press 6 to skip to the next message. Press 4 to repeat the message. Press twice to hear the previous message. Press /DELETE to delete the message.
-
Page 99: Delete All Old Messages
Answering system Message playback Delete all old messages To delete all old messages on the telephone base: 1. When the telephone is idle, press /DELETE. The system announces, “To MUTE 2. Press /DELETE again. The system announces, MUTE To delete all old messages on the handset: 1. -
Page 100: Recording And Playing Memos
Answering system Recording and playing memos Memos are your own recorded messages used as reminders for yourself or others using the same answering system. You can record your own memos using a system handset or the telephone base. Play and delete them in the same way as incoming messages. -
Page 101: Remote Access
Answering system Remote access You can reach your answering system remotely by dialing your home telephone number from any touch-tone telephone. To remotely reach your answering system: 1. Dial your telephone number from any touch-tone telephone. 2. Once the system answers, enter the two-digit remote access code (19 is the default code. -
Page 102: Appendix
Appendix Adding and registering handsets/headsets/speakerphones Your telephone can support up to 12 DECT 6.0 cordless handsets (AT&T model CL80119, sold separately) or up to 10 cordless handsets and two cordless headsets or speakerphones (sold separately). Visit www.telephones.att.com/accessories for a list of compatible DECT 6.0 cordless headsets and speakerphones. -
Page 103: Deregistering Handsets
Appendix Deregistering handsets You may need to deregister your handsets if: You have 12 registered handsets and need to replace a handset. -OR- You wish to change the designated handset number of your registered handsets. wish to use again, one at a time. Please read carefully through all the instructions on this page before beginning the deregistration process. -
Page 104: Troubleshooting
Install a new telephone line cord. If changing the telephone line cord does not help, the wall jack (or the your home to connect your CL83519 telephone, or contact your telephone service provider (charges may apply). - Page 105 Appendix Troubleshooting I cannot dial out. Try all the suggestions mentioned above. Make sure you have a dial tone before dialing. The cordless handset may take normal. Wait an extra second before dialing. Eliminate any background noise. Noise from a television, radio or other appliances may cause the phone to not dial out properly.
- Page 106 Appendix Troubleshooting I experience poor sound quality when using the handset speakerphone. For increased sound quality while using the handset speakerphone, place the My caller ID isn’t working. Caller ID is a subscription service. You must subscribe to this service from your telephone service provider for this feature to work on your phone.
- Page 107 Appendix Troubleshooting While screening a call, the telephone suddenly stops screening and connects to the call. Another handset may have picked up the screening call. If you have other telephone system sharing the same telephone line, and someone picks up the call on the other telephone system while the screening is in progress, the screening process will be terminated and connect you to the caller.
- Page 108 Appendix Troubleshooting I cannot retrieve voicemail messages. Your telephone has both a built-in answering system and voicemail indication. They are independent features and each alerts you to new telephone service provider, contact your telephone service provider for more information on how to access your voicemail. I get noise, static, or weak signals even when I’m near the telephone base.
- Page 109 Appendix Troubleshooting Make sure that the answering system is on. ANS ON should show on the handset and the /ANS ON/OFF light on the telephone base should be on. If toll saver is activated, the number of rings changes to two when you have new messages stored.
-
Page 110: Maintenance
Appendix Maintenance Taking care of your telephone Your cordless telephone contains sophisticated electronic parts, so you must treat it with care. Avoid rough treatment. Place the handset down gently. Save the original packing materials to protect your telephone if you ever need to ship it. -
Page 111: Important Safety Information
Appendix Important safety information This symbol is to alert you to important operating or servicing instructions that may appear in this user’s manual. Always follow basic safety precautions when using this product to Safety information Read and understand all instructions in the user’s manual. Observe all markings on the product. Avoid using a telephone during a thunderstorm. -
Page 112: Especially About Cordless Telephones
Appendix Important safety information CAUTIONS: Use only the power adapters provided with this product. To obtain a replacement, visit our www.telephones.att.com 1 (800) 222-3111 website at or call In Canada, 1 (866) 288-4268 dial . For more detailed instructions, refer to the online Complete www.telephones.att.com/manuals user’s manual at Use only the supplied rechargeable battery or replacement battery (model BT183342/BT283342). -
Page 113: Precautions For Users Of Implanted Cardiac Pacemakers
Appendix Important safety information Precautions for users of implanted cardiac pacemakers Cardiac pacemakers (applies only to digital cordless telephones): Wireless Technology Research, LLC (WTR), an independent research entity, led a multidisciplinary evaluation of the interference between portable wireless telephones and implanted cardiac pacemakers. -
Page 114: For C-Ul Compliance
Appendix For C-UL compliance In compliance with the bilingual requirements for safety, caution, and warning markings of Canadian Federal and Provincial/Territorial statutes and regulations, the French version of Important safety information is included. Mesures de sécurité importantes Ce symbole vous alertera d’informations importantes ou d’instructions d’entretien pouvant apparaître dans ce guide d’utilisation. - Page 115 Appendix For C-UL compliance MISES EN GARDE: N’utilisez que les adaptateurs inclus avec ce produit. Pour obtenir une pièce de rechange, visitez www.telephones.att.com notre site Web au ou composez le 1-800-222-3111 1-866-288-4268 . Au Canada, composez le N’utilisez que la pile de rechargeable incluse ou une pile de rechange (modèle BT183342/ www.telephones.att.com BT283342).
- Page 116 Appendix For C-UL compliance Mesures préventives pour les utilisateurs de stimulateurs cardiaques implantés dans l’organisme stimulateurs cardiaques implantés dans l’organisme. Appuyée par l’Administration des aliments et Avis aux détenteurs de stimulateurs cardiaques une poche de chemise, lorsque celui-ci est en fonction. opposée au stimulateur cardiaque.
-
Page 117: Fcc Part 68 And Acta
Appendix FCC Part 68 and ACTA This equipment complies with Part 68 of the FCC rules and with technical requirements adopted by the Administrative Council for Terminal Attachments (ACTA). The label on the back or bottom of this The plug and jack used to connect this equipment to premises wiring and the telephone network must comply with the applicable Part 68 rules and technical requirements adopted by ACTA. -
Page 118: Fcc Part 15
Appendix FCC Part 68 and ACTA Industry Canada This device contains licence-exempt transmitter(s)/receiver(s) that comply with Innovation, Science and Economic Development Canada’s licence-exempt RSS(s). Operation is subject to the following two conditions: (1) This device may not cause interference. (2) This device must accept any interference, including interference that may cause undesired operation of the device. -
Page 119: Limited Warranty
Appendix Limited warranty The AT&T brand is used under license - any repair, replacement or warranty service, and all questions www.telephones.att.com about this product should be directed to our website at or call 1 (800) 222-3111 1 (866) 288-4268 In Canada, dial For more detailed instructions, refer to the online Complete user’s manual at www.telephones.att.com/manuals 1. - Page 120 Appendix Limited warranty 4. What is not covered by this limited warranty? This limited warranty does not cover: PRODUCT that has been subjected to misuse, accident, shipping or other physical damage, other liquid intrusion; or than an authorized service representative of the manufacturer; or PRODUCT to the extent that the problem experienced is caused by signal conditions, network reliability or cable or antenna systems;...
- Page 121 Appendix Limited warranty 6. What must you return with the PRODUCT to get warranty service? You must: Return the entire original package and contents including the PRODUCT to the service Include a “valid proof of purchase” (sales receipt) identifying the PRODUCT purchased (PRODUCT model) and the date of purchase or receipt;...
-
Page 122: Dect 6.0 Digital Technology
Appendix Operation Operating time* Talk time (cordless handset) Up to 7 hours Talk time (cordless handset speakerphone) Up to 5 hours Standby Up to 5 days * Operating times vary depending on your actual use and the age of the battery. DECT 6.0 digital technology range competitions against similarly equipped phones of the leading competition. -
Page 123: Index
Index Index Allow list 58 Ending a call 27 Announcement 80 Answering system 80–95 Handset handset locator 33 Battery backup mode 12 quick reference guide 1–3 Battery charging 10 ringer tone 14 Battery installation 9–10 ringer volume 14 Block list 53 voicemail indicator 18 HD audio 116 Caller ID announce... -
Page 124: Index
Index Index Outgoing announcement 80 Telephone base quick reference guide 4–6 ringer tone 21 Paging tone 33 ringer volume 21 Power adapter 7 Time Push-to-talk 36–38 handset 15 telephone base 22 Troubleshooting 98–103 Quick reference guide 1–6 Unwelcome calls 47 Receiving calls 27 Recharging 10 Redial 28... - Page 125 For more detailed instructions, refer to the online Complete user’s manual at www.telephones.att.com/manuals. For customer service or product information, please visit our website at www.telephones.att.com or call 1 (800) 222-3111. In Canada, dial 1 (866) 288-4268. © 2018 Advanced American Telephones. All Rights Reserved. Qaltel is a trademark of Truecall Group Limited.
Need help?
Do you have a question about the CL83519 and is the answer not in the manual?
Questions and answers
What type battery for this phone?
The AT&T CL83519 phone is compatible with the rechargeable battery models BT183342 and BT283342.
This answer is automatically generated