EVBox Elvi Installation Manual
Hide thumbs
Also See for Elvi:
- User manual (150 pages) ,
- Installation and user manual (38 pages) ,
- Installation manual (28 pages)
Table of Contents
Advertisement
Quick Links
Advertisement
Table of Contents

Related Manuals for EVBox Elvi


Summary of Contents for EVBox Elvi
- Page 1 Elvi Installation manual...
- Page 2 I’m home! Let’s get started.
- Page 3 Elvi Installation manual...
-
Page 4: Table Of Contents
Components & features 1. Unpack Elvi 2. Install wall dock 3. Install charging cable 4. Activate Elvi 5. Install station 6. Install cable dock 7. Change charging cable 8. Charge with Elvi 9. Troubleshooting 10. Warranty 11. Declaration of conformity... -
Page 5: Safety Precautions
• Make sure that the power line to Elvi is installed on a dedicated circuit breaker (MCB) on your service panel. The installation must incorporate an adequate residual-current device (RCD). The MCB must be in line with the capacity of the charging cable (3.7, 7.4, 11, 22 kW). -
Page 6: Components & Features
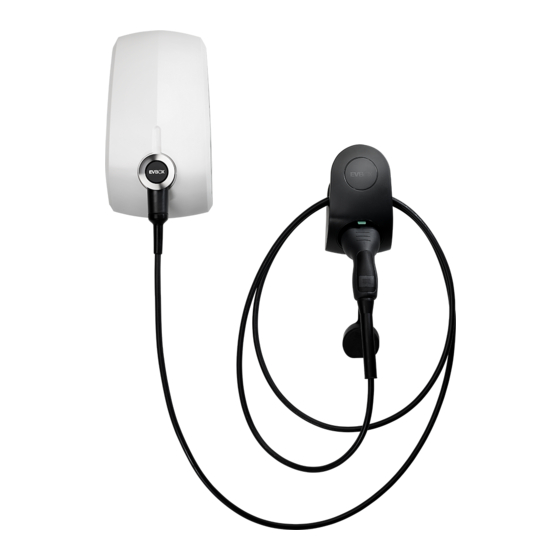
Components & features Operating system Housing Elvi is connected via a Elvi consists of a wall dock, built-in dual band Wi-Fi a charging station and a connection or via an option- charging cable. al UMTS-modem. Elvi is designed with rugged,... - Page 7 Dimensions (in mm) Cable dock (sold separately) Components Wall dock Station Cable dock (sold separately) Cable dock Wall base Charging plug (Type 2 in Charging example) cable Cable dock Front cover Cable dock Cable dock Keys Plug holder Plug holder for Type 2 for Type 1 Charging...
-
Page 8: Unpack Elvi
1. Unpack Elvi Place Elvi package on a flat and stable surface. Remove sleeve. Set the boxes aside. Box 1 contains the charging station. Box 2 contains the charging cable. Open the charging station box. Put the instructions folder (A) aside. - Page 9 1. Unpack Elvi Wall dock already installed? Go to next page Go to page 13...
-
Page 10: Install Wall Dock
Before installing the wall dock, make sure that the power line you’re using is switched off on your service panel. Make sure that the power line to Elvi is installed on a dedicated circuit breaker (MCB) on your service panel. The installation must incorporate an adequate residual- current device (RCD). - Page 11 40 A, 30 mA AC type A Note for the installer: In case of a TT or IT electric grid with 230 V from line to line, Elvi must be installed with 1-phase by connecting the clamps on L1 and N.
- Page 12 2. Install wall dock Option 2: 230 V 1-phase with neutral For 1-phase use of a Wye-connected secondary, only a single phase (L1) and neutral must be connected. This phase voltage must measure 230 V between line 230 V and neutral. 230 V Warning: In this configuration, the charging station operates only from a single phase (L1).
- Page 13 2. Install wall dock Select a solid and flat vertical surface for installing the wall dock. Ensure that the surface is even and solid enough to resist a pull force of at least 100 kg. Find the drilling template at the bottom of the box’s sleeve.
- Page 14 2. Install wall dock Measure the power cable’s diameter and cut out the correct diameter of the rubber seal in order to allow the power cable and optional data cables to get through. Note: Strain relief and rubber seal are supplied in a separate bag in the box.
- Page 15 Tighten the bolts with the T20 bit. Do not overtighten. Fasten the special bolt in the bottom right corner with a regular flat-head screw driver. This special bolt can be used for sealing the installation with a tamper-evident seal. Note: Installation example of a 1-phase connection of Elvi.
-
Page 16: Install Charging Cable
3. Install charging cable Tools you need to install the charging cable 1x bit T30 Unpack the charging cable box. Remove the cardboard cover from the station’s socket. Take the charging cable out of the box. Check that the rubber sealing ring on the charging plug is in place and not twisted. -
Page 17: Activate Elvi
If you don’t have an account yet, create a new account in the app. Register Elvi in the app by adding its station ID and security code. Find the station ID on the back of your Elvi or in the supplied instructions folder inside the Elvi box. -
Page 18: Install Station
CLICK Switch on the power to the station on the service panel. Elvi will switch on automatically. This is indicated by a flashing red LED ring. -
Page 19: Install Cable Dock
8 x 65mm drill bit screwdriver 1x bit T25 The Elvi cable dock is sold separately, part No. 290135. Unpack your Elvi cable dock. Disassemble the charging cable holder by removing the Torx bolt with the T30 bit. - Page 20 Place the cable dock’s wall base on the wall and fasten the three screws 5 x 70 mm length. Do not overtighten. The Elvi cable dock is supplied with two plug holder options: one for Type 1 and one for Type 2 charging plugs.
-
Page 21: Change Charging Cable
(socket) of the wall dock and it requires some force to pull it off. Take out the keys from Elvi wall dock. Turn the charging station around and place the front face of the station on a soft and stable surface. - Page 22 Elvi can supply (3.7, 7.4, 11 or 22 kW). Check with your installer whether the selected output power from your Elvi can be supported by your local electrical installation. The setting of your maximum available amperage in the mobile app and/or web platform for station management may need to be adjusted to the new situation.
-
Page 23: Charge With Elvi
Hold your charge card (RFID card) in front of the reader where it’s marked with a icon. Elvi reacts with a beep. This means that your charge card/key fob is being authorized. The Elvi LED ring turns green when it stops charging. -
Page 24: Troubleshooting
• Turn the charging station off. Turn it on again after 20 seconds by flipping the circuit breaker or main switch to Elvi. Residual-current • Grounding error in the Contact your service technician for device prevents charging station inspection and solution. - Page 25 Elvi. Reconnect again. (check by user) • If your Elvi is equipped with the optional UMTS module, check that Elvi is in contact with the local cellular network and that it has proper reception (check by...
-
Page 26: Warranty
With respect to repair, EVBox is entitled to apply problem avoiding restrictions and/or Workarounds. 6.3 EVBox shall not be liable for the Products’ failure to comply with the warranty in clause 6.1 if: (a) Customer makes any further use of such Products after giving a notice in accordance with or failed to provide notification within fourteen (14) days as set out in clause 6.2;... -
Page 27: Declaration Of Conformity
NL registration KvK 32165082_000018683428 Fred. Roeskestraat 115, 1076 EE Amsterdam, The Netherlands declares under its’ sole responsibility that the following products: • Article series E1160-XX50XX: EVBox Charging station, 1-phase 16 A with charging cable • Article series E1320-XX50XX: EVBox Charging station, 1-phase 32 A with charging cable •... - Page 28 The present document is drawn up by way of information only and does not constitute an offer binding upon EVBox. EVBox has compiled the contents of this document to the best of its knowledge. No express or implied warranty is given for the completeness, accuracy, reliability or fitness for particular purpose of its content and the products and services presented therein.
- Page 29 I’m all set! Let’s charge.
- Page 30 EVBIM_072019 © EVBox Manufacturing B.V.
Need help?
Do you have a question about the Elvi and is the answer not in the manual?
Questions and answers