Table of Contents
Advertisement
Quick Links
Advertisement
Table of Contents

Related Manuals for Yealink T58A Skype for Business


Summary of Contents for Yealink T58A Skype for Business
-
Page 2: Table Of Contents
| Contents | ii Contents About This Guide..................... 9 Related Documentations............................9 Getting Started with Skype for Business Phones..........9 Hardwares of T58A and T56A.......................... 10 Overview of Phone Screens..........................11 Accessing the Favorites Screen......................11 Accessing the History Screen.........................11 Contacts Screen............................12 Accessing the Menu Screen........................ - Page 3 | Contents | iii Audio Calls......................24 Switching among the Handset, Speakerphone and Headset Modes..............24 Placing Calls............................... 25 Placing Calls Using the Dialer.......................25 Placing Multiple Calls..........................25 Placing Calls from a Locked Phone.......................25 Redialing a Number..........................26 Placing Calls from the Call History.......................26 Calling Favorites from the Favorites Screen..................
- Page 4 | Contents | iv Managing the Conference Participants.......................35 Muting and Unmuting All Conference Participants................35 Muting or Unmuting Individual Conference Participants..............36 Demoting or Promoting Conference Participants.................. 36 Enabling or Disabling Conference Announcements................36 Locking or Unlocking a Conference Call....................36 Admitting or Denying Participants to a Locked Conference Call............37 Removing Conference Participants......................
- Page 5 | Contents | v Deleting Skype for Business Contacts....................48 Local Directory..............................48 Adding Local Contacts........................... 48 Viewing Local Contacts..........................49 Editing Local Contacts........................... 50 Deleting Local Contacts......................... 50 Managing Favorites....................50 Skype for Business Favorites..........................50 Adding Skype for Business Favorites....................50 Viewing Skype for Business Favorites on the Favorites Screen............51 Viewing Skype for Business Favorites in the Directory................51 Local Favorites..............................51...
- Page 6 | Contents | vi Changing the Time and Date Format.....................61 Setting a Send Key............................. 61 Setting Screen Savers............................61 Changing Audio Settings............................62 Adjusting the Volume..........................62 Setting a Ringtone for the Phone......................62 Setting a Ringtone for a Contact......................62 Setting a Ringtone for Incoming Private Line..................62 Setting a Ringtone for an Incoming Team-Call..................
- Page 7 Un-pairing the Mobile Phone..........................83 Using Better Together over Ethernet..............84 Getting Started with Better Together over Ethernet..................84 Downloading and Installing the Yealink BToE Connector................84 Starting the Yealink BToE Connector........................85 Setting the Yealink BToE Connector......................... 85 Pairing Your Phone with Your Computer......................85 Enabling BToE and Selecting a Paring Mode..................
- Page 8 Updating Phone Firmware..........................90 Resetting Your Phone............................91 Troubleshooting....................... 91 Why is the screen blank?........................... 91 Why does the phone display “Network unavailable”?..................91 Why does the phone display time and date incorrectly?................... 91 How can I obtain the MAC address of a phone when the phone is not powered on?........92 Why can’t I sign into the Skype for Business server on the phone?..............92 Why can't the phone pair with my Skype for Business client?.................
-
Page 9: About This Guide
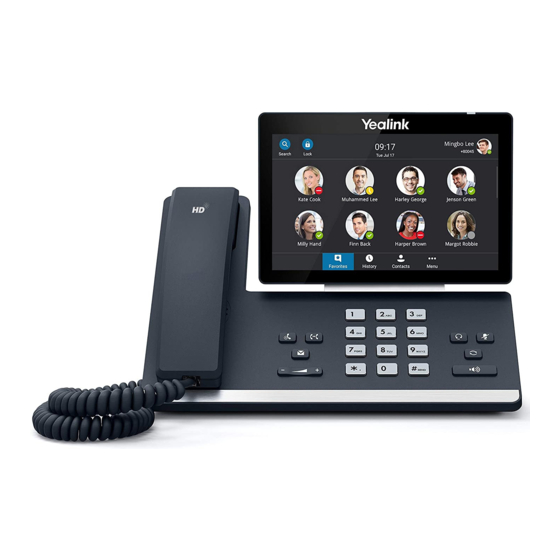
About This Guide Thank you for choosing Yealink T58A/T56A Skype for Business phones, which are designed to work with the Skype for Business Server. This guide provides everything you need to quickly use your new phone. Firstly, verify with your system administrator that the IP network is ready for phone configuration. -
Page 10: Hardwares Of T58A And T56A
| Getting Started with Skype for Business Phones | 10 Hardwares of T58A and T56A The table lists each feature numbered in the figures. Item Description Power LED Indicates call status, message status and phone’s system status. indicator Touch Screen 7 inch (1024 x 600) capacitive (5 point) touch screen. -
Page 11: Overview Of Phone Screens
Secures the handset in the handset cradle when the Phone is mounted vertically. Yealink Wall For more information on how to adjust the reversible tab, refer to Mount Quick Installation Guide for Yealink IP Phones. Hookswitch Connects or disconnects the phone from the phone line. The hookswitch is automatically activated when a user lifts the handset from the cradle to get a dial tone. -
Page 12: Contacts Screen
| Getting Started with Skype for Business Phones | 12 Contacts Screen The Contacts screen includes your local directory and Skype for Business directory. Procedure 1. Tap Contacts. 2. Slide up and down to view more groups. Accessing the Menu Screen In menu screen, you can access phone features, settings and information. -
Page 13: Icon Introductions
| Getting Started with Skype for Business Phones | 13 Icon Introductions Your phones have various icons that display the status of the phone. Icons in the Status Bar • • Icons in the Main Window Icons in the Status Bar The following table displays icons in the status bar. -
Page 14: Led Instructions
| Getting Started with Skype for Business Phones | 14 Call Mute Call Hold Invite a new call to the Skype for Business conference Received Calls Placed Calls Missed Calls Hands-free speakerphone mode Location is not set Unread voicemail Read voicemail Enable the conference announcement Conference presenter Conference attendee... -
Page 15: Entering Data And Editing Fields
| Getting Started with Skype for Business Phones | 15 Red for 500ms and off for 3s alternately The phone enters power-saving mode. The phone is powered off. The phone is idle. The phone is busy. The call is placed on hold. The call is muted. -
Page 16: Using The Phone Keypad
| Logging into and Locking Your Phone | 16 Space Key Enter a space. Using the Phone Keypad Instead of using the onscreen keyboard, you can also use phone keypad to enter data. The phone keypad only provides digit keys, # key and * key. Logging into and Locking Your Phone You can sign in to the phone with your Skype for Business credentials and lock your phone when necessary. - Page 17 | Logging into and Locking Your Phone | 17 3. Enter your mobile phone number in the corresponding field and select an authentication method. 4. Click Next. 5. Select a method to complete the authentication: If you select Call me, your mobile phone will receive a call and you need to follow the voice prompt to •...
-
Page 18: Passing Multi-Factor Authentication
| Logging into and Locking Your Phone | 18 Passing Multi-Factor Authentication MFA applies to user sign-in, web sign-in and sign in via PC methods. You can use Voice call verification or Text verification to log in and use the Skype for Business phones. The Skype for Business phones will use the authentication mode you set on the Skype for Business client by default. -
Page 19: Sign In Using Your Skype For Business User Credentials
| Logging into and Locking Your Phone | 19 Sign In Using Your Skype for Business User Credentials You can sign in to your Skype for Business account using your login credentials, which includes your address, username, and password. Contact your system administrator to get your login credentials. Procedure 1. -
Page 20: Signing Out Of Skype For Business
| Logging into and Locking Your Phone | 20 Signing out of Skype for Business You may want to sign out of your account when you are using a public phone. After you sign out of your account, the account-related features (for example: calling or viewing your Skype for Business contacts) are not available. However, you can still use other available features. -
Page 21: Signing Out Of A Common Area Phone
| Logging into and Locking Your Phone | 21 Signing Out of a Common Area Phone You can sign out the your account after you use the common area phone. Procedure 1. Navigate to Menu > Setting > Advanced > CAP sign out. 2. -
Page 22: Disabling Hot Desking
| Logging into and Locking Your Phone | 22 Disabling Hot Desking You can disable the Hot Desking feature, so that guests are not allowed to sign into your phone. Procedure 1. Navigate to Menu > Setting > Features > Hot-Desking. 2. -
Page 23: Setting The Idle Timeout For Phone Lock
| Logging into and Locking Your Phone | 23 Setting the Idle Timeout for Phone Lock You can configure an idle timeout, after which the phone will lock automatically. The default time is 10 minutes. Procedure 1. Navigate to Menu > Setting > Basic > Phone Lock. 2. -
Page 24: Resetting Your Lock Pin
| Audio Calls | 24 Resetting Your lock PIN If you forget your lock PIN,you can reset the lock PIN from a phone using your login password. Procedure 1. Tap Forgot unlock PIN on the lock screen . 2. Enter your login password for your Skype for Business account. 3. -
Page 25: Placing Calls
| Audio Calls | 25 Placing Calls You can use your phone like a regular phone to place calls in many ways easily. • Placing Calls Using the Dialer Placing Multiple Calls • Placing Calls from a Locked Phone • •... -
Page 26: Redialing A Number
| Audio Calls | 26 Redialing a Number You can recall the last contact you called when your phone is idle. Procedure Press A call to your last dialed number is attempted. Placing Calls from the Call History You can place a call to the history record. Procedure 1. -
Page 27: Setting A Hotline Number And Delay Time
| Audio Calls | 27 Setting a Hotline Number and Delay Time You can configure a hotline number and a delay.When you lift the handset or press the Speakerphone key, the phone will dial out the hotline number automatically after a designated period of time. Procedure 1. -
Page 28: Muting And Unmuting Audio
| Audio Calls | 28 2. Turn on Auto Answer. 3. Save the change. Muting and Unmuting Audio You can mute the microphone during an active call, and then the other party cannot hear you. Procedure 1. During a call, press the mute key on the phone or tap Mute on the touch screen. The mute key glows red. -
Page 29: Transferring Calls
| Audio Calls | 29 Transferring Calls You can transfer a call to another party using the blind transfer or consultative transfer method. • Performing a Blind Transfer Performing a Consultative Transfer • Performing a Blind Transfer You can transfer calls to another contacts immediately without consulting with them first. Procedure or tap Blind Tran. -
Page 30: Retrieve Parked Skype For Business Calls On Another Phone
| Audio Calls | 30 Retrieve Parked Skype for Business Calls on Another Phone After you park a call, you can provide another contact with the call retrieval number to retrieve the call. Procedure Dial the retrieval number. Note: If the call is ended before being retrieved, the prompting message “Parked call ended before it can be retrieved”... -
Page 31: Forwarding An Incoming Call To Your Voicemail Manually
| Audio Calls | 31 Forwarding An Incoming Call to Your Voicemail Manually You can manually forward the call to your voicemail when your phone is ringing. Procedure When your phone is ringing, tap FWD VM. Forwarding All Incoming Calls You can set up your phone to forward all incoming calls to a specified destination. -
Page 32: Simultaneously Ring A Contact
| Audio Calls | 32 Procedure 1. Navigate to Menu > Setting > Features > Call Forward. You can also press when the phone is idle. 2. Turn on Call Forward. 3. Select Forward to Delegates. 4. Save the change. Simultaneously Ring a Contact You can choose to simultaneously ring a contact when you receive incoming calls. -
Page 33: Disabling Call Forward Feature
| Skype for Business Conferences | 33 Disabling Call Forward Feature Procedure 1. Navigate to Menu > Setting > Features > Call Forward. You can also press when the phone is idle. 2. Turn off Call Forward. 3. Save the change. Configuring the Delay Time for Forwarding Incoming Calls You can configure the delay time for forwarding incoming calls. -
Page 34: Initiating A Conference Call During A Skype For Business Call
| Skype for Business Conferences | 34 Initiating a Conference Call during a Skype for Business Call You can initiate a Skype for Business conference call by inviting contacts to the active call. Procedure During a call, tap 2. Do one of the following: •... -
Page 35: Sending The Conference Information
| Skype for Business Conferences | 35 Sending the Conference Information If you are a conference participant, you can send the conference dial-in number and conference ID to contacts who want to join the conference. Procedure 1. During a Skype for Business conference, navigate to More > Conf Info to view the dial-in number and conference ID. -
Page 36: Muting Or Unmuting Individual Conference Participants
| Skype for Business Conferences | 36 Muting or Unmuting Individual Conference Participants The organizer and presenters can mute or unmute individual conference participants. Procedure 1. During a Skype for Business conference, select Participants. To forbid the participant from speaking, tap next to the participant. -
Page 37: Admitting Or Denying Participants To A Locked Conference Call
| Recording Audio | 37 Admitting or Denying Participants to a Locked Conference Call The conference participants can invite participant to join a locked conference. Participants can also join locked conference by dialing dial-in number and Conference ID. Before you begin The conference is locked and you are the conference organizer or presenter. -
Page 38: Recording Local Audios
| Recording Audio | 38 • Playing the Recorded Audios • Copying Recorded Audios to USB Flash Drive • Renaming the Recorded Audios • Deleting the Recorded Audios • Checking Storage Space Recording Local Audios You can record local audio when the phone is idle. The recorded audios are saved in *.amr format. The recorded audios are saved with the name consisting of a prefix “record@”... -
Page 39: Playing The Recorded Audios
| Recording Audio | 39 Playing the Recorded Audios When you receive an incoming call while playing a recording, the recording is paused automatically. If you do not answer or reject the incoming call, or if you answer the incoming call and end the call, the recording will continue to play automatically. -
Page 40: Renaming The Recorded Audios
| Recording Audio | 40 Renaming the Recorded Audios You can rename recorded audios. Procedure 1. Navigate to Menu > Recording. 2. If you want to rename the recorded audio saved in USB flash drive, tap USB. after the desired recorded audio, and then tap Rename. 4. -
Page 41: Checking Storage Space
| Boss-Admin for Skype for Business | 41 Checking Storage Space You can check the storage space (e.g., total space, available space) of the internal SD card or connected USB flash drive. At least 10M free space is required for recording. Procedure 1. -
Page 42: Viewing The Delegates Group
| Boss-Admin for Skype for Business | 42 Viewing the Delegates Group Your delegates are automatically added to the Delegates group on your phone and in the Skype for Business client. Procedure Navigate to Contacts > Delegates. Viewing the Boss Group You can view the contacts for which you are assigned as a delegate in the Bosses group on your phone and in the Skype for Business client. -
Page 43: Responding To Incoming Boss Calls
| Boss-Admin for Skype for Business | 43 • Resuming Held Boss Calls • Transferring a Boss Call • Resuming a Transferred Boss Call • Transferring a Call to a Boss’s Voicemail • Placing a Call on Behalf of a Boss Initiating a Conference Call on Behalf of a Boss •... -
Page 44: Resuming A Transferred Boss Call
| Boss-Admin for Skype for Business | 44 Resuming a Transferred Boss Call If the boss is not available to answer the transferred call or rejects the transferred call, the delegate’s phone displays a notification stating that the transferred call failed. The delegate can resume the call. Procedure Tap Resume or press Transferring a Call to a Boss’s Voicemail... -
Page 45: Managing The Call History
| Managing the Call History | 45 Managing the Call History The call history on your phone includes missed, placed and received calls. Each list holds up to 100 entries. • Viewing History Records Deleting History Records • Disabling Contact Avatar •... -
Page 46: Disabling Contact Avatar
| Managing Contact Directory | 46 Disabling Contact Avatar If you do not want to see the avatars of call records, you can disable contact avatar feature. Procedure 1. Navigate to Menu > Setting > Features > History Setting. 2. Turn off Contacts Avatar. Disabling History Record If you do not want to save the call history, you can disable history record feature. -
Page 47: Adding Skype For Business Contacts
| Managing Contact Directory | 47 Adding Skype for Business Contacts You can add Skype for Business contacts using your Skype for Business client only. • Adding Skype for Business Contacts from the Search Results • Adding Skype for Business Contacts from Local Directory •... -
Page 48: Deleting Skype For Business Contacts
| Managing Contact Directory | 48 3. Tap the avatar of the desired contact. Deleting Skype for Business Contacts You can delete Skype for Business contacts on your phone. Procedure 1. Tap Contacts. 2. Select the Skype for Business group (e.g., Favorites or Other Contacts) that includes the desired contact. 3. -
Page 49: Viewing Local Contacts
| Managing Contact Directory | 49 3. Enter the contact information. 4. Select the desired ringtone for this contact from the Ring field. 5. Save the change. Adding Local Contacts from Skype for Business Directory Procedure 1. Tap Contacts. 2. Select the desired Skype for Business group. 3. -
Page 50: Editing Local Contacts
| Managing Favorites | 50 Editing Local Contacts You can change or add more information to your contacts. Procedure 1. Navigate to Contacts > Local Directory. 2. Select the desired contact list. 3. Tap the avatar of the desired contact. 4. -
Page 51: Viewing Skype For Business Favorites On The Favorites Screen
| Managing Favorites | 51 Viewing Skype for Business Favorites on the Favorites Screen You can view the favorites on the Favorites screen. By default, local favorites are displayed before the Skype for Business contacts. Local favorites are indicated by the icon . -
Page 52: Viewing Local Favorites On The Favorites Screen
| Managing Favorites | 52 Viewing Local Favorites on the Favorites Screen You can view the favorites on the Favorites screen. By default, local favorites are displayed before the Skype for Business contacts. Local favorites are indicated by the icon . -
Page 53: Using The Voicemail
| Using the Voicemail | 53 4. Select OK. Using the Voicemail You can leave voicemails for someone else using the Skype for Business phone. You can also listen to voicemails that are stored in your voicemail. Voicemail is available only when the system administrator enables it for the Skype for Business user. -
Page 54: Listening To The Voicemail
| Using the Calendar | 54 Listening to the Voicemail You can listen to a voicemail directly. Procedure 1. Navigate to Menu > Voice Mail. 2. Do one of the following: • beside the desired voicemail. Tap the avatar of the desired voicemail, and then tap Play Message. •... -
Page 55: Opening The Calendar
| Using the Calendar | 55 • Conference Status • Navigating Year View • Navigating Month View • Navigating Day View • Displaying Meeting View on the Calendar Tracking the Calendar • Disabling the Meeting Reminders • • Setting the Reminder Interval •... -
Page 56: Navigating Year View
| Using the Calendar | 56 Availability Description Your availability during this time shows as Busy on the Outlook software. Your availability during this time shows as Out of Office on the Outlook software. Navigating Year View Procedure 1. In your calendar, tap the title of the month to open Year view. 2. -
Page 57: Tracking The Calendar
| Using the Calendar | 57 Procedure Do one of the following: • From Day view, select a meeting. • From Month view, select a date and select a meeting. Tracking the Calendar When you schedule a Skype meeting via the Outlook software, the attendees can respond to the meeting request via Outlook software. -
Page 58: Joining Skype Conferences
| Using the Calendar | 58 • Select Snooze to temporarily remove the reminder from the screen, until the next schedule reminder. • Select Ignore to permanently remove the reminder from the screen and stop all future reminders for the Skype conference. -
Page 59: Skype For Business Phone Settings
| Skype for Business Phone Settings | 59 Skype for Business Phone Settings You can make your Phone more personalized by customizing various settings. • Setting the Language Changing the Screen Backlight Brightness and Time • Disabling Playing Tone • •... -
Page 60: Disabling Playing Tone
| Skype for Business Phone Settings | 60 Disabling Playing Tone The playing tone feature is enable by default. By default, when you are during an active call, your phone plays a warning tone when the new incoming call arrives. You can disable the playing tone feature, so that your phone does not play a warning tone when the new incoming call arrives. -
Page 61: Changing The Time And Date Format
| Skype for Business Phone Settings | 61 2. Select Manual Setting from the drop-down menu of Type. 3. Enter the specific date and time in the corresponding fields. 4. Save the change. Changing the Time and Date Format You can change the time and date format. About this task You can customize the date by choosing among a variety of time and date formats. -
Page 62: Changing Audio Settings
| Skype for Business Phone Settings | 62 4. Tap the radio box after desired screen saver type. Changing Audio Settings You can control certain audio settings on your phone, including adjusting the audio volume, setting a ringtone and key tone. -
Page 63: Setting A Ringtone For An Incoming Team-Call
| Skype for Business Phone Settings | 63 Setting a Ringtone for an Incoming Team-Call Team-call ringtone feature allows the phone to play a distinct ringtone when receiving a team call. Before you begin You set a team-call group. For more information, refer to Editing Your Team-Call Group Members Procedure 1. - Page 64 | Skype for Business Phone Settings | 64 You are stepping away You can set your presence to this anytime you want. Be Right Back from the phone for a few moments. Your phone has been idle Set automatically for you when your phone has been idle Inactive for a specified period of for a specified time (5 minutes by default).
-
Page 65: Updating Your Skype For Business Presence
| Skype for Business Phone Settings | 65 • Updating Your Skype for Business Presence Updating Your Skype for Business Presence You can update your Skype for Business presence status on the phone, and your presence status is automatically updated in the Skype for Business client. Procedure 1. -
Page 66: Viewing The Location Information
| Advanced Phone Features | 66 • If you select Default, the location configured on the Skype for Business Server will be the default one. • If you select Custom, the location configured on the phone will be the default one. 3. -
Page 67: Configuring The Target Extension Number
| Advanced Phone Features | 67 You can enable or disable intercom feature. If Outgoing Intercom is enabled, an Intercom icon will display on the screen automatically. You can tap it to enter intercom list. Intercom Allow Intercom Allow allows the phone to automatically answer an incoming intercom call. If you disable this feature, the phone will handle an incoming intercom call like a normal incoming call. -
Page 68: Placing An Intercom Call
| Advanced Phone Features | 68 2. Select a desired item. > Delete. The phone screen prompts you are sure to delete. 4. Select OK. If you want to delete all target extension numbers, you can select Delete All. Placing an Intercom Call You can place an intercom call when the phone is idle or during a call. -
Page 69: Deleting A Paging Group
| Advanced Phone Features | 69 Deleting a Paging Group You can delete the desired paging group. Procedure or navigate to Menu > Setting > Features > Paging List. 2. Select a desired paging group. > Delete. The phone screen prompts you are sure to delete. 4. -
Page 70: Modifying The Privacy Mode From The Phone
| Advanced Phone Features | 70 When the privacy mode is disabled on the Skype for Business Server, you can select one of the following options available on the phone/Skype for Business client: • Everyone Can See My Status Regardless Of System Settings/I want everyone to be able to see my presence regardless of system settings (override default settings): Everyone in my Microsoft Active Directory Domain can see my presence regardless of system settings. -
Page 71: Editing Your Team-Call Group Members
| Advanced Phone Features | 71 4. Select the desired value. 5. Click OK. Editing Your Team-Call Group Members A team-call group is a team of people who can answer your work calls. You can edit or delete members in the team- call group via Skype for Business client. -
Page 72: Call Queue
For example, you have been selected by your system administrator to be a call agent for a response group named “YEALINK”. When a user calls your response group, your phone prompts that this is a call for YEALINK. -
Page 73: Shared Line Appearance(Sla)
| Advanced Phone Features | 73 Shared Line Appearance(SLA) When your phone is registered with the Skype for Business Server, you can use the Shared Line Appearance (SLA) feature to share a single line with other contacts as a member of a group. System administrators assign members to the SLA group. -
Page 74: Placing A Sla Call On Hold
| Advanced Phone Features | 74 Any group member can answer an incoming call for the shared line. When a group member answers an incoming call, a red status bar will appear under the shared line appearance. Other members can view the status of a call on the shared line by tapping the corresponding shared line appearance. -
Page 75: Optional Accessories With Your Phone
Check with your system administrator to find out which of these applications or accessories are available on your phone. Note: We recommend that you use the accessories provided or approved by Yealink. The use of unapproved third-party accessories may result in poor performance. -
Page 76: Bluetooth Headset
Activating the Bluetooth Mode USB Headset You can use a USB headset to handle calls on the phone. Tested headset list compatible with Yealink IP Phone For a list of supported headsets, refer to for your IP phone. USB headsets that are not listed may not function properly if you connect them to your IP phone. For more information on how to use your USB headset, refer to the related documentation from the manufacturer. -
Page 77: Wireless Network
Note: For more information about how to connect and use the EXP50, please refer toYealink_EXP50_Skype_for_Business_Edition_Quick_Start_Guide. Wireless Network The T58A Skype for Business phones support the Wi-Fi feature. If there is available Wi-Fi, you can enable the Wi-Fi feature to connect the phone to the wireless network. •... -
Page 78: Connecting To The Wireless Network Using Wi-Fi Protected Setup (Wps)
(SSID) and strong WPA data encryption and authentication. About this task Two methods supported by Yealink IP phones in the Wi-Fi protected setup: • Push Button Configuration (PBC): The user simply presses WPS key on both the IP phone and gateway/router to connect. -
Page 79: Adding A Wireless Network Manually
| Wireless Network | 79 Adding a Wireless Network manually If your gateway/router has SSID broadcast disabled, it might not appear in the scanning results. In that case, you must manually add a wireless network. Before you begin Make sure Wi-Fi Mode is enabled. Procedure 1. -
Page 80: Connecting A Mobile Phone Using Bluetooth
Connecting a Mobile Phone Using Bluetooth T58A Skype for Business phone supports the Bluetooth feature. Bluetooth enables low-bandwidth wireless connections within a range of 10 meters (32 feet). The best performance is in the 1 to 2 meters (3 to 6 feet) range. You can pair and connect the Bluetooth-Enabled mobile phone with your phone. -
Page 81: Making A Mobile Call On The Skype For Business Phone
| Connecting a Mobile Phone Using Bluetooth | 81 Procedure 1. Navigate to Menu > Setting > Basic > Bluetooth. The phone will search for the Bluetooth-Enabled mobile phone automatically. If there is no mobile phone found on the touch screen, tap to search for the Bluetooth-Enabled mobile phone. -
Page 82: Deactivating The Phone Audio Feature
3. Turn off Phone Audio. 4. Save the change. Editing Your Phone's Bluetooth Device Name By default, the device name for Yealink Skype for Business phones display as . You can change the Bluetooth device name for your phone. Procedure 1. -
Page 83: Renaming The Paired Bluetooth Devices
| Connecting a Mobile Phone Using Bluetooth | 83 Renaming the Paired Bluetooth Devices You can rename the paired Bluetooth devices for better recognition effect. Before you begin Pair and connect the Bluetooth-Enabled mobile phone. Procedure 1. Navigate to Menu > Setting > Basic > Bluetooth. after the connected mobile phone name. -
Page 84: Using Better Together Over Ethernet
Skype for Business client. You can also use BToE to sign into your phone using your Skype for Business credentials. In order to use BToE, you need to download and install the Yealink BToE Connector application first. -
Page 85: Starting The Yealink Btoe Connector
Starting the Yealink BToE Connector You can start the Yealink BToE connector manually if it does not start automatically. Procedure Click the Yealink BToE Connector desktop icon on your computer or clickStart > All Programs > Yealink BToE Connector. Setting the Yealink BToE Connector You can customize settings for the Yealink BToT connector. -
Page 86: Pairing Your Phone With Your Computer Over Ethernet
Before you begin Ensure that the Yealink BToE Connector application is running on your PC. Procedure 1. On the Yealink BToE connector application, make sure the Wired checkbox is checked. The IP address of your phone is automatically filled. 2. Click OK. -
Page 87: Using Your Phone As Your Primary Audio Device For Your Computer
Procedure 1. On your computer, click Start > Control Panel > Hardware and Sound > Sound. 2. Click Yealink USB Audio Playback, and click Set Default. 3. Click OK. The PC Audio screen is displayed as following: Using BToE to Lock and Unlock Your Phone When your phone is paired with your computer, you can lock and unlock your phone automatically when you lock or unlock your computer. -
Page 88: Disabling Phone Lock With Pc
| Using Better Together over Ethernet | 88 Disabling Phone Lock with PC When your phone is paired with your computer, you can disable the phone lock with PC feature, so that your phone will not be locked or unlocked with your PC. Procedure 1. -
Page 89: Placing Btoe Calls
| Using Better Together over Ethernet | 89 Placing BToE Calls You can place calls to Skype for Business contacts in the Skype for Business client and on your phone. Procedure Choose a contact and select Call. Pausing and Resuming BToE Calls When your Skype for Business client is during an audio or video call and different user accounts are signed in to your phone and Skype for Business client, you can pause active audio and video calls on your phone. -
Page 90: Uninstalling The Yealink Btoe Connector
| Maintaining Skype for Business Phones | 90 Uninstalling the Yealink BToE Connector You can uninstall Yealink BToE Connector at any time. After you uninstall the Yealink BToE Connector, you can no longer use BToE.Before uninstalling the Yealink BToE Connector, you need to exit BToE. -
Page 91: Resetting Your Phone
| Troubleshooting | 91 Resetting Your Phone You can reset the phone to factory default settings. Procedure 1. Navigate to Menu > Setting > Advanced > Reset Config. 2. Tap Reset to Factory. The phone screen prompts if you want to reset to factory setting. 3. -
Page 92: How Can I Obtain The Mac Address Of A Phone When The Phone Is Not Powered On
If the phone still cannot pair with the Skype for Business client, reboot the PC. • After a reboot, if the phone still cannot pair with the Skype for Business client, uninstall the Yealink BToE Connector and application driver, and then reinstall them. -
Page 93: Why Doesn't The Phone Ring
• Safety Instructions Service Agreements Contact your Yealink Authorized Reseller for information about service agreements applicable to your product. Limitations of Liability TO THE FULL EXTENT ALLOWED BY LAW, YEALINK EXCLUDES FOR ITSELFAND ITS SUPPLIERS ANY LIABILITY, WHETHER BASED IN CONTRACT OR TORT (INCLUDING NEGLIGENCE), FOR... - Page 94 • Without prior written consent, no organization or individual is permitted to make any change to the structure or the safety design of the device. Yealink is under no circumstance liable to consequences or legal issues caused by such changes.
Need help?
Do you have a question about the T58A Skype for Business and is the answer not in the manual?
Questions and answers