Yealink Teams Edition MP56 User Manual
Hide thumbs
Also See for Teams Edition MP56:
- User manual ,
- Quick start manual (15 pages) ,
- Official user manual (5 pages)
Table of Contents
Advertisement
Advertisement
Table of Contents

Related Manuals for Yealink Teams Edition MP56


Summary of Contents for Yealink Teams Edition MP56
-
Page 2: Table Of Contents
Getting Started.....................6 T58A and T56A Hardwares........................ 6 MP56 Hardware...........................8 Power LED Indicator..........................9 Accessing Screens on Yealink Teams Phones................... 9 Accessing the Calls Screen....................10 Accessing the Calendar Screen..................... 11 Accessing the Voicemail Screen.................... 11 Entering Data and Editing Fields...................... 12 Using the On-screen Keyboard.................... - Page 3 | Contents | iii Forwarding Incoming Calls to Delegates if Unanswered..............24 Synchronizing Incoming Calls to Delegates..................25 Boss/Admin Delegate Call Feature............25 Call on behalf of..........................25 Boss's Call Status..........................26 Boss' Held Call..........................26 Operating Calls..................27 Switching among the Handset, Speakerphone and Headset Modes..........27 Placing Calls............................27 Calling Contacts........................28 Dialing the Number.........................28...
- Page 4 | Contents | iv Viewing the Details of Participants..................36 Adding Participants to a Conference Call..................37 Leaving the Conference........................37 Using the Teams Meeting Feature............37 Scheduling a Meeting on the Teams Phone..................37 Viewing the Meeting Details......................38 Joining a Scheduled Meeting......................38 Responding to the Meeting Invitation....................
- Page 5 | Contents | v Viewing the Wireless Network Information..................51 Disconnecting the Wireless Network Connection................52 Deactivating the Wi-Fi Mode......................52 Optional Accessories with Your Phone...........52 Bluetooth Headset..........................52 USB Headset.............................52 Wireless Headset..........................53 USB Speakerphone CP900 / CP700....................53 Hybrid Mode Settings................53 Hybrid Mode............................
-
Page 6: About This Guide
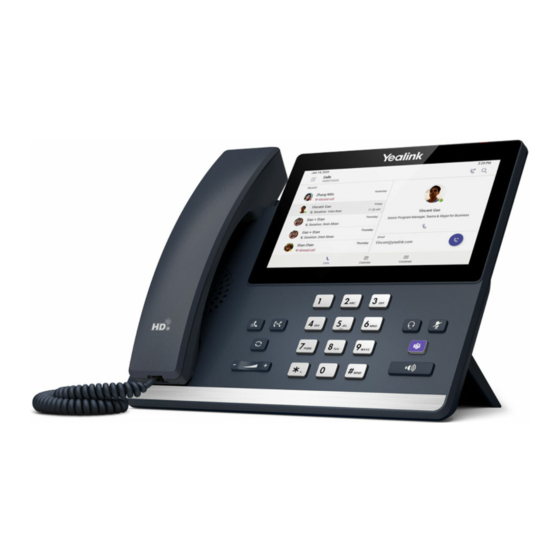
| About This Guide | 6 About This Guide Thank you for choosing Yealink MP56/T58A/T56A Teams phone, which is mainly designed to work with the Microsoft Teams client. This guide provides everything you need to quickly use your new device. Firstly, verify with your system administrator that the IP network is ready for device configuration. - Page 7 | Getting Started | 7 Name Description Power Indicator Indicate phone statuses: • When receiving an incoming call, it fast flashes. • When receiving an voice message, it slowly flashes. Touch Screen 7 inches (1024 x 600) capacitive (5 points) touch screen, tap to select items and navigate menus.
-
Page 8: Mp56 Hardware
Reversible Tab Secures the handset in the handset cradle when the phone is mounted vertically. For more information on how to adjust the reversible tab, refer to Yealink Wall Mount Quick Installation Guide for Yealink IP Phones. Hookswitch • When the user lifts the handset from the cradle, the hookswitch is automatically activated and the network is connected. -
Page 9: Power Led Indicator
Note: The above introduces the default LED status. Your system administrator can configure the status of the power LED indicator. Accessing Screens on Yealink Teams Phones You can navigate the menu bar at the bottom of the touch screen to access the following screens easily. -
Page 10: Accessing The Calls Screen
| Getting Started | 10 Accessing the Calls Screen The Calls screen is displayed after the phone startup. You can place a call from the history entry or view the favorites information from the Calls screen. Name Description Favorites & Call Favorites: Displays favorite contacts. -
Page 11: Accessing The Calendar Screen
| Getting Started | 11 Accessing the Calendar Screen You can access the Calendar screen to join or schedule meetings. 1. Tap Calendar. Name Description Scheduled meeting list Displays all the scheduled on the Teams phone, from Teams client or Outlook. Tap to join the corresponding scheduled meeting. -
Page 12: Entering Data And Editing Fields
| Getting Started | 12 1. Tap Voicemail. Name Description Voicemail list Displays all the voicemails stored in the voicemail list. Tap to play the voicemail. Tap to change the playback speed of the voicemail. Operation options • to view information of contact. •... -
Page 13: Using The On-Screen Dial Pad
| Getting Started | 13 Item Description 26 English Letters • Tap to enter letters. • Long tap a key and then slide to choose one of the options to enter an alternate character. Delete Key • Tap to delete the entered characters one by one. •... -
Page 14: Using The Phone Keypad
| Signing into Microsoft Teams and Locking Your Phone | 14 Using the Phone Keypad Instead of using the on-screen keyboard, you can also use the phone keypad to enter data. The phone keypad only provides digit keys and the following special characters: * # , + ;. Procedure Press digit keys, pound key and star key on the phone or long press the pound key or star key to provide more characters. -
Page 15: Signing Into Microsoft Teams On Your Device
| Signing into Microsoft Teams and Locking Your Phone | 15 Signing into Microsoft Teams on Your Device Procedure 1. Tap Sign in. You will be connected to the Company Portal automatically. 2. Enter your user credentials. 3. After the device signs in successfully, tap Got it. Signing into Microsoft Teams via Web Sign-in Procedure 1. -
Page 16: Signing Out Of Your Teams Device
| Signing into Microsoft Teams and Locking Your Phone | 16 2. Tap Sign in from another device from the Sign in screen. 3. Go to https://microsoft.com/devicelogin on your computer. 4. Enter the code shown on your device and select Next. 5. -
Page 17: Creating A Lock Pin
| Signing into Microsoft Teams and Locking Your Phone | 17 Creating a Lock PIN If your administrator sets security restrictions and enables the phone lock for you, you are prompted to set up a lock PIN, which is used for unlocking your phone. Procedure 1. -
Page 18: Changing Your Lock Pin
| Signing into Microsoft Teams and Locking Your Phone | 18 Changing Your Lock PIN You can change your lock PIN at any time. Procedure 1. Go to > Settings > Device Settings > Phone Lock. 2. Enter the unlock PIN and tap Unlock. 3. -
Page 19: Signing Into A Cap/Meeting Account
| Signing into Microsoft Teams and Locking Your Phone | 19 Signing into a CAP/Meeting Account Procedure 1. Tap Sign in. You will be connected to the Company Portal automatically. 2. Enter your user credentials. -
Page 20: Signing Out Of A Common Area Phone
| Signing into Microsoft Teams and Locking Your Phone | 20 3. After the phone signs in successfully, tap Got it. After signing into the CAP account, the screen is displayed as below: After signing into the Meeting account, the screen is displayed as below: Signing out of a Common Area Phone Procedure 1. -
Page 21: Signing Into A Teams Phone As A Guest User
| Changing Your Presence Status | 21 Signing into a Teams Phone as a Guest User You can sign into a phone as a guest user. Hot Desking feature is convenient for different employees to share one Teams phone. When you sign out, any changes you made on the phone while signed in are removed and the host user settings are restored. -
Page 22: Favorites
| Favorites | 22 2. Tap the presence status field and then select the desired status from the drop-down menu. Tip: You can reset your presence status to be available from any other status by tapping Reset status. Favorites By default, all favorite contacts from the Teams desktop client are marked as favorite contacts on the phone. -
Page 23: Removing Favorites
| Managing Delegates | 23 The contact appears in the FAVORITES list. Removing Favorites Procedure 1. From the Calls screen, tap FAVORITES. 2. Tap on the desired contact. 3. Tap Remove favorites. Managing Delegates You can pick someone to be your delegate—to receive and make calls on your behalf. When you add a delegate, you’re essentially sharing your phone line with them, so they can see and share all of your calls. -
Page 24: Forwarding All Incoming Calls To Delegates
| Managing Delegates | 24 3. Select the permission you want to give your delegate. 4. Save the change. Results Your new delegate will now appear in your delegates list. Forwarding All Incoming Calls to Delegates You can forward all incoming calls directly to your delegates. Procedure 1. -
Page 25: Synchronizing Incoming Calls To Delegates
| Boss/Admin Delegate Call Feature | 25 Synchronizing Incoming Calls to Delegates You can synchronize incoming calls to delegates so that you and your delegates can receive the incoming calls simultaneously. Procedure 1. Go to > Settings > Calling > Also ring. 2. -
Page 26: Boss's Call Status
| Boss/Admin Delegate Call Feature | 26 Boss's Call Status Delegates can see and monitor boss’ call status on the delegate’s phone. About this task In the example below, the icon on the Boss’ tile shows the delegate that the boss is in an active call. You can tap the icon to view additional details about the call. -
Page 27: Operating Calls
| Operating Calls | 27 Operating Calls This chapter shows you how to handle calls on your device. • Switching among the Handset, Speakerphone and Headset Modes • Placing Calls • Answering Calls • Muting and Unmuting Audio • Holding and Resuming Calls •... -
Page 28: Calling Contacts
| Operating Calls | 28 Calling Contacts Procedure From the Calls screen, tap 2. Enter the contact account information to search for the desired contact. beside the contact to place an audio call. Tip: You can tap to search for a contact. Dialing the Number Procedure 1. -
Page 29: Redialing A Number
| Operating Calls | 29 Redialing a Number You can recall the last contact you called when your phone is idle. Procedure Press Placing a Call from Voicemail Procedure 1. From the Voicemail screen, tap the voice mail record that you want to call. to place an audio call. -
Page 30: Answering A Call When In A Call
| Operating Calls | 30 Answering a Call When in a Call You can answer the incoming call when you are in an active call. Procedure on the touch screen. The active call is placed on hold and the incoming call becomes active. Muting and Unmuting Audio You can mute the microphone during an active call so that the other party cannot hear you. -
Page 31: Ending All Calls In The Process
| Operating Calls | 31 Ending All Calls in the Process You can end all calls in the process at a time. Procedure Do one of the following: • If you are using the handset, hang up the handset. • If you are using the headset, press the HEADSET key. -
Page 32: Forwarding Calls To Voicemail
| Operating Calls | 32 Forwarding Calls to Voicemail You can forward all incoming calls to your voicemail. Procedure 1. Go to > Settings > Calling. 2. Enable Call forwarding. 3. Tap the Forward to field and then select Voicemail. Forwarding Calls to a Contact or Number You can forward all incoming calls to a contact or number. -
Page 33: Parking And Retrieving Calls On The Teams Server
| Operating Calls | 33 Parking and Retrieving Calls on the Teams Server Call park and retrieve feature allows a user to place a call on hold in the Teams service in the cloud. When a call is parked, the service generates a unique code for call retrieval. The user who parked the call or someone else can use that code to retrieve the call. -
Page 34: Call Queue
| Conference Calls | 34 Call Queue Call queue is a feature that route and queue incoming calls to group members, called agents, such as to a help desk or a customer service desk. When someone calls into a phone number that is set with a call queue, they will hear a greeting first (if any is setup), and then they will be put in the queue and wait for the available call agent. -
Page 35: Initiating A Conference By Calling Multiple Contacts
| Conference Calls | 35 • Initiating a Conference Call From Call History • Managing the Conference Participants • Adding Participants to a Conference Call • Leaving the Conference Initiating a Conference by Calling Multiple Contacts Procedure from the Calls screen. 2. -
Page 36: Muting All Conference Participants
| Conference Calls | 36 Muting All Conference Participants Everyone can mute all other conference participants in the conference call. The participants being muted can only unmute themselves. Procedure 1. During the conference call, tap All participants are displayed in the participants list. 2. -
Page 37: Adding Participants To A Conference Call
| Using the Teams Meeting Feature | 37 Adding Participants to a Conference Call Everyone in the conference call can add others to the conference. Procedure 1. During the conference call, tap on the touch screen. 3. Enter the participant account information to search and then add members. to add the participants. -
Page 38: Viewing The Meeting Details
| Using the Teams Meeting Feature | 38 3. Enter the location and select the repetition period. 4. To show others your status during this time, tap the Show as field and then select Busy, Free, Tentative, or Out of office. 5. -
Page 39: Canceling The Scheduled Meeting
| Using the Teams Meeting Feature | 39 3. Select the desired response: • Accept (Accept the invitation) • Tentative (Tentatively accept the invitation ) • Decline (Decline the invitation) Your response is shown below: Tip: You can tap the selected response to edit the response to the scheduled meeting. Canceling the Scheduled Meeting If you are the organizer, you can cancel the scheduled meetings. -
Page 40: Deleting The Scheduled Meeting
| Using the Voicemail | 40 Deleting the Scheduled Meeting You can delete the meeting that is not started and remove it from your calendar. It will not affect other participants. Procedure 1. From the Meetings screen, tap the desired meeting. at the top right. -
Page 41: Viewing The Details Of The Contacts
| Teams Device Settings | 41 Viewing the Details of the Contacts You can view the details of the person who left you a message. Procedure 1. From the Voicemail screen, tap the desired voicemail. 2. Tap below the voicemail. Teams Device Settings •... -
Page 42: Setting The Language
| Teams Device Settings | 42 3. Confirm the option. After the phone is restarted, the screen is displayed as follows: Setting the Language The default language of the device depends on what you set after the device starts up. You can change the language. -
Page 43: Changing The Time And Date Format
| Teams Device Settings | 43 Changing the Time and Date Format You can change the time and date format. About this task The built-in date formats are listed below: Date Format Example(2018-05-30) WWW MMM DD Wed May 30 DD-MMM-YY 30-May-18 YYYY-MM-DD 2018-05-30... -
Page 44: Changing The Screen Saver Background
| Teams Device Settings | 44 Changing the Screen Saver Background You can change the screen saver background of the device. You can also set the device to display the custom background. Procedure 1. Go to > Settings > Device Settings > Display. 2. -
Page 45: Activating The Bluetooth Mode
| Teams Device Settings | 45 • Deactivating the Bluetooth Mode Activating the Bluetooth Mode You need to activate Bluetooth mode to use the Bluetooth feature. Before you begin Make sure the Bluetooth USB Dongle BT41 is connected to the T56A phone. Procedure 1. -
Page 46: Renaming The Paired Bluetooth Devices
| Teams Device Settings | 46 Renaming the Paired Bluetooth Devices You can rename the paired Bluetooth devices for better recognition. Procedure 1. Go to > Settings > Device Settings > Bluetooth. 2. Long tap the paired device and then select Details. 3. -
Page 47: Pairing The Device With Pc
| Teams Device Settings | 47 Pairing the Device with PC Before you begin Make sure the Bluetooth is enabled on the phone (enabled by default). Procedure 1. Sign in on Microsoft Teams client installed on laptop or PC. 2. Enable Bluetooth on laptop or PC. 3. -
Page 48: Large Text
| Teams Device Settings | 48 Large Text You can change the displayed text size. Procedure 1. Go to > Settings > Device Settings > Accessibility. 2. Turn on Large Text. High Contrast Mode You can change contrast if any difficulties in reading text on the screen. Procedure 1. -
Page 49: Wireless Network
The Teams device supports the Wi-Fi feature. If there is available Wi-Fi, you can enable the Wi-Fi feature to connect the device to the wireless network. Note: The phones can automatically connect to the wireless network via a Yealink-supplied App. For more information, refer to Easy Way to Connect to a Wireless Network via App. -
Page 50: Connecting To An Available Wireless Network Manually
(SSID) and strong WPA data encryption and authentication. About this task Two methods supported by Yealink devices in the Wi-Fi protected setup: Push Button Configuration (PBC): The user simply presses the WPS key on both the device and •... -
Page 51: Adding A Wireless Network Manually
| Wireless Network | 51 Connecting to the Wireless Network Using PIN Before you begin Make sure that the Wi-Fi mode is activated. Procedure 1. Go to > Settings > Device Settings > Wi-Fi. 2. Tap > WPS-PIN to search the available wireless network. The device screen prompts that you need to enter the PIN xxx on your WLAN router. -
Page 52: Disconnecting The Wireless Network Connection
You can use a USB headset to handle calls on the phone. For the supported headsets, refer to Tested headset list compatible with Yealink IP Phone. USB headsets that are not listed may not function properly if you connect them to your phone. For more information on... -
Page 53: Wireless Headset
Tap the Volume Up/Volume Down button to adjust the volume. Note: The volume will be synchronized between the speakerphone and the phone. For more information, refer to Yealink USB Speakerphone CP700 & CP900 User Guide. Note: It is not available to MP56 phones. -
Page 54: Enabling The Quick Ball
| Hybrid Mode Settings | 54 Enabling the Quick Ball You can use the quick ball to quickly switch between the survivability app mode and teams app mode. Procedure 1. Go to > Settings > Device Settings > Hybrid Mode. 2. -
Page 55: Sending Multicast Paging
| Hybrid Mode Settings | 55 Call Status You can Ring back Cancel a call Call in • Answer a call • Reject a call • Silence a call • Forward a call Talk (peer to peer call) • End a call •... -
Page 56: Setting A Paging Key
| Hybrid Mode Settings | 56 • Sending a Paging by a Paging Key • Setting a Paging List Key • Setting a Paging Group • Editing a Paging Group • Sending a Paging by a Paging List Key • Deleting a Paging Group Related information Hybrid Mode... -
Page 57: Setting A Paging List Key
| Hybrid Mode Settings | 57 2. Tap the Paging key when the phone is idle. Related tasks Switching to Survivability App Setting a Paging Key Setting a Paging List Key You can use the quick ball to quickly switch between the survivability app mode and teams app mode. Procedure 1. -
Page 58: Setting A Paging Group
| Hybrid Mode Settings | 58 Setting a Paging Group Procedure 1. Go to > Settings > Device Settings > Paging List. 2. Select the desired paging group. The default tag is Empty if it is not configured before. 3. Enter the multicast IP address and port number (for example, 224.5.6.20:10008) in the Address field. 4. -
Page 59: Deleting A Paging Group
| Getting More Information About Microsoft Teams | 59 2. Tap the Paging List key when the phone is idle. • Tap the desired paging group. Long tap the desired paging group and select Paging. • Related tasks Setting a Paging List Key Deleting a Paging Group You can edit the information of the paging group. -
Page 60: Viewing More Information About Microsoft Teams
| Getting More Information About Microsoft Teams | 60 Viewing More Information About Microsoft Teams You can view more information about Microsoft Teams such as the version, calling version, and the details of Privacy& Cookies, Microsoft Software License Terms, and Third-party Notices. Procedure Go to >... -
Page 61: Maintaining Teams Devices
| Maintaining Teams Devices | 61 5. Tap SEND. Maintaining Teams Devices When the device cannot be operated properly, you can investigate or troubleshoot issues along with any other tasks your administrator may ask you to perform. • Rebooting Your Device •... -
Page 62: Troubleshooting
| Troubleshooting | 62 Troubleshooting If you are having issues with your device, you can try the troubleshooting options and solutions in the following topics to resolve certain issues. • Why is the screen blank? • Why does the device display “Network unavailable”? •... -
Page 63: Why Doesn't My Handset Work
| Troubleshooting | 63 Why doesn't my handset work? • Check that the headset cord is fully connected to the headset jack on the phone. Checking the IP Address of Device Procedure > Settings > Device Settings > About. Go to...
Need help?
Do you have a question about the Teams Edition MP56 and is the answer not in the manual?
Questions and answers