
Subscribe to Our Youtube Channel
Related Manuals for Kraus KCA-1102


Summary of Contents for Kraus KCA-1102
- Page 1 All-In-One Kitchen Set KCA-1102 www.kraususa.com I Toll Free: 1.800.775.0703 I © 2018 Kraus USA Inc. I REV. December 10, 2018...
- Page 2 Congratulations on the purchase of your new Kraus plumbing fixture! Please keep the box and packaging materials until your product is completely installed. If you have any questions, require technical assistance or have any problems with your product: Please contact our Customer Service Team 1-800-775-0703 / customerservice@kraususa.com...
-
Page 3: Prior To Installation
· Make sure you have all necessary parts by checking the diagram and parts list. If any part is missing or damaged, please contact Kraus Customer Service at 800-775-0703 for a replacement. · Turn off the cold and hot water at the angle stops and turn on the old faucet to release and built up pressure ·... -
Page 4: Tools You Will Need
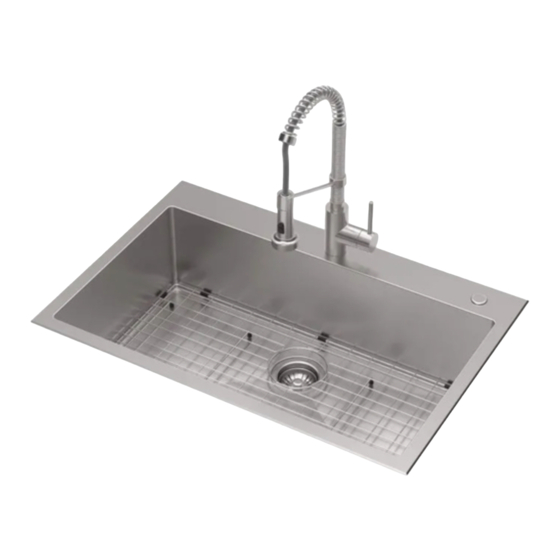
Tools you will need: Safety Goggles Drill Silicone Adhesive Jig Saw Phillips Screwdriver Pencil Putty Knife Tape Measure Scissors Screwdriver NOTE: Specialized tools may be necessary to install Kraus Stainless Steel Kitchen sinks with countertop materials other than wood, marble or granite. - Page 5 Dimensions: 3 1/2" (88.9mm) 2" (50.8mm) 1 3/8" (35mm) 4 1/2" (114.3mm) 3 1/2" (90mm) 3/8" 30 1/2" (774.7mm) (10mm) 33" (838.2mm) 3/8" (10mm) Model #: KHT400-33 Sink Dimensions: 33” x 22” x 9” Min Cabinet Size: 36” Matching Grid: KBG-T400-33 Drain Model #: ST-1...
-
Page 6: Topmount Installation
Topmount Installation Step 1. Position Template · Check the cut-out template against the actual sink to ensure a proper sized cut-out. · Place the cut-out template in the desired location on the countertop. NOTE: Make sure clearance is suitable for backsplash, faucet and plumbing for the sink. Step 2. - Page 7 Step 3. Cut Countertop · Cut the opening in the countertop by carefully following the traced line. NOTE: Please use the appropriate saw that best fits your countertop material.
-
Page 8: Step 4. Attach Mounting Hardware
Step 4. Attach Mounting Hardware · Attach mounting hardware to the prongs protruding from the underside of the sink rim. · Make sure the hooked side of the mounting clip is facing away from the sink. Insert... - Page 9 Step 5. Apply Silicone or Plumber's Putty · Clean and dry the surface around the opening of the sink. · Turn the unit upside down to apply sealant. Apply silicone-based sealant (not included) underneath the edge of the sink.
- Page 10 Step 6. Secure Sink to Countertop • Insert the sink into the opening, check the alignment of the sink to the cutout in the countertop and press firmly. • Tighten the screws in the front of the sink, followed by the ones in the back and on the sides of the sink. •...
- Page 11 Step 7. Install Plumbing Fixtures · Connect drain to sink. Connect trap to drain. Connect water supply connections to faucet according to manufacturer's instructions. Run water into sink and check for leaks. ·...
- Page 12 Step 1. Determine reveal type · Use scissors to cut along the line of the paper template for your desired reveal type (Negative, Positive, or Flush Reveal) KRAUS Recommended Installation Type 3/8" Positive Reveal Flush/Zero Reveal 1/8" Negative Reveal 3/8" POSITIVE 1/8"...
- Page 13 Step 2. Position template · Check the cut-out template against the actual sink to ensure a proper sized cut-out. · Place the cut-out template in the desired location on the countertop. NOTE: Make sure clearance is suitable for backsplash, faucet and plumbing for the sink. Step 3.
- Page 14 Step 4. Cut countertop · Cut the opening in the countertop by carefully following the traced line. NOTE: Please use the appropriate saw that best fits your countertop material. Step 5. Set up mounting brackets · Turn countertop over and align sink with countertop. Decide location for mounting brackets.
- Page 15 Step 6. Drill hole in countertop · Drill 3/8" diameter x 1/2" deep hole in the countertop. Step 7. Install anchors Insert anchors into drilled holes and lightly tap with a hammer until flush. ·...
- Page 16 Step 8. Secure sink to countertop · Use a bead of silicone (or preferred adhesive) around the rim of the sink. Check the alignment of the sink to the cutout in the countertop. Place sink over cutout hole and press firmly. Step 9.
-
Page 17: Maintenance
Step 10. Install plumbing fixtures · Connect drain to sink. Connect trap to drain. Connect water supply connections to faucet according to manufacturer's instructions. · Run water into sink and check for leaks. Maintenance Clean your sink on a regular basis with warm soapy water. Rinse the sink after using cleaning products. Wipe the sink surface with a soft cloth to remove any liquid residue. - Page 18 (7) with the 2.2 gpm washer provided in package. Work with your local jurisdiction to make sure you are in compliance prior to and modification. All modifications are done so at the end users discretion, Kraus is not liable for...
- Page 19 Faucet Installation Procedure 10 3/4" 274mm 4 1/2" 115mm 8 3/4" 221mm 18" 456mm 6 3/8" 162mm 2 1/8" 54mm Installer Tip Shut off main water supply before installing new faucet...
- Page 20 1. Remove mounting hardware · Remove the mounting screws (3D), mounting nut (3C), metal (3B) and rubber washer (3A) from the mounting pipe. 2. Install faucet mounting hardware Insert faucet body (2) into hole in countertop. Install mounting · hardware (3A, B, C & D) from underneath the countertop.
- Page 21 3. Secure mounting hardware Adjust direction of faucet body (2) so that the handle is on the right · side of the faucet. Tighten mounting nut (3C) until snug. Tighten mounting screws (3D) with Phillips screwdriver until snug. 4. Attach spray hose and counterweight ·...
-
Page 22: Check For Leaks
5. Connect waterlines Connect waterlines (5A&B) to angle stops. Tighten both ends of · waterlines with a wrench until snug. Turn on hot and cold angle stops and check for leaks. 6. Flush spray hose · Remove spray head (1) from spray hose (6). Hold tip of spray hose (6). -
Page 23: Replacement Parts
Replacement Parts Replacement Parts List Finish/Color Part # Spray Head CH, SS, MB KP12002 Check Valve KP12003 KP12004 Hose Guide Sprayer Holder CH, SS, MB KP12005 KP12006 Spring CH, SS, MB Set Screw KP12007 Sleeve KP12008 CH, SS, MB KP12009 Set Screw KP12010 10. -
Page 24: Troubleshooting
Any product reported to the authorized dealer or to Kraus as being defective within the warranty period will be repaired or replaced with a product of equal value at the option of Kraus. This warranty extends to the original owner or end-user, and is not transferable to a... - Page 25 This warranty gives you specific legal rights, and you may also have other rights which vary from state to state. KRAUS USA has the right to change, modify, and/or update the warranty policy at any time. For the latest, most up to date comprehensive warranty, go to www.kraususa.com/warranty...
- Page 26 Any product reported to the authorized dealer or to Kraus as being defective within the warranty period will be repaired or replaced with a product of equal value at the option of Kraus. This warranty extends to the original owner or end-user, and is not transferable to a subsequent owner.
- Page 27 Kraus USA, Inc. 12 Harbor Park Drive Port Washington, NY 11050 Toll-free 800-775-0703 Customerservice@kraususa.com If you are a plumbing contractor or trade professional please contact a Kraus Pro Representative at: Kraus USA, Inc. 12 Harbor Park Drive Port Washington, NY 11050 516-801-8955 Proservice@kraususa.com...
- Page 28 Register Your Kraus Product Activate Your Warranty Access Premium Customer Support Get Product Information REGISTER TODAY http://www.kraususa.com/registration...
Need help?
Do you have a question about the KCA-1102 and is the answer not in the manual?
Questions and answers