
Related Manuals for Kraus KCC-1300


Summary of Contents for Kraus KCC-1300
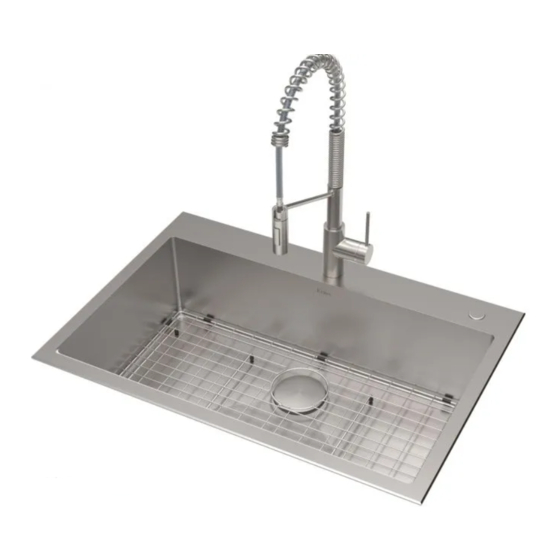
- Page 1 INSTALLATION MANUAL All-In-One Kitchen Set KCC-1300 www.kraususa.com I Toll Free: 1.800.775.0703 I © 2021 Kraus USA Plumbing LLC I REV. April 14, 2022...
- Page 2 Felicitaciones por la compra de su nuevo accesorio de plomería Kraus! Guarde la caja y los materiales de embalaje hasta que su producto esté completamente instalado. Si tiene alguna pregunta, necesita asistencia técnica o tiene algún problema con su producto...
- Page 3 ARRÊTEZ Prior to Installation: · Make sure that you have all necessary parts by checking the parts list. If any part is missing or damaged, please contact Kraus Customer Service at 800-775-0703 for a replacement. · Read all instructions and safety warnings and ensure you have all tools, parts, and equipment necessary for a safe installation.
- Page 4 Kraus sink, this product is likely to perform best when installed by a licensed professional. The failure to follow these instructions or to hire a professional when needed may result in personal injury or property damage and may void the warranty.
- Page 5 NOTE: Specialized tools may be necessary to install Kraus Stainless Steel Kitchen sinks with countertop materials other than wood, marble or granite. NOTA: Tal vez requiera de herramientas especializadas para instalar fregaderos superiores de acero inoxidable Kraus con materiales de encimera que no sean de madera, mármol o granito.
-
Page 6: Dimensions / Dimensiones
Kitchen Sink Installation / Instalación de fregadero de cocina Dimensions / Dimensiones: 3 1/2" (88.9mm) 2" (50.8mm) 1 3/8" (35mm) 3 1/2" (90mm) 3/8" 30 1/2" (774.7mm) (10mm) 33" (838.2mm) 3/8" (10mm) Model # / Modelo #: KHT400-33 Sink Dimensions / Dimensiones del fregadero: 33” x 22” x 9” Min Cabinet Size / Tamaño mínimo del gabinete: 36”... - Page 7 Top Mount Installation / Instalación de montaje superior Step 1. Position Template / Coloque la plantilla · Check the cut-out template against the actual sink to ensure a proper sized cut-out. Place the cut-out template in the desired location on the countertop. ·...
- Page 8 Step 3. Cut Countertop / Corte la encimera · Cut the opening in the countertop by carefully following the traced line. · Corte la abertura en la encimera siguiendo cuidadosamente la línea trazada. NOTE: Please use the appropriate saw that best fits your countertop material. NOTA: utilice la sierra adecuada que se adapte mejor a su material de encimera.
- Page 9 Step 4. Attach Mounting Hardware/ Fije los accesorios de montaje · Attach mounting hardware to the prongs protruding from the underside of the sink rim. · Make sure the hooked side of the mounting clip is facing away from the sink. ·...
- Page 10 Step 6. Secure Sink to Countertop/ Asegure el fregadero a la encimera · Insert the sink into the opening, check the alignment of the sink to the cutout in the countertop and press firmly. · Tighten the screws in the front of the sink, followed by the ones in the back and on the sides of the sink. ·...
- Page 11 Step 7. Install Plumbing Fixtures/ Instale los accesorios de plomería · Connect drain to sink. Connect trap to drain. Connect water supply connections to faucet according to manufacturer’s instructions Run water into sink and check for leaks · · Conecte las conexiones de suministro de agua al grifo de acuerdo con las instrucciones del fabricante ·...
- Page 12 Use tijeras para cortar a lo largo de la línea de la plantilla de papel para el tipo de ranura deseado (negativa, positiva o · al ras) KRAUS Recommended Installation Type / Tipo de instalación recomendada por KRAUS 3/8” Positive Reveal / Ranura positiva de 3/8“ Flush/Zero Reveal / Ranura al ras/cero 1/8”...
- Page 13 Step 2. Position template / Coloque la plantilla · Check the cut-out template against the actual sink to ensure a proper sized cut-out. · Place the cut-out template in the desired location on the countertop. · Compare la plantilla de recorte con el fregadero real para asegurar un recorte del tamaño adecuado.
- Page 14 Step 4. Cut Countertop / Corte la encimera · Cut the opening in the countertop by carefully following the traced line. Corte la abertura en la encimera siguiendo cuidadosamente la línea · trazada. NOTE: Please use the appropriate saw that best fits your countertop material.
- Page 15 Step 6. Drill hole in countertop / Taladre el orificio en la encimera · Drill 3/8" diameter x 1/2" deep hole in the countertop. · Taladre un orificio de 3/8 "de diámetro x 1/2" de profundidad en la encimera. Step 7. Install anchors / Instale los anclajes Insert anchors into drilled holes and lightly tap with a hammer until flush.
- Page 16 Step 8. Secure sink to countertop / Asegure el fregadero a la encimera · Use a bead of silicone (or preferred adhesive) around the rim of the sink. Check the alignment of the sink to the cutout in the countertop. Place sink over cutout hole and press firmly.
- Page 17 Step 10. Install Plumbing Fixtures/ Instale los accesorios de plomería · Connect drain to sink. Connect trap to drain. Connect water supply connections to faucet according to manufacturer’s instructions · Run water into sink and check for leaks · Conecte las conexiones de suministro de agua al grifo de acuerdo con las instrucciones del fabricante ·...
- Page 18 Kitchen Faucet Installation / Instalación del grifo de la cocina Diagram and Parts List / Diagrama y lista de piezas A. Spray Head B. Faucet Body C. Escutcheon D. Gasket Easy Install Assembly Weight G. Weight Clip H. Quick Connector 2.5mm Hex Wrench 6mm Hex Wrench A.
- Page 19 Faucet Dimensions / Dimensiones del grifo 10 3/4" [274.6mm] 10 1/4" 11" [279.6mm] [259mm] 9 1/8" [233.2mm] 2" [52mm] 2 1/2" [62mm] 3/8”-compression Installer Tip / Consejo del instalador Shut off main water supply before installing new faucet / Cierre el suministro de agua principal antes de instalar un nuevo grifo...
- Page 20 Step 1A: Installing the easy install assembly (without escutcheon) Instale el conjunto del grifo (sin placa de cubierta) Shut off the water supply. Remove the old faucet. Clean the mounting surface. Check for the proper thickness of the sink. Insert the base (a) into sink. If your model does have a escutcheon, skip to step 1B.
- Page 21 Step 2. Installing the easy install assembly Instalación del conjunto de instalación sencilla Press the base (a) and escutcheon (C) so that they can not move, then turn the screws with the provided hex wrench (J, HEX: 6.0mm) clockwise, as shown Fig 1. When the mounting plates (b) make contact with the sink (1), continue to turn the screw with the provided hex wrench (J, HEX: 6.0mm) clockwise, as shown Fig 2, until the base (a) is completely tightened and secured, as shown Fig.4.
- Page 22 Step 3. Installing the faucet / Instalación del grifo Insert the hose (1), supply lines (2) and quick connect hose (3) one by one through the hole of the base (a). Carefully insert the hoses into the base. Place the faucet assembly onto the base (a) as shown in the above figure.
- Page 23 Step 4. Securing the faucet assembly / Asegure el conjunto del grifo Install the weight clip (G) at the point of the hose marking "weight here". Insert the weight (F) onto the weight clip (G) by sliding it down onto the weight clip (G). Instale el clip de peso (G) en el punto de la manguera que marca "peso aquí".
- Page 24 Step 6. Flush faucet / Grifo enrasado Pull the hose assembly out of the spout and remove the sprayer (A) by unscrewing it from the hose in a counterclockwise direction. Be sure to hold the end of the hose down into the sink and turn the faucet on to the warm position where it mixes hot and cold water.
-
Page 25: Troubleshooting
Troubleshooting If you have followed the instructions carefully and your faucet still does not work properly, take the following corrective steps: PROBLEM CAUSE ACTION Leakage under the Bonnet nut (9) has Remove the index (13). Loosen screw (12) handle come loose with hex wrench (20). -
Page 26: Solución De Problemas
Solución de problemas Si vous avez suivi attentivement les instructions et que votre robinet ne fonctionne toujours pas correctement, veuillez prendre les mesures correctives suivantes: PROBLEMA CAUSA ACCIÓN Fugas debajo del asa La nuez de bonete (9) tiene Elimine el índice (13). Aflojar tornillo (12) se suelta con llave hexagonal (20). - Page 27 Kraus warrants the structure and finish of the Kitchen Sink to be free from defects in material and workmanship under normal usage for as long as the original purchaser resides in the residence in which the sink was Kitchen Sink was first installed.
- Page 28 TO THE MAXIMUM EXTENT PERMITTED BY APPLICABLE LAW, THIS WARRANTY DOES NOT COVER, AND KRAUS USA PLUMBING, LLC SHALL NOT BE LIABLE FOR, ANY SPECIAL, INCIDENTAL OR CONSEQUENTIAL DAMAGES (INCLUDING LABOR CHARGES TO REPAIR, REPLACE, INSTALL OR REMOVE THIS PRODUCT), WHETHER ARISING OUT OF BREACH OF ANY EXPRESS OR IMPLIED WARRANTY, BREACH OF CONTRACT, TORT, OR OTHERWISE.
- Page 29 Kraus ofrece una garantía para la estructura y el acabado del Fregadero que no tienen defectos en el material y la fabricación en condiciones de uso normales durante el tiempo que el comprador original resida en la residencia en la que se instaló...
- Page 30 Cómo hacer un reclamo de garantía Si usted es un comprador o consumidor, comuníquese con un representante de atención al cliente de Kraus en: Kraus USA Plumbing, LLC 12 Harbor Park Drive Port Washington, NY 11050 Teléfono gratuito 800-775-0703 Customerservice@kraususa.com Si usted es un contratista o profesional de la plomería, comuníquese con un representante de...
- Page 31 Kraus warrants the structure and finish of the Faucet to be free from defects in material and workmanship under normal usage for as long as the original purchaser resides in the residence in which the Faucet was first installed.
- Page 32 TO THE MAXIMUM EXTENT PERMITTED BY APPLICABLE LAW, THIS WARRANTY DOES NOT COVER, AND KRAUS USA PLUMBING, LLC SHALL NOT BE LIABLE FOR, ANY SPECIAL, INCIDENTAL OR CONSEQUENTIAL DAMAGES (INCLUDING LABOR CHARGES TO REPAIR, REPLACE, INSTALL OR REMOVE THIS PRODUCT), WHETHER ARISING OUT OF BREACH OF ANY EXPRESS OR IMPLIED WARRANTY, BREACH OF CONTRACT, TORT, OR OTHERWISE.
- Page 33 Kraus y en el lugar de instalación original. Esta garantía es intransferible. Kraus ofrece una garantía para la estructura y el acabado del Grifo que no tienen defectos en el material y la fabricación en condiciones de uso normales durante el tiempo que el comprador original resida en la residencia en la que se instaló...
- Page 34 Cómo hacer un reclamo de garantía Si usted es un comprador o consumidor, comuníquese con un representante de atención al cliente de Kraus en: Kraus USA Plumbing, LLC 12 Harbor Park Drive Port Washington, NY 11050 Teléfono gratuito 800-775-0703 Customerservice@kraususa.com Si usted es un contratista o profesional de la plomería, comuníquese con un representante de...
- Page 35 IMPORTANT Register Your Kraus Product Activate Your Warranty Access Premium Customer Support Get Product Information REGISTER TODAY http://www.kraususa.com/registration www.kraususa.com...
Need help?
Do you have a question about the KCC-1300 and is the answer not in the manual?
Questions and answers