
Subscribe to Our Youtube Channel
Related Manuals for Gaggenau BM 271


Summary of Contents for Gaggenau BM 271
- Page 1 All manuals and user guides at all-guides.com Gaggenau instruction manual Microwave oven BM 270/271 BM 274/275...
- Page 2 All manuals and user guides at all-guides.com...
-
Page 3: Table Of Contents
All manuals and user guides at all-guides.com Table of contents Before Connection of the Appliance ... Cooking time ....... . Safety information . - Page 4 All manuals and user guides at all-guides.com Technical data ....... Tested for you in our cooking studio .
-
Page 5: Before Connection Of The Appliance
All manuals and user guides at all-guides.com Before Connection of the Appliance d Safety information Hot cooking compartment There is a risk of burns. Never touch the hot surfaces of heating and cooking Read this instruction manual carefully. Only then will you appliances. -
Page 6: Information On The Microwave
All manuals and user guides at all-guides.com Hot or humid environment There is a risk of burns. There is a risk of short circuiting. Airtight packaging may burst when food is heated. Never expose the appliance to intense heat or Follow the information provided on the packaging. -
Page 7: Causes Of Damage
All manuals and user guides at all-guides.com Environmentally friendly disposal Food with a low water content There is a risk of fire. Never defrost or heat food with a low water content, Dispose of packaging in an environmentally friendly e.g. bread, at too high a power or for too long. manner. -
Page 8: Your New Appliance
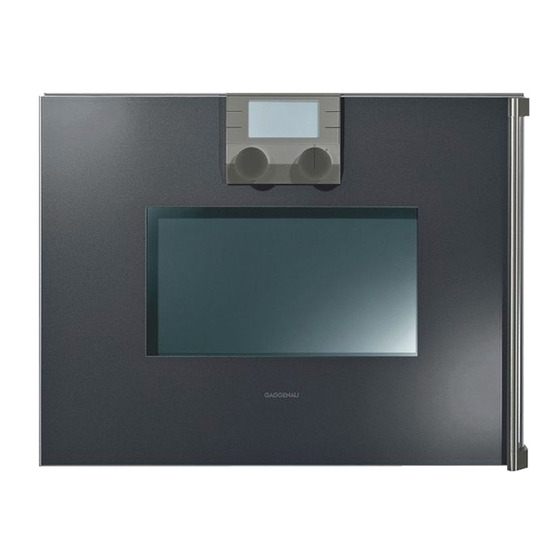
All manuals and user guides at all-guides.com Your new appliance Use this section to familiarise yourself with your new appliance. The control panel and the individual controls are explained here. You will also find information about the cooking compartment and accessories. Display and operating controls Display Buttons... -
Page 9: Symbols
All manuals and user guides at all-guides.com Symbols Symbol Button function To the right To the left Go up Go down > Confirm set values/Start Cancel Increase values Decrease values Call up timer menu Call up basic settings menu Call up additional information Activate the childlock Release the childlock ª... -
Page 10: Accessories
All manuals and user guides at all-guides.com Accessories The accessories can be inserted into the appliance at 4 different heights. Ovenware can also be placed on the oven floor (level 0). As standard, your appliance comes with the following accessories: Wire rack for ovenware, cake tins, grilling and frozen meals. -
Page 11: Initial Settings After Connection
All manuals and user guides at all-guides.com Initial settings after connection After connecting your new appliance for the first time, the "Initial settings" menu is shown in the display. Here you set the language, time format, clock, date, and the required temperature unit. Note: The "Initial settings"... -
Page 12: Setting The Date
All manuals and user guides at all-guides.com Setting the date Use the C menu button to select the date function. The date appears in the display. Use the @ / A buttons to set the day, month and year. Use the bottom right arrow button C to switch from day to month and year. -
Page 13: Activating The Appliance
In stand by mode, the buttons are not active and the display is not lit. Note: Different display settings are available for stand by mode. The default setting is the GAGGENAU logo and the clock. To change the display, refer to the "Basic settings" section. -
Page 14: Microwave
All manuals and user guides at all-guides.com Microwave Microwave power settings Microwaves are converted to heat in foodstuffs. The microwave function can be used solo, i.e. on its own, or in combination with another type of heating. You can select the following microwave power settings: Note: In the "Tested for your in our cooking studio"... -
Page 15: Setting The Microwave
All manuals and user guides at all-guides.com Setting the microwave Turn the function selector two notches clockwise to the "Microwave" setting. The ˜ microwave symbol appears in the display. Set the microwave power using the left hand rotary selector. Use @ or A to set the cooking time. Touch I to start. -
Page 16: Sequential Operations
All manuals and user guides at all-guides.com Sequential operations In sequential operations, you can set up to three different microwave power settings and times to run one after the other. Always use heat resistant cookware that is suitable for microwave use. Setting sequential operations Turn the function selector two notches clockwise to the "Microwave"... -
Page 17: Oven
All manuals and user guides at all-guides.com Oven In oven mode, you can select from three types of heating: S Hot air (40 ºC, 100 250 ºC) « Grilling with hot air (100 250 ºC) ¬ Grilling with circulated air (100 250 ºC) Setting the type of heating and temperature Turn the function selector four notches clockwise to... -
Page 18: Grill
All manuals and user guides at all-guides.com Grill In grill mode, you can select between three grill settings: Level 1 (low) Level 2 (medium) Level 3 (high) Setting the grill Turn the function selector four notches anti clockwise to the "Grill" function. The symbol for the grill and grill setting 3 appear in the display. -
Page 19: Cooking Time
All manuals and user guides at all-guides.com Cooking time When you set the cooking time for your meal, the appliance switches off automatically after the set time has elapsed. You can set a cooking time of between 1 minute and 5 hours. -
Page 20: Cooking Time End
All manuals and user guides at all-guides.com Cooking time end In oven mode, you can delay the cooking time end to a later time. In grill mode, this feature is not available. Example: It is 14:00. The meal requires a cooking time of 40 minutes. -
Page 21: Microwave Combination Mode
All manuals and user guides at all-guides.com Microwave combination mode In microwave combination mode, a type of oven heating or the grill are operated at the same time as the microwave. This enables your meals to be cooked more quickly while still being nicely browned. You can switch on all microwave power settings. - Page 22 All manuals and user guides at all-guides.com Changing the settings: You can change the oven temperature at any time during operation. To change other settings: touch the H symbol. Operation stops. Touch the “ symbol and change the settings. Use the > symbol to exit the menu. Touch I to start. To delete settings: Touch the H symbol.
-
Page 23: Automatic Programmes
All manuals and user guides at all-guides.com Automatic programmes The automatic programmes enable you to prepare food very easily. You select the programme and enter the weight of your food. The automatic programme makes the optimum setting. You can select from 15 programmes. -
Page 24: Individual Customisation
All manuals and user guides at all-guides.com Individual customisation Vegetables: Fresh vegetables: Cut into pieces of equal size. Add If the cooking result of a programme does not meet your one tablespoon of water for every 100 g vegetables. expectations, you can change it the next time. Make the settings as described in steps 1 to 3. -
Page 25: Programme Table
All manuals and user guides at all-guides.com Programme table Suitable foodstuffs Weight range in Ovenware / accessories, shelf height Defrosting Loaf of bread* Wheat bread, mixed 0.20 1.50 Shallow ovenware without a lid wheat bread, wholemeal Cooking compartment floor bread Minced meat* Minced meat made from 0.20 1.00... -
Page 26: Timer
All manuals and user guides at all-guides.com Timer You use the Timer menu to make the following settings: 3 Timer 4 Stopwatch Note: If you turn the function selector while a timer or stopwatch is running, a message is diplayed in the display. -
Page 27: Stopwatch
All manuals and user guides at all-guides.com Stopwatch The stopwatch counts from 0 seconds up to 90 minutes. It also has a pause function, which enables you to temporarily stop the clock. The stopwatch only runs if no other function is set. Starting the stopwatch Call the timer menu. -
Page 28: Extended Timer
All manuals and user guides at all-guides.com Extended timer With this function, the oven maintains a temperature of 85 ºC with the hot air heating type. You can keep food warm for 24 to 74 hours without having to switch the appliance on or off. Bear in mind that food which spoils easily should not be left in the oven for too long. -
Page 29: Childlock
All manuals and user guides at all-guides.com Childlock Your oven has a childlock feature. This prevents the oven from being unintentionally switched off. Prerequisite: You must set the childlock to "available" in the basic settings. See the "Basic settings" section. Activating the childlock Prerequisite: The function selector is switched off. -
Page 30: Basic Settings
All manuals and user guides at all-guides.com Basic settings Your appliance has various basic settings. To change the settings to your requirements, proceed as follows: Turn the function selector one notch clockwise to the "light" position. Touch the ? button to call the "Basic settings" menu. -
Page 31: Table Basic Settings
All manuals and user guides at all-guides.com Table basic settings This table lists all the basic settings and the options for changing them. Basic setting Options Explanation Time format AM/PM format (12 h) / Display the clock in 12 or 24 hour format. 24 h format Clock Sets the clock... -
Page 32: Care And Cleaning
All manuals and user guides at all-guides.com Care and Cleaning Area Cleaning agents Front Hot soapy water: Clean using a dish cloth and then dry If carefully cleaned and taken care of, your microwave with a soft cloth. Do not use metal or oven will remain fully functional and in a good condition glass scrapers for cleaning. -
Page 33: Trouble Shooting
If oven cleaner is accidentally applied to the rear If the power supply is functioning correctly contact your panel, remove it immediately with a sponge and dealer or Gaggenau after sales service. plenty of water. Please specify the E number and FD number of the Never use abrasive cleaning agents. -
Page 34: Replacing The Oven Light Bulb
All manuals and user guides at all-guides.com Replacing the oven light bulb The oven light bulb is replaceable. Heat resistant 60 W, 240 V halogen bulbs can be obtained from the after sales service or a specialist retailer. Always remove the new halogen bulb from the packaging using a dry cloth. -
Page 35: Technical Data
All manuals and user guides at all-guides.com Technical data Tested for you in our cooking studio Here you will find a selection of dishes and the ideal Power supply 220 240 V, 50 Hz settings for them. We will show you which type of heating Maximum total connected 3100 W and which temperature or microwave power setting are... -
Page 36: Defrosting
All manuals and user guides at all-guides.com Defrosting Place the frozen food in an uncovered tray on the oven Turn or stir the food once or twice during the defrosting floor. time. Large pieces of food should be turned several times. -
Page 37: Defrosting, Heating Up Or Cooking Frozen Foods
All manuals and user guides at all-guides.com Defrosting, heating up or cooking frozen foods Take ready made meals out of their packaging. They will You should stir or turn the food two to three times during heat up more quickly and evenly if you place them in heating. -
Page 38: Cooking Food
All manuals and user guides at all-guides.com Meat in sauce 500 g 600 watts, 8 11 Covered Stew 400 g 600 watts, 6 8 Covered 800 g 600 watts, 8 11 Vegetables 1 portion 150 g 600 watts, 2 3 Add some liquid. -
Page 39: Cakes And Pastries
All manuals and user guides at all-guides.com Cakes and pastries Baking tins: The temperature and baking time depend on the type It is best to use dark baking tins made of metal. and amount of mixture. This is why ranges" are given in the tables. -
Page 40: Baking Tips
All manuals and user guides at all-guides.com Baking tips You wish to cook to your own recipe. Refer to the instructions in the tables for similar types of food. How to check that a sponge cake is cooked Approximately 10 minutes before the end of the baking time specified in the cooking properly. - Page 41 All manuals and user guides at all-guides.com Dark meat, e.g. beef, browns more quickly than Tips for braising: lighter coloured meat such as veal or pork. Use ovenware with a lid for braising fish. When grilling light coloured meat or fish, these often only Add two to three tablespoons of liquid and a little lemon brown slightly on the surface, although they are cooked juice or vinegar to the dish.
-
Page 42: Tips For Roasting And Grilling
All manuals and user guides at all-guides.com Dish Quantity Weight Level Type of Grill Cooking time in minutes heating setting Steaks 2 3 pieces approx. 200 g 1+3** ® 1st side: approx. 10 15 2 3 cm thick each 2nd side: approx. 5 10 Neck steaks 2 3 pieces approx. -
Page 43: Pre Prepared Frozen Products
All manuals and user guides at all-guides.com Pre prepared frozen products Please observe the instructions on the packaging. The values in the table apply to dishes placed in a cold oven. Meal Ovenware Level Type of heating Temperature ºC Cooking time in minutes Strudel with fruit filling Baking tray 180 200... -
Page 44: Tips For Saving Energy
All manuals and user guides at all-guides.com Baking The values in the table apply to dishes placed in a cold oven. Dish Ovenware and notes Level Type of Temperature Baking time, heating in ºC minutes Viennese whirls Baking tray 160 170 30 35 Small Cakes* Baking tray... -
Page 45: Acrylamide In Foodstuffs
All manuals and user guides at all-guides.com Acrylamide in foodstuffs Which foods are affected? Acrylamide is mainly produced in grain and potato products heated at high temperatures, such as potato crisps, chips, toast, rolls, bread, baked goods (biscuits, gingerbread, cookies). Tips for keeping acrylamide to a minimum when preparing food General... - Page 46 All manuals and user guides at all-guides.com...
- Page 47 All manuals and user guides at all-guides.com...
- Page 48 All manuals and user guides at all-guides.com Gaggenau Hausgeräte GmbH Carl Wery Str. 34 81739 MÜNCHEN GERMANY www.gaggenau.com...
Need help?
Do you have a question about the BM 271 and is the answer not in the manual?
Questions and answers
i need to know the cabinet specifications for building a unit to suit the BM 271
The cabinet specifications for building a unit for the Gaggenau BM 271 are:
- Appliance dimensions (H/W/D): 455 x 590 x 580 mm
- Cooking compartment dimensions (H/W/D): 244 x 445 x 350 mm
These measurements should be used to design the cabinet space to properly fit and support the appliance.
This answer is automatically generated