Table of Contents
Advertisement
Quick Links
Download this manual
See also:
Use and Care Manual
Advertisement
Table of Contents

Related Manuals for Gaggenau BM281


Summary of Contents for Gaggenau BM281
- Page 1 Gaggenau us Use and care manual ca Notice d'utilisation mx Manual de instrucciones BM281...
-
Page 3: Table Of Contents
Table of contents Cleaning and Maintenance ....About This Manual ......Care and Cleaning of Your Microwave Oven . -
Page 4: About This Manual
About This Manual How This Manual Is Organized The Cleaning and Maintenance section describes how to clean and maintain the appliance. This manual contains several sections: The Service section includes troubleshooting tips and your warranty. The Safety section describes important procedures that can ensure your safety while using the appliance. -
Page 5: Safety
Safety IMPORTANT SAFETY INSTRUCTIONS READ AND SAVE THESE INSTRUCTIONS State of California Proposition 65 Warnings Do not operate this appliance if it has a damaged cord or plug, if it is not working properly, or if it has been damaged or dropped. - Page 6 IMPORTANT SAFETY INSTRUCTIONS READ AND SAVE THESE INSTRUCTIONS Use extreme care when inserting a spoon or other Do not use recycled paper products unless the paper utensil into the container. product is labeled as safe for microwave oven use. Recycled paper products may contain impurities which Do not use straight sided containers with narrow may cause sparking.
-
Page 7: Installation & Grounding Instructions
IMPORTANT SAFETY INSTRUCTIONS READ AND SAVE THESE INSTRUCTIONS Oven Rack Installation Use these rack for Bake cooking to elevate food for proper Do not block air vents. If they are blocked during heating. May also be used during microwave cooking. Do operation, the oven may overheat. -
Page 8: Safety Precautions
the marked electrical rating of the cord set or extension Move the microwave oven away from the receiver. cord should be at least as great as the electrical rating Plug the microwave into a different outlet so that the of the appliance, oven and the receiver are on different branch circuits. - Page 9 Deep fat frying Do not attempt to deep fat fry in your microwave oven. Oil can be heated beyond ideal temperatures very quickly in a microwave oven. Temperatures can climb high enough for the cooking oils to reach their respective flash points and burst into flames. The heated oil may bubble and spatter causing possible damage to the oven and perhaps resulting in burns.
- Page 10 When using foil, warming rack or utensils made of General oven usage guidelines / Oven door metal in the oven, allow at least 1 inch (2.5 cm) of Do not use the oven for any reason other than the space between foil, metal material and interior oven preparation of food.
-
Page 11: Getting Started
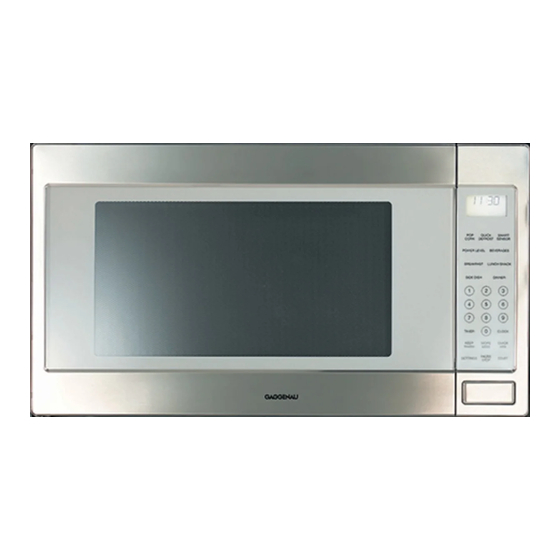
Getting started Control Panel Display Window Step by step instructions scroll for easy operation QUICK DEFROST Pad AUTO REHEAT Pad POPCORN Pad CONV BAKE Pad POWER LEVEL Pad AUTO COOKING by Bake MORE / LESS Pad AUTO COOKING Pad Number Pads TIMER Pad CLOCK Pad SERVING / WEIGHT Pad... -
Page 12: Parts And Accessories Included
Parts and Accessories Included External Air Vent Internal Air Vent Control Panel Roller Ring Door Release Button Ceramic Tray Identification Plate Exhaust Air Vent Waveguide Cover (do not remove) Door Safety Lock System Rack Roller Ring / Ceramic Tray Place the Roller Ring correctly on the oven floor. Place the Ceramic Tray exactly on Roller Ring. -
Page 13: Operation
Operation Starting to Use Your Oven Note: To reset the clock, repeat 1 3. Note: Before using for the first time, wash the interior with a soapy cloth, then operate the oven without food on Conv The clock will retain the time of day as long as the oven Bake for 20 minutes at 230 ºC (450 ºF). - Page 14 Settings Child Lock ON/OFF The oven has a Child Safety Lock feature which prevents use by children. It does not lock the door. 1. ON Child Lock has been set and operation modes will not be accepted. 2. OFF* Child Lock has been cancelled. Beep ON/OFF If you wish to have the oven operate with no beep, it can be eliminated.
-
Page 15: Getting The Most Out Of Your Appliance
Getting the Most Out of Your Appliance Selecting Power & Cook time Do not over cook This oven requires less time to cook than an older unit. Select Power Level Over cooking will cause food to dry out and may cause a fire. -
Page 16: Quick Min Feature
To set Stand Time (2 or 3 programs) Press Start. Keep Warm will start. The time in the display window e. g. will count down. Press P3 Note: Enter 25 minutes (using number pads). Keep Warm can be programmed as the final stage after cook time/s have been manually entered. -
Page 17: More/Less Feature
Remarks .36 .45 .46 .55 When popping multiple bags one right after the other, the 9 10 .56 .65 cooking times may vary slightly. This does not affect the popcorn results. 11 12 .66 .75 .76 .85 More/Less Feature 14 15 .86 .95 For Popcorn Example: To defrost 1.5 pounds of meat... -
Page 18: Convection Bake With Time Selection
Select power and minimum time so that items will be If the oven door is not opened after preheating, the under defrosted. selected temperature will be maintained for 30 minutes. After 30 minutes, the oven will shut off automatically Drain liquids during defrosting. and beep five times. -
Page 19: To Use Auto Cooking (By Microwave)
All foods must be previously cooked. A plate of food is normally 3 4 servings. Foods should always be covered loosely with plastic To Use Auto Cooking (by Microwave) wrap, wax paper or casserole lid. Press Auto Cooking Pad. All foods should have a covered stand time of 3 to 5 minutes. - Page 20 Pad Auto Recipe Serving/Weight Ovenware Hints Cooking Rice ½ cup, 1 cup, tall microwave safe Rice foams a lot during cooking. 1½ cups serving bowl with lid or Therefore, use a tall dish with a lid. Do not vented plastic wrap use boil in the bag rice.
-
Page 21: To Use Auto Cook By Bake
To Use Auto Cook by Bake To Use More/Less Pad After having used One Touch Cooking a few times, you This feature allows you to bake cake or pie without having may prefer your food cooked to a different degree. By using to select oven temperature and baking time. -
Page 22: Cooking Techniques
Starting Temperature Cooking time Foods that are at room temperature take less time to cook A range of cooking time is given in each recipe. The time than if they are chilled, refrigerated, or frozen. range compensates for the uncontrollable differences in food shapes, starting temperature, and regional Cooking Techniques preferences. -
Page 23: About Food Safety And Cooking Temperature
About food Safety and cooking To test for doneness, insert a meat thermometer in a thick or dense area away from fat or bone. NEVER leave the temperature thermometer in the food during cooking, unless it is approved for microwave oven use. Check foods to see that they are cooked to the United States Department of Agriculture's recommended temperatures. - Page 24 Item Microwave Comments Oven Cooking Bag Follow manufacturers' directions. Close bag with the nylon tie provided, a strip cut from the end of the bag, or a piece of cotton string. Do not close with metal twist tie. Make six ½ inch (1 cm) slits near the closure.
-
Page 25: Container Test
Container Test Time ranges are often specified in the tables. Set the shortest time first and then extend the time if necessary. To test a container for safe microwave oven use It may be that you have different quantities from those specified in the tables. - Page 26 Amount Power Approx. defrosting Ovenware Hints time 2 whole fish apiece 9 oz. 4 min. flat dish turn after ½ of the cook 12 16 min. time. Fruit, e.g. raspberries 9 oz. 6 8 min. flat dish 1 lb 6 8 min. flat dish 9 12 min.
- Page 27 Heating food Warning: Heated liquids can erupt if not mixed with air. Do not heat liquids in your microwave oven without first Take ready made meals out of their packaging. They will stirring them. When boiling is delayed, the liquid comes to a heat up more quickly and evenly if you place them in boil without the customary steam bubbles.
- Page 28 Amount Power Approx. Ovenware Hints cooking time Fish fillets 14 oz 7 10 min. dish with lid add 1 3 tbsp water or lemon juice Shrimp, medium size 1 lb 4 6 min. dish with lid add 1 tbsp water or shelled and cleaned lemon juice Whole fish, e.g.
- Page 29 Amount Power Approx. cooking Hints time Artichokes 2x 8 12 oz 11 14 min. add some lemon juice on the first cut turn after ½ of the cook time add 1 tbsp water per 3.5 oz 4x 8 12 oz 17 20 min.
- Page 30 Power Approx. cooking Hints time Cereal, cream 1 serving 3 tbsp 2 3 min. add ¾ cup cold milk of wheat 2½ stir after 1½ min. and following after each min. cook time min. 2 servings 6 tbsp 3 4½ min. add 1½...
-
Page 31: Test Dishes According To En 60705, Iec 60705
Test dishes according to EN 60705, IEC 60705 The quality and function of microwave combination devices are inspected by inspection institutions using these dishes. Defrosting with microwave Dish Microwave power, Note cook time in minutes Ground meat 7 8 min. Place Pyrex pan Ø... -
Page 32: Cleaning And Maintenance
Cleaning and Maintenance Care and Cleaning of Your Microwave Oven Door Oven Wipe with a soft dry cloth when steam accumulates inside or around the outside of the oven door. During cooking, Caution: It is important to keep the oven clean and dry. especially under high humidity conditions, steam is given Food residue and condensation may cause rusting or off from the food. -
Page 33: Maintenance
Maintenance Steam accumulates on the oven door and warm air comes from the oven vents. Before Requesting Service During cooking, steam and warm air are given off from the food. Most of the steam and warm air are removed These things are normal: from the oven by the air which circulates in the oven cavity. -
Page 34: Service
Please make sure to return your registration card; while not FD No./No FD necessary to effectuate warranty coverage, it is the best Date of Purchase way for Gaggenau to notify you in the unlikely event of a safety notice or product recall. Specifications How Long the Warranty Lasts... - Page 35 Product, including all electrical, plumbing or other Out of Warranty Product connecting facilities, for proper foundation/flooring, and for Gaggenau is under no obligation, at law or otherwise, to any alterations including without limitation cabinetry, walls, provide you with any concessions, including repairs, floors, shelving, etc.);...
- Page 36 BSH. How to obtain warranty service To obtain warranty service for your Product, you should contact the nearest Gaggenau authorized service center. BSH Home Appliances 1901 Main Street, Suite 600, Irvine, CA 92614 / 1 877 442 4436...
- Page 37 Gaggenau 1901 Main Street, Suite 600 Irvine, CA 92614 Telephone: 1 877 442 4436 www.gaggenau usa.com Gaggenau Hausgeräte GmbH Carl Wery Str. 34 81739 MÜNCHEN GERMANY www.gaggenau.com...
Need help?
Do you have a question about the BM281 and is the answer not in the manual?
Questions and answers