Gaggenau BM 450 Use And Care Manual
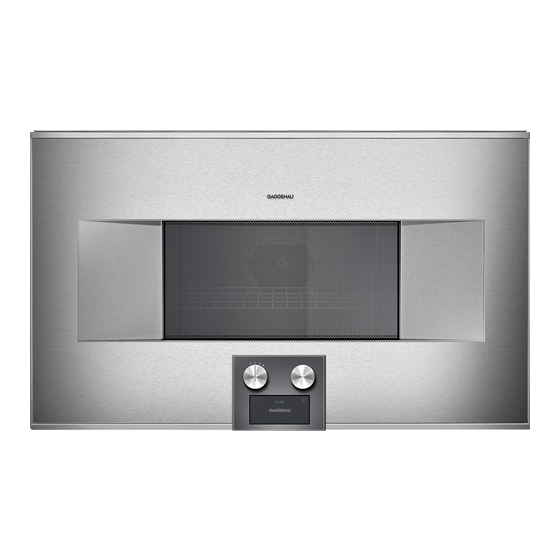
Combi-microwave oven
Hide thumbs
Also See for BM 450:
- Use and care manual (56 pages) ,
- Instruction manual (44 pages) ,
- Installation instructions manual (36 pages)

Related Manuals for Gaggenau BM 450


Summary of Contents for Gaggenau BM 450
- Page 1 Gaggenau Use and care manual BM 450/451 710 BM 484/485 710 Combi-microwave oven SAVE THESE INSTRUCTIONS FOR FUTURE REFERENCE. CONSERVEZ CETTE NOTICE D’UTILISATION POUR RÉFÉRENCE ULTÉRIEURE.
-
Page 2: Table Of Contents
Table of Contents U s e a n d c a r e m a n u Safety Definitions Microwave Notes regarding cookware Microwave output IMPORTANT SAFETY INSTRUCTIONS Setting the microwave 9 PRECAUTIONS TO AVOID POSSIBLE EXPOSURE TO EXCESSIVE MICROWAVE Oven ENERGY Setting the type of heating and temperature... - Page 3 Baking tips Roasting and grilling Tips for roasting and grilling Casseroles, gratins Frozen convenience products Test dishes Acrylamide in foodstuffs Additional information on products, accessories, replacement parts and services can be found at and in the online shop www.gaggenau.com www.gaggenau-eshop.com...
-
Page 4: Safety Definitions
Définitions de Sécurité Safety Definitions AVERTISSEMENT WARNING Le non-respect de cet avertissement peut This indicates that death or serious injuries may entraîner la mort ou des blessures graves. occur as a result of non-observance of this warning. ATTENTION CAUTION Le non-respect de cet avertissement peut entraîner des blessures mineures ou modérées. -
Page 5: Important Safety Instructions
IMPORTANT SAFETY INSTRUCTIONS READ ALL INSTRUCTIONS BEFORE USING THE APPLIANCE CONSIGNES DE SÉCURITÉ IMPORTANTES LISEZ TOUTES LES INSTRUCTIONS AVANT D'UTILISER L'APPAREIL WARNING AVERTISSEMENT Before installing, turn power OFF at the service panel. Avant l´installation, couper le courant au panneau de E C N AI L P P A Lock service panel to prevent power from being service. - Page 6 IMPORTANT SAFETY INSTRUCTIONS READ ALL INSTRUCTIONS BEFORE USING THE APPLIANCE CONSIGNES DE SÉCURITÉ IMPORTANTES LISEZ TOUTES LES INSTRUCTIONS AVANT D'UTILISER L'APPAREIL WARNING AVERTISSEMENT If the information in this manual is not followed Si les informations contenues dans ce manuel ne exactly, fire or shock may result causing property sont pas suivies à...
-
Page 7: Grounding Instructions
IMPORTANT SAFETY INSTRUCTIONS READ ALL INSTRUCTIONS BEFORE USING THE APPLIANCE CONSIGNES DE SÉCURITÉ IMPORTANTES LISEZ TOUTES LES INSTRUCTIONS AVANT D'UTILISER L'APPAREIL Ne rangez pas cet appareil à l’extérieur. N’utilisez pas Do not store this appliance outdoors. Do not use this ce produit à... -
Page 8: Tv / Radio Interference
IMPORTANT SAFETY INSTRUCTIONS READ ALL INSTRUCTIONS BEFORE USING THE APPLIANCE CONSIGNES DE SÉCURITÉ IMPORTANTES LISEZ TOUTES LES INSTRUCTIONS AVANT D'UTILISER L'APPAREIL WARNING AVERTISSEMENT Improper grounding can result in a risk of electric Une mise à la terre inadéquate peut entraîner un shock. -
Page 9: Intended Use
IMPORTANT SAFETY INSTRUCTIONS READ ALL INSTRUCTIONS BEFORE USING THE APPLIANCE CONSIGNES DE SÉCURITÉ IMPORTANTES LISEZ TOUTES LES INSTRUCTIONS AVANT D'UTILISER L'APPAREIL Utilisation prévue Intended Use Cet appareil est destiné uniquement à une utilisation This appliance is intended for normal family domestique normale. -
Page 10: Cooking Safety
IMPORTANT SAFETY INSTRUCTIONS READ ALL INSTRUCTIONS BEFORE USING THE APPLIANCE CONSIGNES DE SÉCURITÉ IMPORTANTES LISEZ TOUTES LES INSTRUCTIONS AVANT D'UTILISER L'APPAREIL Cooking Safety Sécurité de cuisson CAUTION ATTENTION To avoid personal injury or property damage, Pour éviter les blessures corporelles ou les dégâts observe the following: matériels, veuillez suivre les consignes suivantes : ‒... -
Page 11: In Case Of Fire
IMPORTANT SAFETY INSTRUCTIONS READ ALL INSTRUCTIONS BEFORE USING THE APPLIANCE CONSIGNES DE SÉCURITÉ IMPORTANTES LISEZ TOUTES LES INSTRUCTIONS AVANT D'UTILISER L'APPAREIL ‒ Do not clean with metal scouring pads. ‒ Ne nettoyez pas le four avec des éponges à Pieces can burn off the pad and touch récurer métalliques. -
Page 12: Cooking Items
IMPORTANT SAFETY INSTRUCTIONS READ ALL INSTRUCTIONS BEFORE USING THE APPLIANCE CONSIGNES DE SÉCURITÉ IMPORTANTES LISEZ TOUTES LES INSTRUCTIONS AVANT D'UTILISER L'APPAREIL CAUTION ATTENTION Metal e.g. a spoon in a glass must be kept at least 1 in Du métal, par exemple, une cuillère dans un verre, doit (25 mm) from the oven walls and the inside of the être conservé... - Page 13 IMPORTANT SAFETY INSTRUCTIONS READ ALL INSTRUCTIONS BEFORE USING THE APPLIANCE CONSIGNES DE SÉCURITÉ IMPORTANTES LISEZ TOUTES LES INSTRUCTIONS AVANT D'UTILISER L'APPAREIL CAUTION ATTENTION When using pre-packaged microwave popcorn, check Lorsque vous utilisez du popcorn préemballé pour package weight before using the popcorn function. micro-ondes, vérifiez le poids de l’emballage avant Set the oven for the weight of the popcorn package.
- Page 14 IMPORTANT SAFETY INSTRUCTIONS READ ALL INSTRUCTIONS BEFORE USING THE APPLIANCE CONSIGNES DE SÉCURITÉ IMPORTANTES LISEZ TOUTES LES INSTRUCTIONS AVANT D'UTILISER L'APPAREIL Home Canning / Drying foods / Small quantities of Conserves maison / Séchage des aliments / Petites Do not use microwave oven for home canning foods: N’utilisez pas le four à...
-
Page 15: Cooking Utensils
IMPORTANT SAFETY INSTRUCTIONS READ ALL INSTRUCTIONS BEFORE USING THE APPLIANCE CONSIGNES DE SÉCURITÉ IMPORTANTES LISEZ TOUTES LES INSTRUCTIONS AVANT D'UTILISER L'APPAREIL Utensiles de cuisson Cooking Utensils Les ustensiles de cuisson, les plateaux de verre et les Cooking utensils, the glass tray and racks get hot grilles deviennent chauds pendant la cuisson au during microwaving. -
Page 16: Pacemakers
IMPORTANT SAFETY INSTRUCTIONS READ ALL INSTRUCTIONS BEFORE USING THE APPLIANCE CONSIGNES DE SÉCURITÉ IMPORTANTES LISEZ TOUTES LES INSTRUCTIONS AVANT D'UTILISER L'APPAREIL Pacemakers Pacemakers ATTENTION CAUTION Pour éviter la défaillance d’un stimulateur cardiaque, To avoid pacemaker malfunction, consult physician or consultez le médecin ou le fabricant du stimulateur pacemaker manufacturer about effects of microwave cardiaque à... -
Page 17: Causes Of Damage
Causes of damage Protecting the environment NOTICES: Unpack the appliance and dispose of the packaging in line with environmental requirements. ▯ Metal e.g. a spoon in a glass must be kept at least 1" (25 mm) from the oven walls and the inside of the door. -
Page 18: Getting To Know The Appliance
Operating controls on the lower side of the appliance Getting to know the appliance You will get to know your new appliance here. We explain the control panel and the individual controls to you. You are informed about the oven interior and accessories. -
Page 19: Function Selector Positions
Function selector positions ° Demo mode “ Preheating with status display ’ Quick heating with status indicator Š Timer Stop watch Automatic programs: Weight Cooking result Defrosting Cooking, combi cooking Position Function Combination mode: Off position > ž Calling up oven Light <... -
Page 20: Automatic Door Opening
Automatic door opening Accessories The accessories can be inserted into the appliance at When you touch the symbol, the appliance door 4 different heights. springs open and you can open it fully with the handle recess at the side. Automatic door opening does not work when the child lock is activated or in the event of a power failure. -
Page 21: Accessories
The appliance must be completely fitted and BA 476 310 Handle, stainless steel for BM 450/451 connected. BA 478 310 Handle, stainless steel for BM 484/485 The "First settings" menu appears in the display after the mains has been connected. -
Page 22: Setting The Time Format
Setting the time format Setting the date the two possible formats 24h and AM/PM appear in The default date appears in the display. The day the display. The default format is 24h. setting is already active. Set the required format with the rotary selector. Set the required day with the rotary selector. -
Page 23: Completing Initial Set-Up
‒ There are various indicators for standby mode. the cooking compartment. Pre-set is the GAGGENAU logo and the time. If you would like to change the display, see the To remove the new cooker smell, heat up the oven Basic settings section on when it is empty and closed. -
Page 24: Microwave
Setting the microwave Microwave Set the required microwave output setting using the function selector. Microwaves are converted to heat in food. The Set the cooking time using the rotary selector. microwave can be used solo, i.e. on its own, or in combination with a different type of heating. -
Page 25: Oven
“ heat-up symbol appears in the display (only if Oven the oven temperature has been set to 210°F (100°C) or higher). The bars continuously display the heating status. When the set temperature has been reached, a In oven mode, you can set the following types of “... -
Page 26: Broil
Broil Combination mode In broil mode, you can set three broil settings: In combination mode, an oven heating type or the grill mode operate simultaneously with the microwave. Your dishes cook faster and are nicely browned. Type of heating Broil setting Usage Broil 1 (low) For soufflés and deep... -
Page 27: Sequential Operation
The operation begins. The cooking time starts Sequential operation counting down. An audible signal sounds once the cooking time has ™ elapsed. The signal stops early if you touch the With a sequential operation, you can set up to five different types of heating and cooking times that are symbol, open the appliance door, or set the function set one after another. -
Page 28: End Of Cooking Time
Note: You can set a stabilization time between Once the cooking time has elapsed, the appliance two microwave outputs so that the temperature is switches off. An audible signal sounds. The signal ™ distributed evenly within the food. To do this, stops early if you touch the symbol, open the touch the... -
Page 29: Automatic Programs
Set the required cooking time end using the Automatic programs rotary selector. You can prepare food really easily using the automatic programs. You select the program and enter the weight of your food. The automatic program then applies the most suitable settings. You can select from 15 programs. -
Page 30: Adjust Individually
To the left = cooking result less well done. Resting time: Some dishes require a resting time after the end of To the right = cooking result more well done. the program in order to reach an even temperature or to simmer. - Page 31 ▯ Liquid will be produced when defrosting meat or Rice: poultry. Drain off this liquid when turning meat ▯ Do not use brown or boil-in-the-bag rice. and poultry and under no circumstances use it for other purposes or allow it to come into contact ▯...
-
Page 32: Program Table
Program table Suitable food Weight range Cookware/accessories, shelf height Defrosting Loaf of bread* Wheat bread, mixed wheat 7.1 oz - 3.3 lb Shallow cookware without lid bread, whole-grain bread (0.20 - 1.50 kg) Cooking compartment floor Rolls wheat rolls, pre-baked 1.8 - 21.2 oz Wire rack (0.05 - 0.60 kg) -
Page 33: Personal Recipes
‡ To save: Touch the symbol. The recipe is saved. Personal recipes Entering a Enter the name in "ABC" (see chapter name To cancel: Touch the symbol. The recipe is not You have the option to save up to 50 individual saved. -
Page 34: Entering A Name
Use the rotary selector to select a free memory Press briefly: cursor to the right location. Press long: switch to normal characters Touch the symbol. Press twice: insert line space Entering a Enter the name in "ABC" (see chapter Clear letters name Touch the symbol. -
Page 35: Change Recipe
Change recipe Timer functions You can change the settings of a recorded or programmed recipe. On the Timer menu, set: Turn the function selector to any heating type. Š Timer symbol is displayed. Touch the symbol and select "Personal recipes" Stop watch using the rotary selector. -
Page 36: Timer
Timer Stopwatch The timer only runs as long as no other function is set. The stop watch only runs as long as no other function You can enter a maximum of 90 minutes. is set. The stop watch counts from 0 seconds up to 90 Setting the timer minutes. -
Page 37: Sabbath Mode
Stopping and restarting the stopwatch Sabbath mode Launch the timer menu. With , select the "Stopwatch" function With this function, the appliance uses the heating Touch the symbol. mode Convection to hold a temperature of 185°F (85°C). You can keep food warm for up to 74 hours without having to switch the appliance on and off. -
Page 38: Child Lock
Child lock The appliance has a child lock to make sure children cannot operate it inadvertently. Notes ‒ You must set the child lock in the basic setting to Basic setting "Available" (see section entitled ‒ If there is a power cut while the child lock is activated, it may be deactivated when the power returns. -
Page 39: Basic Settings
- Date + GAGGENAU logo play with the rotary selector. - Clock + date The selection is displayed. - Clock + date + GAGGENAU logo Minimized Display screen Minimized*/Standard When is set, only the most impor- tant details are displayed after a short time. - Page 40 Date Current date Setting the date. Switch between the year/ month/day with the symbol. Temperature format °C*/°F Set the temperature unit Language German* / French / Italian / Spanish / Select language for the text display Portuguese / Dutch / Danish / Swedish Note: When the language is changed, the / Norwegian / Finnish / Greek / Turkish system is restarted;...
-
Page 41: Cleaning
Self-cleaning surface in the cooking Cleaning compartment The back panel of the oven is coated with self- If taken care of and cleaned conscientiously, your cleaning enamel. It cleans itself while the oven is in appliance will stay beautiful and intact for a long time. operation. - Page 42 Area Cleaning agent Area Cleaning agent Do not remove Hot soapy water: Clean with a dish Appliance front Hot soapy water: Clean using a dish door seal. cloth and do not scour. Do not use a cloth and then dry with a soft cloth. Do metal or glass scraper for cleaning.
-
Page 43: Troubleshooting
Troubleshooting You can often easily eliminate problems that may WARNING occur on your own. Before calling customer service, take into account the following information. Risk of electric shock Incorrect repairs are dangerous. Repairs may only be carried out by one of our trained after- sales engineers. -
Page 44: Demo Mode
Demo mode Method Note: You must remove the whole appliance in order ° The demo mode is activated if the symbol appears to replace the cooking compartment light. Follow the in the display. The appliance does not heat up. installation instructions. Briefly disconnect the appliance from the mains Unplug the appliance from the mains or switch off (switch off the domestic fuse or the circuit-breaker in... -
Page 45: Technical Specifications
Technical specifications Customer service If your appliance needs repairs, our customer service Power supply 208/240 V, 60 Hz is there for you. We work hard to help solve problems Max. total connected load 3,300 W quickly and without unnecessary service calls, getting Microwave output 1,000 W (IEC 60705) your appliance back up and running correctly in the... -
Page 46: Tables And Tips
Tables and tips Defrosting Here, you can find a selection of dishes and the ideal settings for them. We will show you which type of Place the frozen food in an open container on the heating and which temperature or microwave power oven floor. - Page 47 Dish Amount Microwave power in watts, cooking Notes time in minutes Whole pieces of beef, pork or 28.2 oz 180 W, 15 min. + 90 W, 15 - 25 min. Turn several times. veal (on the bone or boned) (800 g) 180 W, 15 min.
-
Page 48: Defrosting, Heating Up Or Cooking Frozen Food
Dish Amount Microwave power in watts, cooking Notes time in minutes Cakes, dry, e.g. sponge cake 17.6 oz 90 W, 10 - 15 min. Separate the pieces of cake. Only for (500 g) cakes without icing, whipped cream or 180 W, 3 min. + 90 W, 10 - 15 min. crème pâtissière. -
Page 49: Heating Food
Heating food CAUTION Metal e.g. a spoon in a glass must be kept at WARNING least 1” (25 mm) from the oven walls and the inside of the door. Sparks could irreparably Risk of scalding damage the glass on the inside of the door. There is a possibility of delayed boiling when a liquid is heated. -
Page 50: Cooking Food
Heating food Weight Microwave output in watts, Notes cooking time in minutes Vegetables, 1 portion 5.3 oz 600 W, 2-3 min. Add a little liquid (150 g) Vegetables, 2 portions 10.6 oz 600 W, 3-5 min. (300 g) Cooking food This will help the food retain its own distinct taste, so it will require less seasoning. -
Page 51: Microwave Tips
Microwave tips CAUTION Do not leave oven unattended while popping corn. Popcorn may ignite and cause fire. You cannot find any information about the settings for the Lengthen or shorten the cooking time according to the following rule of thumb: Double the amount = double the time, half the quantity of food you have prepared amount = half the time Next time, set a shorter cooking time or select a lower microwave... -
Page 52: Baking Tips
Cake Cookware Height Microwave Cooking Type of Temperature power set- time in heating °F (°C) ting in minutes watts Nut cake Springform cake 90 W 30-35 340 - 355 (170-180) Fruit tart or cheesecake with pastry* Springform cake 360 W 40-50 300 - 320 (150-160) Fruit pie, delicate with sponge... -
Page 53: Roasting And Grilling
Roasting and grilling meat halfway through the cooking time. When the roast is ready, turn off the oven and allow it to rest for Tables: The times given apply to food placed in a cold an additional 10 minutes. This allows better oven. - Page 54 Dish Amount Microwave power Height Type of Temperature Notes setting in watts, heating °F (°C), cooking time in grill setting minutes Chicken portions, e.g. Approx. 360 W, 20-30 min. 0 355 - 375 Cookware without lid. Place chicken quarters 28.2 oz (180-190) with the skin side up.
-
Page 55: Tips For Roasting And Grilling
Tips for roasting and grilling For small roasts, select a higher temperature and a shorter cooking The table does not contain information for the weight time. For larger roasts, select a lower temperature and a longer of the roast. cooking time. Use a meat thermometer (available from specialist shops) or carry This is how you can tell when the roast is ready. -
Page 56: Frozen Convenience Products
Frozen convenience products Observe the instructions on the packaging. The values in the table apply to food placed in a cold oven. Dish Cookware Height Type of Temperature Cooking time in heating °F (°C) minutes Strudel with fruit filling* Glass tray 390 - 430 (200-220) 40-50 French fries Glass tray... -
Page 57: Acrylamide In Foodstuffs
Baking The values in the table apply to food placed in a cold oven. Dish Notes regarding cookware Height Type of Temperature Baking time in minutes heating °F (°C) Piped cookies Glass tray 320 - 340 30-35 (160-170) Small cakes* Glass tray 320 - 340 25-30... - Page 60 Gaggenau BSH Home Appliance Corporation 1901 Main Street, Suite 600 Irvine, CA 92614 +1.877.442.4436 www.gaggenau-usa.com Gaggenau Hausgeräte GmbH Carl-Wery-Straße 34 81739 München GERMANY...
Need help?
Do you have a question about the BM 450 and is the answer not in the manual?
Questions and answers