
Related Manuals for SEW-Eurodrive MOVI-C Series


Summary of Contents for SEW-Eurodrive MOVI-C Series
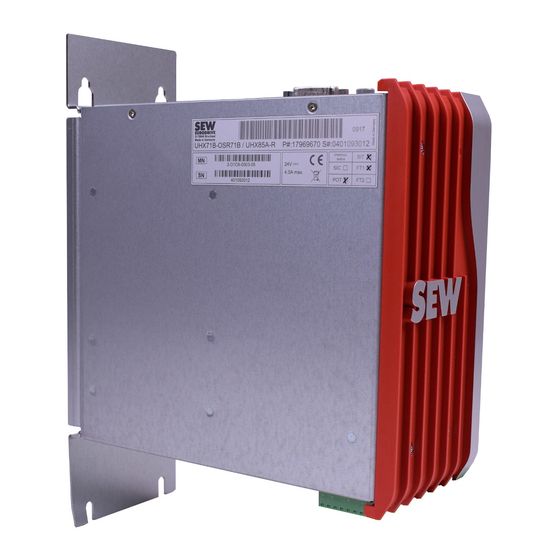
- Page 1 *22781455_0516* Drive Technology \ Drive Automation \ System Integration \ Services Manual ® MOVI-C CONTROLLER power UHX85A and power eco UHX84A Edition 05/2016 22781455/EN...
- Page 2 SEW-EURODRIVE—Driving the world...
-
Page 3: Table Of Contents
Contents Contents General information........................ 5 About this documentation .................... 5 Structure of the safety notes ................... 5 1.2.1 Meaning of the signal words ................ 5 1.2.2 Structure of the section safety notes ............. 5 1.2.3 Structure of the embedded safety notes ............ 5 Right to claim under warranty .................. 6 Exclusion of liability...................... 6 Other applicable documentation .................. 6... - Page 4 Contents 4.2.2 Connecting the PROFIBUS connector (X24) .......... 22 4.2.3 Status LEDs .................... 22 ® MOVI-C CONTROLLER power UHX85A – R / power eco UHX84A – R .... 24 4.3.1 Connecting the controller to the Ethernet network ........ 24 4.3.2 Pin assignment X21 and X22............... 25 4.3.3 Shielding and routing bus cables ..............
-
Page 5: General Information
General information About this documentation General information About this documentation The manual is part of the product and contains important information on operation and service. The manual is written for all employees who assemble, install, start up, and service the product. The manual must be accessible and legible. -
Page 6: Right To Claim Under Warranty
General information Right to claim under warranty This is the formal structure of a safety instruction: • SIGNAL WORD Type and source of hazard. Possible consequence(s) if disregarded. – Measure(s) to prevent the hazard. Right to claim under warranty A requirement of fault-free operation and fulfillment of any rights to claim under limited warranty is that you adhere to the information in the documentation. -
Page 7: Copyright Notice
General information Copyright notice Copyright notice © 2016 SEW‑EURODRIVE. All rights reserved. Unauthorized reproduction, modifica- tion, distribution or any other use of the whole or any part of this documentation is strictly prohibited. ® Manual – MOVI-C CONTROLLER... -
Page 8: Safety Notes
Safety notes Operator's duties Safety notes Operator's duties The operator must ensure that the basic safety notes are read and observed. Ensure that persons responsible for the machinery and its operation as well as persons who work on the device independently have read through the documentation carefully and understood it. -
Page 9: Waste Disposal
Safety notes Waste disposal Waste disposal Observe the applicable national regulations. Dispose of materials separately in ac- cordance with the nature of the materials and the regulations in force, for example: • Electronics scrap (printed circuit boards) • Plastics • Sheet metal •... -
Page 10: Introduction
Introduction General information Introduction General information 3.1.1 Content of this manual This manual describes: ® • The installation of the MOVI‑C CONTROLLER ® • The interfaces of the MOVI‑C CONTROLLER • The interfaces and LEDs ® • The engineering access to the MOVI‑C CONTROLLER ®... -
Page 11: Features
Introduction MOVI-C® CONTROLLER ® • The freely programmable MOVI‑C CONTROLLER is scalable due to several dif- ferent hardware platforms (standard, advanced, etc.) and modular software con- cepts (libraries for numerous applications). ® • The freely programmable MOVI‑C CONTROLLER is powerful due to extensive technologies (such as electronic cam, synchronous operation) and the control of demanding applications (such as material handling). -
Page 12: Communication Interfaces Lan 1, Lan 3, And Vnet
Introduction MOVI-C® CONTROLLER 3 x AC 400V External PLC SBUS PLUS Power 10 min 9007216010041739 3.2.4 Communication interfaces LAN 1, LAN 3, and VNET LAN 1 ® The Ethernet communication interface (LAN 1) is assigned to the Windows section of ® the MOVI‑C ... -
Page 13: Ethercat ® /Sbus Plus Interface Lan 2
Introduction CFast memory card OMH85A (card slot 1) ® PLUS 3.2.5 EtherCAT /SBus interface LAN 2 ® You can connect up to 64 of the following units to the MOVI‑C CONTROLLER via the ® PLUS EtherCAT /SBus interface: ® • MOVIDRIVE modular drive inverter ®... - Page 14 Introduction Windows memory card option OMW71B/72B (card slot 2) INFORMATION • In the following cases, SEW‑EURODRIVE recommends the 32 GB variant: – If you would like to use third-party software. ® – If you would like to use the Windows section as permanent working platform for plant programming.
-
Page 15: Installation Notes
Installation notes MOVI-C® CONTROLLER power UHX85A / power eco UHX84A Installation notes MOVI-C® CONTROLL ER power UHX85A / power eco UHX84A ® MOVI-C CONTROLLER power UHX85A / power eco UHX84A 4.1.1 Minimum clearance and mounting position ® • The booksize MOVI‑C ... -
Page 16: Description Of Terminal Functions
Installation notes MOVI-C® CONTROLLER power UHX85A / power eco UHX84A 4.1.2 Description of terminal functions SLOT 2 SLOT 1 LAN1 LAN2 COM1 USB7 USB5 USB6 USB4 DVI-1 LAN3 LAN4 USB1 USB2 USB3 OnM -24+ 14344441483 Designation Terminal Function CFast card slot Slot 1 Card slot for CFast memory card OMH85A (con- trol section with firmware, IEC program, user... - Page 17 Installation notes MOVI-C® CONTROLLER power UHX85A / power eco UHX84A Designation Terminal Function Connector LAN 3: LAN 3 Engineering interface for the control section of ® the MOVI‑C CONTROLLER Ethernet interface connection (RJ45 socket) Default IP address: 192.168.10.4 Connector LAN 4: LAN 4 In preparation Ethernet interface connection (RJ45...
-
Page 18: Voltage Supply
Installation notes MOVI-C® CONTROLLER power UHX85A / power eco UHX84A 4.1.3 Voltage supply An external DC 24 V power supply unit (power consumption P = 100 W) has to be ® used for the voltage supply of the MOVI‑C CONTROLLER. Wiring diagram DC 24 V supply for control electronics 14344508683 ®... -
Page 19: Ethercat ® /Sbus Plus Interface (Lan 2) Connection
Installation notes MOVI-C® CONTROLLER power UHX85A / power eco UHX84A Pin assignment Use prefabricated, shielded RJ45 plug connectors compliant with IEC 11801, edi- tion 2.0, category 5. [3] [2] [1] 2104906251 View from front View from back Pin 1 TX+ Transmit Plus Pin 2 TX–... -
Page 20: Connection To Ethernet Communication Interfaces
Installation notes MOVI-C® CONTROLLER power UHX85A / power eco UHX84A 4.1.6 Connection to Ethernet communication interfaces You can use the Ethernet communication interfaces LAN 1 and LAN 3 to connect an engineering PC or other network stations (e.g. visualization systems). The Ethernet communication interface LAN ... -
Page 21: Movi-C ® Controller Power Uhx85A - P / Power Eco Uhx84A - P
Installation notes MOVI-C® CONTROLLER power UHX85A – P / power eco UHX84A – P MOVI-C® CONTROLL ER power UHX85A – P / power UHX84A – P ® MOVI-C CONTROLLER power UHX85A – P / power eco UHX84A – P 4.2.1 Connecting the controller to the PROFIBUS network The following chapters describe the terminals and LEDs relevant for PROFIBUS operation. -
Page 22: Connecting The Profibus Connector (X24)
Installation notes MOVI-C® CONTROLLER power UHX85A – P / power eco UHX84A – P 4.2.2 Connecting the PROFIBUS connector (X24) Connection to the PROFIBUS system is implemented using a 9-pin D-sub connector in compliance with IEC 61158. The T-bus connection must be made using a plug with the corresponding configuration. - Page 23 Installation notes MOVI-C® CONTROLLER power UHX85A – P / power eco UHX84A – P Status Possible cause Measure Green Connection to the PROFIBUS – master is OK. Wrong PROFIBUS DP configura- Check the configuration settings. tion. Flashing red, • Connection to the DP master •...
-
Page 24: Movi-C ® Controller Power Uhx85A - R / Power Eco Uhx84A - R
Installation notes MOVI-C® CONTROLLER power UHX85A – R / power eco UHX84A – R MOVI-C® CONTROLL ER power UHX85A – R / power UHX84A – R ® MOVI-C CONTROLLER power UHX85A – R / power eco UHX84A – R 4.3.1 Connecting the controller to the Ethernet network You can connect the controller to the Ethernet network via the following Ethernet inter- faces: •... -
Page 25: Pin Assignment X21 And X22
Installation notes MOVI-C® CONTROLLER power UHX85A – R / power eco UHX84A – R 4.3.2 Pin assignment X21 and X22 Use prefabricated, shielded RJ45 plug connectors compliant with IEC 11801, edi- tion 2.0, category 5. [3] [2] [1] 6139704459 View from front View from back Pin 1 TX+ Transmit Plus Pin 2 TX–... -
Page 26: The Integrated Ethernet Switch
Installation notes MOVI-C® CONTROLLER power UHX85A – R / power eco UHX84A – R 4.3.4 The integrated Ethernet switch The device is equipped with an integrated 2 port Ethernet switch for connecting the fieldbus technology. The following network topologies are supported: • Tree topology •... -
Page 27: Status Leds In Profinet Io Mode
Installation notes MOVI-C® CONTROLLER power UHX85A – R / power eco UHX84A – R Status LED Operating status Green There is a controlling connection to the fieldbus system. Green, flashing No controlling connection. Green/red, flashing The controller performs a self-test. Red, flashing The previously established controlling connection has timed out. -
Page 28: Status Leds "Link/Activity
Installation notes MOVI-C® CONTROLLER power UHX85A – R / power eco UHX84A – R Status Possible cause Measure • Connection to the • Check the fieldbus con- PROFINET IO master has nection of the controller. failed. • Check the PROFINET IO master. • PROFINET IO slave does not detect a link. -
Page 29: Omw71B/72B Windows Memory Card
Installation notes OMW71B/72B Windows® memory card Status LED "Link" Status LED Operating status Green There is an Ethernet connection. Flashes Function for locating in the Address Editor of SEW‑EURODRIVE. There is no Ethernet connection. Status LED "Activity" Status LED Operating status Yellow Data is currently being exchanged via Ethernet. -
Page 30: Project Planning And Startup With Windows
® Project planning and startup with Windows 7 Embedded General information ® Project planning and startup with Windows 7 Embedded General information INFORMATION ® • The Windows 7 Embedded operating system on the OMW71B/72B memory card is only available in English. •... -
Page 31: Using An On/Off Button On X1
® Project planning and startup with Windows 7 Embedded Procedure after a unit replacement 5.3.2 Using an on/off button on X1 You can use terminal X1 on the controller to connect an on/off button for the controller. The button works like a PC on/off button. •... -
Page 32: Setting The Lan And Vnet Address
® Project planning and startup with Windows 7 Embedded Setting the LAN and VNET address INFORMATION Installing the recovery image will clear all data from the OMW71B/72B memory card. 1. Connect the USB stick to a USB port of the controller. 2. -
Page 33: Reserved Ram
® Project planning and startup with Windows 7 Embedded Startup and visualization 5.7.1 Reserved RAM You can set the size of the reserved memory according to your requirements. Each write access of a program is routed to this reserved section. The reserved memory should be large enough to cope with all memory accesses and small enough to make sure there is sufficient memory left for the correct execution of programs. -
Page 34: Remote Desktop Connection
® Project planning and startup with Windows 7 Embedded Application examples – operation of the Windows section INFORMATION • SEW‑EURODRIVE provides the non-exhaustive application examples as a gen- eral reference and does not assume corresponding liability. ® • SEW‑EURODRIVE does not offer support for setting up your Windows system. -
Page 35: Working With A Touchscreen Monitor
® Project planning and startup with Windows 7 Embedded Application examples – operation of the Windows section 5.9.2 Working with a touchscreen monitor On-screen keyboard You can use the on-screen keyboard if you are working with a touchscreen monitor without keyboard and mouse. 7834129291 ®... - Page 36 ® Project planning and startup with Windows 7 Embedded Application examples – operation of the Windows section ® Proceed as follows to activate the Windows swap file: ® 1. Open the Windows control panel. 7829376267 2. Choose "System and Security". Click on "System". 9007207089680395 ®...
- Page 37 ® Project planning and startup with Windows 7 Embedded Application examples – operation of the Windows section 3. The "View basic information about your computer" window opens. Choose "Ad- vanced system settings" on the left. 7837825547 4. The "System Properties" window opens. Choose the "Advanced" tab [1]. In the "Performance"...
- Page 38 ® Project planning and startup with Windows 7 Embedded Application examples – operation of the Windows section 5. The "Performance Options" window opens. Select the "Advanced" tab [1]. In the "Virtual memory" section, click [Change] [2]. 7837835275 ® Manual – MOVI-C CONTROLLER...
- Page 39 ® Project planning and startup with Windows 7 Embedded Application examples – operation of the Windows section 6. The "Virtual Memory" window opens. Select "System managed size" [2]. To activ- ate the swap file [1], click [Set] [3] and then click [OK] 7837968139 ®...
-
Page 40: Automatic System Startup
® Project planning and startup with Windows 7 Embedded Application examples – operation of the Windows section 5.9.4 Automatic system startup After startup, you can configure the system to boot automatically and directly start with a previously generated visualization. Proceed as follows: 1. - Page 41 ® Project planning and startup with Windows 7 Embedded Application examples – operation of the Windows section 3. The "User Accounts" window opens. On the "Users" tab [1] select the user that is to log on automatically, and deactivate the option "Users must enter a user name and password to use this computer"...
-
Page 42: Replacing The Unit
Replacing the unit Replacing the unit For replacing a controller, a compact controller, or a controlled drive, follow the in- structions in the "Installation" chapter. Insert the CFast memory card of the previous controller into the new controller. INFORMATION The variable values stored remanently on the controller are not stored on the CFast memory card by default. -
Page 43: Technical Data
Technical data General technical data Technical data General technical data ® MOVI-C CONTROLLER power UHX85A / power eco UHX84A Interference immunity complies with EN 61800-3 Ambient temperature 0 °C to +50 °C Storage temperature −25 °C to +70 °C Climate class EN 60721-3-3; class 3k3 Type of cooling Convection cooling Degree of protection IP20 Operating mode... -
Page 44: Technical Data
Technical data Technical data ® MOVI-C CONTROLLER power UHX85A / power eco UHX84A CFast memory card • PC readable • Includes: OMH85A – Firmware – IEC application program – Application data • 2 GB memory • Software package: CFast memory cards: OMW71B (16 GB) –... -
Page 45: Dimension Drawing Movi-C® Controller Power Uhx85A / Power Eco Uhx84A
Dimension drawing MOVI-C® CONTROLLER power UHX85A / power eco UHX84A Dimension drawing MOVI-C® CONTROLLER power UHX85A / power eco UHX84A 221.5 14345610251 ® Manual – MOVI-C CONTROLLER... -
Page 46: Index
Index Index Shielding and routing bus cables .... 25 Ethernet switch ............ 26 Additional documentation ........ 10 Auto-crossing .......... 26 ® Application examples of the Windows section ... 33 Auto-negotiation .......... 26 Automatic system startup ....... 40 Multicast handling........... 26 Remote desktop connection...... - Page 47 Index Signal word, meaning .......... 5 Startup Meaning of signal words........ 5 ® Configuring the Windows section .... 33 ® MOVI-C CONTROLLER ........ 10 Visualization ........... 33 Communication interfaces...... 11 Status LED Dimension drawing......... 45 LED 25.3 (COM).......... 22 Engineering ............ 13 LED 25.4 (SYS)..........
- Page 52 SEW-EURODRIVE—Driving the world SEW-EURODRIVE GmbH & Co KG Ernst-Blickle-Str. 42 76646 BRUCHSAL GERMANY Tel. +49 7251 75-0 Fax +49 7251 75-1970 sew@sew-eurodrive.com www.sew-eurodrive.com...
Need help?
Do you have a question about the MOVI-C Series and is the answer not in the manual?
Questions and answers