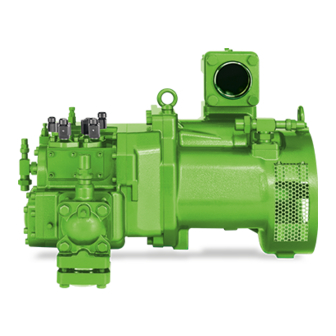
Bitzer OS.53 Maintenance Instruction
Checking and adjusting the axial clearance of screw compressors
Hide thumbs
Also See for OS.53:
- Operating instructions manual (28 pages) ,
- Maintenance instructions manual (12 pages) ,
- Maintenance instructions manual (12 pages)
Table of Contents
Advertisement
Wartungsanleitung
Maintenance Instruction
Instruction de maintenance
Überprüfen und Einstellen des Axialspiels
bei Schraubenverdichtern
Verdichtertypen
• OS.53 / OS.70 / OS.74
• HS.53 / HS.64 / HS.74
• HSKC 64 / HSKC 74
Inhalt
1 Allgemeines
Hinweise hinsichtlich routinemäßiger Überprüfungs- und
Austausch-Zeiten sind in der Wartungsanleitung "Überprü-
fungs- und Austauschintervalle bei Schraubenverdichtern"
(SW-110) gegeben.
Bei schwergängigen oder blockierten Rotoren wird eine
Überprüfung des Verdichters beim Hersteller empfohlen.
Autorisiertes Fachpersonal
Sämtliche Arbeiten an Verdichtern und Kälteanlagen dürfen
nur von qualifiziertem und autorisiertem Fachpersonal aus-
geführt werden.
Die hier beschriebenen Tätigkeiten sind sehr anspruchsvoll
und erfordern höchste Präzision.
Checking and Adjusting the Axial
Clearance of Screw Compressors
Compressor types
• OS.53 / OS.70 / OS.74
• HS.53 / HS.64 / HS.74
• HSKC 64 / HSKC 74
Seite
Contents
1
2
3
4
5
6
1 General
Advices on routine times for checking and replacing is given
in the maintenance instructions "Inspection and
Replacement Intervals with Screw Compressors" (SW-110).
If rotors are tight or blocked it is recommended to have the
compressor inspected by the manufacturer.
Authorized staff
All work on compressors and refrigeraton systems is to be
carried out by qualified and authorized personnel only.
The activities described here are very demanding and requi-
re utmost precision.
SW-120-1
Page
1
2
3
4
5
6
Advertisement
Table of Contents

Summary of Contents for Bitzer OS.53
- Page 1 Checking and Adjusting the Axial bei Schraubenverdichtern Clearance of Screw Compressors Verdichtertypen Compressor types • OS.53 / OS.70 / OS.74 • OS.53 / OS.70 / OS.74 • HS.53 / HS.64 / HS.74 • HS.53 / HS.64 / HS.74 • HSKC 64 / HSKC 74 •...
-
Page 2: Werkzeuge Und Hilfsmittel
Achtung! Attention! Verdichter-Folgeschaden möglich! Successive compressor damage possible! Kältemaschinenöle können größere Mengen Luft- Refrigerating compressor oils can absorb large amo- feuchtigkeit aufnehmen. Chemische Reaktionen mit unts of moisture. Chemical reactions are possible with Luftfeuchtigkeit und Luftsauerstoff sind möglich. humidity and oxygen in the air. Ölbenetzte metallische Oberflächen können schnell Oil wetted metal surfaces can corrode quickly. -
Page 3: Demontage
3 Demontage 3 Dismantling • Verdichter allseitig absperren und auf drucklosen Zustand • Isolate all compressor connections and release pressure. bringen. Warnung! Warning! Verdichter kann unter Überdruck stehen. Compressor may be pressurized. Schwere Verletzungen möglich. Serious injury possible. Verdichter auf drucklosen Zustand bringen! Release compressor pressure! 3.1 Ölabscheider demontieren (nur bei Kompakt- 3.1 Removing the oil separator (only for compact screw... -
Page 4: Axialspiel Überprüfen
4 Axialspiel überprüfen 4 Checking the axial clearance 4.1 Überprüfung vorbereiten 4.1 Prepare for inspection • Je eine Ringschraube (2) in das Wellenende des Haupt- • Screw one eye bolt (2) each in the end of the shaft of the läufers (bzw. -
Page 5: Axialspiel Einstellen
5 Axialspiel einstellen 5 Adjusting the axial clearance 5.1 Axialspiel verkleinern 5.1 Reducing the axial clearance Tips & Tricks: Tips & Tricks: Mit Filzstift (Permanent-Schreiber) oder Reißnadel Mark first the position of the grooved nut with a felt-pen zunächst die Position der Nutmutter markieren, um (permanent marker) or a scribing iron, so that this diese "Ausgangsbasis"... -
Page 6: Montage
5.2 Axialspiel vergrößern 5.2 Increasing the axial clearance • Die zwei Sicherungsschrauben (1, Abb. 3) am Umfang der • Loosen the two locking screws (1, Fig. 3) at the circumfe- Nutmutter lösen. Anschließend wieder leicht anziehen, rence of the grooved nut. Then tighten them a little again damit die Nutmutter nicht wackelt oder zu leicht verdreht so that the grooved nut does not rock and cannot be tur- werden kann. - Page 7 • Schrauben (5, 6, 8, 10 und 11) mit den vorgeschriebenen • Tighten screws (5, 6, 8, 10 and 11) with the prescribed Anzugsmomenten anziehen, entsprechend der Wartungs- tightening torques, according to the Maintenance Instruc- anleitung SW-100. tions SW-100. Achtung! Attention! Kältemaschinenöle können größere Mengen Luft- Refrigerating compressor oils can absorb a large amo-...
- Page 8 Bitzer Kühlmaschinenbau GmbH P. O. Box 240 D-7 10 44 Sindelfingen (Germany) Tel. +49 (0) 70 31 / 9 32-0 Fax +49 (0) 70 31 / 9 32-1 46+1 47 http://www.bitzer.de • mail@bitzer.de...


Need help?
Do you have a question about the OS.53 and is the answer not in the manual?
Questions and answers