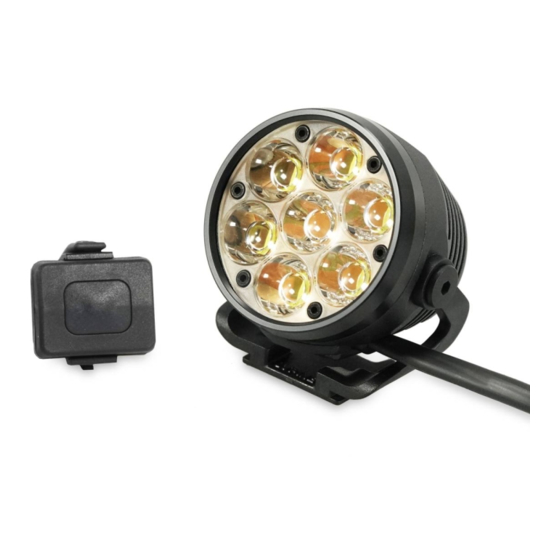
Lupine Betty R Owner's Manual
Head unit
Hide thumbs
Also See for Betty R:
- Owner's manual (52 pages) ,
- Mounting instructions (24 pages) ,
- User manual (24 pages)

Related Manuals for Lupine Betty R


Summary of Contents for Lupine Betty R
- Page 1 Betty R Lampenkopf/Head Unit Betty R 7/14 Betty RX 7/14 BEDIENUNGSANLEITUNG / OWNERS MANUAL Betty R...
-
Page 2: Table Of Contents
Technische Daten Letzte Hinweise English Read this manual before using Mounting 28–29 Mounting Accessoires 30–31 Mounting Batteries Operation 33–37 Bluetooth Remote 38–39 Customizing brightness levels 40–41 Special Functions 42-44 Charging Product care and storage Troubleshooting Technical data 48-49 Miscellaneous Betty R... -
Page 3: Erst Lesen, Dann Leuchten
Funksender. Wärmeentwicklung: Unsere Betty R ist keine Taschenlampe. Das Gehäuse kann heiß werden, achten Sie deshalb immer auf ausreichenden Abstand zu brennbaren Materialien. Der ruhende Betrieb (also ohne Kühlung durch z. B. Fahrtwind) ist jederzeit möglich, er schadet dem Scheinwerfer nicht. -
Page 4: Montage
Montage Helmhalter: Der Lupine-Helmhalter kann an nahezu allen Helmen mit Lüftungsschlitzen befestigt werden. Die Montage ist sehr einfach, betrachten Sie hierzu die Abbildungen und die Begleittexte auf den folgenden Seiten. Tipp: Die beiden Bänder sind im Regelfall zu lang. Kürzen Sie die Bänder jedoch... - Page 5 O-Ringe. Unser Stirnband ist in zwei Ausführungen erhältlich. Das reguläre Standardband (Artikel Nr. 205) und unser „Heavy Duty“ Stirnband: für den sportlichen Einsatz in dunklen Wäldern wie z. B. bei Nachtorientie- rungsläufen. HD Stirnband: www.lupine.de (Artikel Nr. 207) Betty R...
-
Page 6: Montage Zubehör
O-Ring, Schraubbolzen ist unbedingt wie im Bild einzuhalten, um eine einwandfreie Funktion zu gewährleisten. Den Schraubbolzen zunächst locker und dann fest mit 2 Nm anziehen. Mit dem beigelegten Blindstopfen das freie Gewindeloch verschließen. Die Schelle um die Stange legen und schließen. Betty R... - Page 7 (Artikel Nr. 760) und (Artikel Nr. 1066) Auf der Unterseite des Funk- senders befindet sich eine mehrstufige Rasterung welche es ermöglicht, den Sender im Peppi bis zu 1.5 cm nach links oder rechts zu verschieben. GoPro Adapter: siehe: www.lupine.de (Artikel Nr. 144) Betty R...
-
Page 8: Montage Akku
Montage entweder das kurze oder das lange Klettband geeignet. Das Klettband so um das Rohr legen, dass die Antirutschbeschichtung auf der Innenseite für zusätzlichen Halt sorgt. Die Akku-Montage am Rahmen wird auch in einem Video im Supportbereich auf unserer Homepage gezeigt! Betty R... -
Page 9: Bedienung
LED abwechselnd leuchtet. Zum Ausschalten den Taster erneut drücken. Hinweis: Die Kapazitätsanzeige erlischt nach wenigen Sekunden wieder von alleine. Ist dies nicht der Fall, wurde eventuell das Rücklicht aktiviert und die 5 roten LEDs bedeuten keineswegs, dass der Akku noch komplett geladen ist. Betty R... -
Page 10: Bedienung
Ohne Kühlung wird die Leistung stufenlos reduziert, um eine Überhitzung der LEDs und der Elektronik zu vermeiden. Die Reduzierung wird durch die Status-LEDs angezeigt und so leuchten z. B. bei langsamer Fahrt nach gewisser Zeit nur noch 4 der 5 blauen LEDs. 1 0 Betty R... - Page 11 Wenn die blaue LED 4-mal blinkt und anschließend die grüne LED 6-mal blinkt, wurden 4.6 Ah aus dem Akku entnommen. Zuerst blinkt die blaue LED 1-mal pro Ah, dann blinkt die grüne LED 1-mal pro 1/10 Ah. Betty R...
- Page 12 Bedienung Anzeigen am Lampenkopf: Die Restkapazität des Akkus wird an jedem Lupine SmartCore Akku (siehe S. 9) angezeigt. Darüber hinaus leuchtet das Backlight (Hintergrundbeleuchtung) des Lampenkopfes rot wenn die Kapazität des Akkus deutlich gesunken ist. Bei rot blinkendem Backlight ist der Akku leer. Bestimmte Spannungswerte beeinflussen diese Anzeige.
- Page 13 Warnung! Ein erneutes Anschalten ist nicht mehr möglich rot/blau bzw. nur durch ein Neu-Anstecken des Akkus zu erzwingen schädigt immer den Akku! Im entladenen Zustand besteht die Gefahr der Tiefstentladung, laden Sie den Akku deshalb baldmöglichst wieder auf. Betty R...
-
Page 14: Bluetooth Funksender
Möchte man deshalb seinen Lampenkopf wieder ausschließlich über einen Sender ansteuern, so ist es eventuell notwendig, diesen einen Sender bis zu 3 mal mit dem Lampenkopf zu verbinden, bis alle anderen Codes aus der Liste überschrieben worden sind. 1 4 Betty R... - Page 15 Zum Batteriewechsel alle 4 Schrauben auf der Unterseite des Senders mit einem T5 Torxschraubendreher öffnen. Die neue CR 2032 Knopfzelle wie abgebildet einlegen und das Gehäuse wieder verschließen. Die Schrauben so fest anziehen, dass die blaue Dichtung sichtbar gepresst wird. T5 Torxschraubendreher: (Artikel Nr. 137) Betty R...
-
Page 16: Leuchtstufen Anpassen
34 W Leuchtstufe 45 W Leuchtstufe SOS* RVLR* Alpines SOS* * Wird im Betrieb durch keine LED angezeigt Flash* ** Wird im Betrieb durch eine grüne LED angezeigt Bei roter LED 0.8 W 0.3W Center-LED** Werkseinstellung 1 6 Betty R... - Page 17 Bis zur Erschöpfung des Akkus, oder Tastendruck, wird ein SOS Signal abgeben. Die missbräuchliche Verwendung ist strafbar! Flash 15hz: Dieser Modus wirkt extrem irritierend und darf keinesfalls missbräuchlich verwendet werden. Center LED: Die mittlere LED erzeugt ein schwaches Licht. Betty R...
-
Page 18: Spezialfunktionen
Erschöpfung des Akkus im gewählten 45 W Leuchtstufe Leuchtprogramm. SOS* RVLR* Alpines SOS* Flash* 0.3W Center-LED** * Wird im Betrieb durch keine LED angezeigt ** Wird im Betrieb durch eine grüne LED angezeigt Bei roter LED 0.8 W Werkseinstellung 1 8 Betty R... - Page 19 Das Prinzip gleicht dem unserer SmartCore Akkus. 14 Ah Achtung! Wird der Lampenkopf vom Akku getrennt, 16 Ah funktioniert diese Anzeige nicht mehr richtig bis der 18 Ah Akku erneut voll aufgeladen ist. 20 Ah Akku Kapazitätsanzeige deaktivieren Betty R...
- Page 20 6.5 V 7.1 V 6.8 V Rücksetzen auf Werkseinstellung: Taste solange gedrückt halten bis fünf rote LEDs leuchten. Taster loslassen Im Anschluss müssen Sie den Lampenkopf einmal vom Akku trennen und alle Werkseinstellungen sind wieder aktiviert. 20 Betty R...
-
Page 21: Laden
Ideal zur Lagerung des Akkus über einen längeren Zeitraum. Ladespannung in Volt (V) Ladestrom in Ampere (A) Eingeladene Kapazität in Ah Warnung! Mit diesem Ladegerät dürfen nur Li-Ionen-Akkus aufgeladen werden. Es ist NICHT zum Laden von Ni-MH-Akkus geeignet! Keine Trockenbatterien verwenden! – Explosionsgefahr! Betty R... -
Page 22: Pflege & Lagerung
Pflege & Lagerung Steckerkontakte: Im Regelfall benötigen die Steckerkontakte keine besondere Pflege. Sollten Sie Ihre Betty R jedoch in salzhaltiger Umgebung benutzen, freuen sich die Kontakte über gelegentliches dünnes Einfetten, was die Oxidation der Kontakte zuverlässig verhindert. Verwenden Sie keinesfalls Polfette... -
Page 23: Fehlerbehebung
Siehe Kapitel Funksender. Die Lampe reagiert nicht auf den nicht miteinander gebunden. Sender. Der Sender leuchtet nicht bei Tasten- Knopfzelle leer oder falsch Siehe Kapitel Funksender. druck und die Lampe reagiert nicht. herum eingelegt. Betty R... -
Page 24: Technische Daten
Ladezeiten: Betty R 7/X7: 6.6 Ah 7.2 V Li-Ion Betty R 7/X7: 2 Std. 45 Min. Betty R 14/X14: 13.2 Ah 7.2 V Li-Ion Betty R 14/X14: 5 Std. 30 Min. Beinhaltet: Einsatzbereich: FCC ID: QDS-BRCM1078 -25 °C – +70 °C... -
Page 25: Letzte Hinweise
Land zu Land unterschiedlich geregelt sein. Informieren Sie sich über die in Ihrem Land gültigen Bestimmungen. Die Art der Montage und das Design der Betty R sowie des Funksender sind sowohl in Europa als auch in den USA patentrechtlich geschützt! Änderungen:... - Page 26 Index English Read this manual before using Mounting 28–29 Mounting Accessoires 30–31 Mounting Batteries Operation 33–37 Operation Remote control 38–39 Customizing brightness levels 40–41 Special Functions 42-44 Charging Product care and storage Troubleshooting Technical data 48-49 Notes 26 Betty R...
-
Page 27: Read This Manual Before Using
Water resistance: All Betty R components are waterproof and can of course be used under extremely severe conditions. The lamp complies with IP protection class 68 but is NOT a diving lamp and is NOT suitable for use under water. -
Page 28: Mounting
Mounting Helmet bracket: The Lupine helmet bracket can be attached to virtually any helmet that has ventilation slits. The bracket is easy to mount. For further information, see the text and pictures on the pages that follow. Helpful hints: Normally the two straps are too long. However, only shorten them after mounting and removing the bracket once, because once you’ve snipped off the extra length,... -
Page 29: Mounting
The regular black headbelt ( Art.No. 205) and our “Heavy Duty” headbelt: The headbelt hd is the first choice for orienteering and other fast runners. Have a look at www.lupine.de (Art. No. 207) Have a look at www.lupine.de (Art. No. 207) Betty R... -
Page 30: Mounting Accessoires
Mounting Accessoires Handlebar mounting: For mounting the Betty R on a handlebar, three optional CNC Quick Release mounts are available. Have a look at www.lupine.de Art.No. 825 for Ø 25.4 mm Art.No. 831 for Ø 31.8 mm Art.No. 834 for Ø 31.8 mm For mounting, please first loosen the bolts on the helmet mount/headband. - Page 31 Have a look at: www.lupine.de (Art.No. 760) The transmitter features a corrugated bottom allowing for moving the transmitter up to 1.5 cm to the left or to the right in the Peppi. GoPro Adapter: Have a look at: www.lupine.de (Art.No. 144) Betty R...
-
Page 32: Mounting Batteries
Use the strap which most closely matches your tube size. For a demonstration of how to mount the battery on a bicycle frame, see the video on our Website (click “Support”). 3 2 Betty R... -
Page 33: Operation
Note: The capacity indicator will fade out within a few seconds. If it does not, eventually the taillight was activated and the 5 glowing LEDs do by far not mean the battery is fully charged. Betty R... -
Page 34: Operation
LEDs: e.g., after a period of low airflow conditions, 4 of the 5 blue status LEDs will be lit, indicating that the power has been reduced from 45W to 34W in order to protect the unit from heat damage. 3 4 Betty R... - Page 35 LED blinks once for each 1/10 of an Ah. For example, if the blue LED blinks four times and then the green LED blinks six times, this means that 4.6 Ah were discharged from the battery. Betty R...
- Page 36 Operation Lamphead display: The remaining capacity will be shown in detail on any Lupine SmartCore battery (see page. 33). Additionally, the LEDs on the back of the lamp-head change color to indicate decreasing voltage. When battery voltage drops below a certain level, the Backlight LED changes from blue to green.
- Page 37 Safety advisory: When the battery is completely discharged ( all 5 red LEDs blink with a red backlight on), the light will shut down after flashing a few times. In such a case, you should stop riding your bicycle immediately. Betty R...
-
Page 38: Bluetooth Remote
“fi rst in fi rst out” principle. If you want to use only one transmitter again to control your lamp, it might be necessary to connect this transmitter up to 4 times with the lamp until all other codes in the list will have been overwritten. 3 8 Betty R... - Page 39 T5 torx screw driver. Insert the new CR 2032 button cell as shown and close the transmitter again. Tighten the screws until the blue sealing is visibly squeezed. T5 torx screw driver: (Art.No. 137) Betty R...
-
Page 40: Customizing Brightness Levels
34 W brightness level 45 W brightness level SOS* RVLR* Alpine SOS* * If in use, shown by green LED ** Will not be signalised by status LED Flash* With red LED 0.8W 0.3W Center-LED ** Default setting 40 Betty R... - Page 41 Alpine SOS will continue until the battery is empty. Improper use of the SOS signal is punishable by law. Flash 15hz: (Disorientation) This mode is extremely irritating and may by no means be misused. Center: Low beam made by the center LED only. Betty R...
-
Page 42: Special Functions
45 W brightness level is completely discharged. SOS* RVLR* Alpine SOS* Flash* 0.3W Center-LED ** * If in use, shown by green LED ** Will not be signalised by status LED With red LED 0.8W Default setting 42 Betty R... - Page 43 12 Ah 14 Ah Attention! When the lamp-head is disconnected 16 Ah from a battery, the indicator will not work correctly 18 Ah until the battery is fully recharged. 20 Ah Disable indicator Betty R...
-
Page 44: Special Functions
6.2 V 6.9 V 6.5 V 7.1 V 6.8 V Recover factory settings: Press and hold the button until 5 LEDs turn on. release the button. Disconnect the battery, and all factory settings will be restored. 44 Betty R... -
Page 45: Charging
Current in amperes (A) Charged in capacity in Ah Warning! This charger is to be used to charge rechargeable Li-Ion batteries only. It is NOT suitable for charging NiMH batteries! Do NOT use non-rechargeable batteries. – Risk of explosion! Betty R... -
Page 46: Product Care And Storage
Product care and storage Plug contacts: Normally the plug contacts are maintenance free. However, if you use your Betty R light in humid, salt- air, environments, it’s advisable to apply a thin layer of Lupine Dutch Grease to the contacts every so often to prevent oxidation. -
Page 47: Troubleshooting
Keep battery warm. temperature. Faulty charger. Replace charger. Unsuitable battery. Use original Lupine battery. The indicator was reseted. Discharge the battery with Even after charging only your light and fully charge it the 20% LED will light up afterwards. -
Page 48: Technical Data
Charging time: Battery capacity; nominal voltage: Betty R 7/X7: 2 h 45 min. Betty R 7/X7: 6.6 Ah 7.2 V Li-Ion Betty R 14/X14: 5 h 30 min. Betty R 14/X14 13.2 Ah 7.2 V Li-Ion 48 Betty R... - Page 49 -25 °C – +70 °C Protection class: IP68 Contains: More informations at www.lupine.de FCC ID: QDS-BRCM1078 EC Declaration of Conformity: www.lupine.de/ce/ IC: 4324A-BRCM1078 Lumens: lm (Lumens) = Unit of luminous flux Usually differentiated in measured and calculated values. Calculated values often differ considerably from the actual light output.
-
Page 50: Miscellaneous
We recommend that you inform yourself about the relevant laws in this domain in your country. The mounting technique, as well as the design of Betty R lamps and the Remote control are protected by European and US patents. - Page 51 (2) this device must accept any interference received, including interference that may cause undesired operation. Changes or modifications not expressly approved by the party responsible for compliance could void the user's authority to operate the equipment. Contains: FCC ID: QDS-BRCM1078 IC: 4324A-BRCM1078 Betty R...
- Page 52 Lupine Lighting Systems GmbH Winnberger Weg 11 92318 Neumarkt Germany Phone: +49 (0) 91 81 - 50 94 90 Fax: +49 (0) 91 81 - 50 94 915 E-mail: info @lupine.de 52 Betty R...
Need help?
Do you have a question about the Betty R and is the answer not in the manual?
Questions and answers